Wednesday, 10 October 2012

2nd Punic War Campaign: The End Game.


This was the campaign position after Hannibal's great victory. There now followed a long run of map play.

Rome - Card 3 - Used to assert political control of three areas.
Carthage - Card 2 - Used to assert political control of three areas.
Rome - Card 64 - Used to assert political control of two areas.

End of turn. New consuls were elected. Nero to Sicily. Paulus to Rome.

Rome: Card 39. Nero moved by sea to Praeneste via Rome and picking up troops en-route. Scipio moved to Segobriga.

Carthage: Card 19. Marcellus was dismissed by the Senate.

Rome: Card 12. Political control asserted over 2 areas.

Carthage: Card 58. Cato councils Rome not to send any troops to Africa.

Rome: Card 4. With the arrival of Scipio in the region, Celtiberia revolts!

Carthage: Card 46. Political control asserted over three areas in Celtiberia.

Rome: Card 56 . Political control asserted over two areas in Celtiberia.

Carthage: Card 22. Regional political control wrested from Rome in Sicily.

Rome: Card 43. Slave legions raised in Rome - 4 CU!!!

Carthage: Card 20. Hannibal to Bruttium.

Rome: Card 41. Scipio to Toletum.

Carthage: Card 47. Mago by sea via Croton to reinforce Hannibal with 5 CU from Africa.

Rome: Card 5. Scipio wrests regional control of Celtiberia.

Carthage Card17. Hannibal moves to Paeneste, trying to bring another Nero to battle but Nero is able to avoid battle by withdrawing to Rome.

Rome: 15. Scipio moves to Hispilis and brings Hasdrubal willingly to battle. Hasdrubal plays card 6 as a battle card to improve his army characterisation hand.

The 2nd Battle of the Hispilis

Scipio brought 12 CU to the battle whilst Hasdrubal brought 15 CU, which might not be the largest CU battle, but it must come close.  We have fought some quite sizable engagements in this campaign but we have always kept something under the counter, but as the campaign is nearing the end game, Peter and I decided to make it the largest figure battle yet. We got out all of the Romans and scaled from there. After working out the unit integrity count we dealt characterisation cards (Rome on the left):


Then we deployed. Here are some shots of the armies massed on the plain ready to do battle next week.


Now that looks like a cast of thousands - but I think it is actually less than 1500. 

Monday, 8 October 2012

Fresh off the press - WW2 stuff

Here are the trucks for the battalion of British infantry I painted a week or two ago, plus the battalion command stand.

The battalion command stand. A K2 ambulance with a medical officer asking for directions.

I could have done this piece as a 'non-useful' diorama piece. But, having thought about it, I decided to use it as a command stand. Doing it this way means that my ambulance will actually drive about a bit and get used - it also saves on cost.


 Another battalion of British infantry.

Plus transport and command stand.


I have also revisited my desert basing. Initially, I wanted bases to show that the desert of WW2 was not the 'sand sea' of Beau Geste. However, in doing so, I think I lost the sameness of 'dun colour', so often referred to in first hand accounts, with too much green. The desert was all the same colour with different textures.

So I've gone back over the lot, staining out the green with brown ink and dry brushing with the 'base colour'.


Now my desert bases look like this. I'm much happier with them now.

Painting Report - Budget units

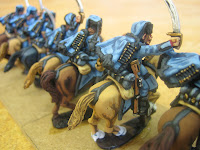
 A Russian hussar regiment. In this case, the Serbski Regiment in cornflower blue. This unit should have 'tall' fur hats, but eBay could only provide me with short ones. These figures were £2 a pop, and I'll take the short fur hats, thank you. SYW experts might wince, but I'm happy to compromise - after all, I'm from the generation of war gamers who.....


4th Grenadier Regiment. This unit still needs a flag.


This latest units has a couple of ringers in it. I have sawed off some tricorns and replaced them with miters. I have replaced an NCO standard bearer's flag staff with a musket. Ebay can only go so far in providing what you want, but with a little time and effort it can be just enough. If you look VERY closely - but, who the hell does.

In these times of austerity........

Thursday, 4 October 2012

The Battle of Paestium - Nero's Cannae

And so, after a short break,  the campaign continues. We left the campaign just as Nero was about to strike a decisive blow for Rome by knocking Hannibal out of Italy and the war. He attacked at Paestium which is in the region of modern Salerno. I looked at this area on Google Earth; the coastal plain south of Salerno is wide and very, very flat - it is the perfect place for a battle. I set the table with a few places of 'Type II' scrub land and left it at that.

The Romans fielded a total of 76 Unit Integrity points to represent the 12 CU Nero had brought to the battle. Hannibal fielded 57 UI to represent the 9 he had brought. Nero drew 7 characterisation cards (8 for UI, minus 1 for being two command grades less than Hannibal).
Hannibal also drew 7 characterisation cards (5 for UI, plus 1 for being two command grades better than Nero, plus the 1 for just being Hannibal).


The shots above show the two hands of characterisation cards for each army. You should have seen Nero's face when he discovered the lack of morale chip cards he had drawn (right) in comparison to Hannibal: The Roman army wasn't up for it at all.

As Scrotivius wrote:

"....the 'Pride of Rome' would rather have been in a brothel than in the open field and showed it with irreverence and ill discipline...."

Hannibal deployed his infantry in a convex curve with the left refused. His cavalry and elephants were deployed forward on the flanks.
Rome deployed in a balanced formation with equal cavalry wings and infantry massed in triplex acies in the centre.


 Rome began the attack.
Carthage threw out skirmishers in an attempt to slow them. 
The Carthaginian skirmish line was was thrown back having caused little harm.


The Roman infantry crashed home in the centre. 
On the Roman right the cavalry clashed. At first honours were even. 
Then the cavalry battle began to swing in Carthage's favour. 
Then the Romans collapsed after being flanked by superior numbers. Most of the Carthaginian cavalry was still in the field but quite shaken (all units needed to rally back lost UI).


The Roman infantry, still present in great numbers, were now surrounded and outflanked by rampaging Carthaginian cavalry - could Hannibal's infantry perform as well?
Yes it could!


 A victory was awarded with a double envelopment bonus. First battle casualties were diced for. Rome did well - losing 1 CU. Hannibal did badly - losing 3 CU. But then the Romans rolled for retreat with a plus two modifier - they rolled 5 scoring the magic 7! The whole army including Nero was lost. Bloody hell, there are only 2 Roman CU in the whole of Italy!!!!!!

Scrotivius wrote:

"When news reached Rome, Senators were mobbed in the streets by wailing wives and mothers asking for word. The people began to riot and shout Nero Zero, Nero Zero! No one could believe the stories of isolated pockets of brave soldiers being hacked to death without mercy - for none, not even the allies, were spared.........."
"....Such was the shock of the defeat that Rome's allies also failed her. Many places thought true to Rome went over to Carthage."

Carthage played card campaign card 24 immediately Rome had removed the appropriate number of control markers (because I couldn't believe the effect and wanted to take advantage before I woke up). Carthage took control of Regium and Neoaplis (both walled cities) and gained a foot hold in Sardinia.

I'm not sure there is any chance of Rome coming back from this but we shall see.

Thursday, 6 September 2012

A tank battle by way of a rules test

Last night Peter and I played another Western Desert game. The rules are working quite well now - though there are lots of things to add, and everything to write up. The game is a German attack on an isolated British infantry battalion in a defencive position, perhaps the flanking battalion of a brigade (currently being painted), with British armour rushing to support.  The table might seem quite crowded, but each unit (typically 2 - 3 stands) is a company and ground scale is 18" to 1 km - the table is 8 km long. Anyway, here are some shots of the action.


Tuesday, 4 September 2012

Table 'terrain boundaries'

Usually, green wargames terrain and its boundaries can be easily marked. Trees and lichen can be used to mark the edge of a wood; lichen can be used to mark the edge of a marsh; and the beauty of lichen is that it is very flexible - it 'bends' to a slope - and sits quite firmly on the table. Here is a picture of what I mean.

But, in the Western Desert, lichen boundaries would look a little odd; as would long lines of applique terrain pieces, laid end to end to form a boundary, because they would be too clutter-some for that general 'open desert' look we associate with the Western desert.

Last week, Peter and I experimented with declaring whole terrain tiles as a terrain type, marking each with a few small applique terrain pieces. This week I improved the look of my 'terrain area offering possible hull down positions' markers. I laid them out, within the boundaries of the tiles as I did last week. They looked OK, but I thought how much better it would be if I could mark the boundary with a 'line' of some kind to get a much greater variety of terrain area shapes and sizes.

First, I wondered about chalk but, being polystyrene, the tiles might not take well to being cleaned, and chalk has a habit of being a little more permanent than one might suppose. What I needed was something as versatile and flexible as lichen, but which had very little profile - it had to be totally and easily removable, thin, heavy, very bendy, and easy to put on the table-top. In a flash it came to me. I went straight to ebay to get a price and was pleasantly surprised - it was £0.60 per metre. I ordered 14 meters of '3mm x 4mm antique bronze'. Last night I put it on the table.

Can you see the long, thin, line surrounding the small rises?

Can you see what it is? 

Subtle, isn't it?
Closer.....


And, just in case, and to give you an idea of the thickness of the 'line' here it is next to some 15mm scale infantry.


I think this is quite an elegant solution, but only play testing will tell if it is durable. In fact, I think it is very clever, so clever that I'm unsure that it could could be an original idea of my own - I must have seen it somewhere before [?].