Monday 28 December 2015

One more for December - a strangely mixed bunch of Hungarians

Yesterday, I painted the last unit of line infantry for my SYW Austrian army. It's IR 31 Haller. I nearly didn't paint this unit up because, there is something rather odd about it.


This unit consists of a batch of twelve figures I purchased from ebay made up to strength with a direct purchase from Front Rank. 

I didn't immediately notice that, although both lots of figures are by Front Rank, and although the shooting figures all have the same catalogue code, they are different sculpts.
I seem to remember someone telling me that Alec had, at some point, redesigned some of his Seven Years War range. It looks like I have a unit that comprises both the new and the old.
Although the difference is very apparent close up, the older sculpts being much bulkier figures, I doubt anyone will notice during game play. 

Just 16 Grenzers to pant and the Austrian infantry are finished.

Saturday 26 December 2015

December painting - The Austrian infantry, very nearly finished

I've somehow managed to do another four units of SYW Austrian infantry in the two weeks leading up to Christmas. These are three German Infantry Regiments and a unit of combined German grenadiers.

This batch brings the Austrian infantry up to twenty seven units.

Front to back, IR 10 Jung-Wolfenbuttel (as a name, you couldn't make a better one up), a unit of grenadiers, and IR 36 Kinsky.
The same units, still needing their flags and basing. 

I painted these three units in two batches so that the grenadier unit can be split up to make the other units into six stand large units when required.
IR 55 D'Arberg. This is a regiment from the Netherlands that fought at Prague, Kolin, Breslau, Leuthen, Hochkirch and Liegnitz. 
IR 55 from the rear. 

I've just got 40 more Austrian infantry to paint now: A unit of 24 Hungarian infantry and two units each of 8 Grenzers. 

Tomorrow, I have my brother in law plus family coming to visit for a week - so I'll have plenty of time to do these this week [Grin].

I just need the rain to stop so that I can undercoat the last of the cavalry. Ilkley is, pretty much, cut off from the rest of the world by flooding today.

Thursday 17 December 2015

Mollwitz - AAR part 1


Firstly, for those wishing to see how the game was set up I have edited the scenario post for Mollwitz by adding notes on unit and officer quality, the effect of terrain and weather, and some special rules. The notes are intended for use with Piquet rules, but most could be converted for use with other sets of rules.  Mollwitz Scenario link

The only change I made to the deployment pictured in the notes was to move Frederick to the left wing. Apparently he went forward with Schulenberg.


The Austrians choose to 'rig their deck' as per the special rule for Romer's charge.

Romer is on his way.
Romer's cavalry are soon in among the Prussians .
Schulenberg's command begins to disintegrate.
 Infantry from the Prussian second line is rushed to hold up the right flank.
With the Prussians under stress, the Austrians advance with their infantry.
This shows the general situation at the end of turn 1.

Beads are:

  • Red, battle weary.
  • Green, ready.
  • Blue, eager.
  • White, first fire unused.

The first lines of infantry begin to exchange long range musketry.

What do you know, Frederick fails his major morale check rolling D20 Vs 3 he rolls 3! Fearing the worst, Frederick leaves the field and Schwerin takes over.
The Prussians slowly gain the upper hand, but the Austrians are getting all the initiative and are able to keep pace with the Prussian volleys.
On the Prussian right infantry begin to empty the saddles of Romer's cavalry. Romer's attack has been held.

Schulenburg is dead. Caught between Romer's cavalry and Leopold's infantry it is difficult to assertain which side actually killed him.

Counters are:

  • Stones, unit integrity lost.
  • Tuft, disordered.
  • Wheel, shaken.

In the centre the volleys of musketry are incessant but, due to the extreme range, it's effects are not telling. It is now the end of turn three.
The Prussian infantry are looking menacing. If they can win some initiative they will be unstoppable.
The Austrian cavalry on the Austrian right wing are content to stand in readiness to exploit any success of their infantry.
Whilst their hussars, having seen off the Prussian hussars, attempt another lonesome charge against Rothenburg's cavalry.
On the Austrian left, Romer begins to pull back. He only has two units of cavalry left, though another might return from pursuit at some point.

I think this game has another three turns in it. 

The Prussians have 14 morale chips and are rolling against 6 for Major Morale.

The Austrians have 8 morale chips and are rolling against 3 for Major Morale.

Tuesday 15 December 2015

Green snow. The Battle of Mollwitz 1741.

There are two important rules in life: One, never drink in a pub with a flat roof. Two, never eat yellow snow. What you do with green snow I have no idea, but that's what we will be playing on for this re-fight of the Battle of Mollwitz. We will just have to imagine the table being a 'winter wonderland'.


THE MOLLWITZ CAMPAIGN

In December 1740, Frederick II of Prussia launched a surprise attack on the Austrian province of Silesia. By the end of January Frederick had taken Breslau and overrun most of the Province, only Neisse, Glogau and Brieg were holding out and Frederick sent most of his army into winter quarters.

The Austrian response was to send raiding parties against Prussian border outposts. Kleinen Krieg (literally small war) was something of an Austrian speciality and they got much the better of their Prussian opponents. So much so that, by the end of February, Frederick returned to Silesia to take personal command of operations.

On 9 March Glogau fell to a Prussian night assault. Silesia, though subject to constant raiding, would require the Austrians to take to the field in force to retake it. By the end of March the Austrians had assembled a force capable of contesting the province in Moravia. Commanding 16,000 men Field-Marshal Wilhelm Neipperg relieved Neisse on 5 April, crossed the river, and cut Frederick’s line of communication to Breslau and Brandenburg. Cut off, Frederick had no choice but to advance towards home and force a battle.

That was when the weather turned. Blizzards halted all significant military activity and the armies lost touch with each other. On 10 April, the skies having turned clear, the Prussians discovered the Austrians encamped around the village of Mollwitz. Rather than attack at once, Frederick ordered his army of 21,000 men to form into a line of battle and, in doing so, the advantage of its surprise appearance was lost: The Austrians had time to form a line of their own.


At 1.30 Frederick gave the order to advance.


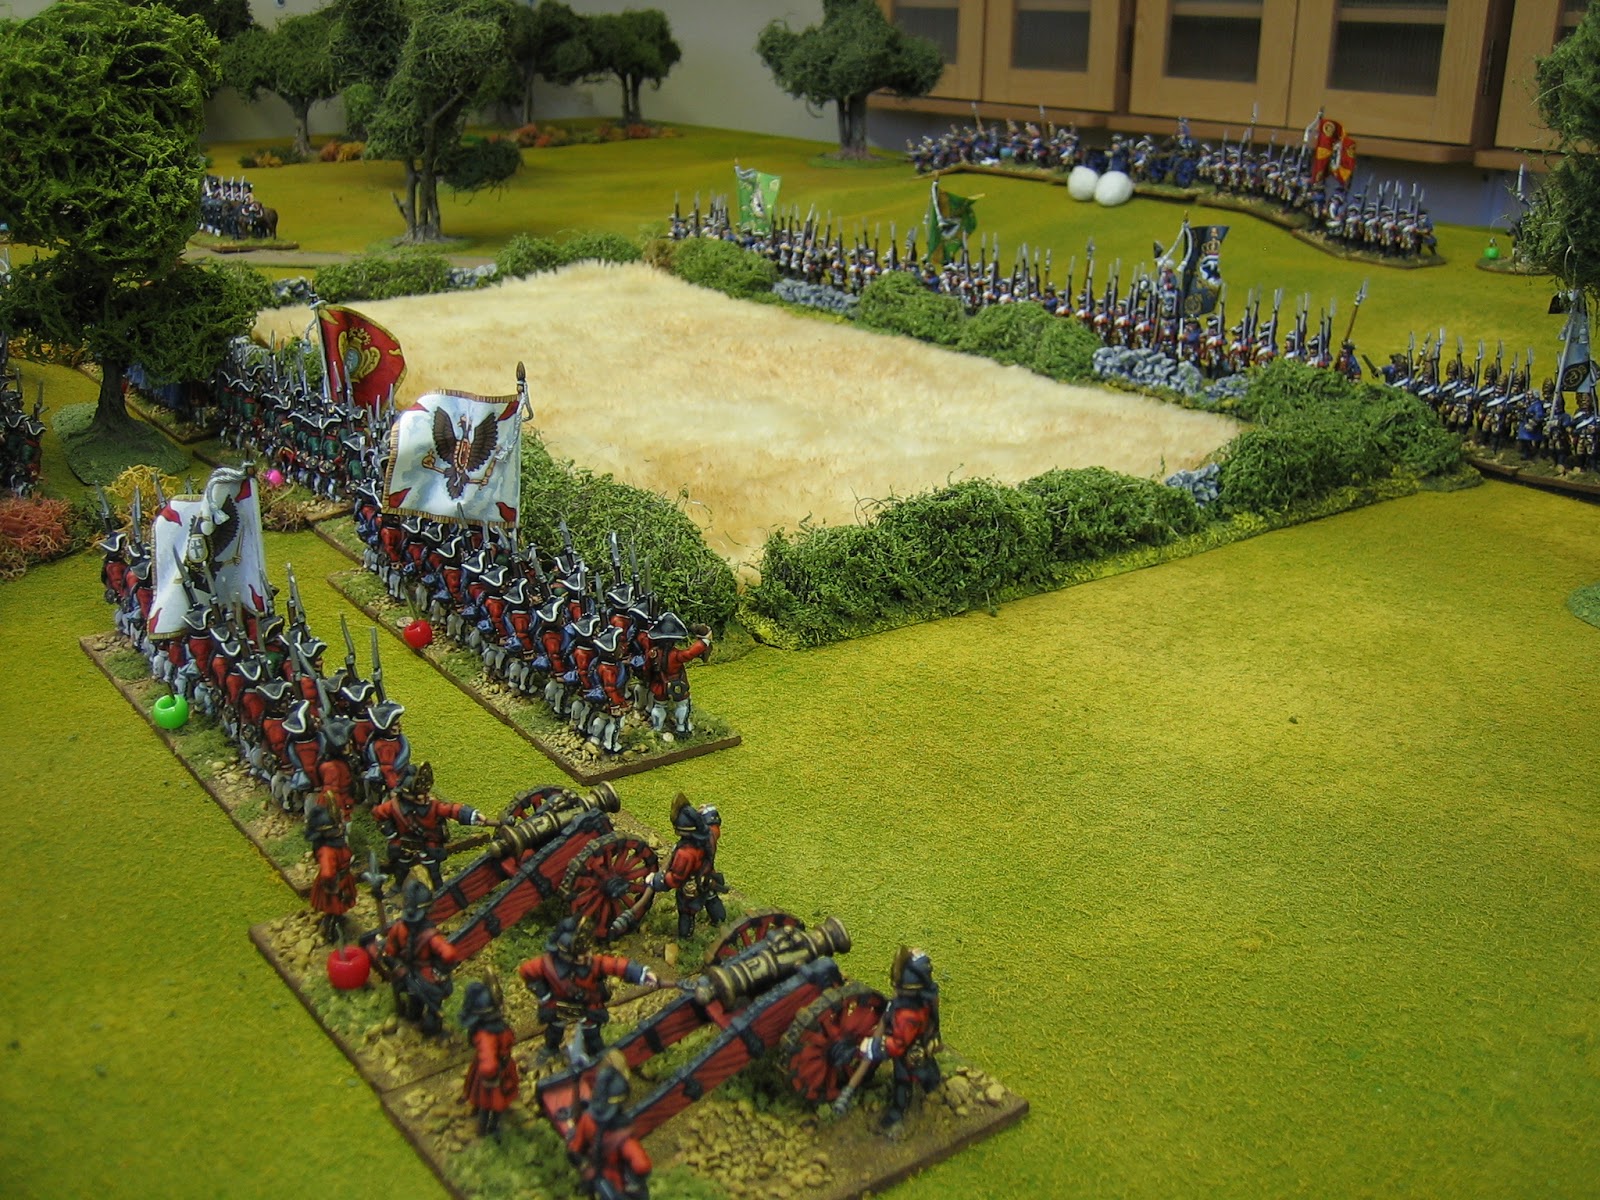
I've deployed the armies in their positions at 1.30 pm. I have set up the table with the villages of Mollwitz and Grunningen, the Kleinerbach and the small wood. I have chosen not to feature Neudorf and Pampitz as they have no bearing on the battle, and I only feature Grunningen because it forms a nice 'edge' to the Austrian's open left flank.

As for the order of battle, I have simply counted up the 'blocks' on the map in The Army of Frederick the Great by Duffy. I have used one unit to represent a regiment, or two battalions. The exceptions to this are the way I have decided to represent the the Prussian squadrons of Schulenberg's command (I'm indebted to Jeff Berry who lists the number of men in each of the Cuirassier regiments in that command - they add up to a single war game unit at this scaling), and the way I've scaled the number of grenadier and guard units, which is a rough approximation for 'game-ability'.

We will use classic Piquet rules, with house amendments for large battles, to play this game.

THE AUSTRIANS


Right wing: Berlichingen.

Two units of cuirassier.
Three units of dragoons.

Note: two units of hussars out in front. These are independent units.

Note: The Austrians have no positional artillery.
Centre, first line: Goldy.

Five units of infantry.
Centre, second line: Harrach.

Three units of infantry.
 Left wing: Romer.

Four units of cuirassier.
Two units of dragoons.
NOTE ON AUSTRIAN UNIT AND OFFICER QUALITY

The infantry was a mixture of trained infantry and raw recruits. I classed two of the first line and one of the second line units as Ready, the rest as Battle Weary. The cavalry was somewhat better with several units having recently served against the Turks. I classed half of the dragoon and cuirassier units as Ready and the other half as Eager, I classed both hussar units as Eager. 

All commanders except Romer are Average. Romer is Skilled.


SPECIAL RULES FOR THE AUSTRIANS

Romer's charge: The battle began with a daring charge by Romer’s cavalry which set off to (successfully) envelop the Prussian cavalry opposite them before falling into disorder. This manoeuvre was largely responsible for subsequent events.

Before the start of the game, the Austrian player may remove a Manoeuvre and a Cavalry Move in Open card form his sequence deck, placing them, in that order, at the top of the reshuffled deck. If this option is taken only Romer’s command can be activated on the cards. They allow Romer’s cavalry to get a head start on their flank attack.

If this option is taken all rallies and pursuit checks are made with a down 1 modifier.

Mollwitz and Grunningen: These are not strong points for Austrian defence. Any Austrian unit voluntarily entering a built up area will be seen as taking a retrograde, morale shattering, step. Each and every unit doing so will be counted against numbers for Major morale and impose a down 1 modifier to all morale challenge responses and officer checks for the entire army.

Army characterisation cards: Add extra Cavalry Move in the Open card. 25 morale points.


THE PRUSSIANS

Left wing: Rothenberg.

One unit of cuirassier.
Two units of dragoons.
One unit of hussars.
Centre, first line: Marwitz.

One unit of guard infantry.
Two units of genadiers.
Five units of infantry.

Centre, second line: Leopold.

Six units of infantry. 
Right wing: Schulenberg.

One unit of cuirassier.
Two units of dragoons.
One unit of grenadiers.
Artillery.

Two batteries of heavy guns. Both are independent.
NOTE ON PRUSSIAN UNIT AND OFFICER QUALITY

At the start of the Austrian War of Succession the Prussian cavalry was atrocious. I classed all Prussian cavalry as Battle Weary. The Prussian infantry, though unbloodied, was possibly as good as it would ever be. I classed al Prussian infantry as Eager.


I classed Frederick as Average and Schwerin, his second in command (see special rule) as Skilled. I classed Schulenberg and Rothenberg as Poor, Marwitz as Skilled and Leopold as Average.


SPECIAL RULES FOR THE PRUSSIANS


Frederick leaves the field: Following Romer’s successful attack Frederick was advised to leave the field for his own safety. He did so, leaving command of the army to Schwerin. To represent this happening in the battle, Frederick will depart the field if the Prussians fail a major morale check. Failure will cause the loss of 5 morale points but Schwerin will take command and a Brilliant Leader card will be added to the Prussian deck.

Army characterisation cards: Add extra Infantry Move in the Open and Muskets Reload card. 31 morale points.


TERRAIN NOTES


The snow fields: All open areas are type II for movement.

Snow effect on combat: For the entirety of this battle, artillery will fire with a Down 1 modifier in addition to those given in the fire combat table. Artillery may not target units using ‘bounce through’.

The Kleinerbach: Treat as type III for movement. Defending a bank gives a terrain advantage. Artillery counts all troops in type II cover at all ranges due to the cushioning effect of the snow and cannot count ‘bounce through’ bonuses for round shot.

The wood: For movement, treat as type II for infantry and type III for cavalry. For cover, treat as type II for all.

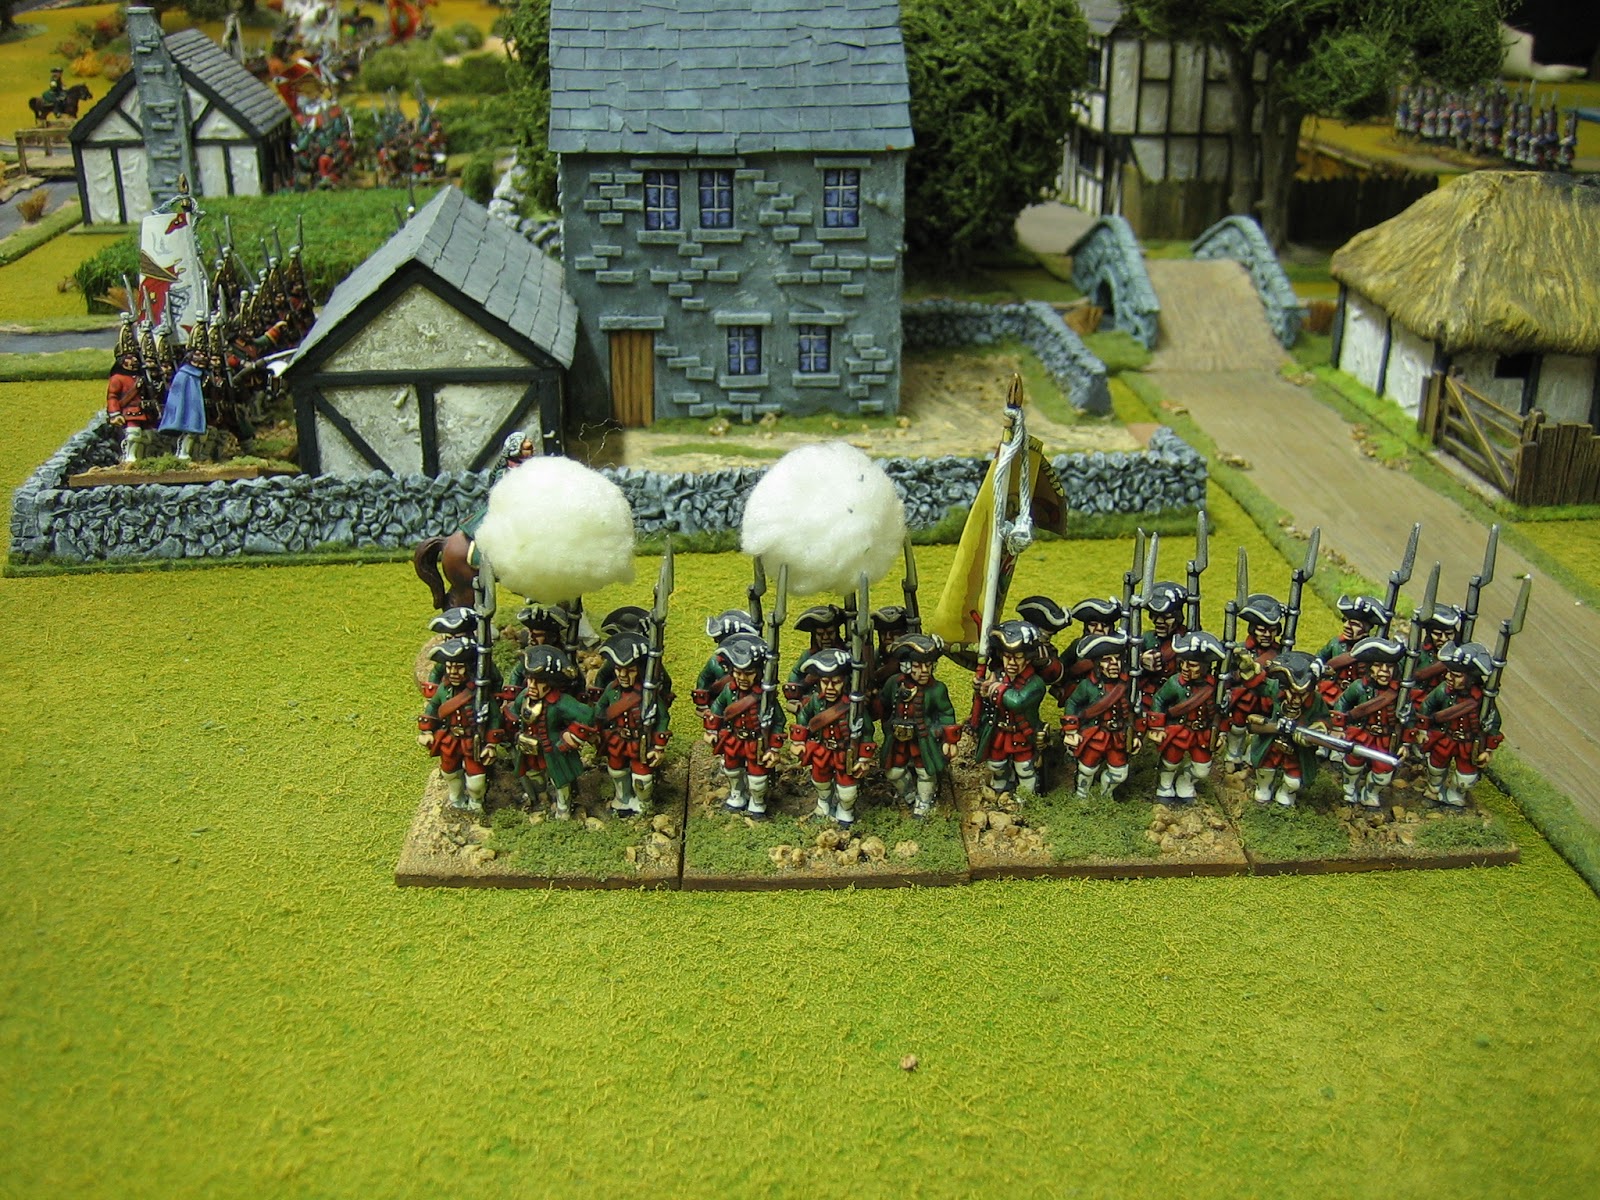
The villages: Treat as standard built up areas giving type III cover. 

SPECIAL RULES FOR THE AUSTRIANS

Romer's charge: The battle began with a daring charge by Romer’s cavalry which set off to (successfully) envelop the Prussian cavalry opposite them before falling into disorder. This manoeuvre was largely responsible for subsequent events.

Before the start of the game, the Austrian player may remove a Manoeuvre and a Cavalry Move in Open card form his sequence deck, placing them, in that order, at the top of the reshuffled deck. If this option is taken only Romer’s command can be activated on the cards. They allow Romer’s cavalry to get a head start on their flank attack.

If this option is taken all rallies and pursuit checks are made with a down 1 modifier.

Mollwitz and Grunningen are not strong points for Austrian defence. Any Austrian unit voluntarily entering a built up area will be seen as taking a retrograde step. Each and every unit doing so will be counted as ‘routers nearby’ for morale challenges and officer checks.


For a description of the battle, and possibly the best map of the deployments, I couldn't do better than provide this link to the obscure battles website . So that's what I'll do. 


Test game conclusions

Last Wednesday Graham and I (Peter was horse sitting) played out the game started the previous week. 

The amended rules all worked out very well and we have decided to use them as standard. 

The new way of paying for morale challenges was a winner, as was testing the opponents morale (rather than one's own) on the Major Morale card.
The game was a topsy turvy affair. The Prussian cavalry lost every encounter they initiated.

Their final unit of hussars did no better than the rest, though they did slightly better than the Garde du Corps which were slaughtered by canister fire before getting to grips - useless, hopeless.... 

....tis ever the way with war games guard units!
But, the Prussian infantry faired much better. 

As they floated across the corn, they poured volley after volley into the Russians until they began to crumble.

They won the battle for the Prussians in some style.

Next week, for pre-Christmas, we will put on our snow boots for the Battle of Mollwitz. I know you shouldn't eat green snow.....

Monday 7 December 2015

Door mat versus teddy bear fur

Last week I set up a game with some large areas of heavily cultivated ground, ground that represented small fields bounded by walls, hedges and ditches and containing standing crops, orchard and the odd farm building. Now, at the ground scale we war game this type of ground cannot be realistically represented because it would entail having a wall or hedge every couple of inches, orchards represented by a single tree in a small enclosure, and buildings represented by small chicken coups and the like. 


Troops prepare to cross an area of rough 'heavily cultivated' terrain

I chose to represent this hotchpotch of agricultural ground with a wheat field bounded by a single hedge. Any troops within the field would count as in cover, in difficult terrain for movement and with a limited line of sight. It wouldn't matter where in the field they were standing as the field represented terrain that was much more dense than it looked on the table. This way of doing things works well. The area is clearly delineated, has a little hint of it's make up within the bounds of scale and, most importantly, is fairly easy to move the little lead men around in - it also stops troops packing arbitrary hedge lines to gain cover.  

Previously I've used coir door mat to represent corn fields but I didn't have enough of the stuff to do what I wanted for the game. A few blogs I've recently visited have shown teddy bear fur used to represent cornfields. It looked pretty good in their photos and certainly looked practical.  I did have a large piece of teddy bear fur, so I cut it up and laid it out on the table. It looked O.K., to be honest it looked like teddy bear fur. Next day I went to ebay, I bought a couple of rubber backed coir door mat off cuts (sold in meter lengths). 

It arrived on Friday. Yesterday I cut it up and painted it with household emulsion and a 2" brush. I used diluted (1:1) Dulux wholemeal honey #1 as a base coat, then dry brushed it with neat Dulux golden umber #4. The whole job took about an hour with a couple of hours drying time between coats.

I cut the mat up into various sizes. I made ten of 6" x 5" pieces, two 12" x  5", two 12" x 12" sections and two 12" x  8" pieces. The reason why most of the sizes are not square has to do with the size of my field boundaries which are mostly in 6" and 12" lengths. Given that I want fields where the boundaries cross over at the corners, allowance must be made for this - most fields are based on the 12" x 10" not 12" x  12".

The game we are currently playing is ongoing so I exchanged the pieces I could. The problem with mat is, that unlike teddy bear fur, it will not 'mould' itself to any contours. As one of my fields was originally put on a hill (pics below, top left) I have not been able to replace it for this game. I've taken a few shots to show the difference. To my mind the mat looks a bit better. 

So this was how the teddy fur looked.

This is how the mat looks.

 The fur.
 The mat.
Some of the new pieces, the left overs, next to my original paltry stock of very yellow 'wheat'. It doesn't really go with the rest, so I'll paint it verdant green, like the piece by the church in the shot above, at some point in the future.
Four 6" x 5" pieces making a 12" by 10". The open, un-hedged side, of the field is at the table edge but you can see how well the field fits within the boundary sizes I have.

So there it is. I now have plenty of wheat fields. 

I bought two 1 meter lengths each 30 cm wide. Cutting to a chosen size rather, than the size of each mat, meant a little, acceptable waste, but the cost, including the paint, was only about £16 - bargain!

Thursday 3 December 2015

Testing some new ideas for Piquet - SYW battle report.

For some time Graham has not been happy with the morale rules we've been using in our house amended 'classic' Piquet rules for large SYW battles. Typically these battles feature 50 plus units, Zorndorf (see picture below) featured 88 units; this is well above the game size that Piquet was designed for - typically 12 to 20 units a side. Last week, with support from Peter, Graham convinced me to make some changes. 


To allow 'classic' Piquet style rules to cope with bigger battles one of the changes we made was to cut the amount of morale chip loss for units in combat. We have found that losing less morale allows the action in big battles to become more expansive, with more attacks, or multiple attacks, in more sectors of the table. To 'save' morale expenditure we had completely discarded morale chip loss in relation to stand loss. We only count a loss for destroyed, routed or shaken (disordered in 'classic' Piquet) units. This has worked well except that morale challenges, costing a morale chip each, seemed expensive. Graham's change was for morale chip loss for a morale challenge to be debited from the side that failed to achieve a positive result, effectively halving the cost overall. BTW, you still need a morale point in hand to issue a challenge, just in case the enemy succeed in passing the test. We tried this last night and it worked - I like it, thought the way re-rolls work needs more discussion.

A bugbear of many war games is the end game. Games either go on and on to 'last man standing', end abruptly with an army reaching an arbitrary break point, or by gentleman's agreement. In Piquet the end game is largely governed by the expenditure of morale chips reducing a side to zero morale chips and the Major Morale card but, the major morale check is cumbersome and often indecisive. We've tried to come up with a number of ideas to improve the standard Major Morale rule over the years and our last attempt was almost there. Now I think we have come up with something with its roots in 'classic' Piquet, but much more workable, and able to effectively end the game in a satisfying manner. It is substantially different to the classic Piquet Major Morale check rule on failure. It reads as follows.


MAJOR MORALE CHECK
When this sequence card is turned it is played against the enemy army. The enemy’s C-in-C must pay a morale chip and take a major morale check. He does this by rolling a d20, adjusted for command quality (-2 to +2 in this case) versus the total number of units his army currently has destroyed or routing. To pass the check the die result must be higher. If the check is passed no further action is required. If the die roll is equal or lower than the number required the army fails the check, adds a Dress the Line card to its sequence deck and the army must individually check the morale of each of its command groups.

If the army has no C-in-C or morale chips to take the major morale check it automatically fails, adds a Dress the Line card to its sequence deck and must individually check the morale of each of its command groups.

Command groups forced to take major morale checks do so by rolling D12, adjusted for command quality, versus D8. If the command is currently leaderless a D6 is rolled. If the die roll is higher the command passes the check. If the command fails the army loses one morale point; if the army cannot pay a morale chip all of the group’s units are downgraded one battle quality level and any units already rated as battle weary are routed.


Recovering lost officers. On the appearance of this card any command group leaders lost in battle can be recovered on a successful other difficulty check versus D8. Each test costs one initiative point. If the officer is recovered at the first attempt the replacement officer will be the original one; if not, the officer will be a new officer and his quality will need to be diced for.

Note the use of Dress the Lines sequence cards here. We do not add dress the lines cards to a sequence deck for lost units. In big games there are just too many units lost. We do add them for officer casualties, and also for any successful supersedence of command (changing command structure mid battle). We do not deal out cards at the start of a turn.

We have also tightened up the rules governing Cossacks. In the SYW these troops were useless on the battlefield. However, this is a game and I didn't paint up eight units for them never to be used. I think we have a balance now - Cossacks are only next to useless. The rule reads:

COSSACKS
Cossacks always move as independent units. A Cossack unit may never close with an unshaken enemy unit that is facing it frontally. Shaken Cossacks may never close with the enemy. Unshaken Cossacks may only close with an enemy unit’s flank or rear, or a shaken unit, if they pass an ‘other difficulty’ test before movement. The unit rolls the army’s ‘other difficulty’ die, adjusted for unit quality, Vs D8. If the unit rolls higher it passes the test and may close. If the unit fails it stands in place. Each test, and any subsequent movement, costs a single initiative point. Cossacks are removed from play if they lose in melee. Cossacks count towards Army Characterisation / Morale card score but do not count towards unit loss for Major Morale checks.

Last night I set up a simple smallish game to test out some of the modifications. It was Russians Vs Prussians. Numbers were balanced by Army Characterisation Deck / Morale card divisor. Both sides got 7 cards - the Russians had 28 units (divisor 4) and the Prussians got 21 units (divisor 3). Except for deployment zone boundaries (marked out with coloured 'Jenga' blocks), players deployed as they wanted. 


The table was set up with a valley at one end, a town in the centre and a small hill at the other. There were also a few areas of woodland (bounded by lichen) and some intensively cultivated areas represented by corn fields; the latter count as type II throughout with cover and limited line of sight. The latter shot is the armies prior to deployment set out on a pasting table propped up from beneath with a wood plank - there is a lot of weight there and it was sagging dangerously.


 The Prussian deployment.

 The Russian deployment.

The Prussians got much of the early initiative and soon occupied the town with grenadiers. The Russians, seen advancing into the town were caught in column of route - bang, bang, your dead!


In the centre, the Russian infantry line advances towards the cultivated area.
The Prussian centre advances to meet them.
On the Russian right the Prussian cavalry, somewhat isolated from the rest of the army, come under pressure. The Russians support their cavalry with infantry. The Prussians try to get around them.... 
.....but the Russian infantry turns outward and with a vicious volley of enfilading musketry the Prussian attack is left in tatters.

I think this infantry command (four units), now free of the enemy on this flank, is going to have an impact beyond that already achieved. It just needs time to change the direction of its advance.
What remain of the Prussian cavalry are soon surrounded.
On the Russian left, the Prussian cavalry charges up the hill into the Russian cavalrymen waiting there.

In the town, Russian infantry, supported by heavy artillery firing canister, gain ground.
The cavalry melee on the Russian left goes back and forth. 

The Russians bring artillery support to the party.
The Russians and Prussians face each other over the cultivated ground.
The Prussians have most of the town and are reinforcing that position against a possible counter attack from the Russians beyond the stream to their front and on their left flank.
It will probably all come down to who wins in the centre, and the Prussians have lots of eager troops here.............