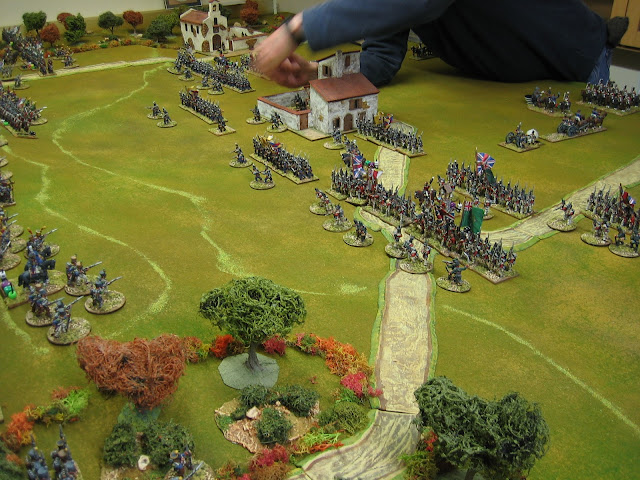
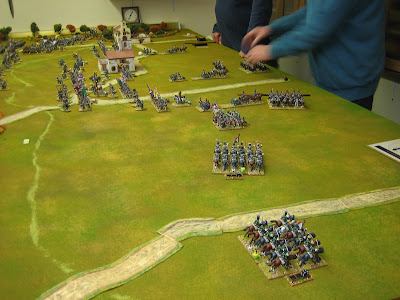
Turn four proved decisive. The French stole away with a run of initiative and swamped the Spanish on the mountain before they could make any real defence - to be fair, the position was pretty hopeless. Only on the extreme left and right flanks did the Spanish escape relatively unscathed - every unit on the mountain was put to flight or cut down. However, the French had been given a bloody nose for their efforts and were down to just 3 Army Morale Points at the end - the Spanish hit zero and that ended the battle there and then: Routing units were considered gone with no chance to rally, etc.
The unit picked out for honours was the Spanish unit in pale blue, centre left, green and yellow beads (the Voluntarios de Leon). This unit led the Spanish counter attack that caused the French so much heartache (not to mention casualties). It fought gallantly to the end, only breaking under the constant pressure of vastly superior numbers. It will be an effort long remembered.
The butchers bill was significant for both sides but the Spanish had by far the worse. The Army of Catalonia (MacDonald; French) started the campaign with 51 Unit Integrity (UI) points but now, two actions later, had 44 UI of which 13 are in 'hospital': An effective strength of 31 UI. The 2nd Army (O'Donnel; Spanish) had started the campaign with 59 UI but in fighting MacDonald every step of the way through the Pyrenees had paid a very stiff price; 2nd Army now has a total strength of just 38 UI of which 18 are in hospital: Effective strength 20 UI. This is the kind of casualty rate I was looking for at the end of two significant actions: 2nd Army is, for the time being at least, pretty much spent.
Hospitalised UI isn't to be taken too literally: As stated in the author notes for the rules used in this campaign, it includes everything from actual wounded to temporary loss of morale, fatigue and expenditure of supplies. This method of doing things saves having to change unit quality every time something happens; the army simply fights with less UI for two turns after hospitalisation; after two campaign turns the hospitalised UI go back to their divisions. Hospitalised UI still count for attrition purposes because they do exist and need to be fed, etc.
Post battle, the presence of two French units of pursuit capable light cavalry really put the boot in: They caused 4 permanent UI losses for simply being present on the field in sufficient numbers (they each had 2 or more UI). A campaign setting is where the value light cavalry over their heavy counterparts really shows - so many wargame myths are created by rule writers trying to give some form of advantage to light cavalry in 'table-top terms' to balance their comparative lack of combat effectiveness [Vs the heavies]. Historically, it's off table, before and after battle, that their value was really felt. I'm thinking of tweaking the 'deployment roll' rule for this campaign: +1 more light cavalry?
After the action compulsory retreat moves forced 2nd Army into southern Catalonia. Unfortunately for the French, bad exploitation dice didn't allow any significant gains to be made; at least in the immediate aftermath.
The game had taken an hour to resolve to a full conclusion. Fine by me. A space was created at the end of the table and down went the campaign map. No time to be wasted. To keep a campaign going the whip must be cracked.
Campaign turn four ended relatively soon after the battle of Manresa [the
End of Turn card appeared] but not before MacDonald had marched into Barcelona. Also, on the activations that followed, O'Donnel marched the force directly under his command into the fortress of Terragona (and safety?)
Freire's 3rd Army and Suchet's Army of Aragon continued to shadow each other (or, to put it another way, nothing to see here, move on).
In Galicia, Marmont's Army of Portugal and Santocildes' 6th Army led a merry dance up and down the coast of north west Spain. Marmont attempted to bring his opponent to battle twice and failed: I'm putting it down to the amount of olive oil in their diet (possibly in their bath tubs too).
Wellington attended several balls on his hunting tour of central Portugal but, not much else. According to French spies, the ire of the Spanish was mounting.
It was Beresford, obviously shame faced by his superior's lack of action that galvanised the forces of Perfidious Albion to boldly go forth, into the valley of death, into the jaws of hell....
In fact, Graham had misunderstood a conversation about Blake's 5th army moving north to retake Berlanga: He thought this move had pinned Soult at Zafra (and he couldn't concentrate at Badajoz if it was attacked).
Not so, under the rules as they stood, but this thought was brilliant! A rule change, to which everyone assented, was made: The relevant section now reads:
"Concentrating forces roll a d6 to determine their times of
arrival. One is deducted from the roll if the attacker is concentrating in the
defending area; one is deducted from the roll if the defender is concentrating
in the attacking area; two is deducted from the roll if the concentrating force
is pinned by an enemy force¹²
that is not itself concentrating and is at least half the strength of the force
it is pinning; one is deducted from the roll if the force has a green pin; one
is deducted from the roll if the force would normally activate on a different
card to the attacking or defending force (unless acting on a Joint Command card).⁴"
Note: When this rule change was made we also added another one to cover green pinned forces.
BTW, whilst on the rules, in setting up this particular game I found no reference to, or definition of, Portuguese cavalry in the unit quality tables. This was an oversight. I have amended Beresford's army list: Being generous, the are always Reliable Light. His lists now reads:
"Cavalry UI is by force UI divisor 8; minimum 3
UI per unit; first unit must be (Reliable, Light) Portuguese cavalry, otherwise
cavalry type is determined randomly."
Anyway, Beresford attacked the forces in and around Badajoz. French pin 6S (6th and 7th divisions) concentrated without difficulty. Soult, at Zafra, rolled a 3, minus 2 (for being pinned by Blake) and will not arrive until the fourth appearance of the Stratagem card. Remember, our games are only five turns long so this is very late in the day: The battle of Manresa was done and dusted in under four full turns.
The map dice were rolled. A D4 gave open terrain maps page 2 of 4. A roll of D20 (1-17 results gives a specific map reference because there are 17 per page; an 18-20 result gives choice to the defender) came up 20 and gave Mark, as defender, the choice of map - he chose table map 34.
N.B. Table maps from Warfare in the Age of Reason rules or its Campaigns and Battles supplement.
Mark rolled up Sebastiani (the French on table C-in-C) as a skilled commander; Graham rolled up Beresford as reliable.
For table deployment Mark added 1 for better C-in-C and 1 more for being the defender. He rolled 4 (adjusted) and Graham rolled 2. Mark, having won, chose the hill side of the table; he had also doubled Graham's score so Mark will deploy second.
The players worked out force composition in full, so that I could get everything prepared for next week, and the session came to a close.
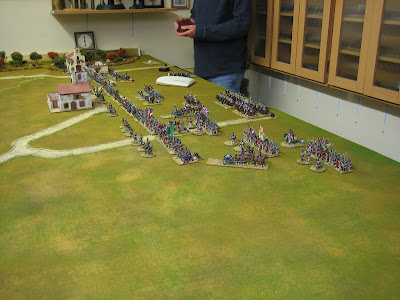
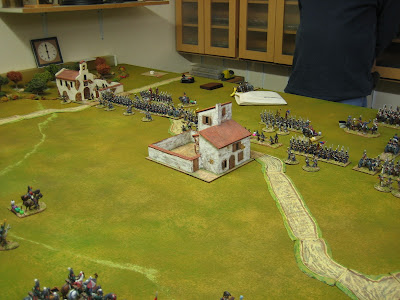
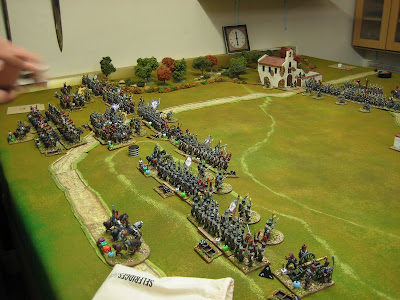
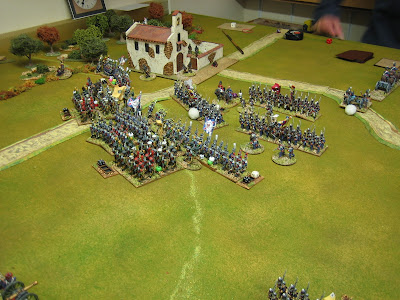
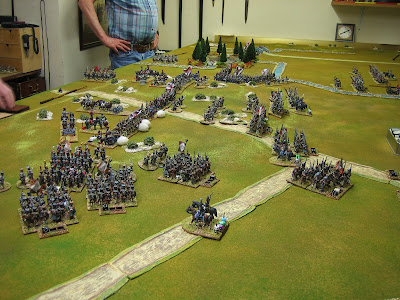
The table looked pretty simple but, as per usual, it proved to be at the limit of both hill and roads.
The hill is actually less deep in the centre than it should be by about 6"; less importantly, I lost the second contour of the ridge - in my rules contours generally only provide 'shape'; height, for practical reasons, is less important.
The amount of road on this table is also deceptive - there must be over 30 feet of it and I couldn't quite make the road behind the ridge go the off the end of the table - instead, it snakes round the end of the ridge to the far village (a minor alteration in the scheme of things).
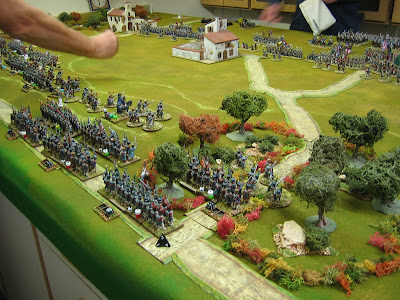
It's still quite an impressive piece of high ground (BTW, after these photos were taken I took off the cliff edged contour for practical wargame reasons) and the road network is quite close to what's on the map.
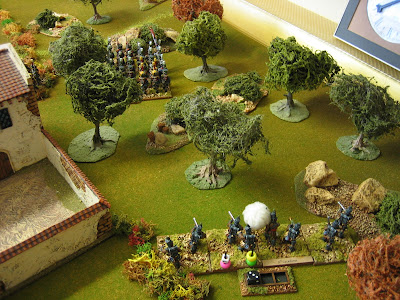
There are two pieces of quite extensive open woodland on the hilly part of the field. This is Spain so 'stunted' trees and undergrowth are best for this. It's my understanding that, after a couple of hundred years of ship building on the grand scale, Spain was largely devoid of big trees and had been largely deforested - Spain has more trees and woodland today (mostly commercial forestry) than it did in Napoleonic times.
TO BE DEPLOYED: The Anglo Portuguese Army under Beresford; 53 UI plus cavalry and guns. Note that some Portuguese units (British divisions) are wearing red because I only have six units of Portuguese line infantry - but, they diced up as Portuguese so in game terms everything stands up.
Note to self: More Portuguese?
TO BE DEPLOYED: The French that managed to concentrate before the start of the battle. 64 UI plus cavalry and guns. Note the unit of Polish lancers - the Polish Division is here.
The Army of the South is 112 UI strong but the rules only allow 100 UI plus cavalry and guns to be fielded for a single battle (practicalities, again); in consequence, a division is absent from the Army of the South.
Soult's force of two divisions (one division, the 3rd, was chosen to be absent to bring the army down to 100 UI; it's possibly screening Blake?); this force is 35 UI plus guns (the cavalry are on the table already - quirky rules). These troops will probably arrive very late in the day; Graham will be hoping never.
BTW. Mark is running away with the Campaign Victory Points at this point in the campaign (early days). He has 29, I have 25, Peter has 22 and Graham has 21.
THERE CAN ONLY BE ONE WINNER. THIS CAMPAIGN IS ABOUT PERSONAL GLORY!






.jpg)