Saturday 29 January 2011

The Ilkley Lads present Bir El Gubi 1941

Next Sunday the Ilkley Lads will be making the annual pilgrimage to Vapnartak at York Racecourse. We will be taking our Bir el Gubi 1941 game. For those unable to attend, and for those who will but want more details about the game, here is a preview complete with the scenario notes.
THE BATTLE OF BIR EL GUBI 19th November 1941

On the second day of Operation Crusader, the offensive to relieve Tobruk, British 22nd Armoured Brigade was ordered to shift Italian Ariete Armoured Division from Bir El Gubi and secure the southern flank of 7th Armoured Division for operations around Sidi Rezeg and Tobruk.
22nd Armoured Brigade comprised three newly operational regiments equipped with new A15 Crusader tanks (168 of them). It was supported by three batteries of assorted artillery and a single company of King's Royal Rifle Corps infantry; 11th Hussars provided reconnaissance. Morale among the tank men, unlike proficiency, was sky high.
Facing the British tanks, 8th Bersaglieri Regiment of Ariete Division, well supported by anti-tank and field guns (including 90mm AA and truck mounted 102mm naval guns), were dug dug in around Bir El Gubi. In the rear, of 8th Bersaglieri, the M13/40 tanks of 132nd Tank Regiment stood ready to counter-attack. Here was the cream of the Italian army in North Africa.
At 11am, and without any artillery bombardment, the tanks of 22nd Armoured Brigade attacked. It was described as "the nearest thing to a cavalry charge by tanks yet seen during this war" - it was a 'Balaclava' moment. But, with insufficient artillery or infantry support and despite initially breaking into the Italian position, the attack was driven off with very heavy losses. British 'all tank theory' had been proved wrong - though the lesson would not be realized, or acted upon, for some time to come.

Orders of Battle for a Company Level Game (scaled at 1:5-ish).

SCENARIO NOTES

Rules
I will be using a very slimmed down, less complex and faster play version of Piquet (but it is still Piquet) for this battle. If you wish to use these notes for another rule set you will probably need to amend the arrival times slightly, and come up with a different way for the Italians to place minefields; otherwise the scenario should be easily adaptable.

The Battlefield
When setting up the terrain for this battle I used three primary sources. The maps in The Sidi Rezeg Battles 1941 by Agar-Hamilton and Turner, Benghazi Handicap by Chadwick, and Google Earth. The position of Bir El Gubi, for those wishing to find it on Google Earth, is 31 degrees 32' 14" N 24 degrees 01' 48" E. The trench lines are still clearly visible, and the battlefield is unchanged.
The ground is virtually flat, and seems to have provided good going for all vehicles. The only natural feature of any note is Wadi esc Sciaaba which runs north - south to the west of Gubi. There are two 'villages' in the area, Bir Belchofas and Bir El Gubi; Bir el Gubi is described in Brazen Chariots by Robert Crisp as "a little white-washed house surrounded by a low parapet". I have added two roads, one of which is the Trigh El Abd, but the word 'road' is, like the word 'village', an overstatement - they were desert tracks which served only as a means not to get lost. Although the terrain is reasonably accurate I have scaled it for feel rather than actual ground scale - as the battle area is flat this should make next to no difference.
Initial Deployments
At the start of the game 8th Bersaglieri Regiment and all associated artillery start the game
dug-in in two concentric arcs facing SE, with the front line beyond Bir El Gubi. The front line should be infantry, the reserve line should be a gun line. One company of M13/40s should be deployed just outside and in front of the defences. The remainder of 132nd Tank Regiment, along with the Corps artillery (105mm), are initially deployed off-table.

22nd Armoured Brigade starts the game with two tank regiments and 11th Hussars deployed on table. 2nd Royal Gloucestershire Hussars (Horse in one source) deploys to the west of Trigh El Abd facing Bir El Gubi; 4th County of London Yeomanry are to 2nd RGH's left (they are looking for the right flank of the Italians); 11th Hussars are to the right of 2nd RGH heading north east of Gubi (to find the left flank of the Italians); everything else is initially deployed off-table

Arrivals

The British have one Stratagem 1 card (activating 3rd County of London Yeomanry) and one Stratagem 2 card (activating the brigade's 'support group') in their sequence deck. Both cards activate arrivals from the start of turn 2. Once turned, the arriving units may move onto the table at full rate on the appearance of a relevant Move card. 3rd CLY appear on the far right of the British base line (looking to find the left flank of the Italians). The support group arrives, on the British base line, anywhere behind the advance of 2nd RGH and 4th CLY. Discard the Stratagem cards after use.

The Italians have one Statagem 1 card (activating both battalions of 132nd Tank Regiment, but on different turns) in their sequence deck. The card activates the two remaining companies of the 1st battalion (the other was deployed on table at the start of the game) from the start of turn 3. The card activates the 2nd battalion from the start of turn 5. Once turned, the arriving units may move onto the table at full rate on the appearance of a relevant Move card. Both battalions arrive on the base line at the extreme left of the Italian line - poor old 3rd CLY! Discard the Stratagem card after its final use.

Minefields

The Italians have four minefields. These can be placed by the Italian player during the game on the appearance of Special 1 and Special 2 cards. There is one of the former and two of the latter in the Italian sequence deck. On the appearance of a Special 1 card the Italian player may place one minefield. On the appearance of a Special 2 card the Italian player may place one or two minefields. When a Special card is used it is discarded. Minefields may not be placed under units, otherwise there is no restriction on placement. Italian troops can pass through minefields at half speed without risk. Any other movement through a minefield automatically enforces a D10 Vs D6 fire strike, and if any hits are caused an automatic morale challenge.
Notes:
I have chosen to do minefields this way for two reasons. First, there is no need for mapping (and any resulting argument). Second, I was struck by the accounts of British tanks 'running into minefields'.

The Italian player must remember that he does not have sufficient cards to place all minefields individually.
Primary Sources
The Sidi Rezeg Battles 1941 - Agar Hamilton and Turner
Crusader - R. Humble
Iron Hulls, Iron Hearts - I. Walker
Benghazi Handicap - F. Chadwick
Google Earth
Figures, etc.
From the collections of Mark D. and yours truly. BTW, the shell case at the end of the table is a 2pdr from 1941.

Tuesday 25 January 2011

Desert terrain pieces for WW2

The Ilkley Lads need some terrain bits for Vapnartak. Four minefields, two built up areas and twenty seven dug-in markers.

Mine fields. These are 4mm ply, drilled for wire (spear off-cuts) posts. Wire is 'unwound' picture hanging wire. I decided to paint the wire rusty - 'metal' wire always looks a bit odd to me.


A couple of desert buildings. The ones on the left (very nice little models) are of unknown manufacture with scratch built 'compound'. The one on the left is scratch built, the surrounding wall is made of cat litter. Palm trees are white metal (I don't know by who).


Dug-in markers. At some point I may buy and paint dug-in figures. Until then I'll use markers. I'll need lots, so I made a mould and cast them in plaster.
Master, mould box and mould. I used a sheet of glass to make the bottom of the mould smooth and completely level.

Plaster of Paris in, then scraped flat (the reason for making the mould on glass). Bottoms are almost flat - so very little sanding is required.
One soon becomes fifteen - making masters and moulds save lots of time in the long run!

Once dry, and a quick rub of sandpaper on the bottoms, I PVA glued them to thin card. Plaster is brittle, and this should protect the thin leading edge. The card was trimmed (to nothing) before painting.
All paint is household emulsion and a bit of artists acrylic.

Thursday 20 January 2011

Bir El Gubi - play test for Vapnartak


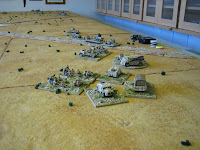
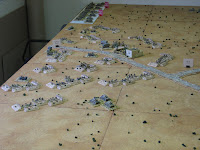
The Ilkley Lads will be doing Bir El Gubi 1941 at Vapnartak this year (York Race Course, 6th February). This was the first major clash of Operation Crusader, between British 22nd Armoured Brigade Group and Ariete Armoured Division, on the southern flank of the Axis investment of Tobruk. The game will use Mark D's Italian stuff and my British stuff. I still have a few things to finish off (some mine fields - one down three to go, and 10 Italian medium tanks - which I'll knock off this weekend) but we had enough to have a run through last night. Here are some picks of of the game half way through.


The tanks of 22nd Armoured Brigade attacking from the south (possibly south east) break into Bir El Gubi's defences. They are being funneled by minefields and they are becoming 'horribly bunched'. We are using Piquet rules (heavily amended) which allows for all manner of 'randomisation'. Reading about the battle, one thing I noticed was the repeated line 'ran into minefields'; Consequently, I have given the Italians four minefields that they can place during the game when they turn a 'special card' - they have three in their deck. They can place them anywhere they want, if they want, providing no troops are 'in the minefield' when it is placed. This worked well.


The Battle of Bir El Gubi involved the arrival of reinforcements for both sides. A CLY Regiment (Crusaders) arrives on turn 2 moving to find the northern flank of of the Italians, and the artillery and infantry support for 22nd Armoured Brigade Group arrives at the same time in the wake of the major thrust from the south. On turn 3 the first battalion of 132nd Regt (M13s) arrives for the Italians - they will bump into the newly arrived CLY Regt. Another battalion of M13s arrives on turn 5. Arrivals are timed by turn and the turning of 'stratagem cards'.


The general terrain layout was derived from books and, more usefully, Google Earth. Looking at Google Earth is very useful for getting Western Desert terrain right - unlike a scenario in an otherwise very useful wargames tome - it appears that there are no escarpments or 'hills' at Bir El Gubi. The terrain will not win any prizes, but it will show 'punters' the general flatness and empty waste that is the Western Desert - too frequently 'WW2 desert games' have far too much terrain. BTW, according to Robert Crisp (in his memoir 'Brazen Chariots'), Bir El Gubi was a single white building surrounded by a low parapet - there are two buildings there now!


Main sources, were: The Sidi Rezeg Battles 1941, Iron Hulls Iron Hearts, Crusader, Operation Crusader 1941 and Benghazi Handicap. (For authors, etc, these books are listed in this blogs 'labels' side bar.)

Figures are by various manufacturers including FoW and Skytrex. Painting by Mark D. and myself.

Monday 10 January 2011

Trasimene set up - observations / suggestions please

All being well, the Ilkley Lads' demo game for Sheffield Triples (21st & 22nd May 2011) will be the Battle of Lake Trasimene 217 BC. Although I still have plenty of figures to paint for the battle (the bright bits of paper under troops show the footprint of these figures) and some terrain to make, I thought it was time to roughly set out the troops on my table to get an idea of the layout I'll do.

Please forgive the very rough looking hill shapes, the terrain colour and the lake edge (the white strips of card), but eye candy was not my prime concern here. I'll cut out the actual hill shapes (over which I'll throw a green cloth) and make the lake closer to the event. There are no trees on the table either, which will change the look quite a lot.

I think this is the basic layout of the battle I'll use, but if you have any observations or suggestions that would make the game better, I'd like to hear them.


This is the overall deployment. The Romans are centre left and just climbing the hill in the foreground, the Carthaginians are in a crescent surrounding them. The lake is on the extreme left (white card border).

The head of the Roman column. Here the extraordinarii are beginning to climb the hill to engage what they believe is the Carthaginian rear guard of skirmishers. The first Roman legion and first ala have deployed into three line battle formation to support this attack. Hannibal's veteran Spanish and Libyans are lining the hills immediately to the right of their skirmishers.


The Roman column marching up the defile with the Carthaginians lying in wait on their flank. I have decided to include Sempronius' force (remnants of Trebbia) at the rear of the column for a total of 6 Roman legions / ala. They are only mentioned by Livy(and Mark Healey's Osprey?), but I've included them to increase the 'mass' of the column and give the Romans a better chance. The Gauls can be seen occupying the gullies and spurs in the centre of the Carthaginian line, "Zulus, sir, thousands of 'em....."


The rear of the column has entered the defile and the Spanish and Numidian cavalry are deployed to close any escape route to the rear.
OK. So what do you think?
Are the 'terrain lines' about right?
What do you think of the deployments at the head of the column - do they look like a reasonable hypothesis of what would be happening following the initial contact by the extraordinarii?
I've used most of my reference books as sources, picking and choosing the bits I want to use from each. A list of the books can be found in this blog's 'labels' section (see book lists).
Your thoughts please,
James
Figures are almost all Renegade 28s, The table is 12' x 6'. One figure represents about 60 men (ish).

Thursday 6 January 2011

Punic Wars Project - Adrift?


At the beginning of June I posted my painting schedule for my Punic Wars project. The plan was to paint 720 figures by the end of November. It is now the beginning of January and I've only managed 464. Why?

I could claim excuse for several reasons, but most would be dismissed by a right minded boss without hesitation (work load, family, etc.). The real reasons are three fold:
  • I committed the cardinal sin. I got side tracked by things new and shiny (see WWII stuff).
  • I committed to several other wargames related activities (articles, etc.) and found my spare time too thinly spread.
  • Thirdly, I got bored with things Punic.

The last thing is not something new, I often get bored half way through a project and it is a 'lull' I build into my overall deadlines. But, the new shiny stuff and the articles gave me an excuse to escape the project for longer than usual. Big mistake!

I can't change the overall completion date for the whole Punic Wars project (or, why have one?) so I finished the WWII stuff to a good break point (22nd Armoured Brigade Group) and then put it all away. I got back into the Punic Wars saddle and took out a batch of Gauls. As self punishment I made it a big batch. I finished it on my Birthday (New Years eve). It has done me good - I've already started the projected cavalry and aim to finish them quickly. The project is still do-able, but I can't take another break now.

Anyway, the new painted stuff.


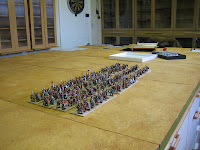
176 Gallic warband - 8 units of 22 (these took 3 weeks). I think they have just the right amount of 'tartan'.

48 velites - 4 units of 12, for the allies in the Roman army (these took 2 months!).