Sunday 1 December 2019

The Peninsular Project - A new plan for OOB, and why.

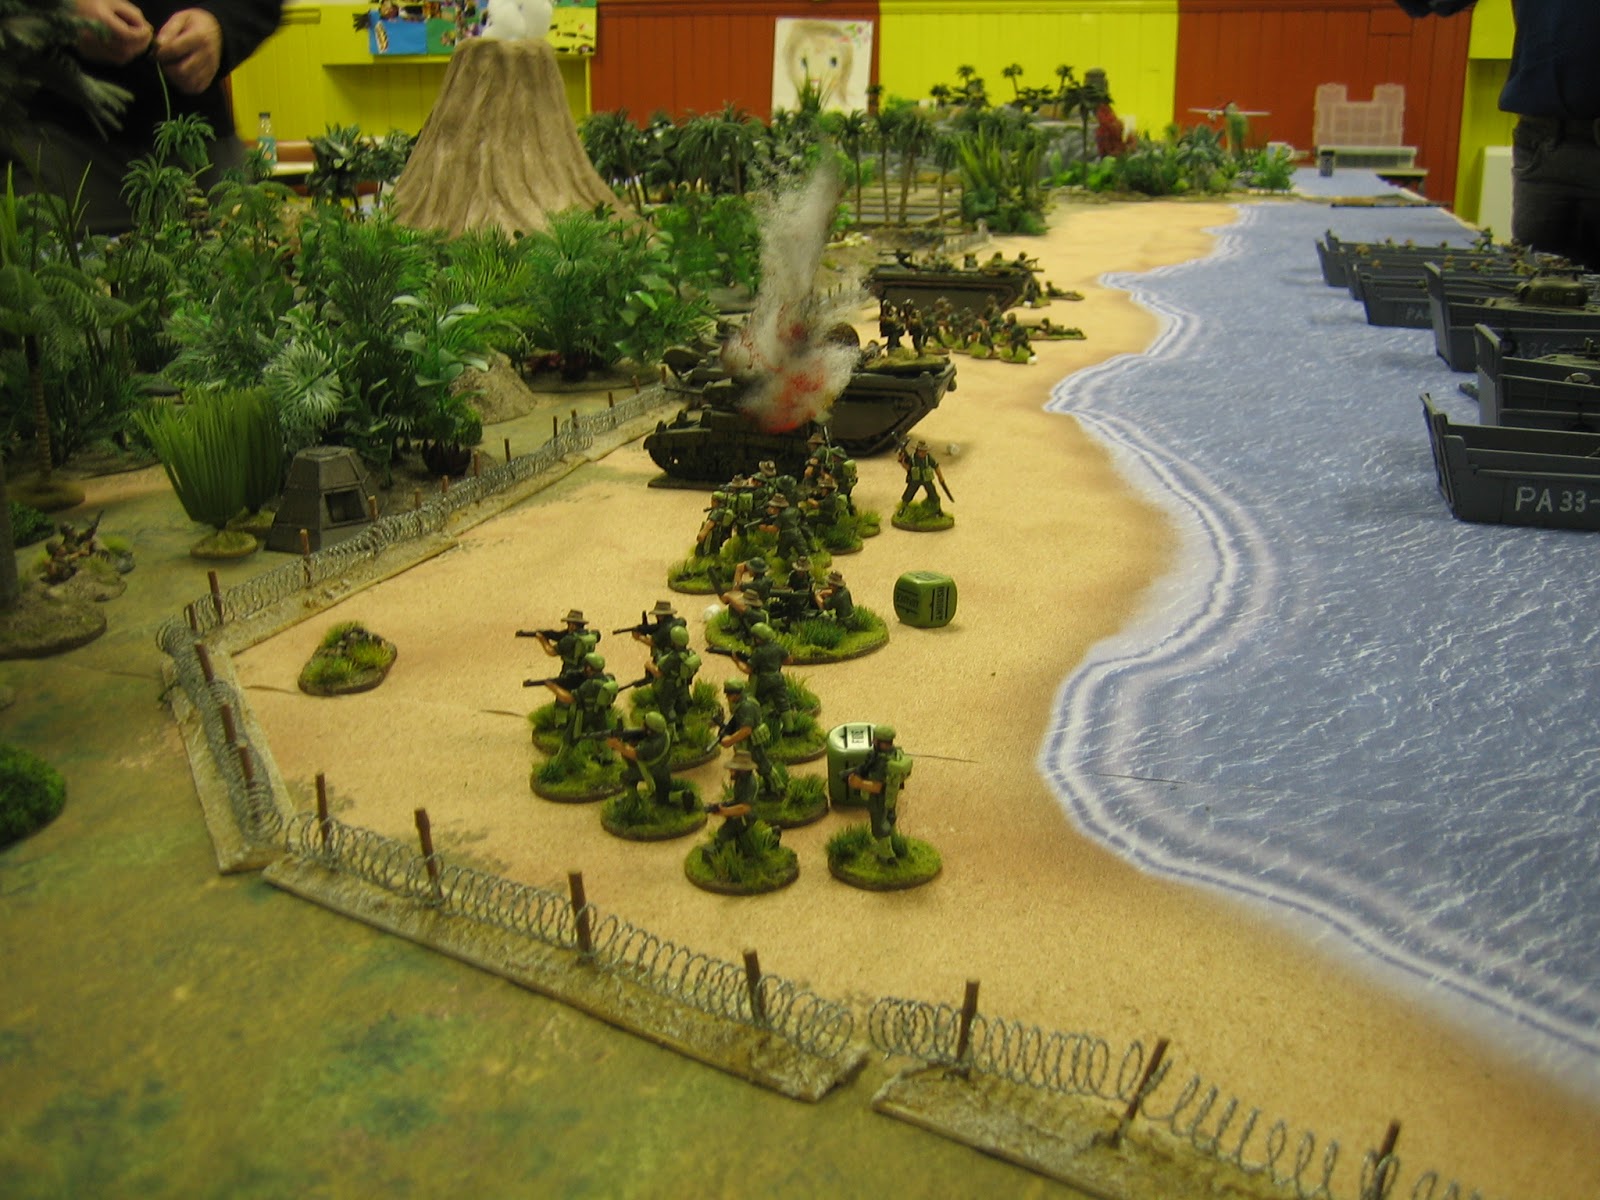
This is a shot of a recent game in progress.
Progress with my Peninsular War project is painfully slow and I haven't managed to add a new unit for a couple of months now. When I get the time they do come in spurts of half a dozen or so units in quick succession, so the quest goes on. However, I've reassessed where I'm going with it and I've downsized the overall numbers to get it finished. A few months ago I began looking again at my overall aims. 

When this project first started my aim was to build the armies based on actual brigade structures, with brigades that contained the right historical units: For example, I planned on building British First Division with all of its component brigades and battalions, with large units where appropriate. This plan soon hit the buffers - it was a train wreck with few survivors. 


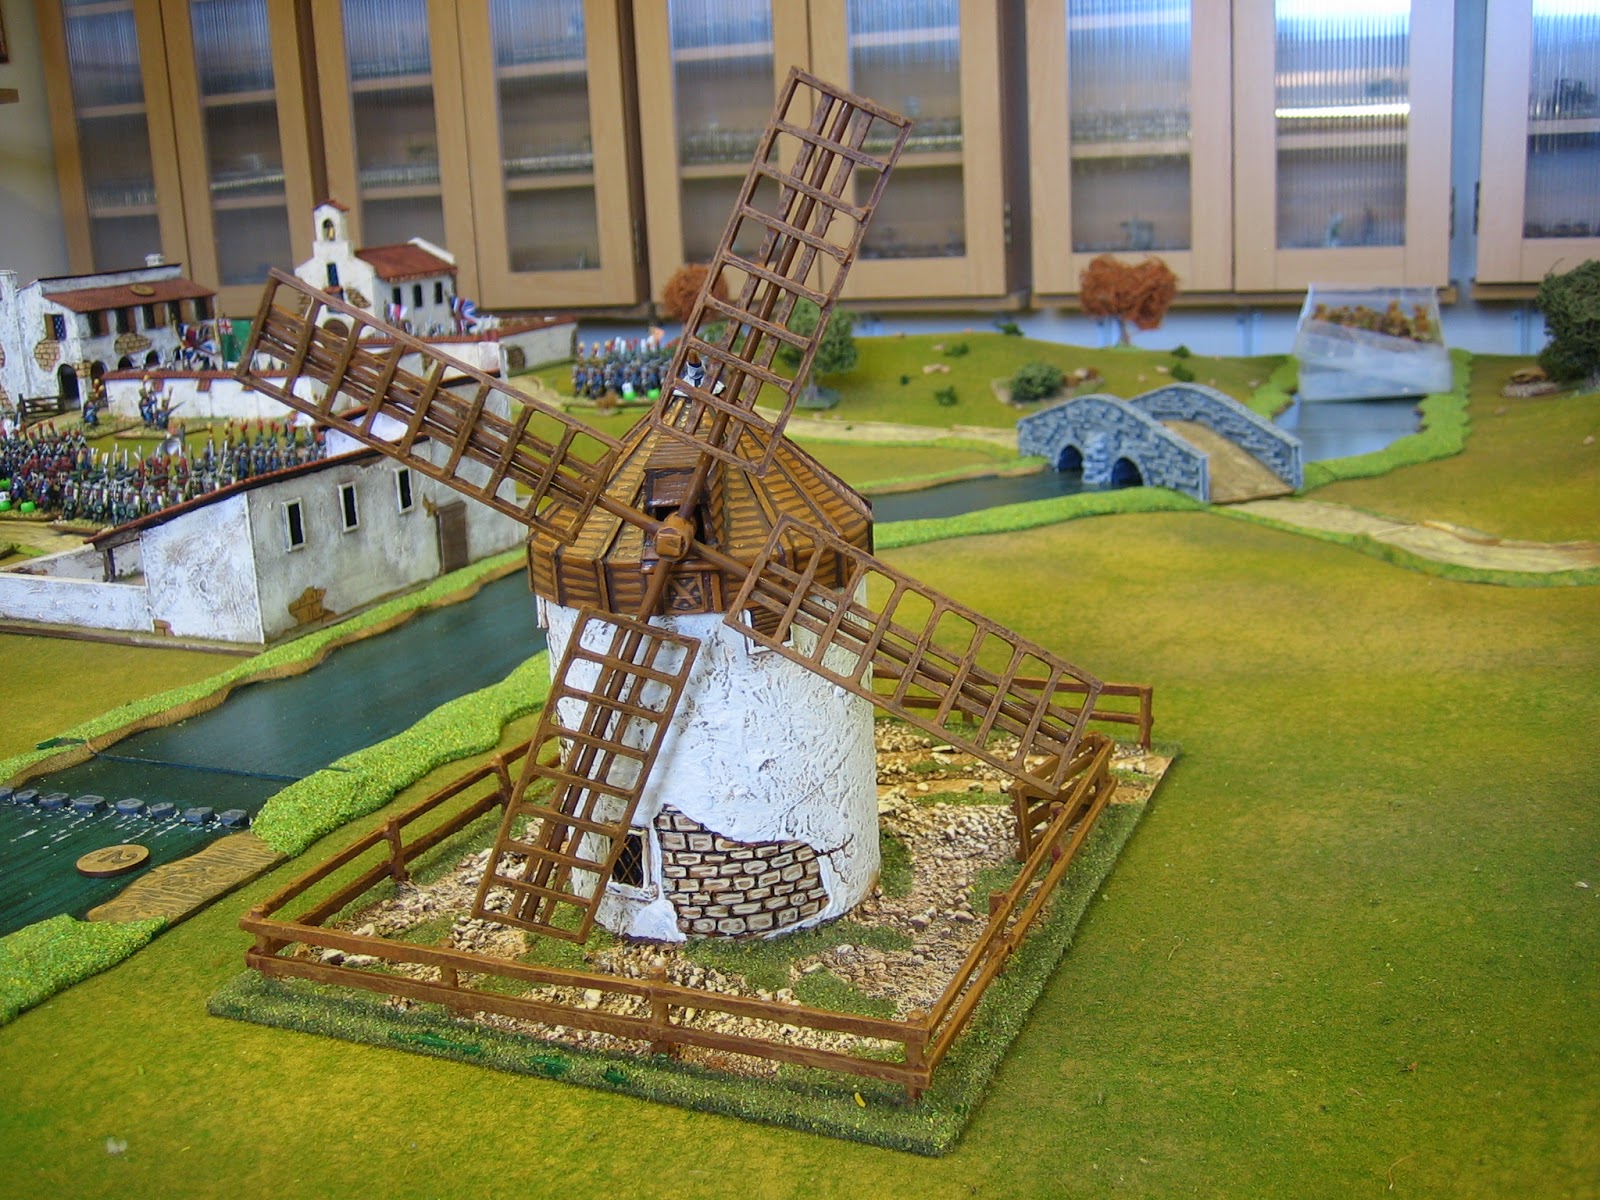
Another shot of the game from further back. The game is using all of the figures I currently have painted - 32 units plus artillery and command: The battlefield isn't crowded.
For those who follow this blog, the windmill and pigsty are also both present in this battle - note I've darkened the roof of the windmill with a 'wash' and it looks much better.

Looking at the size of my table, it soon became blindingly obvious that with divisions averaging ten to twelve battalions, I would be limiting myself to fighting battles with two divisions a side at most. I was also looking at a collection of around forty battalions, per side, simply to get the right overall mix of troops: This was especially true for the Anglo-Portuguese.

Then, quite by accident, I found my road to Damascus. I was reading the OOBs for Fuentes De Onoro, in the Osprey book of that name, and I was mentally noting the manpower in each division: They had roughly 4,000 to 7,000 men each. Now, the numbers four to seven are something akin to Goldilocks numbers when building armies for Piquet games because, in my opinion, four to seven units per command group is about as perfect as it gets - not too big, not too small, just right. Blinding flash of light! 


2nd Legere (left) and Municipal Guard in white coats (right). Typical 24 man units based on 45 x 45. The beads negate the use of roster sheets. The beads on the left are a bead for Defence Die modifier and the number bead indicates the units 'division' command group; the bead on the right is the Combat Die modifier: Red = Down 1, Green = No Change, Blue = Up 1.
If I built divisions containing one 'battalion sized' unit for each 1000 men not only would I be getting my comparative man-power ratios correct, I'd also be getting divisions of four to seven units each, and I could be fielding four or five divisions a side - and that's almost proper army strength. 

This was looking good, and it suddenly got a lot better when I realised, because the number of units in a division sank to just over half what they should be, the number of unit types to make up the divisions also fell dramatically - I could do the British Light Division with just four specialist units, rather than the eight specialist units I'd previously been looking at.

When it came to the French, for me, they were never as problematic as the Anglo-Portuguese to begin with. By and large, most French infantry look pretty much the same (including most of their flags). In my opinion, to field French armies for the Peninsular, you just need the right ratio of Line to Legere, enough foreign units to give them the multi-national 'Empire' feel, and a couple of units of converged grenadiers for 'special occasions'. This means, with a dollop of fudge, if you get the ratios right, you can serve up just about anything fairly easily. 


French 1st Hussars and Polish Vistula Lancers facing British 14th Light Dragoons advancing through an orchard.

Cavalry, on the other hand, were always going to be a problem for me. You need quite a few units for both sides because of the variation of obvious types: French dragoons don't pass for Polish Lancers, and British cavalry can't pass for Portuguese, etc. However, looking at a unit of cavalry, representing 500 troopers, it soon became obvious that, although I'd still need to purchase the same number of units, I could do more with them. Still a plus for the divide by a thousand method.

There was one other bonus to using the 'thousand man divisor', though this only became evident quite recently: It's to do with artillery units. Looking at the unit frontages for men in line (in my Waterloo Companion) compared to that for a battery of guns, my planned two gun batteries were going to be far too wide. A battery of guns would have a frontage of roughly one third that of a thousand men in line. My infantry units have a frontage of 180 mm, my guns have a frontage of 60 mm: Now is that job done or, is that job done? One gun batteries - I already have too many!


A one gun battery with limber - in this shot the battery has been silenced as is being withdrawn before it gets overrun.

So, my plan is formalised. After my next order arrives (for Christmas), I'll have just eight more units to buy: Four more infantry units and four more cavalry units. I'll have just over half left to paint.

Then I can start thinking about the Spanish and the hidden extras such a baggage trains, etc. Maybe, this project doesn't have an end.

My OOBs, for the Anglo-Portuguese and the French, will be as follows:

British


Highland Light Infantry (71st Foot) with a heavy four stand skirmish line deployed.
Working on a basic 5000 strong division of five units (three British and two Portuguese) and enough extra units to do the First and Light Divisions, plus artillery and cavalry support, my Anglo-Portuguese army will be as follows:

Infantry: 27 'battalions': Line units are 24 figures strong plus 4 extra figures to put out as skirmishers; light units are 24 figures plus 8 - 10 figures to put out as skirmishers. 

1st Division: Guards x 2; Highlanders x 2; Highland Light Infantry x 1; KGL x2; British Foot x1.
Light Division: Light Infantry x 2; Rifle Battalion x 1; Cacadores Battalion x1.
Three basic infantry divisions each comprising: British Foot x3; Portuguese Line x2.

The glaring omission in the above list is the lack of specialist troops for 7th Division (The Mongrels). This is for two reasons. Firstly, I would need an additional five or six units to make this division possible as a stand alone entity and, frankly, time and cash are in short supply at present. Before making the British army any bigger, I'd like some Spanish, at least enough for an allied contingent, and the £200 I'll save not getting troops for the 7th Division will go some way to helping in that regard. Secondly, Front Rank don't make Brunswickers yet but, I know these are planned - when they come out I'll think again.

Because of the way I'm using the '1000 man divisor', Cacadores battalions attached to the Portuguse 'Brigades' will not be fielded as separate units. They will be fielded as extra stands in the division's general 'skirmish line'. All told, there will be an additional 30+ figures in a 'general pool' of extra skirmishers representing these types, though not all will ever be needed (for aesthetic reasons I'll have a mix of 95th, 60th, KGL lights, Oels jagers and Cacadores stands).


British 1st Dragoons.


Cavalry: 8 'regiments' of 12 figures each. 

Dragoons x4; Light Dragoons x2; Hussars x1; Portuguese x1.

At a pinch, the Portuguese could be used as an extra unit of British light cavalry but, looking at the numbers in historical OOB, this mix seems to cover most eventualities. Although the light cavalry might have been more active on campaign, in most field battles there seem to be just as many heavy dragoons present. As I said earlier, cavalry are a problem because of the different mixes required. In numbers terms there were never that many of them in Spain, so I'm loathe to purchase more, just for variation, than this.


British and Portuguese infantry, with artillery support, coming into action.

Artillery: 8 guns in total, each with 4 crew. 

British Foot x 4; British Horse x 2; Portuguese x 2; Limbers x 4 (including 1 horse artillery).

Not every gun will have its own limber (they take up too much table room and are generally removed when not in use) and these will be 'general pool' additions. As noted, this is too many guns but, I've bought them, I'll paint them, and in some scenarios (where I will use a different troop scaling method) two gun batteries will not go amiss. 

Officers: There will be eleven command stands in total.

There will a 'Commander in chief' stand of four figures, six divisional command stands of two figures each, and four one figure command stands (cavalry brigades and an engineer).

Grand Total Anglo-Portuguse:

Totting that up, that comes to 971 men, 8 guns, 4 limbers and 131 horses. I've painted just under half.

French


French infantry in line.

Working on a basic 5000 - 7000 strong division of five to seven units, plus artillery and cavalry support, my French army will be as follows:

Infantry: 28 'battalions': Line and converged grenadier units are 24 figures strong plus 4 extra figures to put out as skirmishers; Legere units are 24 figures plus 6 figures to put out as skirmishers. 

Legere x 8 (5 French, 3 Foreign); Line x 18 (12 French, 6 Foreign); Converged Grenadiers x 2 (French).

My French infantry, if anything, are too colourful. The army can field French, Italians, Irish, German, Nassau, Poles and Swiss - in blue, white, brown, green and red coats; but mainly blue. The French infantry will be a pretty thing to behold but, though all served in theatre, it's not historically accurate as a combined force - it really has become a painting pretty things, thing. 


Very pretty!

Cavalry: 8 'regiments' of 12 figures each. 

Dragoons x4; Chasseurs a Cheval x2; Hussars x1; Polish lancers x1.

The notes for the British cavalry apply just as easily to the French. If anything more so because, the French fielded more of it and with greater variation. I might add one or two more unit to this list, including a unit of Imperial Guard cavalry for re-fights of Fuentes De Onoro, but maybe I won't. As per British 7th Division, in any event, extra units can wait until after I have some Spanish.

Artillery: 8 guns in total, each with 4 crew. 

 Foot x 6; Horse x 2; Limbers x 4 (including 1 horse artillery).

Notes as per British. 

Officers: There will be eleven command stands in total.

There will a 'Commander in chief' stand of four figures, six divisional command stands of two figures each, and four one figure command stands (cavalry brigades and an engineer).

Grand Total French:

Totting that up, that comes to 975 men, 8 guns, 4 limbers and 131 horses. I've painted just over half.


Combined infantry, cavalry and artillery working together under one commander. In this game they are all part of  'French 3rd Division' (note division number beads). Note: In this game the Chasseurs have been attached to 3rd division from Corps.
So, there they are, my OOB and my reasons for them. You can see that I'm not exactly a purist when it comes to Napoleonic gaming. However, I believe my proportions and ratios are just about right, and all encompassing, in a pretty general kind of way. 

Using my chosen representative scaling, I should be able to come up with lots of balanced scenarios and, being able to field four or five infantry divisions, even play quite sizeable chunks of some of the big historical battles; though I realise that I'm a fair way off being able to do the whole of most of them. 

If memory serves, at 1:40-ish (1 infantry unit to 1000 men), I would need 34 infantry units and 10 cavalry to do the French force at Fuentes De Onoro, and somewhat more than that to do Salamanca. That presupposes I have a table big enough to do battles this big in the first place - and I don't.

More than anything, I suppose, it was my table that decided the maximum size of this collection. My table, at most, is 15' x 6' and more usually 12' x 6'. We are playing battles with thirty-two units (plus artillery) at the moment and there is plenty of room. I think somewhere between forty and fifty-ish units will probably be more typical in the longer term. This means, after setting up a typical game there will be up to thirty units that could vary the compositions of the forces still in the cupboard. In campaigns, having lots of units never goes amiss, so I can see a time when the whole of at least one side will appear on the same table at the same time.

Monday 25 November 2019

Gentlemen do ungentlemanly things in the jungle

Last weekend, some unspeakable things happened on seLast Saturday several of the League of Gentlemen Wargamers gathered in sleepy Kirriemuir for one of our (three times a year) weekend war game bashes. The theme for this particular gathering was a new one - The War in the Pacific. 

Several players brought stuff along for the game (even I brought along 30 newly painted, still drying Japanese troops). But, the bulk of the troops, and at least half of the terrain, was brought along by Peter N. who has spent the last two years preparing the scenarios, troops and terrain for this particular weekend's fun and frolics; including, the commissioning of a marvellous one off island terrain mat which has to be seen to be believed: Well done, Peter! Your efforts were much appreciated by all.

Players were designated Japanese, American or Australian for the weekend - which side we were on is evident from the mug shot above. Yep, the Japanese are all wearing glasses, and the Australian is furthest away. 

Saturday encompassed the playing of several theatre specific scenarios, all loosely based around historical actions. 

I can't comment on their historical authenticity because my knowledge of this part of World War 2 is mostly based on distant memories of The World at War documentaries and the more recent TV series The Pacific. However, all the games were great fun and Peter really knows his stuff. 

All but one of the games were played using Warlord's Bolt Action rules. The odd one out was a tank Vs tank game using the TWOFATLardie's What a Tanker! 

I like Bolt action and they work very well for this kind of game. I'm not sure about their value for non-infantry battles, or games using small figures but, for platoon level infantry games using 28s, they are a great set of rules.

There were six scenarios in all.

They were played in rotation; between teams of one or two players a side; players swapped opponents for each game; players mostly managed five games in the day's play. 

I can't remember the names of the games and I didn't manage to play one of them.

This one, involved the Japanese trying to get captured American Airmen (who had bombed Japan?) off of an island before they could be rescued by U.S. Marines. In this game, the Americans were awarded points for rescue and lost points for casualties. The Japanese got points for either getting the prisoners away to the harbour or executing them (historically several were murdered), and for G.I.s killed. 

This was the last game I played on Saturday and I was now fully aware of the value of the Japanese being able to charge regardless of pins. Banzai!

Obviously, getting fully into character, my plan was to wipe out the Marines so I could walk my captives to the harbour and away; as insurance, I began executing airmen (one per turn) for points from turn one. My plan nearly succeeded. Time called a halt with only 4 G.I.s left, and not too many more captured airmen. Two more turns would have seen a total Japanese victory - sometimes night comes too soon. It was the only game I lost and scored points on - which is not to say I only lost this game!

Note Kieron, escaping the camera in double-quick time.


This scenario involved the taking of two small islands, one with a radar station. 

The game had a particularly interesting scenario format. The forces were not fixed. The Japanese would score more points for achieving victory with less troops than were available. 

The force, once chosen, could not be altered and I took the absolute minimum to achieve maximum points and paid the price. 

My Japanese paratroops took one island, and brought up an empty landing craft to convey them to the other. However, they were too few in number to beat off the Australians who arrived by boat to retake it. Boy, those Australians are 'Tough' under Bolt Action rules.


I lost this scenario and I scored, in my best Japanese voice, 'Zero!' points.


This game was a simple ambush scenario, photographed here before Steve's road was added on Saturday morning. It zig-zagged through the jungle.

With lunge mines and a couple of banzai charges, the American Stuart tanks, M3 halftracks or the troops they were carrying, didn't make it around the first bend.

This was a particularly hard battle for the Americans, I thought, and I scored heavily.
This is the scenario I didn't play. 

I'm afraid I haven't much of a clue what it was all about.
This was a What A Tanker game. I will not say scenario.

Generally, I think it involved two Japanese tanks versus a Sherman. 

I had not played What a Tanker before. The rules have an interesting game mechanic and, for a game, I suppose they work well enough. My gripe with the rules is that they are for playing a game and, IMHO, bear no resemblance to tank warfare. 

Fun enough but, I will not be buying these rules.

Game lost - zero points.


I think this game was an Iwo Jima scenario and it was the first game I fought. 

My objectives could be met by holding my bunkers and killing G.I.s. 

My secret weapon was the ability to use an underground network of tunnels to bring out reinforcements, which I managed to do quite successfully.

The luck was with me all the way on this scenario. I rolled well; every time the Americans issued a 'Run' order they hit a booby-trap for D3 casualties; I held both M.M.G bunkers. 

I scored so heavily in this game - (from memory) 57 points, and everyone else scored so very many less in their first games, that umpire Peter N. deducted 17 points for being "cocky". Banzai, Ha!

Points for achieving objectives were added up at the end of each scenario played and the top twoo scoring players on each side were promoted. I came in second for the Japanese and promotion in the service of my Emperor was achieved.


Sunday's Big Game - and I'm not using capitals for nothing - as photographed after it was set up on Friday evening. Just look at this beauty! Fought on an island 24' x 6'; I don't think I've ever seen as much jungle. Just look at that game mat!


I was so impressed, the next day, I brought my iPad to take a short videos of it all. I apologise in advance for their wobbly nature - this was all a video-tech first for me and somewhere along the way I lost a similar video of the other side of the table. If it ever turns up I'll edit it into this post.


The scenario was simple enough. A combined American and Australian force was tasked with seizing a Japanese held Island.

All Hell broke loose on the beaches and in the jungle beyond. The Japanese were holding well as the game drew to a close and were declared the day's victors. In the long run though, I feel the Allies, with unlimited resources would have prevailed - I certainly had very few troops left a the end of that grizzly day.
It was a fantastic game. A very enjoyable day's play all round. 

The weekend, largely due to the efforts of Peter N., was another stunning success as a gaming weekend and, as usual for The League, played in the best spirit.

Thanks to all, and a special mention to Steve R. who put me up for the weekend and wined and dined me on the Friday night before the games began. Thanks, Steve.

So, there you have it. I'll just add some photos of the game in progress - for the record.


FOR SALE NOTICE: The 30 Japanese I took to this game are currently listed on ebay at this: Link.

Friday 15 November 2019

The Battle of San Winnoc

This weeks battle will be played using terrain only slightly changed from the last battle we fought. Immediately noticeable is the removal of the river, the addition of two streams that spring from the bottom of  hills, and the addition of a new hill (Pastoso Colina). 

Because I'm using the battle to christen my new windmill the terrain has a bread theme.


After the last battle I think it was agreed that there was rather too much terrain that gave cover. Consequently, I'm changing the definitions of the terrain:

  • Horno Colina (Oven Hill) and the western end of Molina Colina (Mill Hill) are class II terrain. From the top of the first contour they are lightly wooded (block LOS) and provide soft cover. 
  • Pastoso Colina (Doughy Hill) and Cresta de Pan (Bread Ridge) are class II terrain.
  • Arroyo Panadera (Baker Stream) and Arroyo Paleta (Oven-paddle Stream) are class II terrain to infantry and cavalry. Both streams are steeply banked 'gullies'; they are impassable (except at the 'fords') to artillery; they give a terrain advantage to troops defending a bank in melee; troops in the streams cannot see or be seen, except from higher ground or a bank.
  • All built up areas are composed of standard town sections: Honore and Winnoc are the patron saints of bakers and millers; Panderia (bakery); Levadura (yeast).
  • Orchards (light woods) are class II terrain, block LOS and provide soft cover.
  • All other fields have no effect (scenic only).
I have reduced the sum of the table's objective points by about a third.

We will use the same deployment set up as last time - each side initially choosing (in secret) four of his six baseline deployment zones, either as one contiguous group or two groups (3:1 or 2:2) with a gap between.


I will use both armies exactly as they were diced up for in the last battle, including for the officers. Each side will use the sequence deck as it was diced up for the last time. 

New ACAD cards will be dealt before play.

Players will swap sides: So Peter will be French and Graham will be Anglo-Portuguese.

French:

  • C-in-C: Blue. 
  • Sequence Deck: skilled.
  • Division 1: Leader blue. Two infantry green / green; two infantry red / green; one infantry red / red; one artillery red / green.
  • Division 2: Leader green. One infantry green / blue; two infantry green / green; two infantry red / green; one artillery green / green.
  • Division 3: Leader blue. One infantry green / green; two infantry red / green; one infantry red / red; one artillery red / green; one cavalry red / green.
  • Division 4: Leader blue. One cavalry green / blue; one cavalry green / green.

Anglo-Portuguese:

  • C-in-C: Blue.
  • Sequence Deck average.
  • Division 1: Leader blue. One infantry blue / blue; one infantry green / blue; one infantry green / green; two infantry red / green; one artillery green / blue.
  • Division 2: Leader blue. One infantry green / green; three infantry red / green; one artillery red / green.
  • Division 3: Leader blue. One infantry green / green; three infantry red / green; one artillery red / green.
  • Divison 4: Leader green. One cavalry green / purple; two cavalry green / blue.

Sunday 10 November 2019

Tilting at windmills

You only have to google Spanish windmills to find numerous images of the Windmills of La Mancha - the same windmills that Don Quixote mistook for giants. It was from these that I took the inspiration for my model. 

The main difference between my model and the windmills of La Mancha is the roof  covering. From photographs, the ones at La Mancha look like they are covered with lead sheeting and they look quite 'modern'. I did find one tor two pictures of windmills with wooden roofs, with vertically set, long trapezium shaped planking (to be honest, this looked too hard to make) but, I also found one image of a La Mancha style windmill roofed with simple, horizontally set, wooden planks (possibly a roof before the addition of lead sheet?). This latter planking could be reproduced with a paint job: The basic design was set, though plenty of artistic licence would be used.


So, on to the build.

The basic shape is very simple. I used a poster tube for the cylindrical body of the windmill; I also cut a 10 mm ring from the poster tube to make a skirt for the roof, split it, and stuck this around the top of the tube, adding a small section to fill the 'circumference' gap. 

I made a simple cone out of an old Birthday card, with a lower circumference about 5 mm wider than the tube and stuck it on the top. After it was dry, I trimmed off the excess.

Then I added the 'spindle for the windmill sails. This was made with a round pencil, drilled for the sail arms.
 I then made a hole through the front of the thin card roof and pushed the pencil through it until it touched the 'back'. This assembly needed to be firmly secured and strengthened from the inside. I did this with a PVA glue and kitchen roll 'paper mache': Layer of glue, paper, glue, paper, glue, etc.
Then I went to work on the outside of the roof and spindle canopy. 

You can see from this image that I have added a thin card covering to the skirt (brown). I did this to smooth the connection between the skirt and the cone. The thin card was cut slightly wider than the skirt. I trimmed it from the cone angle, painted the join with PVA then, using the round shaft of a small screwdriver to run around the join, smoothed the two (skirt and cone) together into an invisible join.

Then I added some thin balsa wood (it cuts better than card) planks to section the cone. 

I also constructed the spindle 'cover' out of thick card with thin card planking.
 Next I added the tiller (cane barbecue skewer), the doors and the windows. These are War Bases, windows, square doors and shutters. The windows and shutters were cut smaller, lower window sills being added with balsa wood. Note I back painted behind the windows to save time later.

I also added a paper mache cover over the top of thetiller where it comes through the top of the roof cone. (I've seen an image of this kind of thing, another Spanish windmill).


 Images showed the walls of these towers are quite thick, thicker than my tube, and I wanted to show this somehow. Unusually, for me, I cut a gap for the door into the tube and added thin card 'flanges' and a doorstep to artificially thicken the wall at the opening.

 Next up I added the brickwork (I did this first) then the 'plaster' rendering. I did not use plaster!

I used a thin coat of artist's acrylic paint (from a tube). I find yellow ochre is a good choice of basic colour. I scored the brickwork, let it dry, ink wahed it then added the other rendering.
Next I painted the brickwork. I later lightened it further.

Whilst all this was going on I started making the sails. I cut a template out of card, placed it under a a piece of thin clear plastic (the back of a blister pack), and using PVA glue to glue down the balsa planks, glued the bits together over the template - so that all the sails are almost identical and 'square'.
Whilst the sails were drying I undercoated the roof and tower with household emulsion paints....
 .......and the sails.
 I ink washed the tower with ink diluted with water, 1:3 (I use artists acrylic ink, this colour is burnt sienna)
Then I started dry brushing with household emulsion....
...until it was light enough.
I painted the woodwork with enamel paint - because I had more choice of colours. It allowed me to paint on the planks rather than model them individually.

The offset arms for the sail assembly can also be seen in this shot. Sail arms are barbecue skewers.

I've also added a trestle for the tiller arm (that I've seen in some pictures). 
Ground work was added with more artists acrylic.

A boundary fence, made using barbecue skewers drilled into the base, and cut up lolly-pop planking was added. I used lolly-pop sticks rather than balsa wood purely for durability. The fencing received two layers of quality PVA undercoat to bind it all together and add extra strength.
 Fencing painted, sand grit and stones added for an arid look, and finally finished with a bit of flock.
 Lastly, I remembered to add the lolly-pop stick gate I'd left drying on top of a shelf.
 The back.
The front.

Job done, and I hope you found the construction notes helpful.