Wednesday 14 December 2022

Solo Salamanca (A game at Christmas): The rules

Over the Christmas season I will play my traditional solo game. This year it will be Salamanca, using the scenario detailed in the previous post.

For this game I'm going to use my home grown ruleset called Sacre Bleu! This is a Piquet-like game but with so many changes they are not actually Piquet. Several things are quite novel but I'm not claiming anything as original thought: Virtually nothing is new under the sun when it comes to wargame rules. These rules are a basically a mish mash of things I like. When it comes to what is written down, except for a sequence deck list, this is all there is: The rules fit onto four sides of A4. They are still work in progress.

Top tip: I'm using a 4 view American diner style plastic menu holders as a binders - these are excellent for this kind of thing.

Anyway, here is Sacre Bleu! for your perusal. 


So these are the rules that you might need to look up during play. What they don't do is explain how the game is played. So, here goes.

The game is played with a bag of dominos and a sequence deck for each side. The dominos randomly assign each player with a number of initiative points to use during his initiative phase to turn sequence cards in his sequence deck and carry out actions. The sequence decks randomly determine the 'turn sequence' for each side, and the chances are both sides will have a radically different turn sequences.

The sequence decks, placed face down, randomly determine the action sequence each side can follow and as the cards could come out in any order you never quite know how quickly things will happen - if the enemy turn three infantry move cards in quick succession they can be on you before you know it, and likewise you might want your own infantry to get somewhere but you don't know when, or if, it will happen. The sequence deck for each side is quite similar. They comprise: 

Infantry March x 3
Cavalry March x 3
Intrinsic Mobility x 1 (Extra move for Light cavalry and extended line; skirmish card for light infantry)
Command x 3 (Rally card; also allows formation changes)
Musketry Firepower x 2 (French) x 3 (British)
Artillery Firepower x 3
Elite Firepower x 1 (Extra 'reload' card for elites and light infantry, the only reload card for cavalry)
Charge x 2
Shock Action x 1 (Extra charge card for heavy or 'shock / elite' cavalry, highlanders, etc.)
Army Action x 2 (Routers, C-in-C action, recover downed command, etc.)
Heroic Moment x 1 (British) x 2 (French)
Dress the Lines x 3

For the Salamanca game the British get a Brilliant Leader (wild) card effecting a division, and the French get an off table reserve (Sarrut's 4th Division) activation card. Both replace one Dress the Lines card. 

Top Tip: When making your own cards (I use MS word, using the table format with a first narrow column to size everything) it is worth investing in plastic collector card sleeves / covers. Home cut cards are not die cut so their edges are always slightly burred and they are, inevitably, slightly different sizes. Precision made plastic card sleeves allow cards to be shuffled much more easily because they make every home cut card exactly the same size with sealed side edges. They also make home made cards look much better.

Then we come to, what I call, domino theory, and this might be original thought because although I knew some people used dominos I didn't know how. In classic piquet you roll d20s off against each other and the winner gets the difference in the rolls as initiative points that he can use to turn cards and carry out actions, then the d20s are rolled again to determine the winner of the next initiative. This sounds fine but it does mean that one side can keep winning and doing whilst the other stands idly by, sometimes for extended periods. Domino theory doesn't allow that to happen and it works like this: Each side draws a domino from his bag. The winner is the player with the higher domino and where the total is the same (5:2 = 7 Vs 4:3 = 7) the winner is the player with the higher sided domino (in this case 5:2). The winner gets the total (in this case 7) as initiative points and the loser gets the high side of his domino (in this case 4); the winner can choose to play first or second (but, usually he will play first). Where one side draws a double domino (4:4, 6:6, etc.) the winner is decided in the standard way but he gets the total of both dominoes (4:4 = 8 Vs 4:3 = 7 gives the winner 8+7 = 15) whilst the loser still gets the high side of his domino (in this case 4) unless he has the double when he gets both sides (so, 4:4 Vs 5:4 gives the winner 17 and the loser gets 8). Where both sides draw the same domino (say, 3:2 Vs 3:2) the turn ends immediately, sequence decks are re-shuffled and dominoes are drawn again to start the next turn. 

As in all games some things gain jocular momentum and the double two domino is a case in point: It is called 'the domino of death' because it almost invariably gives four points of extra initiative to the opposition. Thought I'd pass that on.

Each time a player turns a card he expends one initiative point. What you can do on each card, and how much acting on the card will cost is detailed in the rules above. When one side finishes its sequence deck by turning the last card, and it spends an initiative point to close the turn, the turn ends and both decks are re-shuffled (so one side doesn't get to act on all of its cards!). 

BTW. Initiative points must be tracked on a 'clock' of some description: I use a double clock face, each face with 20 graduations, though a simple pair of linear tracks is easier to make (Cribbage board style).

And that is basically it. Except to confuse you all further by saying, that when playing, time should be thought of as elastic time. Only at the end of a turn is time equalised for all units everywhere on the field and only at that point can a solid narrative be arrived at - whilst the turn is going on, everything is in flux.
 
Lastly, my games are completely paperless: There are no roster sheets, etc. All information is out there 'on the table'. Unit and command quality, strengths, casualties and so forth are noted with coloured beads (note the colour bars in the combat tables), dice, or counters. You don't need to look things up or remember anything (you would be surprised how quickly players learn the colour and symbol coding - see Commands and Colours) in my games and this speeds everything up and considerably cuts down on the number of clerical / memory loss errors made - as I'm a bear of little brain this is often a very good thing. 

Next up, Salamanca: Turn 1.


Wednesday 23 November 2022

Battle of Salamanca Scenario

Edit following testing: 08/12/2022

Rather than fight the individual divisional combats in detail, or recreate the whole 'dog legged' deployment of both armies, this scenario aims to take in the major attack made by Wellington along the whole of his southward facing front. To make this possible I have 'bath-tubbed' the whole affair so that it fits on a 12 x 6 table. I will be playing the game using 'Sacre Bleu!': My heavily amended, now almost unrecognisable version of Classic Piquet rules - and still a WIP.

KEY:
Allies: 1. Anson's Brigade and artillery, 4th Division. 2. Pack's Brigade. 3.
4th Division (remainder).4. 6th Division. 5. 5th Division. 6. 7th Division. 7. Cavalry, Cotton.
8. Bradford's Brigade.9. Spanish Division. 10. 3rd Division. 11. Cavalry, D'Urban.
French: A. 7th Division. B. 5th Division. C. 2nd Division. D. Cavalry, Curto.
E. 6th Division. F. Cavalry, Boyer. G. 8th Division. H. 4th Division (off table).

TERRAIN

Lesser Apariles: At the eastern end of the field, and in British possession, is the Lesser [or Southern] Arapiles. This is a cone that rises out of the plain and is rocky and steep on its northern facing slopes (very rough terrain) but much less so on its southern facing slopes (rough terrain).


Greater Arapiles: Opposite the Lesser Arapiles, and in French possession, is the longer, coffin shaped, Greater [or Northern] Arapiles. This hill is steep and rocky on every side topped by a natural terrace supported on a 1m to 2m high vertical cliff face (very rough terrain). Infantry (line deployment only) and artillery on the terrace can fire down from a superior position, count as obscured to fire from below the rim, and will count as defending a fortification if charged. 
Note: Artillery on the terrace had insufficient gun depression to fire on any troops climbing the hill’s slopes.
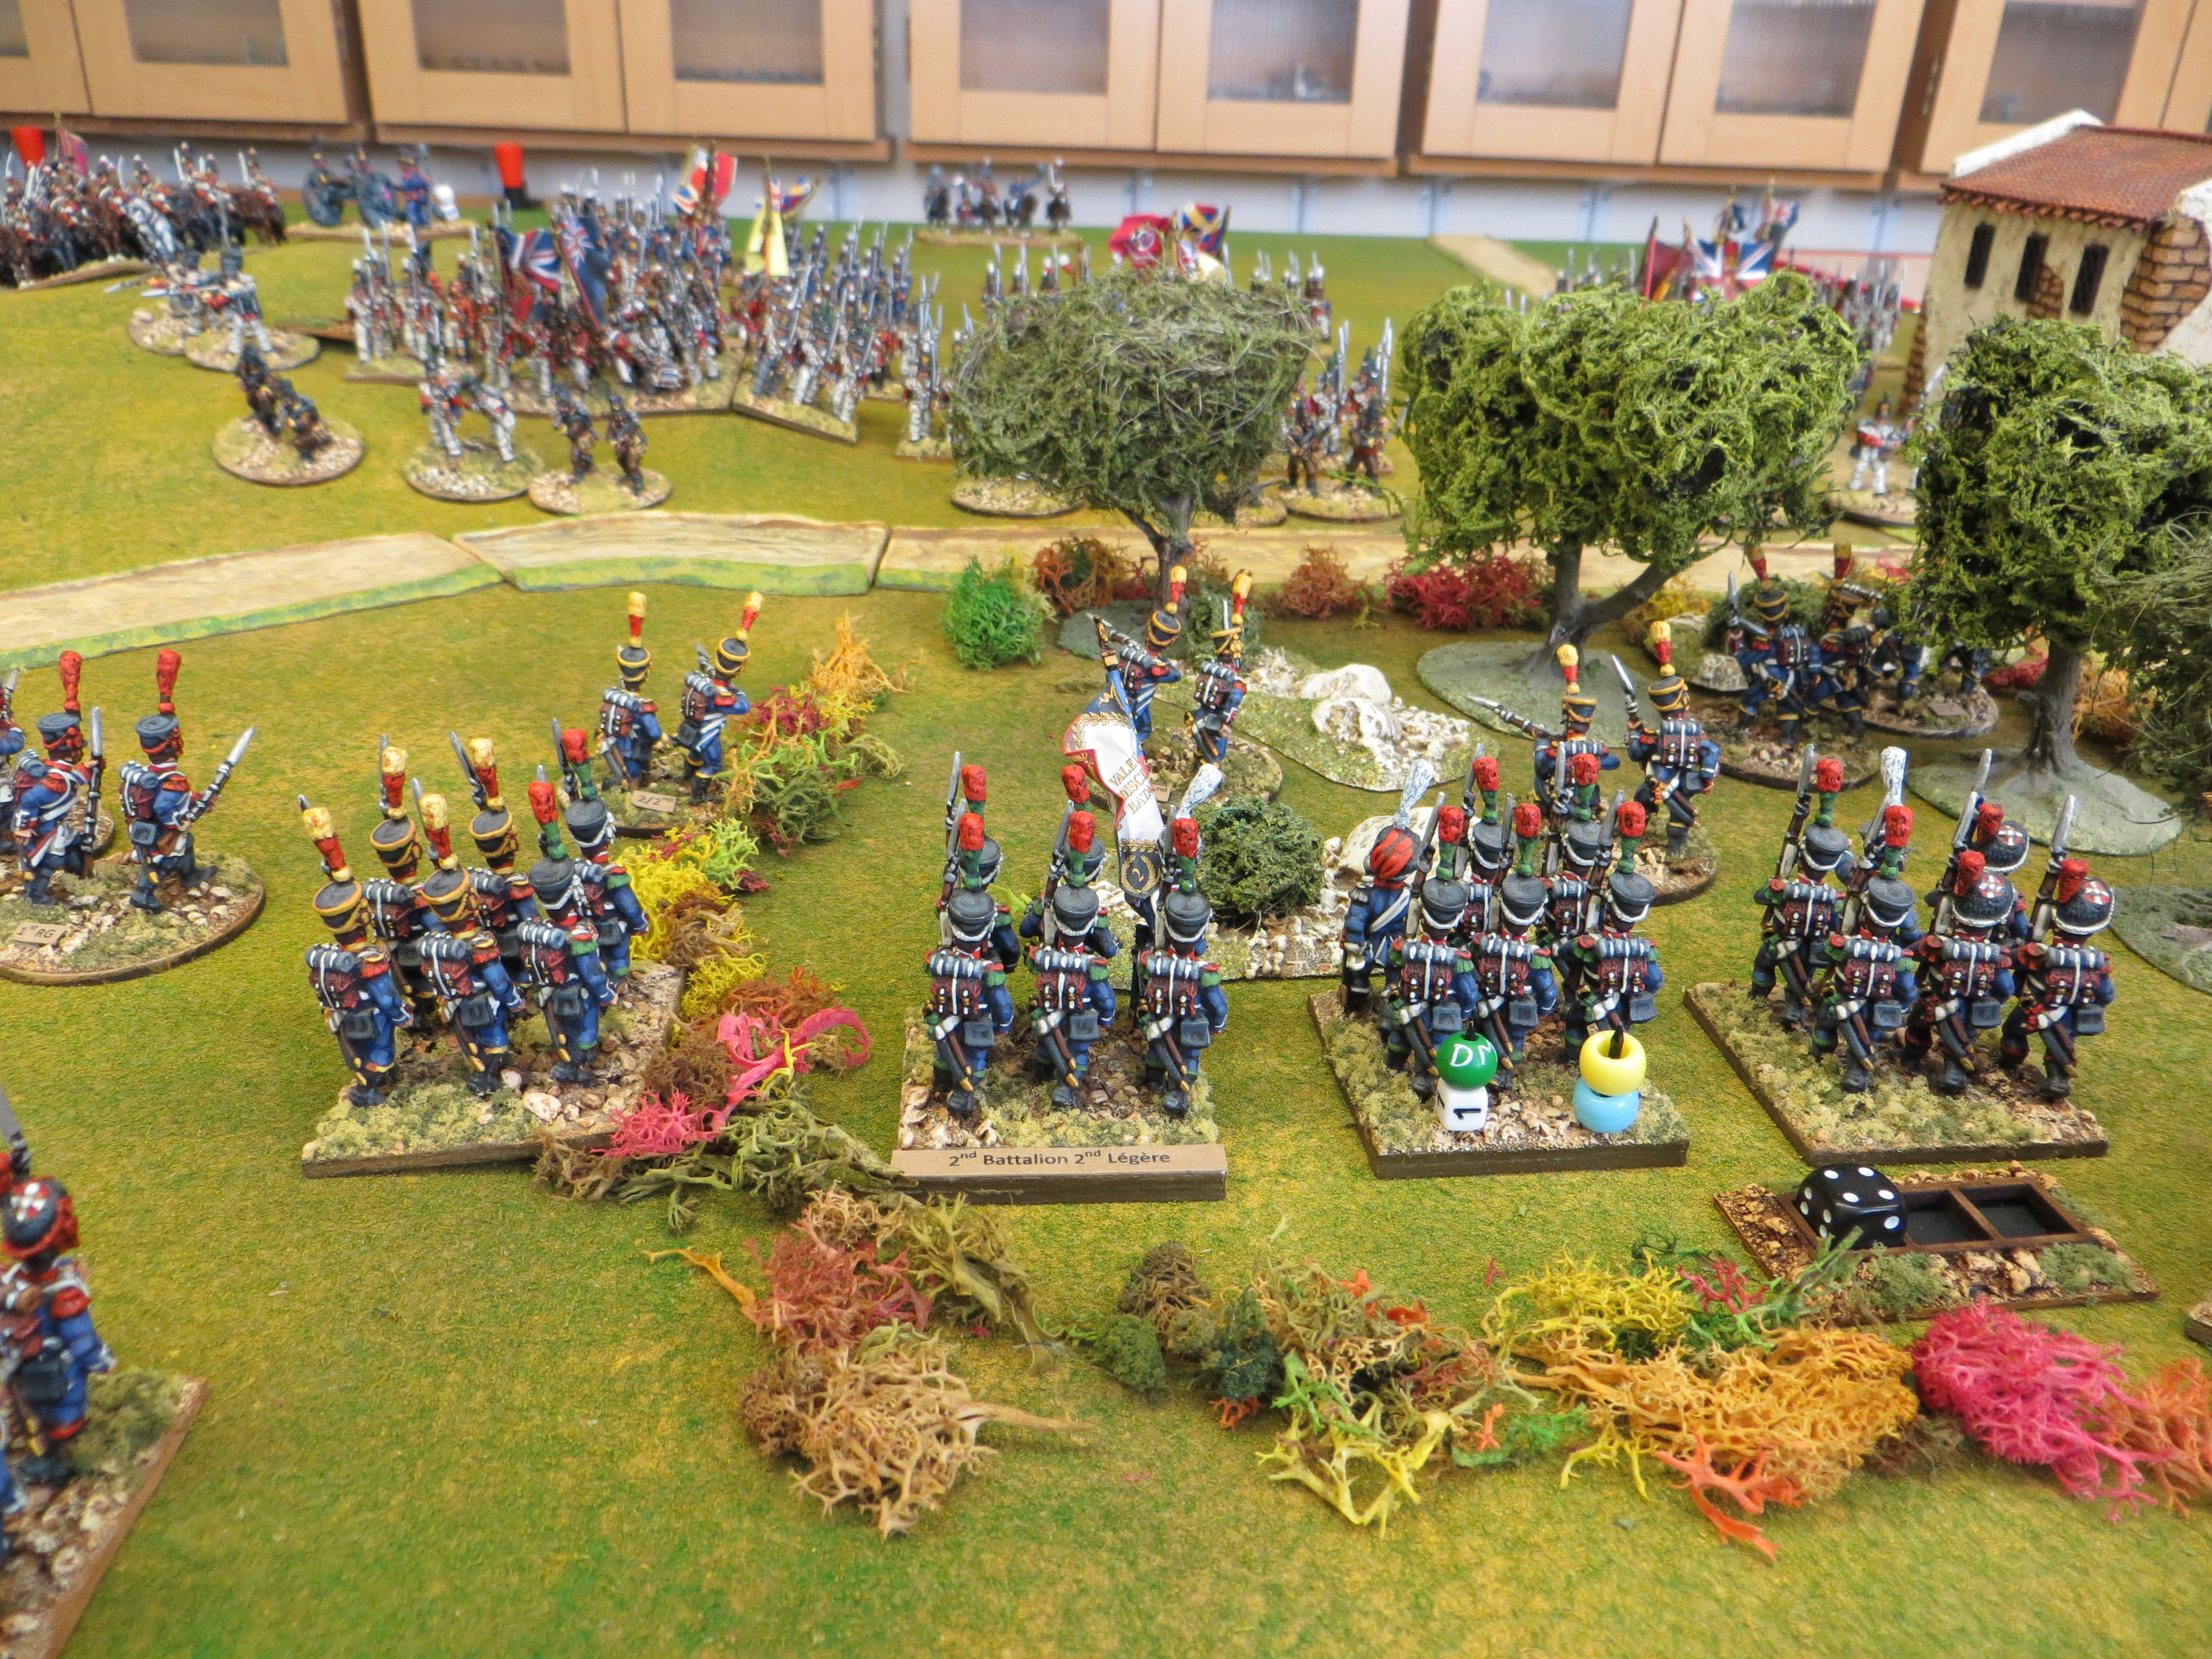
Los Arapiles: Directly west of the Lesser Arapiles, and centrally placed within the British deployment, is the village of Los Arapiles. This linear village runs east to west and comprises stone buildings (very rough terrain, hard cover).

The Monte de Azan: The last major feature is the Monte de Azan. This isn’t as obvious to the eye as the previous three features but is no less important. It is a low, undulating, three mile long plateau; described as ‘ideal for marching’. The bulk of the French army is presently deployed on it, or making its way westward on or behind it. It obscures units 3" beyond the facing contour but does not provide a superior position for fire or defence. Troops marching on top of it gain the 3" rate bonus for road movement - it's 'The Monte de Azan Superhighway'.
Other terrain features: These include the small village of Miranda de Azan which stands at the north western end of the Monte de Azan; the high ground of the Teso San Miguel which begins to rise immediately north of Los Aripiles; two other pieces of gently rolling high ground (one between the Greater Arapiles and the Monte de Azan, the other extending from the northern edge of the battlefield to the western end of the Monte de Azan) which provide dead ground to troops behind them; and several areas of open, cork tree woodland, some going on to be extensive, that dot the battlefields edges, especially south of the French position (rough, obscuring terrain). Lastly, there are four roads radiating from Los Araples but, given the natural ‘good going’ of the ground they only really serve to stop a traveller from getting lost. Only the Los Arapiles to Miranda de Azan road is important in game terms because it serves as a delineating feature for British victory objectives (see below).

TIME AND ARRIVALS

The game will commence with the armies deployed as they were at about 4.00pm. 

Marmont and Bonnet have already been wounded and carried from the field and French command has devolved to Clausel. Bonnet with 8th Division is holding the Greater Arapiles, Clausel's 2nd Division and Maucune's 5th Division have taken up position on the Monte de Azan, and Boyer is holding the gap between the two positions with his heavy cavalry supported by a French regiment of 8th Division. Thomiere's 7th division is marching westward along the top of the Monte de Azan and has become separated from the rest of the army and is now out on a limb: Brennier's 6th Division and Curto's light cavalry are marching in Thomiere's support. 

Packenham and D'Urban with orders to 'sweep all before them' on the Monte de Azan and are about to assault Thomieres 7th Division (see Surprise Attack below). Leith's 5th Division, supported by Hope's 7th Division, Cotton's cavalry, Bradford's Brigade and the Spanish Division, have been ordered to assault the French position to their front, and Leith's division is presently filtering through Los Arapiles in compliance with those orders. Other units have not yet received orders to attack (see Victory Conditions below).

Surprise Attack: The game starts with the British getting an unopposed pre-turn one initiative phase of 10 initiative points. This phase can only be used to activate D'Urban and Packenham in an effort to take full advantage of their successful 'ambush' of Thomieres column. As soon as this phase is over any surprise has been lost: The British deck is shuffled - the game begins with turn one. 

Tardy Sarrut: French 4th Division under Sarrut arrived on the field very late in the day, it failed to do much harm when he did, and several historians have asked why this should have been the case. Consequently, in true D. Featherstone fashion, I will allow for the military possibility of a more speedy arrival and effect. From turn two, on the appearance of the Special Event card, the French player can start dicing for arrival: On turn two roll D8 Vs D8; on turn three roll D12 Vs D8 and if 4th Division rolls higher it can arrive on the next Infantry March card; it will arrive on turn four (historical arrival) in any event. Sarrut arrives over the southern table edge between the south eastern corner and the start of the Monte de Azan.

Game Duration: The game will last five full turns, after which the light will be deemed too poor for the action to continue.

VICTORY CONDITIONS

The victory conditions are fairly easy for this one. Each side must bring its opponents Army Morale Points (AMP) to zero - at which point victory is achieved. If neither side has done so before nightfall (end of turn five) the game is drawn.

French objectives: Holding the Lesser Arapiles is victory objectives for the French:  It is worth 4 British AMP. Holding the greater Arapiles is victory objectives for the French: It is worth 4 British AMP.

British Objectives: Holding the Greater Arapiles is a victory objective for the British: It is worth 4 French AMP. If an attempt is not made to storm (charge) the terrace of the Greater Arapiles before the end of turn three (historically made by Pack's Brigade) the British will lose 4 AMP. Holding the Monte de Azan (by having more units on top of it, east of the Los Arapiles to Miranda de Azan road, than the French) at the end of turn 3 is a victory objective for the British: It is worth 6 French AMP.

ORDER OF BATTLE

Below I list the forces being used for this scenario. Absent are British 1st Division and Light Division, which took little part in the battle until very late in the day. They were side by side, set roughly at right angles to the rest of the British line, behind the Lesser Arapiles, facing due east; Bock’s heavy cavalry brigade (KGL) is in support. Tied up facing them are French 1st Division and 3rd Division supported by a dragoon regiment from Boyer’s division. Although French 3rd Division stood to cover the retreat of the French army - causing heavy casualties to British 6th Division in doing so - this only happened after the French had effectively lost the battle, therefore none of these forces are available to the players for this scenario and I make no apology for not listing their composition – they are, as they say, ‘on the moon’.

Note: I have pre-rolled Divisional Morale Points (DMP) for the divisions.

Allied Army: Wellesley (Outstanding: 15 AMP, 6 PMP)

Packenham and D'Urbans cavalry - note Arenchild's hussars coming
through the wood, and the precarious position of 
Thomieres leading unit.
Cavalry Division: Stapleton Cotton (Able: 5 DMP)

Two 3UI Heavy Dragoon unit (Veteran, Fierce, British)
One 4UI Light Dragoon unit (Reliable, Fierce, British)
Note: I have taken the decision to fudge the organisation of this command (see below) and make the heavy brigade two units strong so that it is possible for it to charge on a broader front - this has meant playing fast and loose with the overall numbers: The dragoons is 1 UI stronger overall and the light dragoons are 1 UI less overall.

D’Urban: (Independent units: 5 DMP)
One 3UI Portuguese Cavalry unit (Reliable)
One 4UI Hussar unit (Reliable, Fierce, British)
Note: For the purposes of divisional morale I have split the cavalry division into two commands. Marchant’s and Anson’s Brigade under the divisional commander Stapleton Cotton, and  D’Urban’s and Arenchild’s cavalry, accompanying Packenham, under D’Urban as an ‘independent brigade’.


3rd Division: Packenham (Able: 10 DMP)
Two 5UI British infantry units (Reliable, Steadfast, 3SK)
One 5UI Portuguese infantry unit (Reliable, 3SK)
One 3UI battery (Reliable, Steadfast, HA)

4th Division: Lowry Cole (Poor: 8 DMP)
Two 4UI British infantry units (Reliable, 3SK)
One 5UI Portuguese infantry unit (Reliable, 3SK)
One 3UI battery (Reliable, Steadfast)
Note: 4th Division has had its command quality reduced to poor, and it’s British infantry have lost their steadfast status because of the heavy casualties received at the Trinidad breach at Badajos in April (including two thirds of its officers ‘knocked over’): The division’s poor performance at Salamanca probably stems from that bloody assault.


5th Division moving through Los Arapiles with 7th Division in support
on the Teso de San Miguel and Cotton's cavalry on their right flank.
5th Division: Leith (Able: 8 DMP + 5D)
Three 4UI British infantry units (Reliable, Steadfast, 3SK)
One 4UI Portuguese infantry unit (Reliable, 3SK)
One 3UI battery (Reliable, Steadfast)
Note: 5th Division had only three brigades but they each had four battalions rather than three, making this the largest British Division in theatre - it could cover a very long frontage in line. In consequence there are four infantry units.

6th Division: Clinton (Able: 10 DMP)
Two 4UI British infantry units (Reliable, Steadfast, 3SK)
One 5UI Portuguese infantry unit (Reliable, 3SK)
One 3UI battery (Reliable, Steadfast)

7th Division: Hope (Able: 8 DMP + 4D)
One 4UI British infantry unit (Reliable, Steadfast, Light Infantry, 4SK)
One 4UI Brunswick Oels infantry unit (Reliable, Light Infantry, 3SK)
One 4UI Chasseurs Britannique infantry unit (Reliable, 3SK)
One 3UI battery (Reliable, Steadfast)

The Spanish Division of Carlos de Espana, with Bradford's Brigade, 
and the cavalry brigades of Marchant and Anson (Cotton)
to their front and left.
Edit: There are now two units of dragoons with 3UI each and
one unit of light dragoons with 4UI (see notes above).

Spanish Division: Espagnac (Able: 5 DMP)
Two 4UI Spanish infantry (Reliable, 2SK)

Pack’s Brigade: (Able, Independent units: 4 DMP)
One 4UI Portuguese infantry unit (Reliable, 3SK)
One 3UI Portuguese Cacadores SK infantry unit (Reliable, Light Infantry, Rifles, 2SK)
Note: I have chosen to represent this strong brigade as line infantry and a SK unit.

Bradford’s Brigade: (Able, Independent units: 2 DMP)

One 5UI Portuguese infantry unit (Reliable, 3SK)

French Army: Marmont (Reliable: 14 AMP, 4 PMP)

Clausel, now in command of the army, directs affairs from his
divisional position (note additional 'staff'. Beyond are Boyer's dragoons
and, directly behind, Brennier's 6th Division marches westward.
Note: Marmont was seriously wounded on the Greater Arapiles sometime after 3pm and was replaced by Bonnet when Clausel couldn't be found. Bonnet was seriously wounded soon after and replaced by Clausel who had reappeared after going to get an injured heal dressed. In effect, command of the army changed three times in an hour and confusion reigned in this vital period immediately prior to Wellington's attack. In consequence, the C-in-C stand is now just a dice holder. PMP has been reduced (from 6 to 4) for command being seriously downed.

Heavy Cavalry Division: Boyer (Reliable, 7 DMP)
Two 3UI Dragoon units (Reliable, Fierce)
One 3UI battery (Reliable, Steadfast, HA)
Note: With one regiment absent on the French right this division should have one dragoon unit of 4UI and one unit of 2UI but, two 3UI units work better in game terms so that is what I've done.

Light Cavalry Division: Curto (Reliable, 4 DMP)
One 5UI Chasseurs a Cheval unit (Reliable)
One 4UI Chasseurs a Cheval unit (Reliable)
Note: I did consider adding an activation mechanism for this division: It wasn't where it should have been and took some time to come to Thomieres' rescue. However, not introducing such a penalty will make the game a better game - for the French - so I've just started them half a move farther back. 

2nd Division: Clausel (Reliable, DMP)
One 4UI French Leger unit (Reliable, Light Infantry, Steadfast, 3SK)
One 4UI French Line unit (Reliable, Steadfast, 2SK)
Two 4UI French Line units (Reliable, 2SK)
One 3UI battery (Reliable, Steadfast)

Bonnet's 8th Division holding the Greater Arapiles and 'the gap'
between it and the Monte de Azan. Note the 'terrace' with its
cliff like front: I madethat piece of terrain because it's such
an important feature of that hill.
Many moons ago, I actually climbed that 'parapet' - to 'test it'.
 
4th Division: Bonnet (Reliable, DMP)
One 4UI French Line unit (Reliable, Steadfast, 2SK)
Three 4UI French Line units (Reliable, 2SK)
One 3UI battery (Reliable, Steadfast)

Maucune's Division standing far enough back to obscure the British
view of them. Behind them are the cavalry of Curto's Division.
5th Division: Maucune (Reliable, DMP)
One 5UI French Line unit (Reliable, Steadfast, 2SK)
Two 4UI French Line units (Reliable, 2SK)
Two 3UI batteries (Reliable, Steadfast)

6th Division: Brennier ((Reliable, DMP)
One 3UI French Leger unit (Reliable, Light Infantry, Steadfast, 3SK)
Two 4UI French Line units (Reliable, 2SK)
One 3UI battery (Reliable, Steadfast)


7th Division: Thomieres (Reliable, DMP)
One 4UI French Line unit (Reliable, Steadfast, 2SK)
One 4UI French Line unit (Reliable, 2SK)
One 3UI French Line unit (Reliable, 2SK)
One 3UI battery (Reliable, Steadfast)
Note: The three UI French Line unit is at the head of the column. It has not had time to form square in the face of D'Urban's cavalry but has managed to bring up it's second company to face the threat six deep. It is surprised, and probably in panic. I have decided to represent this unusual formation as a column of attack, disordered, with skirmishers withdrawn.

8th Division: Sarrut ((Reliable, DMP)
One 4UI French Leger unit (Reliable, Light Infantry, 3SK)
Two 4UI French Line units (Reliable, 2SK)
One 3UI battery (Reliable, Steadfast)
Note: This division starts the game off table. It cannot arrive before turn two. See Time and Arrivals above.

General Note: How were unit strength, unit type and unit quality derived? Basically, I took total divisional strengths from Oman, divided by 400 infantry, 200 cavalry, to get unit integrity (UI) points, then did the best I could to generate the right number of unit types by percentage (e.g. Legere 27%), with a strength of between three and five UI points per unit (because that works best for my rules). It's not an exact science, and there is a lot of fudging for effect but, it's not totally make believe. As for quality, well that was done with an eye to how troops perform under my rules and is, I believe, the only way such things can be done. Remember, this is a bath tubbed scenario, where units represent something close to brigade strength but are used on the table like battalions - it's the blending of two game scales and something I like a lot.

Lastly, I suppose I should cite my sources. I'm not going to do all, as some provided very little the others didn't, like the road network (Peninsular War Atlas - Osprey), but these three are the best I have. Oman's work, volume 5, is the key and his map is the best too. Of the three, Edwards tells by far the best tale, in the most detail and in an entertaining style but, he's short of a good map. Fletcher has done a good job for Osprey but, like all Osprey's, it's just a wetter and scene setter for further reading - if I'm honest, there could be more maps and they could be much better (Osprey, I thought you were better than that!). 

Oh, and just to date my own visit to this fantastic battlefield, these photographs were taken using this weird stuff they called film. My wife, in shot above the parapet on the Greater Arapiles, is 5'4" tall and she's stood quite near the edge - I'm glad I didn't have to assault it in 1812, the 'cliff' I mean. The bloke by the monument? I haven't a clue who he is, LOL. 


Saturday 3 September 2022

Wednesday night madness. Last week's was cheap and cheerful; this week, a big SoN game


So last week's game was a two player versus one (Graham H. and I versus Peter J.) To the Strongest, Crusades, affair. 

Never, in the field of lead men conflict, have so many chits been turned in anger to so little effect: Peter J, playing the Franks, only failed to make four saves all night in what might rate as the most one sided game of TtS that I've ever played. We were hammered, crushed, and sent packing on all fronts. C'est la vie.  
So this week, with the return of Mark D. to the fold, I thought I'd go back to trying Soldiers of Napoleon. I really like this rule set and I have high hopes for it. 

I've set up a lopsided points game where the French (with more points) will attempt to crack the Anglo Portuguese position on a long ridge. The British players each have three commands, the French each have four (including a reserve). Who controls which sector/side will, as usual, be determined randomly by drawing cards - I don't actually draw a card, I just get the last one, for fairness.

The British position, holding the reverse slope of aforesaid ridge, will be an interesting test of the skirmish rule (terrain not blocking line of sight). 

Also, given this is basically an attack versus defence game, it will be interesting to see how defence favours card play - if at all.

The forces are quite large, with each SoN brigade actually representing a bath-tubbed division (as described in the previous post). The morale values are quite substantial - the British have 52, the French have 56 but many more units.

British on the reverse slopes.

Note the variable 'stand strength' dice cell trays. Disruption will be shown with white dice. All of my units are the same size but have variable strength. I don't do stand removal. All ranges, etc. are measured middle to nearest. This works surprisingly well and is much less fussy, for big games, than in the rules proper.
A lightly held centre. The Light Division, rifle units forward.
One of the French commands in columns with skirmishers and a leger unit in extended line giving cover. 

All about to get their feet wet, by the looks of it.


Finally three shots of my QRS which have the troop types on the reverse. 

Sorry about the order they appear in. Don't know why that happened. 

You should be able to enlarge to read and spot the movement rules differences / differences in troop classification (for the Peninsular) / and a couple of optional rules. 

Also note that my troop classification gives the 'bead colour code' of the unit. This saves any requirement for roster sheets and relieves a lot of strain on the memory - everything is plain to see at all times.

Note, there is a misprint here (corrected by hand since this shot was taken), Harass range is 20" not 24".


Tuesday 23 August 2022

HISTORICAL ORDERS OF BATTLE FOR THE PENINSULAR


Firstly, it must be remembered that, unless I’m missing something, Soldiers of Napoleon (SoN) does not really use historical divisional organisation for army composition: If it did most infantry brigades would comprise three battalions without artillery but, they don’t. Most compose 4-6 units with attached artillery. What we are most likely looking at when we talk about SoN brigades are really bath-tubbed infantry divisions - or, at least, that's how I'm looking at it.

Looking at historical divisional organisations, I have decided to work out composition by running two basic mechanisms, side by side, with a piece of fudge wedged in between.

  • For each full 1000 infantry (500 cavalry) in the historical division the SoN brigade will get one unit. Generally, there shouldn't be rounding a up of fractions here. If the infantry division has 4999 men it should get four units, not five. Doing it this way will produce four unit SoN brigades more often and it will give the units within a division a more variable stand count. Rounding fractions will nearly always lead to SoN brigades of five or six units all with 4 stands each. Sometimes divisions will comprise fewer very big units and sometimes the number of units may need to be increased but in general, dividing by 1000 (without rounding) will be the rule of thumb.
  • To work out the stand count, divide the number of infantry in the division by 250 (125 cavalry), rounding fractions. If the infantry division has 4999 men it gets twenty stands to divide amongst its four units. How the stands are divided between the units is more art than mechanism: It’s generally a fudge, pure and simple.

Looking at some bath-tubbed British and French divisions (SoN Brigades), this is how I’m going to do.

Example 1: 2nd Division, Houdelet (Fuentes de Onoro, 1811). Comprising 17th Legere (1224 men); 70th Ligne (1078 men); 31st Legere (1583 men); 47th Ligne (1606 men). This gives a total of 5491 men. This firmly gives a five unit SoN brigade with 22 stands. Now comes the fudge. There are 2807 Legere and 2684 Ligne. This gives three units of Legere (simply because they outnumber the Ligne) with 11.2 stands and two units of Ligne with 10.7 stands. However, applying more art than science, I’m going to call it three units of Legere each with 4 stands, and two units of Ligne each with 5 stands. To this, in Peninsular fashion, I would attach a single two gun battery of 8pdr foot artillery. I would need to look up the division’s history / battle performance to determine unit quality.

Example 2: 7th Division, Houston (Fuentes de Onoro, 1811). Comprising 51st Light Infantry (590 men); 85th Light Infantry (387); Chasseurs Britanniques (839 men); Brunswick Oels (593 men); 7th Portuguese (713 men); 19th Portuguese (1024 men); 2nd Cacadores (442). This gives a total of 4588 men for four units with 18 stands. To give the feel of 7th Division (Wellington’s intended second Light Division) I would represent this division as follows. There will be a unit of Veteran Light Infantry (Shorncliffe trained) represented by the 4 stands, a unit of trained Light Infantry ( representing Chasseurs Britanniques / Brunswick Oels) with 5 stands, one unit of trained Portuguese Line with 4 stands and one with 3 stands; the remaining two stands will be trained Cacadores fielded as musket armed ‘SoN Detachments’. I would probably attach a single two gun battery of 9pdr Portuguese foot artillery. At least, that would be the way to do it 'properly'. However, I’d probably lose a stand of Cacadores and add a stand of Portuguese Line (increasing the second unit to a 4 stand unit), then I'd split the remaining stand of Cacadores and simply use it to increase the skirmish factor of the two Portuguese units from 2 to 3: I’d do this because its much less faff than detachments, and 3 stand infantry units are brittle.

Example 3: Cavalry Division, Cotton (Fuentes de Onoro, 1811) Comprising 1st Dragoons (388 men); 14th and 16th Light Dragoons (378/362 men); 1st Hussars KGL (414 men); 4th and 10th Portuguese Cavalry (312 men). Total 1854 troopers for (dividing by 500 for cavalry) three units with (dividing by 125) 15 stands. However, because this division didn’t operate as a single entity I’d ignore the mechanism for unit numbers and increase the number of units to four and split it into two brigades – possibly only fielding one. The first would be a ‘brigade’ comprising a unit of Dragoons with 4 stands and a unit of Light dragoons with 3 stands. The second would be a unit of Light dragoons with 4 stands and a unit of Hussars with 4 stands. There might be a temptation to convert one of the Light Dragoons to Portuguese cavalry, or even increase the number of units still further and have a lot of little units but, the Portuguese cavalry didn’t contribute very much to the battle and lots of little light cavalry units can still still Harass and thus make them slightly OP for their size; consequently, as the smallest contingent, I would choose to ignore their representation on the table. I’d probably attach two 6pdr guns (horse artillery) to the entire division, possibly one gun to each ‘brigade’.

So that’s it, that’s how I would represent historical formations on the table-top in a Soldiers of Napoleon game. I hope it is useful to someone – or, at least food for thought.

Next up, for SoN, generic brigade lists for British and French. Followed by troop types.

Friday 19 August 2022

Dice Cell Trays

I needed dice cell trays for SoN games. I bought a load from War Bases (not enough) and they are great. However, I needed a lot and, rather than double the price by sticking two together, I decided to make them deeper by cutting out lots of platforms, made from mounting board, with the centres cut out, just wider than the cells but not wider than the cell walls. As it turned out, a 1mm tolerance was more than sufficient. Once cut out, I chamfered the edges so that, when textured, the platform was lost / disguised. It was all a bit tedious for the money saved but, it worked very well.

Cells, on platforms, on bases. And the finished test cell - should of stopped with that one.
Why didn't I just buy double the  cells, to save time and pain, I ask you?
A Yorkshireman's 
stingy, bloody mindedness, that's why!


Soldiers of Napoleon - For 'MY' Peninsular Battles

The associated pics show our current SoN battle. It's being played on a 12'x6' table, has about 70 units in 16 command groups, and two players a side. It's one-side-go-other-side-go and Events only effect one end of the table depending on which player plays it (each player has an end of table). There is no limit to where players can move or fight after initial deployment. We didn't find it necessary to declare arrival point of reserves other than they had to arrive behind the owning player's initial deployment area. One thing we are trying in this game (the Lads came up with it) is a new way of playing 'How Goes the Day?': Instead of getting victory points you get Event cards. These are dealt blind (not chosen from a hand) and played as the very first cards of the turn and before normal play begins (one card = random end of table, two cards = one at each end). It seems to work nicely, probably because it's so simple.

I've captioned the pictures with details showing just how easy it is to play a game of SoN, this size, without a single roster sheet. One thing not photographed are the trays with each side's VPs (poker chips) in.

Looking up the table. Note the commander in the foreground. A white dice displaying 'At Risk' chance
and a day glow orange pawn indicating that this command was the last to receive orders.
 
The Lancers are a four stand unit (black dice) with two disruptions (white dice) and they have
used their lances up (barrel); they are professionals (purple bead) of command group
3 (square bead) and their unit leader is La Beau Sabre (orange bead marked LBS).
 

The more I play this game the more I like it but, because of the way I play my Peninsular games - big battles; two players a side; on a big table - things don't move far enough for my liking and I felt a tweak here and there, for my personal taste, was necessary. This isn't a criticism of SoN: I just can't help tweaking things! So, just how many tweaks did I need for my SoN games run as I want them to? Answer, not many and to SoN's credit it was a matter of tinkering rather than re-writing whole swathes of the rules. The changes I've made all fit nicely onto my QRS and are simple enough not to require much explanation. 

Movement: This is where the biggest house amendments have been made. They have been made to compensate for the table size. Shooting ranges have not altered that much in response and the balance of play has undoubtedly been altered here to a small degree. Before deciding to make the change we did try altering a 'pace' to 1.5" but, we all found the shooting ranges to be preposterously long, especially for skirmish fire (30" with no line of sight restrictions!). Changing movement wasn't as simple as it sounds and what I have come up with is quite different in a lot of ways but, the rules covering basic 'Orders' remain the same and the new movement rules follow most of SoN's basic movement principles. All movement rates (for my 28mm games) are in inches.


Infantry

Cavalry


Open

Diff.

Obst.

Open

Diff.

Obst.

Line

6

3+D3

-D3

10

3+D6

-2D6

Col. Att.

8

3+D3

-D3

15

3+D6

-2D6

March Col.

12

3+D6

-D3

20

6+2D6

-2D6

Square

3

D3

-D3

-

-

-

Ext. Line

8

3+D6

NC

-

-

-

F.A.

12

3+D6

-

Note: Where 2D6, use the highest.

H.A.

18

3+D6

-


Road Bonus: +3
Withdraw / Wheel 45áµ’ / Cautious Advance (can skirmish)-50%
At the Quick: (1 Disruption): +50%
Charge bonus: Infantry D6, Cavalry 2D6 (use highest).
6pdr H.A. limber and move / move and unlimber: -50%

Light Cavalry: Because I believe that the battlefield speed of light and heavy cavalry was basically the same I only have one move rate for both types. It is also my view that light cavalry, in the Peninsular at least, was often called upon to fulfil the role of heavy cavalry in set piece battles and it generally did so quite successfully. To emphasise this dual role, and to compensate for the loss of move rate, I have added the following line (in parenthesis) to the Intimidate rule:

  • Intimidate: Heavy Cavalry & Lancers: 2 discipline tests Vs 2 units (Optional: Light Cavalry: 1 discipline test Vs 2 units that are not Heavy Cavalry or in Square) up to 20” away: Each failed test causes 1 disruption.

Artillery: I have chosen to reclassify artillery by type: Horse Artillery H.A. and Foot Artillery. I will allow 6pdr H.A. to limber move / move unlimber but, I will not allow heavier pieces to do so; 12pdr horse artillery does not exist. I have removed the right of any artillery to be manhandled forwards (prolong) because gun batteries, with all the accompanying caissons and other paraphernalia of the train were so very rarely moved this way; repositioning on a Manoeuvre order is still allowed, with the gun stand pivoting on its front centre. Artillery rarely fired at targets much beyond 800 meters, gunners thinking such fire a waste of powder, so not increasing maximum artillery ranges seemed logical to me. Consequently, artillery range changes are very moderate: 6pdrs shoot cannister to 12", shot to 32". 8/9pdrs 12" and 40". 12pdrs 16" and 48". 5.5" Howitzers 8" and 40". 

Graham's French. His main command stand with a green dice showing his remaining Command Points.
Note the artillery to the left: 2 guns (black dice -replaced by purple here because I don't have
enough black dice to go round),
 Seasoned (blue bead) with with full caissons (pink bead).

Small Arms Shooting Ranges: Muskets 12", Carbines 8", Rifles 18". Skirmish fire, which is very powerful (over-powerful?) in the rules, remains the same at 20".  

Linear Tactics: Unlike some, I find no specific coverage of the Peninsular War in SoN to be a blessing because I can go off on my own tangent and do as I please. In reality, this doesn't mean very much because so little had to be done. Except for Light Cavalry (see above) the only essential rule change is to not allow Anglo-Portuguese or Spanish infantry to form Column of Attack. To compensate, trained or better British and Portuguese units will now be able to re-roll a miss when conducting volley fire whilst in line formation to represent their superior, very steady, fire drill - the Spanish get no compensation, LOL. It's probably worth noting that I had originally thought to increase the number of dice by one: This was tried and would have been fine except that certain Event Cards made this a devastating, over powered, adjustment (see Event: Withering Volley) - rerolling a miss is probably better as the maximums are not effected. 

The Centre. Big table and lots of units.

No Stand Removal: As said in a previous post: 

  • ".... one thing we stopped playing after the first game is stand removal. I don't like it because after spending all that time painting I want to see my figures on the table for as long as possible and, as I don't own any 5 or 6 stand infantry units, not doing stand removal also allows a four stand unit to represent anything between 3-5 stands easily, 6 stands at a pinch..... However, in consequence of units having a constant frontage when in line (okay, that's the fudge - I love fudge), we now need to measure all ranges middle to nearest, and one whole enemy stand must be in unit weapon arc to qualify it as a target to all; split fire is done by halving the number of dice, with any odd dice to majority side or player's choice if about equal." 

This has moved on a step as I now have dice cell bases for displaying stands (black dice) and disruptions (white dice). Things are much clearer and easier now.

Unit Classification: These have, pretty much, been lifted straight out of the lists for 1813-15 except for one major change. Most Trained or better Line Infantry are now skirmish factor 2 (there are one or two exceptions with skirmish factor 1). Only Seasoned Light Infantry or better are skirmish factor 3. I also downgraded Riflemen to skirmish factor 2 for the reasons given below. It's worth noting that I denote the skirmish factor of units by using the appropriate number of skirmish stands, E.g. Skirmish 2 = two round skirmish stands.

Town occupation: This module represents two buildings. The one on the left has an occupancy
value of two stands and the one on the right three stands indicated by the orange dice. The town has
been occupied by a Legere unit of command group 1 (square bead). The green dice show how
many stands are actually in each section whilst the black dice [showing 5] is the unit's
total formed strength dice. Note that their command group commander will be rolling
1 die for 'At Risk' in the end phase (white dice). The unit's quality beads are just out of sight
(next to the unit's square white command group ID bead)
- they are yellow over blue, Seasoned Light Infantry.

British Riflemen: I've changed the rules for riflemen simply because of the way mine are based up (two figures per base rather than six), and a general belief that they very rarely fought as formed bodies in the Peninsular (and even then, if they ever had to, units were generally four or five companies strong rather than whole ten company battalions - look up Light Division OOB). I fear that allowing otherwise will only encourage players to use large formed units of Riflemen like Gatling guns! My rules for them are as follows:

  • Rifle units always count as 2-3 stand maximum units. Rifle units can only use Extended Line (base to base contact in line for these units), Square or Column formation; Rifles may re-roll 1 missed shooting hit. Rifle units are only skirmish factor 2 (due to unit size).

Special Units - Detachments: I have tried the proper rule (Detachments are covered in SoN) and, although it works well enough as written, it's not as elegant as most of the other rules, far too expensive in points, and it doesn't fit well with how I've organised my existing figure collection. Consequently, personal taste and a desire for simplicity will lead me to use my own version of 'Detachments': The Anglo-Portuguese Army can have 'stands' of skirmish screen Riflemen or Cacadores (at half the usual stand points cost) to use as Detachments. A single skirmish stand (Detachment) can be added to the skirmish screen of an Infantry unit, adding 1 to the unit's skirmish factor when its skirmishers are deployed. If the detachment is Riflemen the skirmish screen is allowed to re-roll 1 missed hit; otherwise they operate as per unit skirmishers as standard, using the parent unit's to hit and discipline factors. I think this will represent the generally heavy nature of Anglo-Portuguese skirmish screens far better than the standard rules and bring another counter-balance to their rule enforced linear tactics. Note: Because of the way I organised my Line Infantry Divisions (see below), a unit of Cacadores in a Line Division will only ever be represented as Detachments (up to one per Line unit therein); for each Rifle company attached to a division one Rifle Detachment can be fielded.

My French, being mercilessly peppered by British skirmishers. Black die indicate
formed strength, white die indicate disruption. Note, the two militia units (red beads).

Command Groups (SoN Brigades): I will be using my usual Peninsular organisations to fulfil the requirements of 'SoN Brigades'. That is to say, I'll be using 'bath-tubbed' divisions (1 unit represents around 1000 men - a 5000 man division is five units) as the basic command group and I'll detail my Army Lists as soon as they are done.

Using bath-tubbed divisions means that my 'SoN Brigade Commanders' will be termed 'Division Commanders' and my 'SoN Division Commander' will be termed a 'Corps or Column Commander'. This requires only a semantic change to the rules regarding the arrival of a Corps commander on an Event card - the rules regarding what a SoN Corps Commander actually does remain unchanged: When a Corps commander turns up as an Event the table-top commander will gain 'Corps Command Clarity'. If he disappears in an End Phase the table-top commander loses 'Clarity'. If he is killed the table-top commander loses 'Clarity' permanently. If the Division commander is dead, 'Corps Command Clarity' is passed to his second in command (a chosen SoN Brigade commander) until it disappears as a result of the End Phase (leaves) or Event (death). Army Commander rules are completely unchanged. Note: I do not use actual command stands for Corps or Army command arrivals - I use yellow and green pawns instead. Note: I use large day glow orange pawns to note 'Last Order' given.

French Light Infantry of command group number 1 - how can you tell?
Easy: White square bead indicates command group, yellow over blue bead indicating
seasoned light troops. They also have a Drillmaster - green bead marked DM.
They have four formed stands (black dice) without disruption (no white dice)
and skirmish factor 3 (3 stands) out in front.

Beads: I've now formalised my plastic pony bead colours, to display unit information, in the usual 'Olicanalad's fashion', to do away with roster sheets. My army lists no longer use descriptive unit names like "Veteran Line Infantry", which to be honest only confused the Hell out of everyone because the term 'veteran' means absolutely nothing in the rules, and now units are simply listed by 'game quality': E.g. Trained Line Infantry, Professional Riles, Seasoned Light Dragoons, etc. My bead colours, following the usual progression and meanings, are: 

  • Square number bead: Command I.D.
  • Red: Militia Quality.
  • Green: Trained Quality.
  • Blue: Seasoned Quality.
  • Purple: Professional Quality.
  • Black: Elite Quality.
  • Extra Yellow (above quality): Light Infantry.
  • Extra White (above quality): Trained or better unit with Skirmish Factor 1.
  • Extra Pink (above quality): Full Caissons for artillery, Fine Horses for cavalry.

I've done some round wooden beads (with initial letters painted on). These are placed above a unit's Command Group I.D. bead if the unit commander has a special ability (E.g. Red bead marked 'HC' = Heroic Commander). I've also done some similar beads for 'table-top commander' special ability.  

Apart from needing more dice cells and dice, that's about it, job done and ready to rock.