This scenario is the very straight forward encounter battle I've set up for Graham and Peter to fight this, and probably next, Wednesday night. We will be using a hybrid version of classic Piquet and Field of Battle 2 rules, with the odd house rule as a cherry on the top.
It is set up to use all of my painted Napoleonic troops, the British list now being just three units short of half way. There still aren't enough units, certainly of the right types, to make up proper commands but, I'm fairly close now.
PENINSULAR PROJECT NOTE:
Speaking of commands, I've now pretty much decided that my basic command group will be the division rather than the brigade. This is because of a combination of what the historical narratives of the battles are telling me and how my rules work.
However, to make it all stick together, I'm going to have to use a great deal of fudge when it comes to the internal organisation of my divisions.
When using Piquet style rules, I've found the best size for a command group is four to six units. This doesn't really fit either the British or French organisation of either brigades (French regiments ?) or divisions, especially when I will only be using a four stand, 24 figure unit of infantry as the basic building block - I will have no big or small units.
Having spent some time poring over historical OOBs I have noticed something quite interesting. Most divisions in the Peninsular, French and British, averaged between 4000 and 7000 men. Only occasionally do they have less or exceed these numbers. If you divide by 1000 to get a 'strength value in units', a 4-7000 men average is bang on the money. So, for my Piquet games at least, that is what I'm going to do.
This means most British divisions (5000 strong) will have five units (three British and two Portuguese), the Light Division will have four (breaking down as two light infantry, one Cacadores and one Rifles), and 1st Division will have eight units (choosing the most flavoursome units this breaks down as two guard units, one light infantry, two Highland units and three KGL units).
Typically French divisions will also field between four and eight units but, unlike the British five, most seem to be a little larger at about six units strong. There are too many divisional breakdown variations to list, so I'll not trouble to.
The Napoleonic Purists (.....heard of but never actually seen.....) will be tearing their hair out at this point. They'll be setting up a Facebook page called 'Burn Olicana the Heretic', and they'll be sharpening their pitchforks but, I'm afraid I'm going to do it this way anyway because, well because in game terms, I think it will probably work out quite nicely.
The Table.
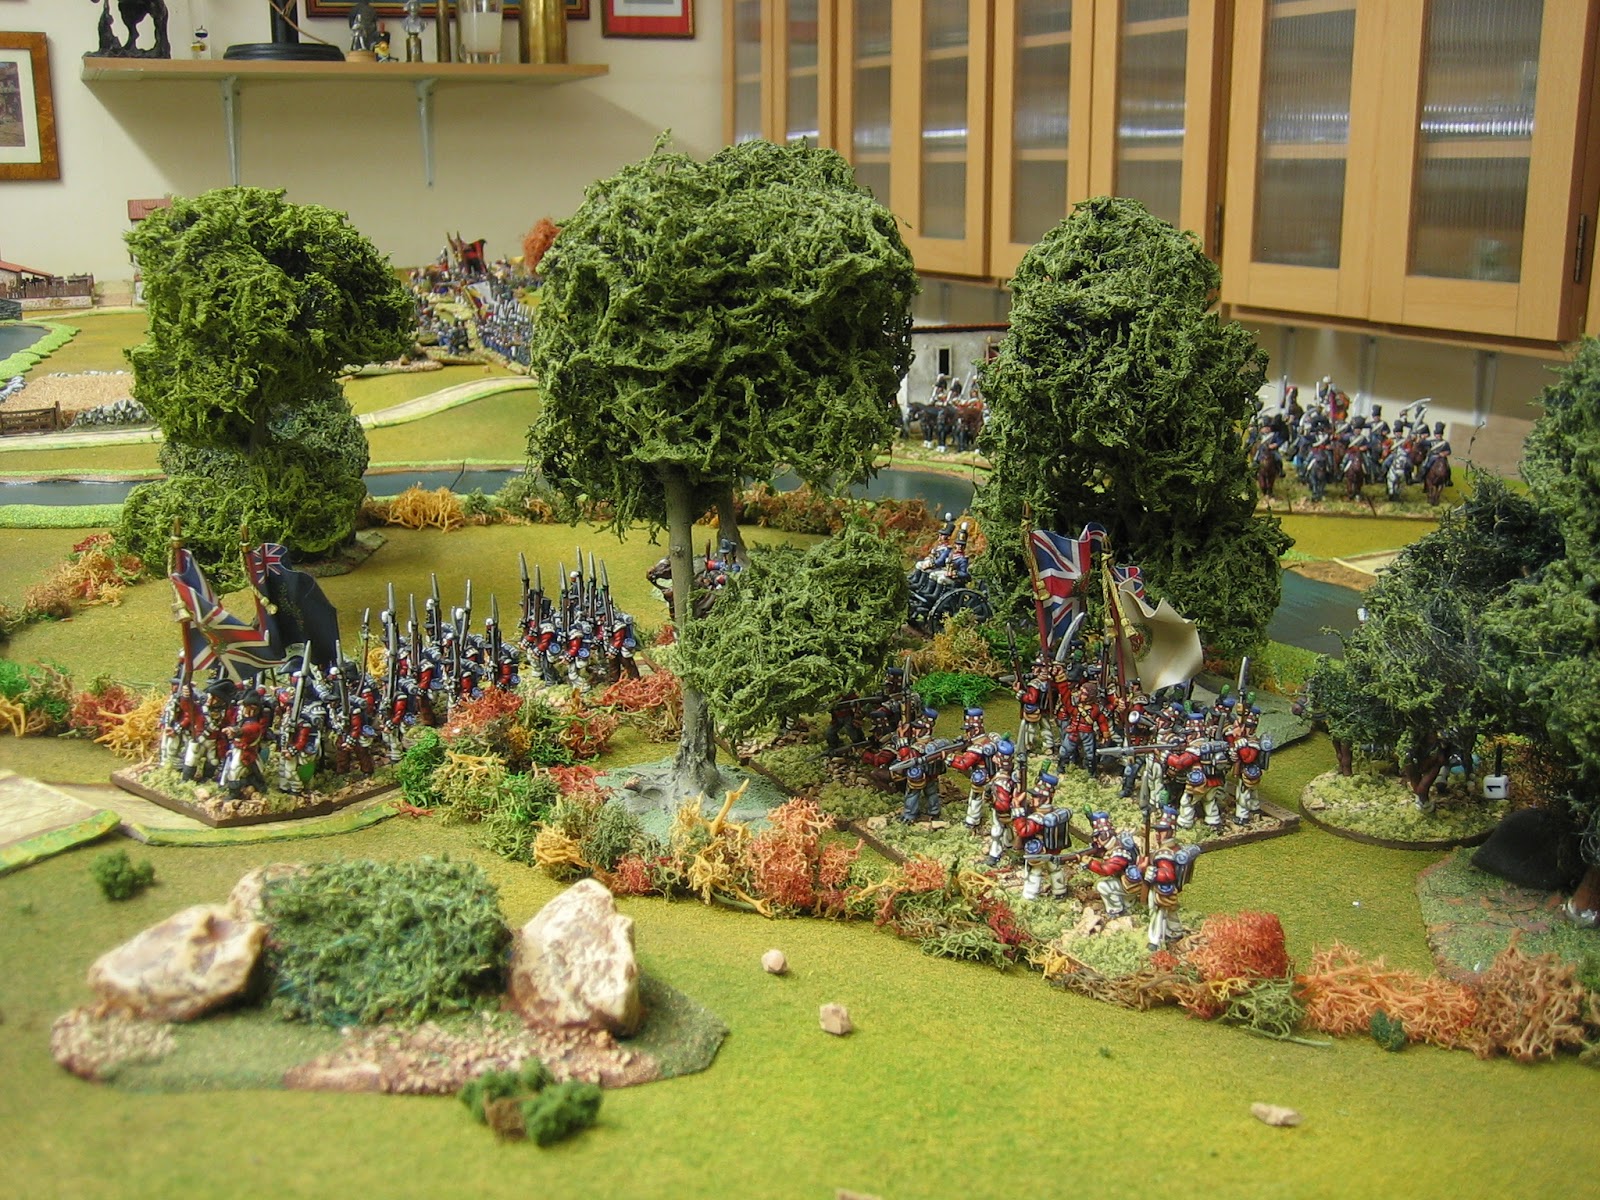
The battlefield is dominated by a shallow river (class II terrain), everywhere fordable by infantry and cavalry, which winds its way along the table. Two large rocky, scrubby hills (class II terrain, soft cover) rise from a surrounding plain dotted here and there by settlements (town sections, heavy cover) linked by a road network, among small fields (class II terrain, soft cover), and areas of woodland (class III terrain, heavy cover).
To encourage aggressive play, especially in the middle of the table, several features are battlefield objectives worth Army Morale Points (see picture above). To claim the points a unit must be in control (on top of) the objective marker at the end of its initiative.
- Black points (9 per side) are in the players' central initial deployment areas. They can only be claimed by the other side. They can only be claimed once, coming out of a neutral bank.
- Red points (21 total) are outside the players' central initial deployment areas. They are claimed from the opposition's bank. They could change hands several times during the battle.
(Note: Our house rules, a hybrid verison of FoB 2 and classic Piquet uses approximately 70% more morale points than FoB 2 so anyone using this scenario should bare this in mind).
The Armies
I have organised both armies into 'Divisions' and rolled for unit quality. The players will be assigned their army by lot. I have not rolled up for commander quality or assigned artillery or rifle companies (where applicable). Likewise, I have not assigned a particular table side to either army. The players can decide this on the night as part of the set up procedure (as per our amended Field of Battle 2 tables).
The French
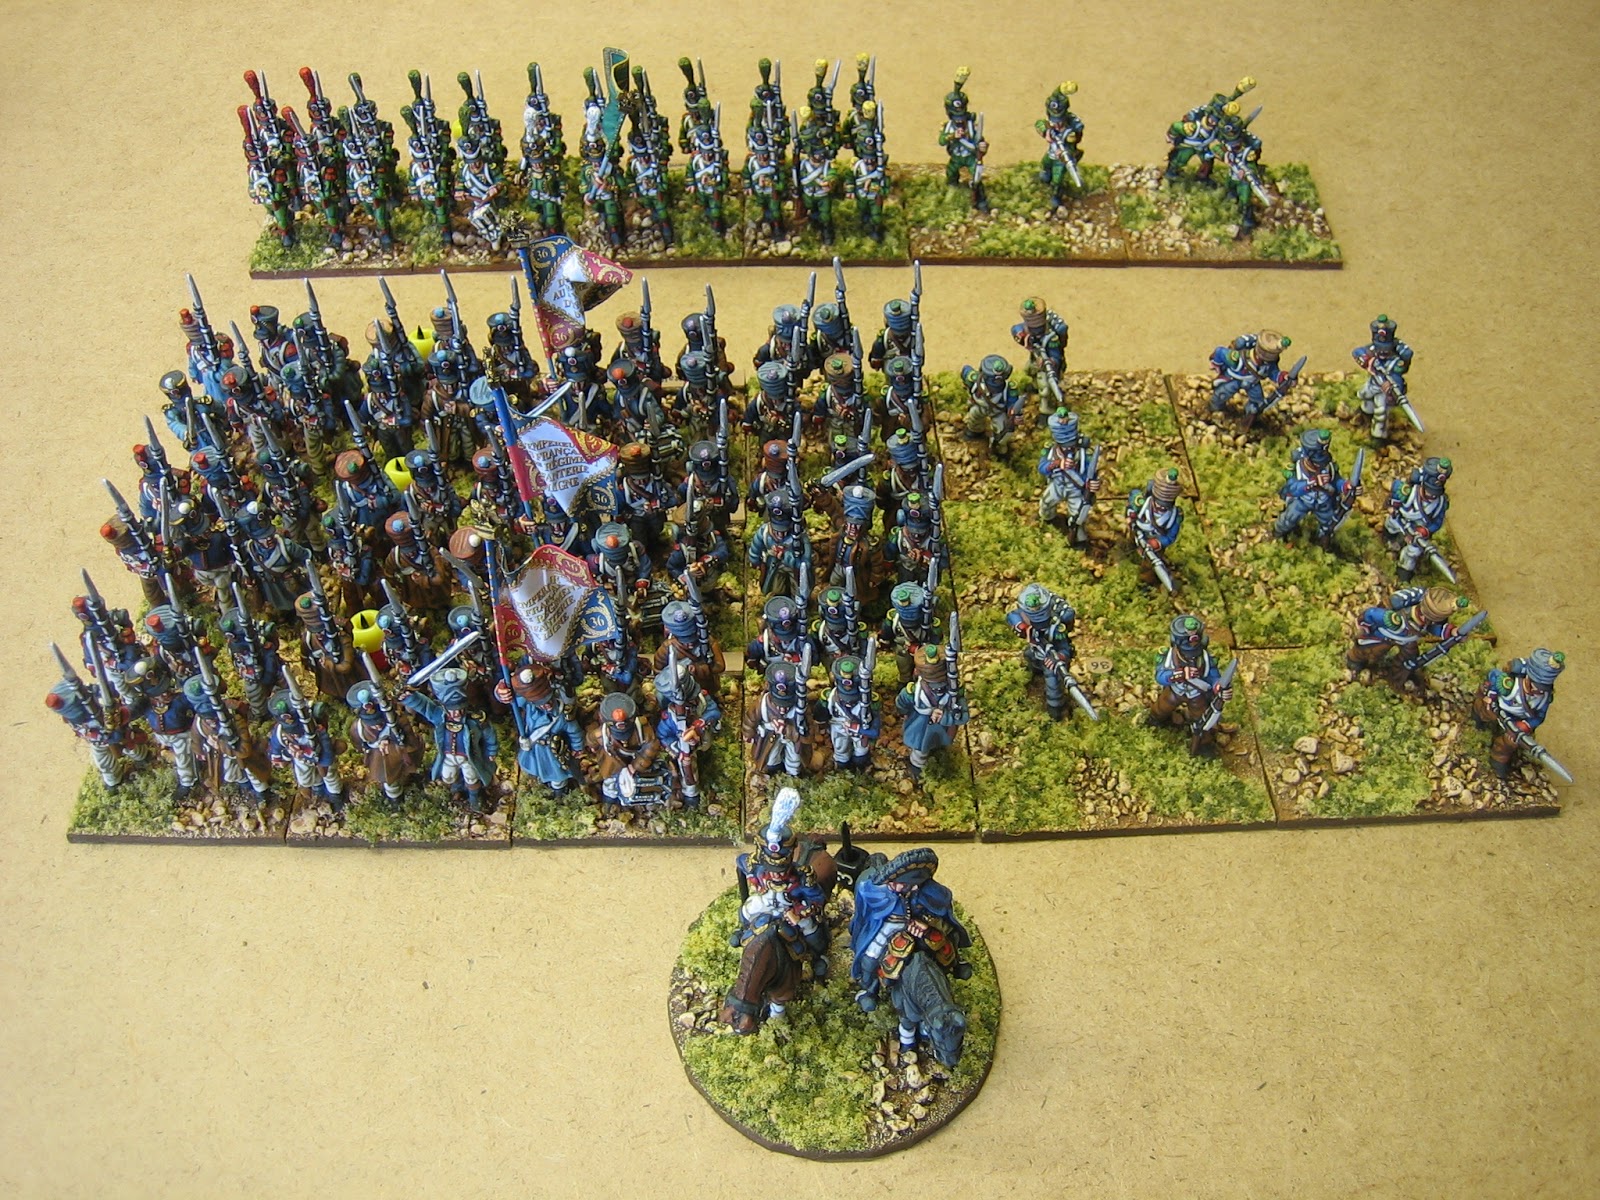
Division 1
3 Battalions 2nd Legere : DD 8 / CD10; DD8 / CD12; DD6 / CD12.
2 Battalions 1st Paris Municipal Guard: DD10 / CD12; DD8 / CD12.
Division 2
3 Battalions 27th Ligne: DD6 / CD10; DD6 / CD10; DD4 / CD8.
1 Battalion Legion Du Midi: DD6 / CD10.
1 Battalion Legion Hannovrienne: DD4 / CD10.
Division 3
3 Battalions 36th Ligne: DD6 / CD10; DD6 / CD8; DD6 / CD8.
1 Battalion Regiment Irlandais: DD8 / CD10.
Division 4
22nd Chasseurs: DD6 / CD10
4th Dragoons: DD6 / CD12
Division 5
1st Hussars: DD8 / CD 12
Vistula Lancers: DD8 / CD12+1
Arillery:
2 batteries of foot artillery: DD6 / CD12; DD6 / CD10.
The Anglo-Portuguese
Division 1
71st Foot (light infantry): DD8 / CD12.
92nd Foot (highlanders): DD8 / CD12+1.
2nd & 5th Battalions KGL: DD8 / CD12; DD6 / CD12.
Division 2
50th Foot: DD6 / CD10.
53rd Foot: DD8 / CD12.
13th Line (Portuguese): DD6 / CD12.
16th Line (Portuguese): DD6 / CD10.
Division 3
24th Foot: DD8 / CD12+1.
1st Battalion KGL: DD6 / CD12.
13th Line (Portuguese): DD6 / CD10.
13th Line (Portuguese): DD6 / CD10.
Division 4
1st Dragoons: DD6 / 12CD.
3rd Dragoons:DD6 / 12CD.
Division 5
14th Light Dragoons: DD6 / CD12.
Arillery and rifle companies:
2 batteries of foot artillery: DD6 / CD12; DD6 / CD10.
4 rifle companies to add to integral skirmishers. (Note: choose most appropriate 4 of 6 provided).