Turn 2
Prussians draw 8 initiative Vs Austrians 1
The Prussians draw
Native Mobility (the amended rules allow Prussian infantry, due to their superior training, to move in type I terrain on this card) and advance the unit of infantry outside of the town to reinforce their left. Then a
Muskets Reload brings action back to the Graner Koppe with two vicious volleys. The final card comes, as they say, in the nick of time: It is
Move in Difficult Terrain and there are just enough initiative points left for the Prussians to reoccupy the lost section of the town.
The Austrians turn
Major Morale and the routers make their compulsory moves (free of initiative cost).
Austrians draw 11 initiative Vs Prussians 0
The dreaded double blank - is this a chance for the Austrians to shift attention away from the Graner Koppe? My plan for the Austrians is taking shape - they will attempt to win Burkersdorf, thus threatening the flank of the Prussians advancing on the Graner Koppe; they will throw their cavalry at the Prussian cavalry, sacrificing it to the last man if necessary, in order to buy time.
The Austrians cycle through their deck until they discover a
Musket Reload when they use four initiative points to fire into Burkersdorf and one to fire their grenadiers to fire from the Graner Koppe. The former fire causes 3 UI loss to one of the Grenadier units in the town and 1 UI on the other. The Austrians challenge the morale of the grenadiers with 3 losses- it becomes shaken. In return, the Prussian grenadiers cause 3 UI losses on the Austrians with opportunity fire.
Prussians draw 10 initiative Vs Austrians 5
The Prussians have a good series of cards including an
Infantry Move in the Open and two
Brilliant Leader cards with which they press their attack on the hill.
Their assault is carried out with movement and musketry to which the Austrians cannot effectively reply.
The Austrian units that form the corner of their defensive position at the summit of the Graner Koppe is shattered and a definite breach is made in the Austrian infantry line. Furthermore, under
Officer Check they manage to rally units on the Graner Koppe and in the town. Things are looking good for the Prussians.
The Austrians manage to draw
Officer Check and rally their retreating grenadiers (seen in retreat in the photo above). The Austrains need to win some initiative!
Austrians draw 18 initiative Vs Prussians 8
The Austrians draw a double 5 domino and the Prussians draw a double 4. Just what the Austrian doctor ordered. Because a double domino was drawn, the winner of the initiative (the player with highest number of domino pips) gets the sum of both dominoes - in this case 10 + 8; because the loser drew a double domino he gets both sides of his domino - in this case 4 + 4. See domino theory in the previous battle report.
The Austrians have a lot of initiative but as yet they have not turned either of their
Command Indecision cards (for having an abysmal C-in-C) this turn which will immediately end their initiative phase - so as they turn their cards they pray.
The cards are with them and they almost immediately turn a
Musket Reload card; they resolve the musketry duels around Burkersdorf - the Prussian units are 'unloaded' so can't opportunity fire in return so the single casualty caused is nothing but a bonus. Fearing more devastating return fire on the Graner Koppe the the Austrian decide to 'keep their powder dry'.
Note: Piquet is a game of tactical decision at just about every point. Just because you turn a card, even a good one, doesn't mean you must use it: Firing at the Prussians on the Graner Koppe would only induce opportunity fire by the much better Prussian units - I decided that the Austrians might be as well to stall the occasion for the Prussian to unleash and fire on 'opportunity' themselves: In Piquet you can fire provided your unit is 'loaded'; you can even shoot in your opponent's phase to counter his movement or fire - this fire is called 'opportunity fire' and is simultaneous to the action of your opponent and is free of initiative point cost, it just leaves you unable to 'reload' until a suitable card allows you to do so.
Secondary Note: In classic Piquet you have a limited number of opportunity chips with which to carry out opportunity fire and you can buy them back with initiative points after use. In small games this works very well but, in large games it doesn't work at all (IMHO), so we ignore them completely, saying it's enough of a penalty to go unloaded.
At Burkersdorf, the focus of the Austrian counter moves, a
Melee Resolution card allows an assault assault to be made against the Prussian Garde and a unit grenadiers holding the eastern side of Burkersdorf under the most favourable circumstances. Outnumbered, and having sustained casualties in the raging firefight preceding the assault, the Prussians (including the Garde) are evicted in the ensuing melees. The Austrians occupy the buildings; the Prussian left is a wreck.
Amidst a hail of
Dress the Lines (do nothing) cards that stuff the Austrian sequence deck (they have 5 Vs the Prussian 3) and a flurry of cards not immediately useful they draw a
Cavalry Move in the Open card and a
Manoeuvre card, the Austrians make some positive moves on the Graner Koppe, greatly increasing the look of their potency there, and an
Officer Check card helps sort some disorder out.
Then, with two points left they draw Command Indecision and their initiative phase is over. The boys done good!
The Prussian response is devastating. They draw just three cards.
The first is
Manoeuvre and they use this to make some minor wheels to bring more muskets to bare.
Then a
Musket Reload is drawn and their fire is so accurate that the depleted Austrian front line on the Graner Koppe melts away under four sharp volleys (three Austrian units are routed) for no casualties to themselves.
Then, with their they last initiative point, they turn
Infantry Move in the Open (which they may immediately act in their next initiative phase).
It is now a race against time for both sides. I feel that this phase, one way or another, will prove decisive. Will the Austrians be able to roll up the Prussians from Burkersdorf, or will the Prussians prevail on the Graner Koppe and roll up the Austrians?
Prussians draw 14 initiative Vs Austrian 4
The Prussians draw a double 4 domino and the Austrians draw a double 4:2.
The Prussians, with Infantry Move in the Open showing and unused, advance on the Graner Koppe and the Austrians fire at them (using opportunity fire) as they come on to some effect but the Prussian infantry is not for wavering at this point. The Prussian cavalry advances on Cavalry Move in the Open (* see below).
The Prussians enforce a Major Morale check on the Austrians (** see below). Charles must roll 10 or more on D20 and fails. The Austrians lose three morale chips and add two dress the lines cards to their deck.
The Prussians draw Officer Check and rally both units routing out of Burkersdorf (pictured here behind Burkersdorf, it reminds me of the Prussians rallying behind Zorndorf after a failed attack in 1758). The Prussians are now running low on morale chips - they have just 10 left.
The Prussians draw
Muskets Reload and all hell breaks loose. They do casualties up and down the Austrian line and risk four morale challenges (costing 1 morale chip each) on the effected Austrian units. It's a gamble but it pays off spectacularly - three Austrian units, including the square, are shaken and the fourth unit is routed. The Austrian lines look well and truly broke.
The initiative ends for the Prussians. The Austrians draw Command Indecision - that's two of them back to back - and they get to do nothing.
*Note: We use a small house rule variation for when troops move from one terrain type to another. Under the rules as they are written, when troops contact a terrain type with a greater difficulty level (e.g. open class i terrain to wood class iii terrain) they must stop at contact with it. This produces the anomaly of units sometimes spending an initiative point to advance a very small distance before having to stop their movement, and although it is a very simple rule in operation it all feels a bit gamey - at least to me. We say that, providing that the card would allow the unit to cross the boundary of the higher terrain, and it moves at half speed it can move that distance without stopping. E.g. A unit of infantry has finished it's last move 1" in front of a type iii terrain wood. Normally it would require an Infantry Move in the Open card to move the inch before it has to stop, then on a Move in Difficult Terrain card it can advance into the wood at half rate. We simply allow the unit to use a Move in Difficult card to move the 1" in the open and enter the wood moving the entire move at half rate from the off. Likewise, a unit moving from open class i terrain up the slope of a class ii hill (all doable on a Move in the Open card) does not stop at contact with hill providing that it does not exceed moving at half rate. We do not allow a unit to move into or through difficult terrain (class iii/iv) using a card that only allows movement in open terrain (class i/ii). If you play Piquet you should try this rule out, I think it makes for smoother game play and does away with the irritating half inch move.
**Note: Major Morale: We use a completely different rules for this card and I include all of our Major Morale card rules below; BTW, each sequence deck has two Major Morale cards. Also, as an aside, adding Dress the Line cards for lost units does not work in big games so we ignore that rule and add them only when officers are lost or as a result of failing a major morale challenge.
MAJOR
MORALE CARD
Routers and Pursuers: The routing
and pursuing units of both sides move at this time regardless of terrain; they
move at their full normal ‘in line’ rate; they move for free. Pursuers in
contact get a free hack, light cavalry D12 Vs D6, others D10 Vs D6. Routers and pursuers always ignore the impediments of passable terrain.
Major Morale Challenges: When this sequence card is
turned it is played against the enemy army and the enemy’s C-in-C must take a
major morale check.
If the army has morale chips he does this by rolling a d20, adjusted for command quality
(-2 to +2 in this case) versus the total number of units destroyed or routing (on table or off).To
pass the check, the die result must be higher. If the check is passed no
further action is required. If the die roll is equal or lower than the number
required the army fails the check and the army must pay a morale chip and add two Dress the Line cards to its sequence
deck; then the army must individually check the morale of each of its command
groups (see below).
If the army has no C-in-C (he is a casualty), or the army has no morale chips, major morale checks are automatically failed and the army adds two Dress the Line cards to its sequence
deck, and the army must individually check the morale of each of its command groups.
Command groups forced to take major
morale checks do so by rolling a D12 command die, adjusted for command quality, versus D8. If
the command is currently leaderless a D6 is rolled. If the command die roll is higher
the command passes the check. If the command fails to pass the check the army loses one morale chip; if the army cannot pay a morale chip all of the group’s units are
downgraded one battle quality level (determined > eager > ready > battle weary) and any units already rated as battle weary are routed.
The challenging side never gains morale chips from major morale checks.
Recovering
lost officers.
On the appearance of this card any officers lost in battle can be recovered on
a successful other difficulty check versus D8. Each test costs one initiative
point. If the officer is recovered at the first attempt the replacement officer
will be the original one; if not, the officer will be a new officer and his quality
will need to be diced for.
Prussians draw 11 initiative Vs Austrians 6
The Prussians draw Cavalry Move in the Open and launch into the disordered Austrian infantry. The square is cut to pieces and the dishevelled grenadiers just over the brow of the hill are sent streaming down it with CR1 in pursuit.
A Melee Resolution card allows the Prussian infantry on the lower slopes of the Graner Koppe to come to grips and they flush the Austrians before them away at the point of the bayonet and continue to crash forward, on Infantry Move in the Open, into the flank of a now isolated Austrian infantry unit.
The Austrians now look completely doomed and I don't think they can even manage a draw from here. Is it worth playing on simply to see more Austrians skewered? You bet your bottom dollar it is!
The Austrians draw Major Morale to which Frederick, being a superior commander with no losses, is immune. The Austrian routers continue their headlong flight - all except for the grenadiers who are cut down to a man by CR1 as they run for the woods.
They finish the intiative phase with a Move in Difficult Terrain card, which they use to further consolidate their hold of Burkersdorf.
The Austrians have not given up yet, and are very close to finishing the turn by having cycled completely through their sequence deck - indeed, they are well ahead of the Prussians in this respect.
Austrians draw 9 initiative Vs Prussians 1
The Austrians turn Dress the Lines, followed by Artillery move with which they turn their remaining battery to face the Graner Koppe. A Cavalry Move in the Open allows them to move all three of their cavalry commands and fight the disordered cuirassier facing them: The cuirassier are shaken but they hold.
The Austrians finish their initiative phase with just one card left un-turned - I know what it is, it's the other cavalry move card they've been looking for!
The Prussians, with Infantry Move in the Open showing, move to consolidate themselves on the Graner Koppe.
Austrians draw 7 initiative Vs Prussians 3
The Austrians turn their last card - Cavalry Move in the Open and make some minor adjustments before ending the turn. The Prussians failed to turn fifteen of their sequence cards, mostly because they used far more initiative points acting on the ones they did turn - most often the case for the attacking player and thus giving the defender a natural advantage.
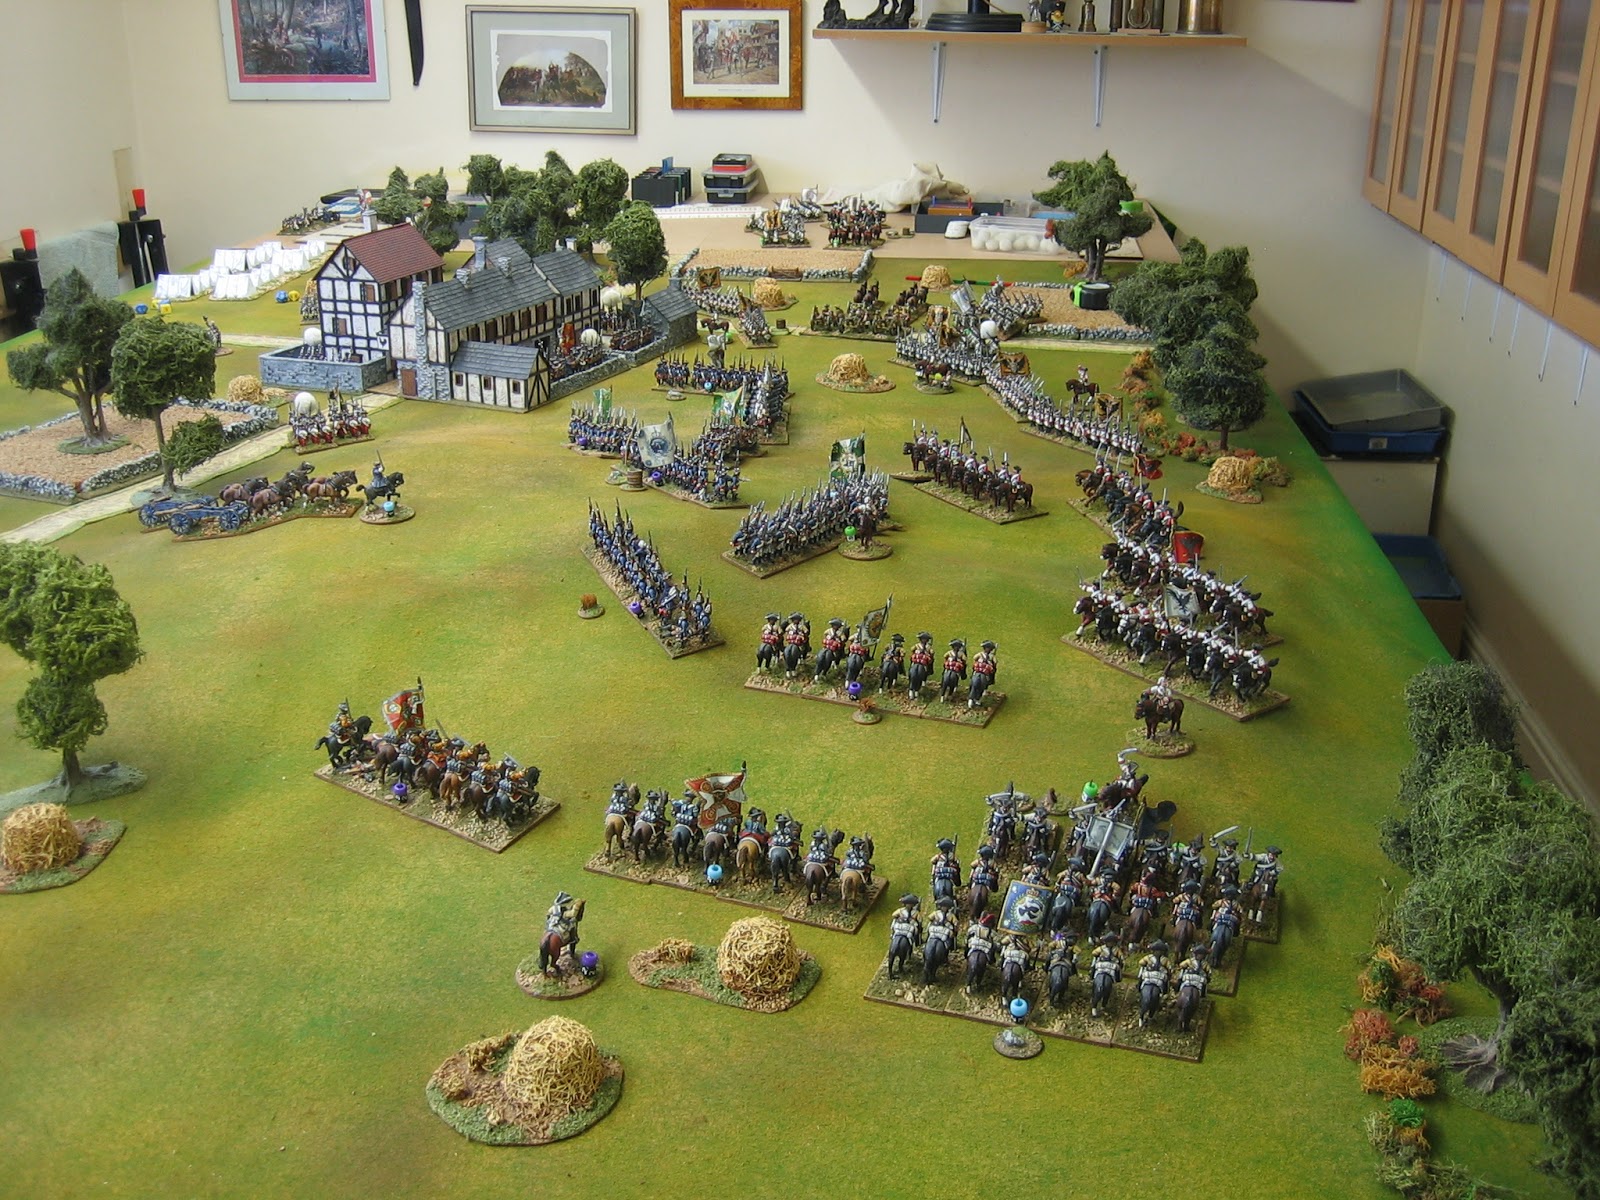
The photo above shows the positions at the end of turn 2.
Note the masses of fleeing Austrian infantry top right below the cornfield. As the Austrian player I decided to keep them around as long as possible by fleeing them 'up table' (whilst still away from the Prussians) to give the Austrians a chance of rallying some of them farther back.
Note too, that because few cavalry move cards were turned by the Prussians, the Austrian cavalry is still largely intact. Frederick must be fuming at Buddenbrock (his subordinate cavalry commander) for being tardy. This is one of the wonderful things about Piquet, especially in solo play. You can never be quite sure that your subordinates will act as required and this is just as it should be when playing as a commander-in-chief - you might be the all knowing, all seeing 'eye in the sky' but, the sequence deck and initiative mechanism often pokes a stick into it. In Piquet you play can only play the role of C-in-C; you must hope that the right cards and sufficient initiative enable your sub-commanders (in command of groups and units) to act as and when required, effectively fulfilling your orders in accordance with your master plan.
The Prussians are so low on morale chips (6 Vs 13) that the Austrians are still in with a chance. On the other hand, the Prussians are in a strong position, with better troops and a better sequence deck, and the Austrians are almost sure to fail their major morale checks (they have lost 13 units including those in rout).
Turn 3 coming soon.