I've been wanting to change my 'arid / desert' terrain playing surface for quite some time and I've toyed with several ideas including simply purchasing a ready made play mat.
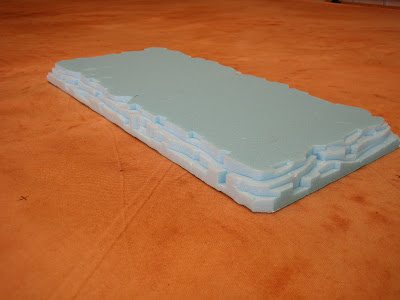
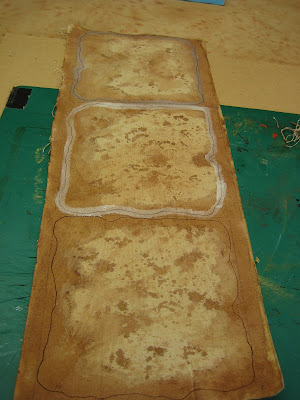
My reasons for wanting a change are that firstly, my current terrain tiles (the painted backs of terrain tiles by TSS, pictured above) are very old and have largely seen better days: They are dinted beyond belief, several have had large chunks polystyrene taken out of their edges and corners, and the cat has used several as scratching posts. Secondly, they simply take up too much storage space: Storage space I sorely need for other bulky stuff like hills, so I can clear a cupboard for new buildings, new trees and such like.
The solution has always been obvious. A cloth, suitably coloured, that can be kept permanently of my table. I did look into this and made some serious enquiries about the cost of professionally made cloths, of one kind or another, 5 meters in length. As you can imagine the quotes were not cheap; they were not impossible prices (£170 - £350) but, I figured I could probably make my own for £60 - £80.
But, how? What materials would I need? A cloth, obviously, but what kind of cloth. How would I colour it? These were questions that I've been pondering for over a year or two.
Then a couple of months ago I stumbled on a blog post about someone buying a new professionally made desert cloth to replace a home made one. I'm afraid I can't give you a link because I've forgotten who's blog it was but there was a comment he made that stuck with me and set this particular ball rolling. In the blog post the author admitted that although he liked his new cloth, he still preferred the one he'd made by staining a plain cloth with tea and coffee.
I'd looked into cloth for some time and decided that canvas was probably my best bet.
Importantly, canvas comes in widths of over 2 meters (the choice of material in wide widths is limited), it is made from a natural fibre (cotton) so it takes stains and dyes readily enough, it is hard wearing and it's relatively cheap.
I went on line to Forrest Fabrics and, after seeking advice on which weight to buy on LAF (thanks Atheling), I purchased 5 meters of 12oz canvas 2.18 meters wide. It cost, all in, £49.50. I also bought (from elsewhere) a large plastic drop cloth to go over my table to protect it whilst work was in progress (£1.50).
I have to tell you now, at the point this picture was taken, I didn't have a clue if this would work, or if it did, how well. I had a plan and some contingency ideas, nothing more.
First up, I wet the cloth with water with a small amount of detergent mixed in to break the water's surface tension so that it would penetrate the fabric more easily.
Here you can see the plastic sheet protecting the table from the liquid deluge that's about to happen; at the far end of the table my main implement of destruction - a big wall paper brush.
The stain. Tea, About two litres of the stuff made with four tea bags, left to stew until the tea was cold.
It went onto the wet cloth. It worked to some extent but it was very pale. I was already having doubts about the tea.
How many applications would it take?
Time to start some dark patches, put on whilst the cloth was sill wet. These were made with instant coffee (half a litre made with four big heaped teaspoons of coffee), applied with a one inch paint brush. I took care to blur the edges well.
Another batch of tea but things aren't darkening as I'd hoped.
Time to bring out the big guns. 1.5 litres of tea with 0.5 litres of strong instant coffee mixed in.
The place is beginning to smell like Starbucks and the cloth is soaking.
This picture accurately shows the true colour of the cloth at this point - insipid is a good word to describe it.
Also, strange dark grey spots are beginning to appear in a couple of places and I'm starting to get worried.
The next morning and the cloth is almost dry. The grey spots have gone but the cloth looks very pale.
Contingency plan number 1: I put on the another tea and coffee mix then I mixed a weak solution artists burnt umber acrylic ink 1:10.
I paint the ink, in patches, onto the cloth, then flick a slightly stronger solution of maybe 1:7 onto the wet cloth in various actions from various directions.
It's not looking good. I've overdone it and I can't go back and change it.
Furthermore, I suddenly realise that the cloth has shrunk by nearly 400 mm lengthways. It hasn't shrunk at all in width. I was expecting to lose a little but, not 400mm!
I'm confused and slightly depressed. I might have completely cocked this up and be buying emulsion paint to rectify the situation with a new approach.
I decide go for a break to let the cloth dry a bit. It's nowhere near as wet as it was the day before so it should dry quicker, and I've set an electric fan to assist in the drying process.
When I come back, the ink has leached into the wet cloth, and the patterns and the colour are not as bad. It's just that the lighter patches between the ink patches are not dark enough. The accompanying photo is taken at this time.
Question: How much more tea and coffee is this thing going to need? I'm not quite as depressed about the way the cloth is turning out as I was but, I'm still not very hopeful. I'll give it one more day.
Several hours later, just before bed time, the cloth isn't dry but, it's just damp. Before I pack it in for another day I add one last application of tea and coffee mix.
The next morning - would you Adam and Eve it! The cloth didn't look like this last night. It didn't look at all like this.
The cloth is dry. It looks a bit like desert. Hell, it looks quite a lot like desert.
The colour has completely changed. Did it hit critical mass? Did the wargaming fairies stop by? I don't have a clue why it suddenly changed but it has; I'm happy again.
I'd actually made up another coffee and tea stain to cool overnight, and I'm not going to need it.
Bloody amazed, absolutely bloody amazed!
More than happy with the colour I trimmed the cloth to size. I took care to PVA the 'cut line' before I cut it. This will stop the cloth fraying.
This wasn't my idea. Along the length edges of the cloth this had been done by the manufacturer - good idea, so I nicked it. Note the edge shown is the width edge that hasn't had a PVA treatment: See how it is fraying badly, this shouldn't happen now
I have several uses for the off cuts. This is the reason I stained all of the extra cloth rather than cutting it first. Their use will become known to you over the next week or two - one of the uses is in this post.
I now ironed the cloth - what a pain in the bum that was. I didn't get rid of all of the creases, several of which had been caused when the cloth was rolled for dispatch by Forrest Fabrics. The worst one is pictured.
Funnily enough, the crease down the centre of the cloth was the one I most worried about (the cloth had been folded in half before it was rolled) and it has been almost entirely ironed out. Perhaps the other creases will disappear over time.
Although the stain has permeated the cloth to some degree, most of the stain has been caught in the surface layers. The contrast is striking considering how utterly wet the cloth was at times.
Cloth with a bit of terrain on it. This gives a fairly good impression of the shade.
I'm as pleased as punch with the way this has come out. I didn't know what to expect, but yesterday, this wasn't it.
Off cuts, heavily darkened in patches with coffee and diluted ink.
You can see I'm PVA-ing where the cut lines will be to stop fraying.
Just after doing this, I decided to go over the PVA 'edge' with burnt umber ink diluted 1:2. Again, I wasn't sure how this would look but, I'm feeling lucky at this point.
They are rough terrain area grid pieces for games using To the Strongest. I've made eleven: Funny number but there isn't going to be a scrap of spare. The cloth shrinking as much as it did has severely lessened the amount of off cut cloth available (I lost 18 pieces like this).
I wasn't completely shocked by the shrinkage because I had been warned that canvas does shrink but, somehow I thought cold liquid wouldn't cause as much shrinkage as it did.
The actual terrain pieces (in this case rocks and bushes) can be moved when troops enter these areas, even to areas that are not rough, and you won't forget which squares are actually rough.
My terrain for TtS is going to be very stylised, I'm going to fully embrace the grid and this will involve the use of more canvas off cuts. That will be my next post, as the hills for TtS games are work in progress.
You might also note the cross hairs, spaced at 200 mm and marking the intersections of the squared grid used by TtS. They are pure burnt umber ink applied with a fine brush.
When I started this experiment I had no idea where it would end up and half expected that I'd end up painting the cloth with emulsion paints. As it is, I'm very happy with the colours that tea, coffee and 15ml of acrylic ink has produced. For the price of a dozen tea bags and the same number of tea spoons of instant coffee, plus half a bottle of ink, I've coloured over ten square meters of fabric. The total cost of a cloth to cover a 15' x 6' table was in the order of £54.50 (plus the hidden costs of electric, etc.), all in.
Edit: Suddenly remembered this piece of advice from Martin S., erstwhile of Vexillia, on LAF: Is this what happened?
"James a word of advice if you are using real tea and coffee. Don't use them fresh!
The polyphenols, in tea especially, are very reactive and that's why the tea darkens with brewing. It will continue for some time after it's cooled down.
For control, far better to make a brew, and leave it overnight and dilute it to the shade you want. You don't want the tea stain darkening whilst on the canvas.
It's amazing what you learn from a career in laundry detergents!"


