Saturday, 10 February 2018
The river making has begun - And a new bridge
Some time ago I finished building a pontoon train and a river piece with pontoon ramps and bridge sections, the latter were left unfinished because I planned to make a wide river into which the piece would fit.
At the time I rather inferred that this would be done soon. Hmmm....
Last week, Tim T. kindly delivered an order of 2mm thick MDF sheets (nine 3' x 4' boards) which had been hanging around in his shop for several weeks. This was the spur for some frantic drawing out of around 7 m of 'wide' river, including turns and tributary entry points. The river will be in sections of between 75 mm and 300 mm long and 240mm wide (the width of water is 180mm with a 30mm bank to either side). At that point work abruptly ceased because I don't have the paint to hand and my hobby budget has been spent for this quarter.
Needing hobby cash NOW, I've put a few things up for auction on ebay (a couple of unwanted board games and some unpainted odds and sods) with a view to filling the hobby coffers to complete the terrain project within budget - and things are looking good.
To keep up my enthusiasm until the money and paint flows in I decided to build a new bridge.
(I figure that I'll need three and I only have one, excluding the pontoon bridge).
I thought that a covered bridge would be interesting, both to build and as a terrain item, and I decided to build one based on this photo of a German one I downloaded from a wargame blog (sorry, I can't remember who's) not so long ago.
As soon as construction got underway, the plan changed. What I came up with, except for having stone abutments [bridge ends], two sets of 'A' frame timber piers (span supports), and a roof, is completely different from thae bridge pictured above. However, I'm indebted to the blogger for the original inspiration.
Here is the finished construction after the bulk has been undercoated brown. The abutments will be grey stone when it is painted, the span will be natural wood. The roof will be grey 'slate' tiles.
Even though, like most of my buildings, the new bridge is under scale it is still quite a big thing. It measures 360 mm long and is 110 mm high. The model is a little over 70 mm wide; the roadway is 50 mm wide.
It is constructed out of several materials including MDF, which provides the bulk of the main build, balsa wood, card, and plastic.
One thing about under scale model bridges that is difficult to get around is the length and gradient of the ramps. To keep the length of the bridge manageable the bridge must be lower than it should be. In this case just 17 mm above the 'river'.
The biggest change to the original design was made so that you can actually see the troops as they cross.
The flag is too tall to go under the roof but it is high enough allow the passage of cavalry figures.
The roof is removable to allow access to the bridge itself.
I'll spray undercoat the roof black before painting.
The whole upper side panel construction is plastic welded together with polystyrene cement for strength*.
The 'X' trellising is from an Airfix pontoon bridge set (I had previously used the pontoons for something else). I was out of plastic rod so I had to improvise the rest of the panels: the long struts across the the top of the trellising are actually made from the sprues of model kits with all of the nobbles cut off, and the vertical railings are off cuts from the Pontoon Bridge set.
* I find building things out of several materials is always tricky, especially when it comes to securely gluing them together, and gluing wood to plastic, where the glue points are small, can be very problematic.
The roof is very light, too light in my opinion. So I've glued some coins to the underside to weight it down and give it some heft. The lip around the bottom edge keeps it in the correct alignment.
So there we are, a Bridge Over Troubled Water. That will go nicely with the tickets I have to see Paul Simon in July. It might even be finished by then!
EDIT:
The Bridge has been finished. Here's a pic.
Friday, 19 January 2018
2nd Game of 2018, Battle Report
Peter's Austrians deployed on their right with their strong command cavalry holding the flank.
The cavalry would suffer early in the battle from artillery fire from the massed Prussian batteries.
Graham's Russians deployed on the left of the Allied line. Their reserve infantry were deployed in columns, ready to react to the Prussian deployment.
The Prussians deployed facing the Austrians.
The distribution of initiative in the session was pretty even. The allies got most at the start, then it balanced up.
The Russians, out on their own, spent much of the early initiative to redeploy onto the Prussian right flank; this threw any hope of a planned early Prussian attack against the Austrians off balance. On the other flank the Austrians demonstrated with their infantry and launched their cavalry into the attack.
The Prussians dispatched infantry and cavalry to slow the Russian advance.
The Prussian cavalry with infantry support duly slow up the Russian attack and temporarily throw its advance elements into confusion.
By the end of turn two several allied units had been repelled.
This shot shows the position of the Russians at the end of the first session.
The Austrians have had one success. Their cavalry has managed to summit the hill first and is now fighting down hill.
The Prussian infantry, in the wood are seriously threatened by a flank attack. This will be touch and go - will I turn a manoeuvre card before Peter turns a move in difficult terrain card.
This shot shows the Austrians facing the windmill and the Russians, still in columns, massing for their attack.
Note the Prussian Guard infantry holding the windmill. In most games this unit gets clobbered but this time it did sterling work. It has stormed the hill, thrown the Grenzers out of the windmill (both units were routed early on) and is now peppering the Austrian line infantry at the stream.
The Russian position at the end of the first session. Again, the Prussians desperately need an elusive manoeuvre card.
A shot of the extreme left flank of the Russian line. Barely visible, coming up the road behind the wood, the Prussians are trying to bring up a battery to face the Russians.
On the whole, the first session went decidedly in favour of the Prussians and the Allies are facing ever more difficult major morale checks*. However, the Prussian line is threatened on both flanks and I feel decidedly uneasy about my position - next week it's going to be nip and tuck.
*In my amended rules for the SYW we play the effect of major morale in a very different way to that in the official master rules. For one thing, each side has two major morale cards and our rule runs as follows:
Note that we do not add Dress the Line cards for the loss of units.
The cavalry would suffer early in the battle from artillery fire from the massed Prussian batteries.
Graham's Russians deployed on the left of the Allied line. Their reserve infantry were deployed in columns, ready to react to the Prussian deployment.
The Prussians deployed facing the Austrians.
The distribution of initiative in the session was pretty even. The allies got most at the start, then it balanced up.
The Russians, out on their own, spent much of the early initiative to redeploy onto the Prussian right flank; this threw any hope of a planned early Prussian attack against the Austrians off balance. On the other flank the Austrians demonstrated with their infantry and launched their cavalry into the attack.
The Prussians dispatched infantry and cavalry to slow the Russian advance.
The Prussian cavalry with infantry support duly slow up the Russian attack and temporarily throw its advance elements into confusion.
By the end of turn two several allied units had been repelled.
This shot shows the position of the Russians at the end of the first session.
The Austrians have had one success. Their cavalry has managed to summit the hill first and is now fighting down hill.
The Prussian infantry, in the wood are seriously threatened by a flank attack. This will be touch and go - will I turn a manoeuvre card before Peter turns a move in difficult terrain card.
This shot shows the Austrians facing the windmill and the Russians, still in columns, massing for their attack.
Note the Prussian Guard infantry holding the windmill. In most games this unit gets clobbered but this time it did sterling work. It has stormed the hill, thrown the Grenzers out of the windmill (both units were routed early on) and is now peppering the Austrian line infantry at the stream.
The Russian position at the end of the first session. Again, the Prussians desperately need an elusive manoeuvre card.
A shot of the extreme left flank of the Russian line. Barely visible, coming up the road behind the wood, the Prussians are trying to bring up a battery to face the Russians.
On the whole, the first session went decidedly in favour of the Prussians and the Allies are facing ever more difficult major morale checks*. However, the Prussian line is threatened on both flanks and I feel decidedly uneasy about my position - next week it's going to be nip and tuck.
*In my amended rules for the SYW we play the effect of major morale in a very different way to that in the official master rules. For one thing, each side has two major morale cards and our rule runs as follows:
MAJOR MORALE CHECK
The routing and pursuing units of both sides move at this
time regardless of terrain; they move at their full normal rate; they move for
free. Routers always ignore the impediments of terrain.
When
this sequence card is turned it is played against the enemy army. The enemy’s C-in-C
must take a major morale check. He does this by rolling a
d20, adjusted for command quality (-2 to +2 in this case) versus the total number
of units he currently has destroyed or routing. To pass the check the die
result must be higher. If the check is passed no further action is required. If
the die roll is equal or lower than the number required the army fails the
check and:
- The army pays 1 morale chip.
- The army adds one Dress the Lines card to its sequence deck.
- The army must individually check the morale of each of its command groups.
If the
army has no C-in-C or morale chips to take the major morale check it
automatically fails, the army adds one Dress the Lines card to its sequence deck,
and must individually check the morale of
each of its command groups.
Command
groups forced to take major morale checks do so by rolling D12, adjusted for
command quality, versus D8. If the command is currently leaderless a D6 is
rolled. If the die roll is higher the command passes the check. If the command
fails the army loses one morale point; if the army cannot pay a morale chip all
of the group’s units are downgraded one battle quality level (determined - eager - ready - battle weary) and any units
already rated as battle weary are routed.
Recovering lost officers. On the appearance of this card
any officers lost in battle can be recovered on a successful other difficulty
check versus D8. Each test costs one initiative point. If the officer is
recovered at the first attempt the replacement officer will be the original
one (he had just fallen off his horse, or something similar); if not, the officer will be a new officer and his quality will need to be
diced for.
Note that we do not add Dress the Line cards for the loss of units.
Wednesday, 17 January 2018
Second game of 2018 - the set up
This game is a re-run of the first game fought this year but with the three players taking control of another army.
The scenario is a simple one. It is a late SYW affair between a small well led Prussian army comprising an excellent mix of troops including a high proportion of elites and a much larger, poorly led allied (2 player) Austro-Russian army of average composition. Victory will be achieved by forcing the enemy into submission.
Using Piquet rules the quality of command is more easily built in than in other rules. The Prussian C-in-C is classed as superior with two Brilliant Leader cards added to his sequence deck, whilst the ally's C-in-C is classed as poor with one Command Indecision card added to his sequence deck. The Prussian player also deploys up second.
For those unfamiliar with Piquet, a sequence deck is a deck of roughly 24 - 30 cards that governs each side's move sequence. The sequence deck of each side is tailored to reflect what it was good and bad at. Each deck comprises cards that govern the movement rate of troops by arm (infantry, cavalry and artillery), how often troops can shoot, resolve melee, rally, change formation, etc.; there are also do nothing cards, and army morale check cards. Each turn the players get a random number of initiative points (up to about 20) which they use to turn cards from their sequence deck and spend to activate troops using them as they are turned. A Brilliant Leader card is a wild card, redefined each time it is turned, giving the army greater flexibility and freedom of action; a Command Indecision card reduces the army's current initiative to zero and effectively ends the player's go when it is turned.
Working on the assumption that dice rolls even out, all other pre-deployment dice rolls, to discover sub-commander ability and troop quality, will be determined by the players in the usual way. The allied C-in-C (the final arbiter in their sides distribution of initiative points) will be decided by coin toss.
The armies are quite small, with each commander controlling 14 units or less. The OOBs are as follows:
Prussian:
Russian:
The Austro-Russians will deploy first. Their initial deployment zone will be approximately 2' on table and 18" from the flank edges. Within that zone, they can deploy as they like. The Prussians deploy after the Austro-Russians anywhere in a similar zone (on the other side of the table).
The scenario is a simple one. It is a late SYW affair between a small well led Prussian army comprising an excellent mix of troops including a high proportion of elites and a much larger, poorly led allied (2 player) Austro-Russian army of average composition. Victory will be achieved by forcing the enemy into submission.
Using Piquet rules the quality of command is more easily built in than in other rules. The Prussian C-in-C is classed as superior with two Brilliant Leader cards added to his sequence deck, whilst the ally's C-in-C is classed as poor with one Command Indecision card added to his sequence deck. The Prussian player also deploys up second.
For those unfamiliar with Piquet, a sequence deck is a deck of roughly 24 - 30 cards that governs each side's move sequence. The sequence deck of each side is tailored to reflect what it was good and bad at. Each deck comprises cards that govern the movement rate of troops by arm (infantry, cavalry and artillery), how often troops can shoot, resolve melee, rally, change formation, etc.; there are also do nothing cards, and army morale check cards. Each turn the players get a random number of initiative points (up to about 20) which they use to turn cards from their sequence deck and spend to activate troops using them as they are turned. A Brilliant Leader card is a wild card, redefined each time it is turned, giving the army greater flexibility and freedom of action; a Command Indecision card reduces the army's current initiative to zero and effectively ends the player's go when it is turned.
Working on the assumption that dice rolls even out, all other pre-deployment dice rolls, to discover sub-commander ability and troop quality, will be determined by the players in the usual way. The allied C-in-C (the final arbiter in their sides distribution of initiative points) will be decided by coin toss.
The armies are quite small, with each commander controlling 14 units or less. The OOBs are as follows:
Prussian:
- Command A: 1 guard cuirassier, 1 cuirassier, 1 hussar.
- Command B: 1 cuirassier, 1 dragoon, 1 hussar.
- Command C: 1 guard infantry, 1 grenadier, 1 infantry, 1 heavy battery.
- Command D: 1 grenadier, 2 infantry, 1 heavy field battery.
Russian:
- Command A: 1 horse grenadiers, 2 hussar.
- Command B: 1 grenadier, 2 infantry, 1 field battery.
- Command C: 1 grenadier, 2 infantry, 1 howitzer battery.
Austrian:
- Command A: 2 cuirassier, 1 horse grenadiers, 1 dragoon, 1 hussar.
- Command B: 3 infantry, 2 grenzer, 1 heavy field battery.
Because the forces are smaller than those I usually deploy I decided to clutter the table with lots of terrain. Here's the table I came up with. This terrain should localise the combats and allow some clever manoeuvring of the forces - it did in the first game. The table is 12' x 6'.
The Austro-Russians will deploy first. Their initial deployment zone will be approximately 2' on table and 18" from the flank edges. Within that zone, they can deploy as they like. The Prussians deploy after the Austro-Russians anywhere in a similar zone (on the other side of the table).
We will start to fight this battle tonight (it will probably go to two sessions). A report will follow.
Sunday, 14 January 2018
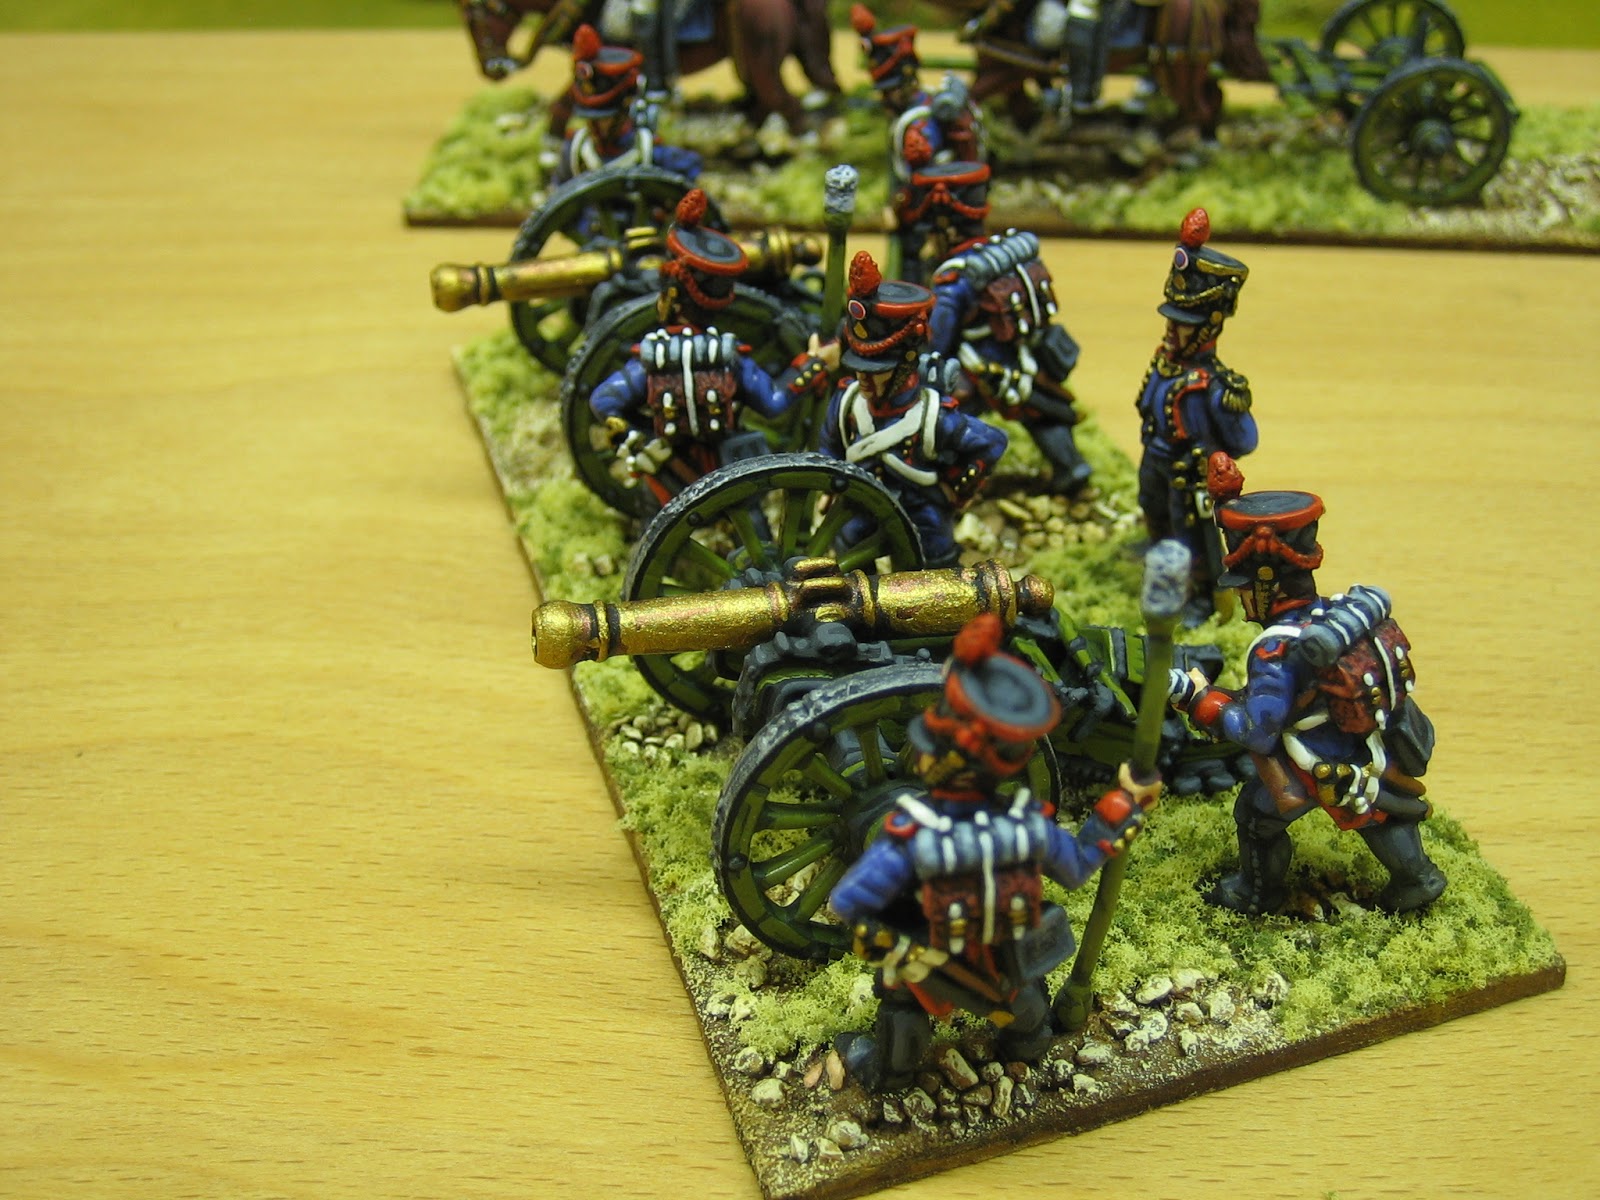
French foot artillery
I have made a decision about my artillery batteries. They will each be two guns strong with a single 'train' piece, either a limber or caisson, to represent the artillery battery when limbered.
The latest addition to the project is a battery of French foot artillery. Bizarrely, I've got very little uniform information about artillery so had to rely on my ever reliable single combined volume of Funcken books (has all the Lace Wars, Napoleonic and Franco Prussian in it) and google for most of the details.
Though it would be nice to have a limber per gun, possibly with a caisson added too, I think one train piece will be adequate for game purposes. In some games I've played, where the full panoply has been fielded, the train ends up being put back on the shelf because its footprint takes up too much room on the table - so I wonder if having more train pieces might be a waste of money and painting time.
At some point I might add the traces but, for now I'm leaving them off.
One thing worth pointing out about the photos is that the French artillery green isn't quite so green in the flesh (lighting?).
I think they came out alright, and hope you do too. The figures are all Front Rank.
The latest addition to the project is a battery of French foot artillery. Bizarrely, I've got very little uniform information about artillery so had to rely on my ever reliable single combined volume of Funcken books (has all the Lace Wars, Napoleonic and Franco Prussian in it) and google for most of the details.
Though it would be nice to have a limber per gun, possibly with a caisson added too, I think one train piece will be adequate for game purposes. In some games I've played, where the full panoply has been fielded, the train ends up being put back on the shelf because its footprint takes up too much room on the table - so I wonder if having more train pieces might be a waste of money and painting time.
At some point I might add the traces but, for now I'm leaving them off.
One thing worth pointing out about the photos is that the French artillery green isn't quite so green in the flesh (lighting?).
I think they came out alright, and hope you do too. The figures are all Front Rank.
Monday, 8 January 2018
First batch for the Peninsular project in 2018
Over Christmas and New Year, I decided to use some of my 'holiday time' to get ahead of the game with the project quota for January. Most of the rest of this month will be taken up painting commissions, probably long into the night, so I'm not expecting too much more to be completed for my Peninsular project until well into February.
The units I chose to add were three battalions of the 27th Ligne.
Figures are by Front Rank. They were painted by yours truly using Humbrol enamels (mainly).
The tricolour flags are by GMB Designs and the fanion is by Flags for the Lads; the latter had to be cut down because the GMB flags are several millimetres smaller than FftL flags.
Another difference between GMB and FftL flags is the paper they are printed on. GMB paper is 'shiny' and consequently the colours seem more vivid than FftL. However, GMB paper is also much heavier and doesn't bend as easily for the 'on the fly' look.
The reason I chose this regiment is visible here. The regimental distinction is not only a colourful one one, it's also blindingly obvious, even from a distance.
These are the last troops in campaign dress that I had in the lead pile.
The next six battalions of Ligne will be in full parade dress.
I have chosen to field the French in both uniforms (full and campaign) because I like uniform variation and French full dress is very striking.
I rather fancy doing a converged grenadier battalion, or two, in great coats for even more variation.
The later voltigeur uniform for this regiment is wonderful! I rather wish all French regiments had adopted it. Yellow shako bands and chevrons, yellow tuft over green ball plume and yellow metal epaulettes with yellow crescents and green fringes (the grenadiers have yellow metal epaulettes with red crescents and fringes).
Now Santa has been, I will be able to do the three battalions for 2nd Legere - with grenadiers in bearskins.
Speaking of Santa and wargaming, he was very good to me this year. He also brought another battalion of Legere (bringing my total lead pile to six); a regiment of Polish lancers; a couple of companies of riflemen; Six battalions worth of Portuguese line skirmishers in shakos which, having wrongly ordered in barretinas over a year ago, Alec at Front Rank kindly replaced; a hardback copy of Brent Nosworthy's Battle Tactics of Napoleon and his Enemies; Osprey's Napoleon's Polish Troops. Ta, Santa!
The units I chose to add were three battalions of the 27th Ligne.
Figures are by Front Rank. They were painted by yours truly using Humbrol enamels (mainly).
The tricolour flags are by GMB Designs and the fanion is by Flags for the Lads; the latter had to be cut down because the GMB flags are several millimetres smaller than FftL flags.
Another difference between GMB and FftL flags is the paper they are printed on. GMB paper is 'shiny' and consequently the colours seem more vivid than FftL. However, GMB paper is also much heavier and doesn't bend as easily for the 'on the fly' look.
The reason I chose this regiment is visible here. The regimental distinction is not only a colourful one one, it's also blindingly obvious, even from a distance.
These are the last troops in campaign dress that I had in the lead pile.
The next six battalions of Ligne will be in full parade dress.
I have chosen to field the French in both uniforms (full and campaign) because I like uniform variation and French full dress is very striking.
I rather fancy doing a converged grenadier battalion, or two, in great coats for even more variation.
The later voltigeur uniform for this regiment is wonderful! I rather wish all French regiments had adopted it. Yellow shako bands and chevrons, yellow tuft over green ball plume and yellow metal epaulettes with yellow crescents and green fringes (the grenadiers have yellow metal epaulettes with red crescents and fringes).
Now Santa has been, I will be able to do the three battalions for 2nd Legere - with grenadiers in bearskins.
Speaking of Santa and wargaming, he was very good to me this year. He also brought another battalion of Legere (bringing my total lead pile to six); a regiment of Polish lancers; a couple of companies of riflemen; Six battalions worth of Portuguese line skirmishers in shakos which, having wrongly ordered in barretinas over a year ago, Alec at Front Rank kindly replaced; a hardback copy of Brent Nosworthy's Battle Tactics of Napoleon and his Enemies; Osprey's Napoleon's Polish Troops. Ta, Santa!
Wednesday, 20 December 2017
Project management, the British starter army, and men in green.
All figure painting projects, in my opinion, are best carried out in a series of small achievable goals. To this end, I always set out to paint enough stuff for a first game, then I paint to achieve what is needed to create the next, usually bigger, scenario.
Getting past the goal of first game is always the hardest thing to do because it invariably involves painting a few hundred figures. I'm the first to admit I've found scoring this particular goal very difficult for this project.
In the case of my Peninsular project, my first goal involves painting a little over 500 figures plus some cannons, limbers, and horses of course. I'm pleased to report that I'm now well over half way and the British 'starter army' is almost complete - I just have the divisional command element and four skirmishers for the 'Gordons' to do (the latter are winging their way through the post, with another 100 figures from Front Rank, as I write).
I've also done about a quarter of the French but they are easier to paint than British troops so it shouldn't take too long to do them.
Here is the British starter army. It comprises two Brigades of infantry, a cavalry Regiment and a battery of foot artillery plus command elements. Please ignore the SYW Austrians in the background, they are set up for tonight's game.
This week, apart from finishing the 14th Light Dragoons, I've managed to do some Brigade attachments. These are:
Some riflemen of the 95th for Howard's Brigade.
The Figures are by Front Rank.
Riflemen are always quite difficult to paint because the darkness of their uniform makes picking out the detail difficult until the final highlights go on.
I've painted the 95th from several manufactures recently and I think these Front Rank figures were the easiest to do.
Men of 2nd Battalion KGL Light Infantry for Lowes Brigade.
The figures are by Warlord Games.
These figures are in far more active poses than those from Front Rank figures. However, I found them much more difficult to paint.
I was also a little surprised to find musket armed troops in a sealed pack (bought from ebay) that was described as riflemen - I seem to have received a pack of mixed rifles and muskets but, as I only need six figures for 'skirmishing', and the battalion had musket armed troops, it's not a major problem.
Next up, more French.
Getting past the goal of first game is always the hardest thing to do because it invariably involves painting a few hundred figures. I'm the first to admit I've found scoring this particular goal very difficult for this project.
In the case of my Peninsular project, my first goal involves painting a little over 500 figures plus some cannons, limbers, and horses of course. I'm pleased to report that I'm now well over half way and the British 'starter army' is almost complete - I just have the divisional command element and four skirmishers for the 'Gordons' to do (the latter are winging their way through the post, with another 100 figures from Front Rank, as I write).
I've also done about a quarter of the French but they are easier to paint than British troops so it shouldn't take too long to do them.
Here is the British starter army. It comprises two Brigades of infantry, a cavalry Regiment and a battery of foot artillery plus command elements. Please ignore the SYW Austrians in the background, they are set up for tonight's game.
This week, apart from finishing the 14th Light Dragoons, I've managed to do some Brigade attachments. These are:
Some riflemen of the 95th for Howard's Brigade.
The Figures are by Front Rank.
Riflemen are always quite difficult to paint because the darkness of their uniform makes picking out the detail difficult until the final highlights go on.
I've painted the 95th from several manufactures recently and I think these Front Rank figures were the easiest to do.
The figures are by Warlord Games.
These figures are in far more active poses than those from Front Rank figures. However, I found them much more difficult to paint.
I was also a little surprised to find musket armed troops in a sealed pack (bought from ebay) that was described as riflemen - I seem to have received a pack of mixed rifles and muskets but, as I only need six figures for 'skirmishing', and the battalion had musket armed troops, it's not a major problem.
Next up, more French.
Saturday, 16 December 2017
14th (Duchess of York's Own) Light Dragoons
This week (well since Tuesday) I've managed to find time to knock out the first cavalry unit for the Peninsular War project.
I chose to do the 14th Light Dragoons for the British for two reasons. Firstly, it fought throughout the War, from the 2nd Battle of Porto in May 1809 to the Battle of Toulouse in April 1814. Secondly, it has orange distinctions (cuffs and collar), and I particularly like orange and blue together.
The figures are a Front Rank 'battalion pack'. They are painted in enamels. The flag is that for the second squadron, chosen over that for the first squadron because it has an orange field; it is by GMB.
Basing is two figures per stand. Bases have a 45 mm frontage and are 60 mm deep - for me this has become the ideal size for two cavalry figures on a single base as it prevents 'figure clash' in all directions.
All in all I think they came out O.K.
I chose to do the 14th Light Dragoons for the British for two reasons. Firstly, it fought throughout the War, from the 2nd Battle of Porto in May 1809 to the Battle of Toulouse in April 1814. Secondly, it has orange distinctions (cuffs and collar), and I particularly like orange and blue together.
The figures are a Front Rank 'battalion pack'. They are painted in enamels. The flag is that for the second squadron, chosen over that for the first squadron because it has an orange field; it is by GMB.
Basing is two figures per stand. Bases have a 45 mm frontage and are 60 mm deep - for me this has become the ideal size for two cavalry figures on a single base as it prevents 'figure clash' in all directions.
All in all I think they came out O.K.
Tuesday, 12 December 2017
First French regiment completed & some new lighting for painting
The 3rd battalion of 36th Ligne is done.
I started this regiment on 28th November. Today it's the 12th December. So that's a regiment of three twenty-four man battalions plus a dozen skirmishers, eighty-four figures in total, done in fourteen days. I doubt I'll be able to maintain this pace but, it's a very good start.
I was planning to do 2nd Leger next but, whilst double checking the painting guide, I suddenly realised that the carabiniers in this regiment wore bearskins. Of course, I bought all of my Leger in shako. Consequently, I've had to revise my painting schedule until after firing off a quick order for my Christmas / Birthday present to Front Rank. I will not get my hands on these figures until after Christmas so, next up will be 14th Light Dragoons for the British, and after that a dozen riflemen to finish off the two British infantry brigades - both were undercoated today.
On a different note, I've been thinking about getting some new bright lighting for my painting station for for quite some time.
I've talked about a short wall mounted florescent tube with a plug in cable. Today I went into my local, very old school, electrical shop to discuss the possibility of Mr. Clegg (the very old school owner) making me such a light. To my delight I found they are commercially available, ready made, and he had some in stock.
I happily paid over the money, went home and fitted it. I now have 100 watts of lighting, just above eye level (so no glare), directly above my desk - it is, no pun intended, brilliant.
I started this regiment on 28th November. Today it's the 12th December. So that's a regiment of three twenty-four man battalions plus a dozen skirmishers, eighty-four figures in total, done in fourteen days. I doubt I'll be able to maintain this pace but, it's a very good start.
I was planning to do 2nd Leger next but, whilst double checking the painting guide, I suddenly realised that the carabiniers in this regiment wore bearskins. Of course, I bought all of my Leger in shako. Consequently, I've had to revise my painting schedule until after firing off a quick order for my Christmas / Birthday present to Front Rank. I will not get my hands on these figures until after Christmas so, next up will be 14th Light Dragoons for the British, and after that a dozen riflemen to finish off the two British infantry brigades - both were undercoated today.
On a different note, I've been thinking about getting some new bright lighting for my painting station for for quite some time.
I've talked about a short wall mounted florescent tube with a plug in cable. Today I went into my local, very old school, electrical shop to discuss the possibility of Mr. Clegg (the very old school owner) making me such a light. To my delight I found they are commercially available, ready made, and he had some in stock.
I happily paid over the money, went home and fitted it. I now have 100 watts of lighting, just above eye level (so no glare), directly above my desk - it is, no pun intended, brilliant.
Friday, 8 December 2017
Second French battalion
Another French battalion has been done. This one is 2nd Battalion 36th Ligne. Note that I still have to do the name labels for my French units (these go on the base, behind the standard bearer, on the raised name plate). I'll add them when I finally decide on which font to use: Any suggestions welcome.
Figures are Front Rank. The flag is by Flags for the Lads. All figures were painted using enamels.
My immediate plan is to paint a total of three Leger and six Ligne battalions to face my six painted British battalions before moving on to some guns for the French (I already have a battery of three guns for the British, see pic below), one or two cavalry regiments for each side, and a couple of rifle companies to finish off the British brigades: That should be enough to play a first game with the British defending.
Looking further ahead, I have realised that I've probably initially overbought for the British side (twenty-three Battalions including Portuguese, with nothing yet for the Light Division) and I haven't bought enough for the French (a mere seventeen battalions).
My eventual plan will be to buy three units for the Light Division (probably a large thirty-two man battalion of the 52nd, a unit of eighteen figures for the 95th and a battalion of 1st Cazadores); plus an extra battalion of Cazadores to fight alongside the brigaded Portuguese (currently six line and one Cazadores). This will give a Anglo Portuguese infantry list of:
2 x 32 man Guard infantry battalions.
1 x 32 man light infantry battalion.
14 x 24 man (including 3 x KGL, 1 Highland, 1 light) infantry battalions.
6 x 24 man Portuguese line infantry battalions.
2 x 24 man Cazadores battalions.
7 x 6 man 'rifle companies' (4 x 95th, 2 x 60th, and 1 x KGL).
118 x skirmishers for line battalions an alternate figures for light battalions skirmishing.
I'll bring the French up to twenty-one twenty-four man battalions and three thirty-two man battalions (plus skirmishers) by adding another four light and three line battalions to the lead pile - giving a total of fifteen battalions of line and nine of light. I can't see myself ever needing more than twenty four units on my 12 x 6 table at any one time - twenty four battalions have a line frontage of over twenty feet - though the split might be a bit Leger heavy if they are all fielded at the same time.
I'm going to keep the cavalry numbers as small as reasonably possible whilst trying to cover all of the bases. The British will have three regiments of dragoons, two of light dragoons, one of hussars and two of Portuguese. The French will have three regiments of dragoons, three of chasseurs, one of hussars and one of lancers, the latter very much just for the fun of it. This will mean buying another eight regiments.
As for guns, I'm still not sure. Currently I have three batteries of three guns for each side - two of foot artillery and one of horse artillery. Once I've decided what will actually constitute a battery on the table - 1 gun, two guns or three guns - I'll have a much better idea. I guess this will largely depend on what rules I end up using. In any event, I'm not going to buy more than three more guns per side and hope to get away with what I have.
The rules thing is, as always, the key. I want to play games with multiple divisions, with brigade sized formations (French regiments) representing divisions, with sufficient rules detail to allow the constituent units in a 'division' to use battalion formations and tactics. Those who know me know that I don't get overly hung up on ground scales, time scales and such, as I'm more interested in a game's overall narrative, and consequently a false figure / unit scale is an easy leap for me. At the moment my rule set short list is Piquet (with well honed house amendments), Lasalle and Black powder. Piquet is the most complicated and slowest of the three sets (though years of use has made the mechanisms second nature) but always give a good tense game with a good narrative and plenty of period feel. The other two look to give fun fast flowing games but might lack some period feel.
Once I've hacked my way through that lot........The Spanish?.........The Sudan? Anyway, I'm getting ahead of myself. Next up the 3rd Battalion 36th, then I'll shift attention to the three battalions of 2nd Leger.
Figures are Front Rank. The flag is by Flags for the Lads. All figures were painted using enamels.
My immediate plan is to paint a total of three Leger and six Ligne battalions to face my six painted British battalions before moving on to some guns for the French (I already have a battery of three guns for the British, see pic below), one or two cavalry regiments for each side, and a couple of rifle companies to finish off the British brigades: That should be enough to play a first game with the British defending.
Looking further ahead, I have realised that I've probably initially overbought for the British side (twenty-three Battalions including Portuguese, with nothing yet for the Light Division) and I haven't bought enough for the French (a mere seventeen battalions).
My eventual plan will be to buy three units for the Light Division (probably a large thirty-two man battalion of the 52nd, a unit of eighteen figures for the 95th and a battalion of 1st Cazadores); plus an extra battalion of Cazadores to fight alongside the brigaded Portuguese (currently six line and one Cazadores). This will give a Anglo Portuguese infantry list of:
2 x 32 man Guard infantry battalions.
1 x 32 man light infantry battalion.
14 x 24 man (including 3 x KGL, 1 Highland, 1 light) infantry battalions.
6 x 24 man Portuguese line infantry battalions.
2 x 24 man Cazadores battalions.
7 x 6 man 'rifle companies' (4 x 95th, 2 x 60th, and 1 x KGL).
118 x skirmishers for line battalions an alternate figures for light battalions skirmishing.
I'll bring the French up to twenty-one twenty-four man battalions and three thirty-two man battalions (plus skirmishers) by adding another four light and three line battalions to the lead pile - giving a total of fifteen battalions of line and nine of light. I can't see myself ever needing more than twenty four units on my 12 x 6 table at any one time - twenty four battalions have a line frontage of over twenty feet - though the split might be a bit Leger heavy if they are all fielded at the same time.
I'm going to keep the cavalry numbers as small as reasonably possible whilst trying to cover all of the bases. The British will have three regiments of dragoons, two of light dragoons, one of hussars and two of Portuguese. The French will have three regiments of dragoons, three of chasseurs, one of hussars and one of lancers, the latter very much just for the fun of it. This will mean buying another eight regiments.
As for guns, I'm still not sure. Currently I have three batteries of three guns for each side - two of foot artillery and one of horse artillery. Once I've decided what will actually constitute a battery on the table - 1 gun, two guns or three guns - I'll have a much better idea. I guess this will largely depend on what rules I end up using. In any event, I'm not going to buy more than three more guns per side and hope to get away with what I have.
The rules thing is, as always, the key. I want to play games with multiple divisions, with brigade sized formations (French regiments) representing divisions, with sufficient rules detail to allow the constituent units in a 'division' to use battalion formations and tactics. Those who know me know that I don't get overly hung up on ground scales, time scales and such, as I'm more interested in a game's overall narrative, and consequently a false figure / unit scale is an easy leap for me. At the moment my rule set short list is Piquet (with well honed house amendments), Lasalle and Black powder. Piquet is the most complicated and slowest of the three sets (though years of use has made the mechanisms second nature) but always give a good tense game with a good narrative and plenty of period feel. The other two look to give fun fast flowing games but might lack some period feel.
Once I've hacked my way through that lot........The Spanish?.........The Sudan? Anyway, I'm getting ahead of myself. Next up the 3rd Battalion 36th, then I'll shift attention to the three battalions of 2nd Leger.
Friday, 1 December 2017
The first French battalion
Another Napoleonic unit for the Peninsular War project is now done and in the cabinet.
This time, for a change of pace, I've painted a French unit. With regard to the question posed in my previous post, as to why I don't find painting these units that pleasurable, has been answered: It's the piping. It looks great when it's done but, cor blimey gov'nor, it's a chore.
Anyway, here are three more shots of 1st Battalion, 36th Ligne. Next up, the other two battalions of this regiment. I'll start them this weekend.
This time, for a change of pace, I've painted a French unit. With regard to the question posed in my previous post, as to why I don't find painting these units that pleasurable, has been answered: It's the piping. It looks great when it's done but, cor blimey gov'nor, it's a chore.
Anyway, here are three more shots of 1st Battalion, 36th Ligne. Next up, the other two battalions of this regiment. I'll start them this weekend.
Subscribe to:
Posts (Atom)