Tilting at windmills
You only have to google Spanish windmills to find numerous images of the Windmills of La Mancha - the same windmills that Don Quixote mistook for giants. It was from these that I took the inspiration for my model.
The main difference between my model and the windmills of La Mancha is the roof covering. From photographs, the ones at La Mancha look like they are covered with lead sheeting and they look quite 'modern'. I did find one tor two pictures of windmills with wooden roofs, with vertically set, long trapezium shaped planking (to be honest, this looked too hard to make) but, I also found one image of a La Mancha style windmill roofed with simple, horizontally set, wooden planks (possibly a roof before the addition of lead sheet?). This latter planking could be reproduced with a paint job: The basic design was set, though plenty of artistic licence would be used.
So, on to the build.
The basic shape is very simple. I used a poster tube for the cylindrical body of the windmill; I also cut a 10 mm ring from the poster tube to make a skirt for the roof, split it, and stuck this around the top of the tube, adding a small section to fill the 'circumference' gap.
I made a simple cone out of an old Birthday card, with a lower circumference about 5 mm wider than the tube and stuck it on the top. After it was dry, I trimmed off the excess.
Then I added the 'spindle for the windmill sails. This was made with a round pencil, drilled for the sail arms.
I then made a hole through the front of the thin card roof and pushed the pencil through it until it touched the 'back'. This assembly needed to be firmly secured and strengthened from the inside. I did this with a PVA glue and kitchen roll 'paper mache': Layer of glue, paper, glue, paper, glue, etc.
Then I went to work on the outside of the roof and spindle canopy.
You can see from this image that I have added a thin card covering to the skirt (brown). I did this to smooth the connection between the skirt and the cone. The thin card was cut slightly wider than the skirt. I trimmed it from the cone angle, painted the join with PVA then, using the round shaft of a small screwdriver to run around the join, smoothed the two (skirt and cone) together into an invisible join.
Then I added some thin balsa wood (it cuts better than card) planks to section the cone.
I also constructed the spindle 'cover' out of thick card with thin card planking.
Next I added the tiller (cane barbecue skewer), the doors and the windows. These are War Bases, windows, square doors and shutters. The windows and shutters were cut smaller, lower window sills being added with balsa wood. Note I back painted behind the windows to save time later.
I also added a paper mache cover over the top of thetiller where it comes through the top of the roof cone. (I've seen an image of this kind of thing, another Spanish windmill).
Images showed the walls of these towers are quite thick, thicker than my tube, and I wanted to show this somehow. Unusually, for me, I cut a gap for the door into the tube and added thin card 'flanges' and a doorstep to artificially thicken the wall at the opening.
Next up I added the brickwork (I did this first) then the 'plaster' rendering. I did not use plaster!
I used a thin coat of artist's acrylic paint (from a tube). I find yellow ochre is a good choice of basic colour. I scored the brickwork, let it dry, ink wahed it then added the other rendering.
Next I painted the brickwork. I later lightened it further.
Whilst all this was going on I started making the sails. I cut a template out of card, placed it under a a piece of thin clear plastic (the back of a blister pack), and using PVA glue to glue down the balsa planks, glued the bits together over the template - so that all the sails are almost identical and 'square'.
Whilst the sails were drying I undercoated the roof and tower with household emulsion paints....
.......and the sails.
I ink washed the tower with ink diluted with water, 1:3 (I use artists acrylic ink, this colour is burnt sienna)
Then I started dry brushing with household emulsion....
...until it was light enough.
I painted the woodwork with enamel paint - because I had more choice of colours. It allowed me to paint on the planks rather than model them individually.
The offset arms for the sail assembly can also be seen in this shot. Sail arms are barbecue skewers.
I've also added a trestle for the tiller arm (that I've seen in some pictures).
Ground work was added with more artists acrylic.
A boundary fence, made using barbecue skewers drilled into the base, and cut up lolly-pop planking was added. I used lolly-pop sticks rather than balsa wood purely for durability. The fencing received two layers of quality PVA undercoat to bind it all together and add extra strength.
Fencing painted, sand grit and stones added for an arid look, and finally finished with a bit of flock.
Lastly, I remembered to add the lolly-pop stick gate I'd left drying on top of a shelf.
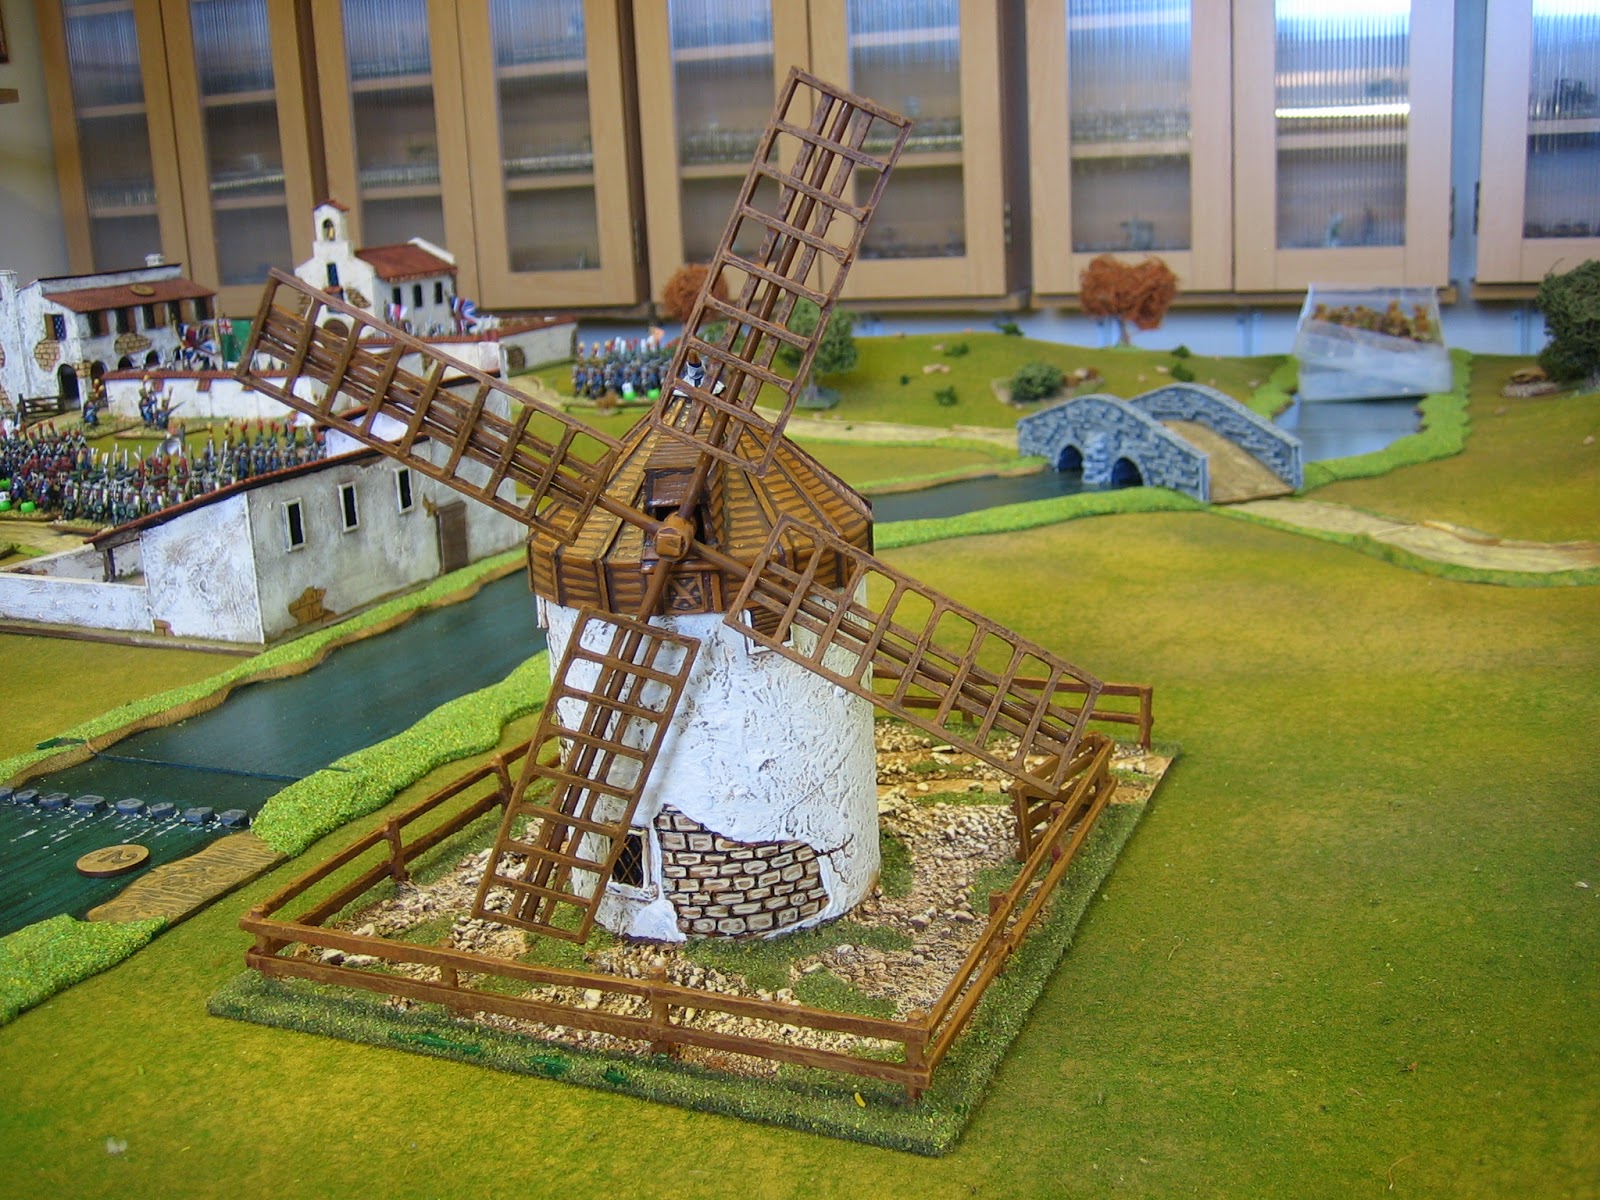
The back.
The front.
Job done, and I hope you found the construction notes helpful.


12 comments:
Looks fantastic, James!
Nice build, really effective
Lovely model and great to see how you went about making this.
So cool! Thanks for the step by step!
Wonderful work! It inspires me to make one myself, although I am not sure it would be appropriate for my primary period, ECW.
Lovely work :)
Lovely looking windmill, great bit of scratch building, nicely location specific too!
Best Iain
Absolutely wonderful sir!
A small master piece!
Very nice work. Painting the roof the way you did was probably the easiest way to do it. Being round, using actual shingles or pieces would have been annoying to get right. The base might be added to by some bushes or maybe even a grain cart sitting near the door.
That is excellent! Well done!
Very nice piece and very effective.
Post a Comment