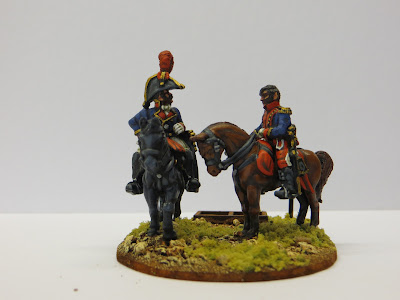
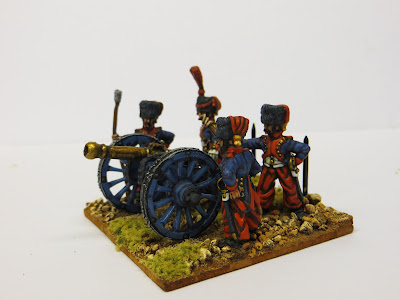
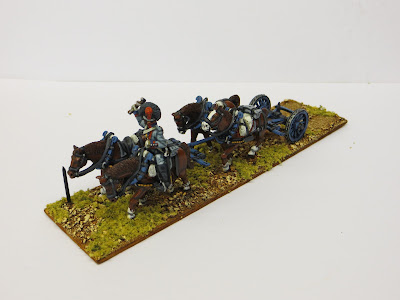
It's been a while since my last post, for reasons I don't really want to go into, and for that I apologise.
It has been a longer while since I painted any Spanish, so to remind you of the first baby step I'm going to do a short recap. Initially I painted a commander, four units in the so called "1812 British Uniform" three guns and a couple of limbers. They are pictured below and here is the full post link.
More to the point, the lead pile definitely looks a lot smaller now: I'm almost exactly half way through it. I always find the start of a project a struggle because I feel like I'm working for little result: at the start of a project there isn't enough (an army / a force) to play a game with for a considerable stretch of time and in consequence initial enthusiasm quickly flags. Now, at last, I can see the end in sight and I feel like I'm on the easy down slope (a bit like myself, with age) - I'm even thinking about any extra units I might need to buy to "finish up".
Several of the new units are made up of Front Rank figures that have received small conversions - though none as extensive as the baggy-trousered horse artillerymen pictured above (now my favourite stand in this Peninsular collection) - and most require some explanation. Consequently, I'm going to add the new units to the blog as a series of posts rather than one long one.
First up, the four command stands.
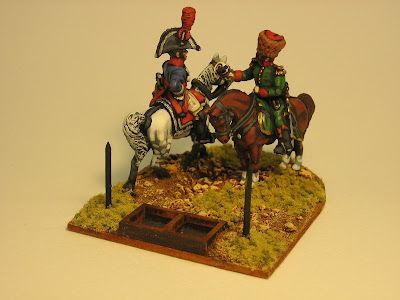
Firstly, the figures: The two mounted figures and the chap with the gold trimmed bicorn are straight out of the box. The 'hussar' and the other ADC are conversions.
The hussar is a French horse artilleryman with linstock with a British hussar head swap (from an unused British hussar standard bearer that I had replaced with a trooper). I removed the linstock, remodelled the hand to grasp a goblet and raised his arm 'in salute'.
A note on arm raising: You can't just bend an arm from down to up without removing most of the metal between the armpit and the shoulder (I did this by sawing up from the armpit with a junior hacksaw until only a millimetre or two of metal remained at the shoulder) before changing the position of the arm. Once in the new position the resulting 'armpit' space was filled with a bead of two part epoxy glue (Araldite) to give strength, then after the glue had set, finishing with modelling putty (Milliput) . If you don't remove the metal first, the arm will not move at the shoulder like a real arm does.
The other ADC is a Portuguese foot artilleryman's body (head already removed to make one of my Portuguese limber drivers) with a new head in bicorn. Actually this was a Roman bare headed head with a bicorn added separately. His sword and sabretache are from a plastic two figure 'sample' sprue finished with Milliput belts. His fringed epaulettes were also made from Milliput.
The table itself was made from two plastic barrels (from a Lego toy?) that I've had kicking about in my bits box for years, with a table top made out of a plastic sheet (Perry Miniatures plastic base) scored to look like a door: the hinges are paper with short pieces of wire glued on the ends as the hinge mechanism. The handle is a piece of wire bent into a loop.
The map is just a piece of paper glued onto the table top (the paper was painted then marked with pens and pencils, largely using dots). I thought it would be interesting to use Milliput oranges as paperweights to hold the map down at two of its corners. The earthenware plate, with more oranges, is also Milliput, as are the jug and wine bottle (the latter two were my best effort - I'm not a sculptor). The satchel is a plastic one (possibly WW2 Japanese) with a paper strap added.
You might have noticed by now that I don't throw anything away (LOL).
The goblets: All the goblets were made in the same (surprising?) way. The stems are wire, of course. The bases are Milliput discs. The goblet cups are white metal cannon balls filled flat on one side and drilled to take the wire stem! The goblets on the table had their bases glued onto the table first, then the bases were drilled (through the table too) so that when the stems were glued into the bases the stems were also glued into the table-top for added strength.
Figures around the table are positioned so that it is actually difficult to touch the table when the stand is being moved about.
Same stand, different angle.
Command stand, figures as standard. ADC painted in green uniform.
Same stand, different angle.
Cavalry commander.
The bugler figure is a Russian cavalryman. I've added a large feather plume (pinned and glued).


9 comments:
Some great looking troops!
Excellent as always James!
Fabulous Spanish command stand and complete with Seville oranges. Good job it wasn't a British stand or they'd have turned them into marmalade!
Great to see some Spanish with the promise of more to come; but the correct term for going beyond a 'plan' is to "top off" - "finish off" sounds far too final... ;o)
Hooray! Finally a new post!
Artillery stands 60x60? I'm still puzzling over how to place my battery.
Hi Digger,
Generally (where possible), 60x60 for artillery and 45x45 for infantry: square bases give an easy way to measure 45 degree fire arcs (corner to diagonally opposite corner arcs). Cavalry are on 45x60, as are some infantry (with sticking out muskets) to avoid figure clash when in column. Officers are on 60x75 (half round at one end). C-in-Cs are on 120x70 (pill shaped).
I find 60x60 is the smallest you can get a gun and four crew on if you want to be able to easily and safely remove the gun from the stand (to limber it) without too much figure clash.
I really enjoyed reading about your Mid-War Spanish additions, they look great! By the way, if you're planning to buy some new clothes to wear while playing with your miniatures, don't forget to check out Express. They have some amazing deals going on right now, like the express coupon $25 off $75 or more. It's the perfect opportunity to save some money and look stylish at the same time! Thanks for sharing your miniatures with us.
Those are wonderful additions. The table is a really clever piece.
Wonderful additions to the collection James. The Spaniards are a very colourful bunch. Great to see you posting.
Richard
Grateful and relieved to find a new post from the artistic and standard-setting hands (and mind) of JR. Understand as well as empathize with the post "problems". At the risk of comparing apples to oranges or an accomplished expert to a complete amateur, I find myself in a similar situation or place. Anyway. These Spanish make a wonderful addition to your amazing collection of figures which cover a variety of periods.
Cheers and hope you keep calm and paint/wargame on.
Chris
Post a Comment