Friday, 27 July 2012

You can't keep a good man down - the campaign continues.

The last cards of turn 6 are played.

Rome: In expectation of losing political control of four areas, Rome asserts political control over 3 areas.

Carthage: Mago sails from Carthage to reinforce Hannibal with 6 CU. After his safe arrival Hannibal moves to Bruttium.

The Situation at the end of turn 6.

Turn 7: Reinforcements were placed and consuls elected. Nero was given a second consecutive term and given command of the troops in Rome. Paulus was replaced by Longus, who was dispatched to Sicily.

Carthage: Mago returned, without troops, to Africa. Hannibal marched again on Rome. Nero managed to withdraw his army out of Rome before he arrived. The siege, even with a siege train present, is a disaster waiting to happen. A surprise assault was repulsed with loss (1 CU).........

Rome: .........and more losses (1 CU) were inflicted on the besiegers when, according to Scrotivius,

"...bad water, from poisoned wells, caused amongst the Carthaginians, a great loosening of the bowels...."

Carthage: Hannibal breaks off from his siege and attacks Nero, who successfully withdraws to Falerii. Hannibal pursues and catches him.


The situation map.


The characterisation draw - Carthage 104 MC, By Saturn and Favourable Omens (Stratagem card 10). Rome 70 MC and Wild card. The terrain in this part of Italy is hilly.

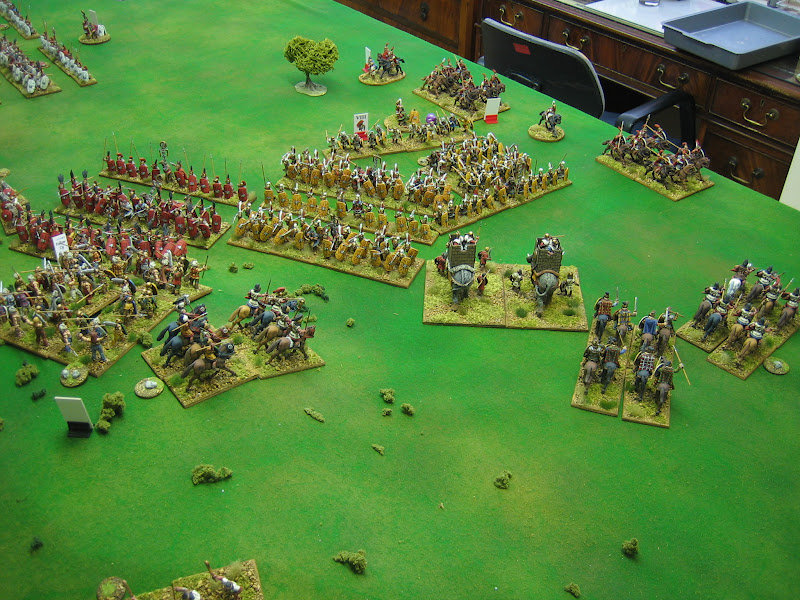
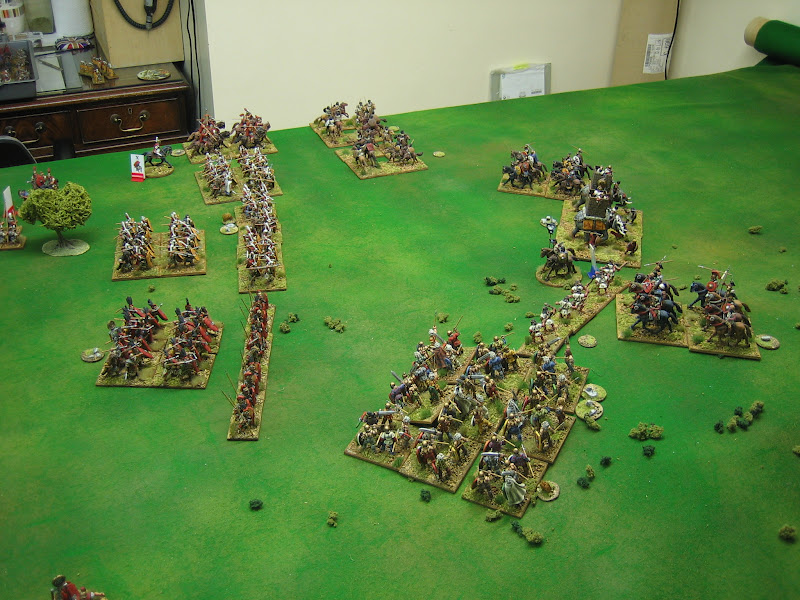
The deployments for The Battle of Faleri:


Thursday, 26 July 2012

Ager Proelii: The Battle for Rome - part 2

The carthaginian centre crumbled under the weight of the Roman attack.....
....whilst the veteran Spanish are pinned down by the Roman right.
On the Roman left, where Hannibal is strongest, the Romans come under extreme pressure. But, before the outcome is settled here.....
.....the Carthaginian centre is broken.

Scrotivius writes:

"..and Hannibal, seeing the Romans manoeuvring before him, declared that "This Roman swings both ways."

On the Roman left the pressure was mounting......
....and mounting.....
....whilst, on the right victory seemed imminent.

Which would give out first?

The Roman left stabilised after some very fierce fighting.....
 On the right the Carthaginians were being surrounded.

A Roman Victory!

Hannibal withdrew to Croton with 4 CU loss. Paulus lost 1 CU.

Sunday, 22 July 2012

One becomes a battalion

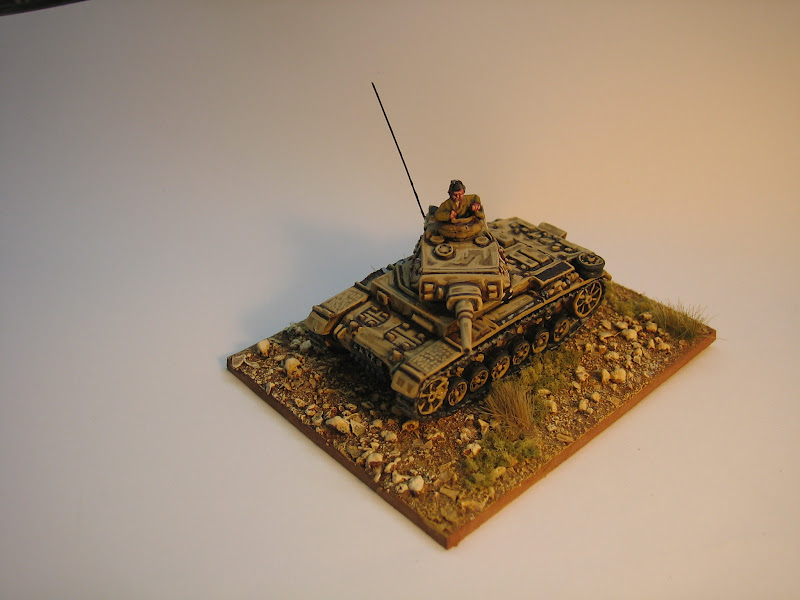
This is my first Panzer Battalion for Operation Crusader / Siege of Tobruk showing the units for historical organisation and deployment (scaled at 1:5):
Battalion HQ; 1 Panzer III H command tank
2 Panzer III Companies; 3 Panzer III H, 1 Panzer II F
1 Panzer IV Company; 2 Panzer IV FI, 1 Panzer IV

The same vehicles showing how I'll probably deploy them on the table. The organisation is a battalion / company level hybrid. This allows the formation to utilize its Panzer IIs as a seperate 'flank guard', their historical, company level, job. It also allows the units to be deployed in units of three vehicles (a supply truck, not painted, will accompany the Panzer IV company).

This might not be historically accurate, but I like playing games with a platoon level feel whilst wanting the diversity of weaponry, not to mention scenario possibilities, of company level games. Most of my games will involve a battle group or two of three battalions or so each, per side. Actions during Operation Crusader tended to be on the large side.

Panzer III H
  Panzer IV FI

Panzer  II F
Battalion command stand

Vehicles are Battlefront Miniatures (FoW) painted in enamels. Bases are, 60mm x 75mm x 2mm, MDF.

Saturday, 14 July 2012

Colour test - German armour for the desert 1941

It's a long time since I've painted any WW2 stuff for my 15mm Desert 1941 collection.

Today, taking a break from Monsieur Anderson's Romans, I looked at some almost completed SYW Russians and thought........nerrrrr.

I had undercoated some German WW2 stuff a while ago and they have sat there since. This was partly down to 'being busy' and partly down to nerves.

I have painted 22nd Armoured Brigade Group for 7th Armoured so I know what colours I'll use as a pallet for the Brits (based on Humbrol 63 and burnt umber ink wash).

I have painted a battalion of Italian vehicles (for the, Ilkley Lad's, Bir el Gubi game) so I know I'll be using ink wash and a Humbrol 93 pallet for the Italians.

How many shades of desert sand paint can there be? I wonder.....


.......and could I find one for the Germans.

But, I think that the ink wash over a Humbrol 225 base highlighted in base Humbrol 93 with Humbrol 94 used as a base for the top two highlights gives a different shade again. I like it because there is an olive green tinge.


It is debatable how 'desert yellow' varied from nation to nation - even formation to formation - but I like there to be a difference: Different sides, in a game, need different coloured counters.

I'm happy with this combination of shades. I'll use it for the rest of 15th Panzer Division (which mainly sits, at 1:5 scale, in its blisters).  
A shot of the Pz III from 15th Panzer Division next to a tank of 22nd Armoured Brigade. The colour difference is noticeable but not 'dramatic'.  The thing that brings them together, IMHO, is the same colour ink wash, which is also used on the bases.

I hope you approve.

Models are from the FoW range.

Thursday, 12 July 2012

Ager Proelii: The Battle for Rome

Carthage (Hannibal): Characterisation draw. 
Rome (A. Paulus): Characterisation draw. 
 Carthaginian deployment
Roman deployment. 
Both sides launch an attack on the hill and a cavalry action is imminent......... 
The Romans guess that the main Carthaginian effort will be made against their left.
The action develops rapidly.
The fight is fierce and confused, but.......
Veteran Spanish cavalry decide the issue of the cavalry battle in favour of the Carthaginians. Rome fears defeat, until....
 ...her infantry counter attack.......
.....all along the line..... 
...and are victorious versus their Gallic enemies.

We have to humour a rare bout of hubris.
Hannibal rides into the fray and temporarily restores the situation but his situation is still dire: His centre is crumbling.
Rome rushes cavalry from one wing to the other.

A 36" move - so fast they are blurry. 
The reinforcements arrive before the Carthaginian cavalry can exploit their earlier success.
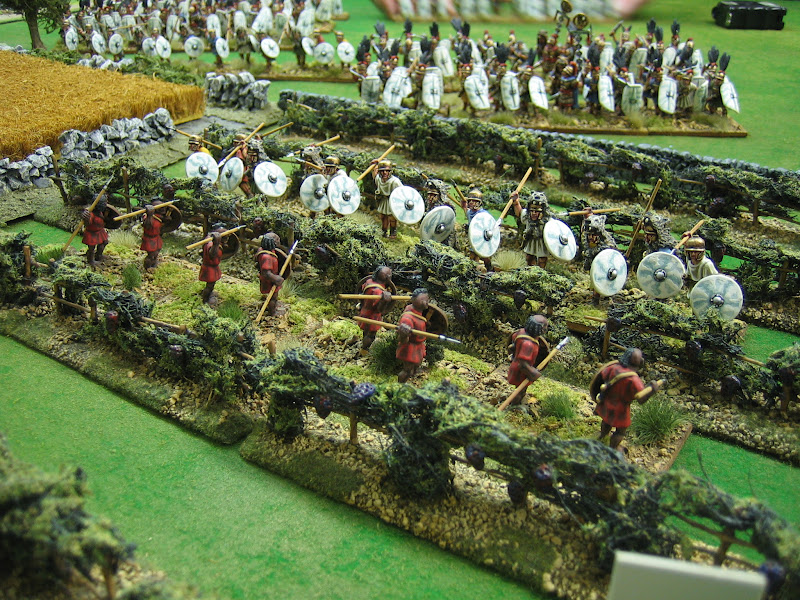
The battle extends to the fields and vineyards........


At the end of turn 1, and for the first time, Rome has the ascendancy.


To be continued.....

Sunday, 8 July 2012

Going for the throat

The campaign continues.............. 

ROME: Scipio force marches to Bilbilis to join Marcellus (total 11 CU).

CARTHAGE: Political control re-taken in Idubeda.

ROME: Rome re-establishes political control over three spaces.

CARTHAGE: With Hannibal having control of southern Italy, and probably sparked by Scipio's defeat, Capua changes sides. Rome is threatened.

ROME: Scipio moves to Ilerda.

CARTHAGE: Hannibal builds a siege train.

ROME: Rome converts the fourth space in Idubeda - Scipio is established in Spain!

CARTHAGE: Hannibal, in fury at losing part of his birthright, marches on Rome.......................

Scrotivius writes: "Paulus, despite orders from the Senate to preserve the army [avoid battle], marched to engage the barbarian in the fertile fields south of Rome. Rome held it's breath in anticipation of  the outcome."

THE BATTLE OF AGER PROELLI

We have decided to set this battle in the fertile fields south of Rome. I have closed one end of the field with a river and boggy ground.

A. Paulus has 14 CU [10 + 2 allies + 2 garrison legions].

Hannibal has 11 CU [8 + 3 Italian allies].

I don't have any purpose built Roman buildings, so I've had to use some later types - but, they do have pantiled roofs at least. Here are three shots of the field. 


Saturday, 7 July 2012

Hispilis. Part 3

According to Scrotivius:

"Scipio, being close to the front lines assessed the situation and it did not look good. His troops were exhausted and the enemy were about to launch the killer blow. But, it was late in the day and the bulk of the enemy were the wrong side of the river. For some reason the enemy tarried in the execution of there duty and Scipio's army was spared".

The positions at the end of turn 4.

In fact, turn 4 had ended on an early double initiative roll. The Romans still had morale chips and had moved away from the river. If another double ended turn 5 (the last turn) before the last Roman chips could be taken, then the Roman army, being the defender, would be able to claim a victory and the Carthaginians and would be forced to retreat and they would surely lose Baetica. If the turn lasted, the Carthaginian would, for sure, get a clean victory.

In campaign turns, Baetica is important. It provides 25% of Carthaginian reinforcements at the start of each campaign turn. Consequently, it was the Carthaginian nerve that broke. The Romans were offered the following result:

Both sides to roll on the '10' column of the attrition table for battle casualties. The Romans to withdraw from the field, rolling on the retreat table with a -2 die modifier (equivalent to a loss by 'probe').

Peter, worried about the possible complete loss of the army, agreed to the terms. As it was, both sides rolled a 1 for attrition and lost 1 CU each. The Romans then rolled a 6 for their retreat and lost another 3. Rome lost political control of three spaces.

The campaign map after Hispilis.

Peter and I used the remainder of the evening to play out the campaign turn. I intend to post the report tomorrow.