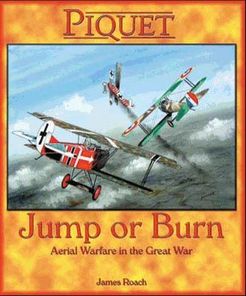
Several years ago, actually back in 2003, I wrote a card based set of rules called Jump or Burn for playing dogfight games set during the Great War.
They were published by Piquet Inc. and boast cover art by Jack Hunter - the same Jack Hunter who wrote The Blue Max, later made into the film starring George Peppard as the brash young German pilot and Ursula Andress as the love interest.
It still has some great dogfight scenes, bedroom scenes less so.

Back then, the only solution I could come up with for a small universal joint on which to mount the aircraft involved cutting up electrical junction boxes (called chocolate boxes in the trade, I believe). These worked well enough but were a pain to make and required tightening with a screwdriver from time to time.
The flight stand also needed a way to display altitude, so I used a D20 held on the stand with a curtain ring.
The base of the stand was a jam jar lid weighted with white metal that I melted down in an old pan and poured in.
The picture on the left shows one of these fascinating contraptions.

So I searched for related items and low and behold, like so many things, what I had been looking at wasn't a specialised item. It wasn't a 'rotation magnet set'. It was, in fact, a countersunk rare earth magnet most commonly used for a door catch and a ball bearing.
So I ordered a bunch of 10 mm x 3 mm countersunk door catches and a bag of 8 mm ball bearing 'catapult ammunition'. By fixing ball bearings to the aircraft and the magnets to flight stands (the reverse of the advertised method) I could save a packet. Rather than spend £30 or so on blister packed 'rotation magnet sets' I got everything I needed for £5.50.

The first two were easy. I had some 3/16 " Aluminium tubing kicking about the place for the poles. The lead filled jam jar lid bases worked a treat, being cheap, weighty and tidy, so no change there.
Machine gun arc indicator discs I could make using MS paint.
I had to think about the altitude indicators.

I sent Martin and team at War Bases an email. A week later my custom made dials arrived.
I'm not going to tell you how much Martin charged me, but frankly I was amazed at how cheaply he was able to do them.
Thank you, War Bases - to the rescue, yet again.

I filled the lids with lead then sprayed them black.
I glued the dials together, including the thin card machine gun / tailing arc indicator discs, then painted them with enamel paint for durability.
Then I drilled the dial for the aluminium pole and stuck everything together.
The first magnet on the stand was then stuck on top of the stand with Araldite with a flat headed nail (down the tube). A second magnet, for extra pulling power, was then dropped on top - no glue required.

There was one slight hitch that I had foreseen but hoped in vain against. There is very little friction between the balls and magnets and consequently, although the magents are strong enough to hold an aircraft without risk of it falling off, the ball moves so freely in the countersunk 'cup' that the planes flop about all over the place.

I got out my trusty modelling drill. I used a 'diamond' covered grinding tool on the inside top edge of the countersunk magnets, and a grinding wheel on the ball bearings.
The rougher surfaces work superbly well. The planes 'rotate' with the push of a finger, halt exactly at the desired attitude, and hold there.
The only thing you have to be wary of, is accidentally rotating the aircraft in the horizontal plane so the the aircraft looks to be flying in the wrong direction, vis a vis the machine gun arc indicator on the base.
Here's a pic of one of my white metal planes (1:144 scale Red Eagle range formerly sold by Skytrex) with a nicely banked attitude, flying at altitude 10.
I hope someone finds this useful. I really like this new solution to an old problem. At some point I'll revamp the rules.
1 comment:
Sounds great! Moreover it happens that I was a great fan of the Blue Max rule set :)
Post a Comment