 |
| Looking from behind the Swiss 'up table' towards Marignano (top right). Swiss pike do look very scary, but they have a lot to do and some distance to travel to win. Their objectives are the tented camps three quarters the way up the table. |
I have moved the river bounding the French left flank closer to the table edge to increase the size of the battle area to its practical maximum. This move, of almost 8 inches, has added much more space than you might think. It has, effectively, given room for the flanking cavalry to deploy properly. It also led to the addition of the same length of ditch and earthwork to the French front line entrenchments, so this line is also less cramped. I could have removed the stream but it gives a hard flank and the impression that the field was actually quite cramped. There should be another deep ditch running on the other flank but I don't have enough ditch to do this even if I wanted to.
I have moved Zuido somewhat further to the French rear than it should be to increase the depth of what I predict will be the main area of battle. This latter move might disturb some geographical purists, but the area between the ditch and the village of Zuido needs to be big enough to allow room for the French cavalry to manoeuvre. I'm also sure the unit footprints are completely out of sync with the ground scale anyway and this move goes some way towards making it closer to being right in the main battle area. The area to the rear of Zuido is now compressed, but as this is a distinct 'rear area' it can be artificially be expanded by the special scenario rules for French activation.
I have moved the French troops about quite a bit in the last few days. I have tried to make the deployment look more like it does in the Marignano booklet published by The Lance and Longbow Society. I have also deployed the heavy cavalry in deep formation which will allow it to manoeuvre more easily - as the Swiss have little missilery this, I think, will work well for them.

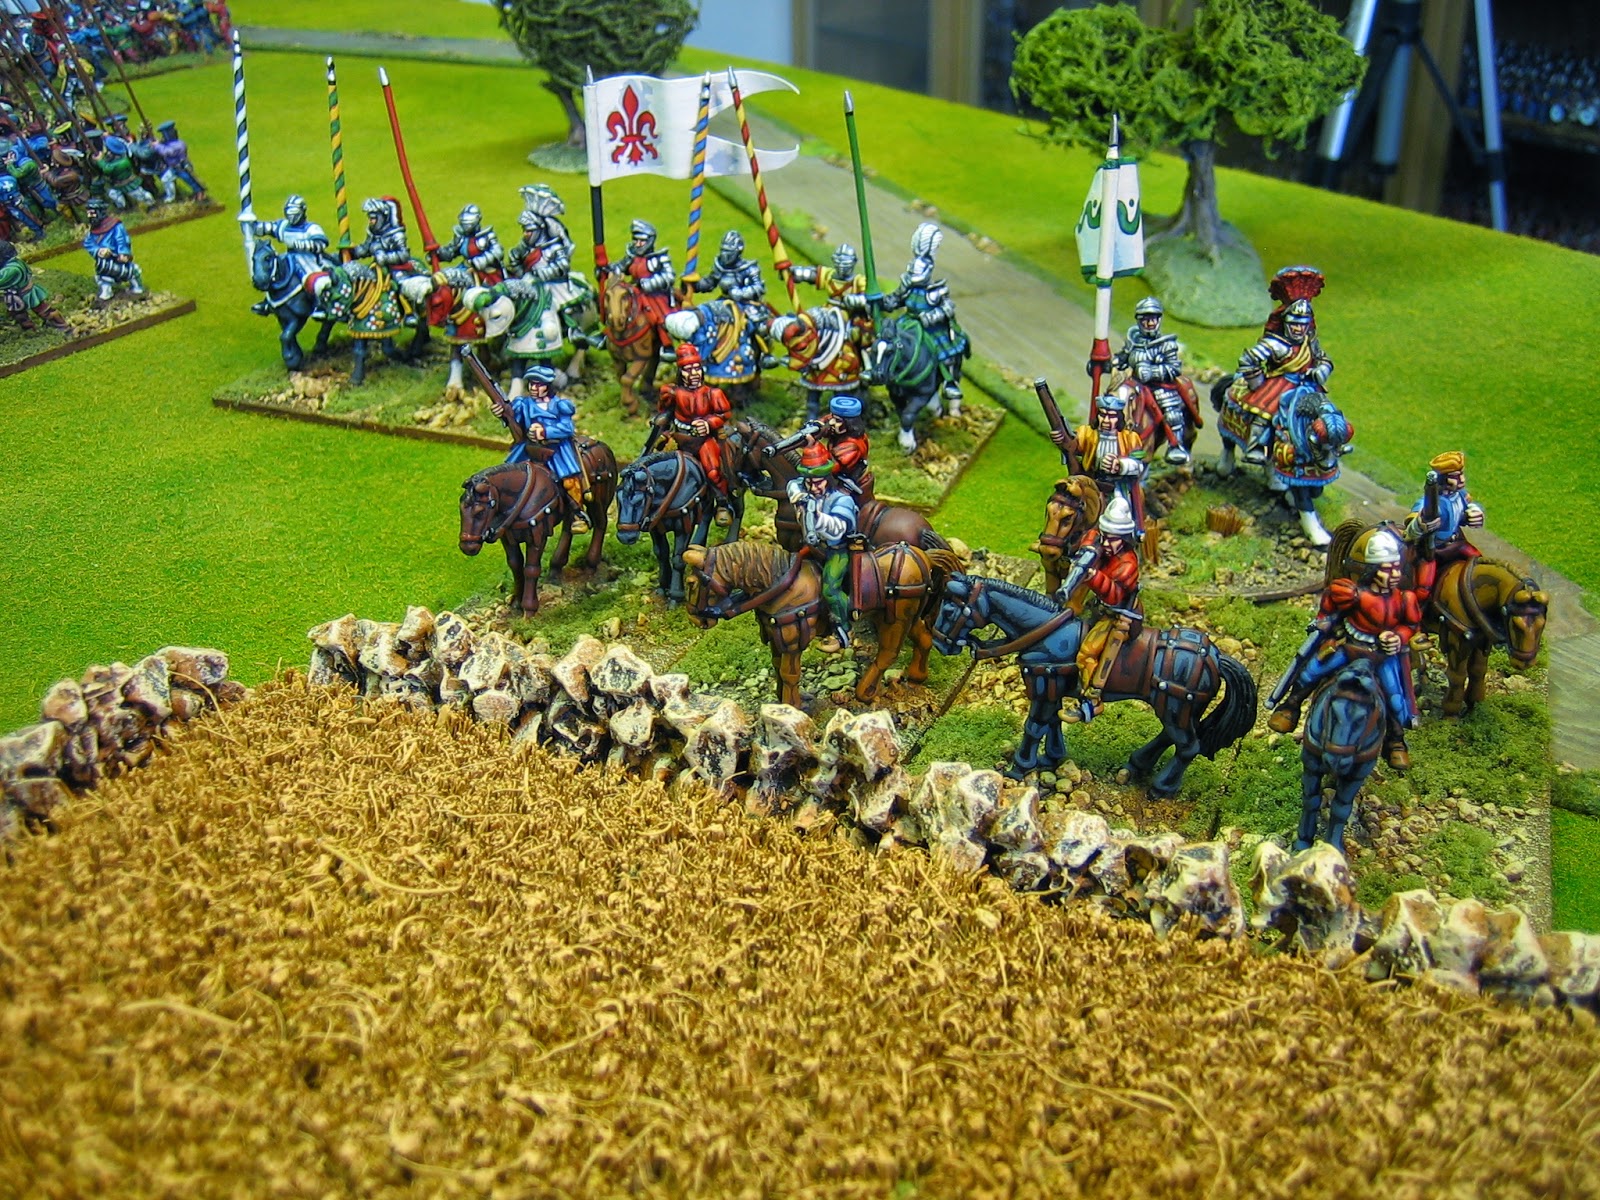
Walls, minor ditches and trees have no effect on the game and can be moved about - they are just aesthetic clutter.
Fields with crops, or that are ploughed or similar, are type II terrain features and cannot be moved about.

This command will operate and activate as an 'off table reserve'.
Stratagem 1 and 2 cards have been added to the French sequence deck.
On the first turn none are valid. On turn 2 only Stratagem 1 is valid. From turn three on, both Stratagem cards are valid. On the appearance of a valid stratagem the French player will roll army die Vs D8. If successful the mainward command activates fully. Until it does it cannot move, but it may shoot. The mainward automatically activates if a Swiss unit comes to contact with any part of it. Once the mainward is activated D'Alencon's rearguard may be activated.

D'Alencons command is now about as far to the rear as it is possible to get. After the French mainward is activated D'Alencons command activates in a similar manner except that only the Stratagem 2 card is valid. The rearward automatically activates if a Swiss unit comes with 12".

The end of turn six is nightfall.
They have 44 Morale points plus the following Sequence card: Army Morale 'stubborn' card (automatically pass Army Morale - replace 1 Army morale card).
They have a D10 army die and sequence deck.

I think the French might have to sacrifice the screen, by charging as they did historically, just to get them clear and get their artillery going.

I think the French will be relying on Francis I getting the mainward activated.
The French will start the Game with 68 morale points plus the following cards: 2 Stratagem cards (extra card), 1 Command 'Deft Cavalry' card (automatically rally 1 cavalry unit from pursuit or vexation - replace Command card), 1 Ciao Bella card (Wild card - replace Lull card).
They have a D10* army die and sequence deck.
So, I am set for Graham and Peter tomorrow. I think We will play the game with two French and one Swiss player. One French player manning each long table edge will help when moving things about. I really don't have a clue if this scenario format is going to work. It's a tall order to get this kind of unbalanced scenario to work anything like it should. We will see...................
7 comments:
That's an awesome set up! It will be interesting to see how the game plays out. The Swiss look massively outnumbered but I suppose it depends on the quality of troops they are up against.
It will be very interesting to see how it plays out. How do your rules handle charging the Flank of a Pike block, as this will surely happen with all the Gendarmes etc on the field?
Hi Peter,
This might sound double Dutch, but here goes.
There is no 'double disorder rout' in my rules and being hit in the flank doesn't immediately cause a disorder (though I use the word vex / vexed / vexation).
Think of FoB OOC, except that in my rules double OOC (vexed) means the loss of an extra UI. Example a flanked pike square with stubborn UI:
Defender down 1 for flanked, attacker up 2 for flanking plus other factors.
Die: Lose by 3-5 pips: 1 UI loss pushed back vexed.
It was a flank attack so no physical push back happens. A second vexation results for losing a flank attack instead.
The block has stubborn UI at the start of the round so it pays an extra morale pip to negate the initial 'push back vexation' (it doesn't move but is still vexed). Result: The block loses 1 UI and is vexed for 2nd vexation. It does not turn to face. It did not throw the flankers off so in the next round the attackers still get Up 2 to for flanking. The defender is assumed to have turned enough guys to fight without the Down 1 penalty.
Second Round: Say, the same result / things happen except, this time the pike block is already vexed, so the new vexation causes an extra UI loss.
Third round: Say, the same result but the PB has no more stubborn UI. This time it will lose 3UI and be vexed.1 UI for the die result plus two further UI for the two vexations this round - one for the result and one for losing the flank attack.
I went this way because the period is far less linear and things seem to have been more able to withstand a 'flank shock'. Nothing indicates this more than the accounts of this battle. 5000 men in a solid square will hang around for some time regardless of which direction it is hit.
Smaller units (cavalry, shot, etc.) don't have stubborn UI so they tend to succumb to flank attack far more readily.
BTW, on losing by 6+ hits in melee the result would be 2 UI loss routed. Stubborn UI can pay an extra pip to reduce this result to a push back vexed. If hit in the flank, this would mean them losing an extra UI of course because the rout becomes an extra vexed result.
Even big blocks, like these 16 standers, only have 9 UI (4 normal plus 1 stubborn for each 3 stands). It's amazing how quickly they can be reduced. Fortunately for the Swiss, this is pre-1522 so instead of the blocks getting 5 stubborn UI plus the usual 4 normal UI (stubborn always used first) all 9 are stubborn.
If you want a copy of the rules, Peter, drop me an email and I'll send you a copy.
James
As always your table and your games look fantastic. One of these days I will get to England and hopefully be able to play against you or at least see all of that lovely gaming table in person.
Victor, if you are ever in these parts, you'd be welcome.
Stunning layout, as always!
That's what I call a beautiful table, most impressive terrain...and splendid armies as well!
Post a Comment