Thursday 30 April 2009

Bicocca 27th April 1522 Scenario. Part 1


The first part of this scenario lays out the strategic situation leading to the Battle of Bicocca, the dispositions, the orders of battle and the terrain. The second will detail the scenario specific rules, what ifs, and umpire notes.

Strategic Situation
In the summer of 1521 the French were sitting pretty. Their possession of the Milanese was secure, their alliance with the Venetians was preventing Landsknechts from the north joining the Spanish forces of Naples, and the Emperor Charles was tied down fighting two disastrous ‘civil wars’ in Spain and the Low Countries.

Then late in 1521 a large body of Landsknechts managed, by making forced marches across a narrow strip of Venetian territory, to slip into Italy. These troops shifted the balance of power. In November the French, who had gone into winter quarters too early, were forced out of Milan. Later Alessandria, Pavia, and Como also fell into Imperial hands.

The loss of the greater part of the Milanese was more than King Francis I could stand. He immediately ordered the raising of a new army for its recovery. The new army, under the command of Lautrec the Viceroy of Milan, was one of the largest raised by France during the Italian Wars. It was much larger than the force in opposition, commanded by the old condottieri captain Prosper Colonna, and this gave rise to the manner of the campaign that followed.

The French first moved to besiege Pavia, hoping that an attempt on such an important place might force Colonna into the field and offer battle. Prosper Colonna did come out – as far as the monastery of Certosa (10 miles from Milan) on the Pavia Milan road. Lautrec sent out scouts to reconnoitre his position but they reported that the position Colonna had taken up was all but impregnable. Lautrec, cautious by nature, was unwilling to attack. He instead decided to move north and cut off Colonna’s lines of communication with Milan in the hope that he would move. Colonna withdrew to the Park of Bicocca, 4 miles from Milan, and established himself in another naturally strong position which he then fortified with earthworks.

Naturally, Lautrec was willing to play the long game. Eventually, by manoeuvre, he would force Colonna into a less favourable position. But then Lautrec found himself facing a problem he did not expect. His Swiss mercenaries, the back bone of his army, went on strike for lack of pay. The Swiss wanted a quick campaign and prompt payment, and the surest way of getting it was to beat Colonna in the field and reap the benefit of the cities and towns that would surely fall without resistance afterwards. If Lautrec did not attack the next day, they would, to a man, march back to the Alps. However, to show good faith, the Swiss volunteered to take position at the sharp point of any attack. Lautrec reluctantly agreed.

The scene was set for one of the bloodiest affairs of The Great Italian Wars: A frontal attack against a naturally strong and heavily fortified position. The deployment map below shows the dispositions of the forces involved.

The Field
Colonna had positioned himself at the Park of Bicocca; gardens and fields surrounding a manor house four miles outside Milan. The ground, as with all the ground around Milan, was dead flat and cut up with drainage ditches; the ditches around the park being particularly deep and wet. The land immediately to the west of Colonna’s position was especially boggy and unfit for the movements of troops. Directly in front of his position was a sunken road. Colonna had ordered that the hollow should be deepened and the earth piled into an earth rampart at its rim. At various points along the sunken road, Colonna’s engineers had sited raised platforms on which to place his artillery. By the time they had finished, an almost shear earth wall, 18 foot high had been constructed. The only immediate way into the park was via a narrow bridge, off the Milan road, and to Colonna’s rear.

Orders of Battle:
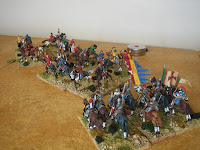
For this game I will be using a figure ratio of 1 to 50. Although the overall figures are accurate, I have had to make an educated guess as to the composition of each contingent. I have taken the liberty of calling all the heavy cavalry Gendarmes – so that there is no misunderstanding of their arms. I have also had to make some small compromises because of my 'stand / basing' sizes.


Lautrec and the French:
1000 Gendarmes: In three units of 7. Those on the left are commanded by Lautrec and Lescun. Those on the right could be under the command of Bayard.
6000 French Foot: One unit of 72 pike, four units of 10 - 12 crossbows. I have given command of the foot to Marshal de Foix.
8000 Swiss: Two units of 72 pike, two units of 10 - 12 arquebus. The left hand column is commanded by Von Stein, the right by Winkelried.
6000 Venetian foot: One unit of 72 pike, four units of 10 - 12 arquebus. They fall under the command of Urbino (see below).
400 Venetian Gendarmes: One unit of 7. They are under the command of the Duke of Urbino.
3300 Giovanni dei Medici’s Black Bands: Six units of 10 - 12 arquebus, one unit of 6 mounted arquebus.
French Artillery: An unknown number of guns represented by two batteries of 2 guns each.


Colonna and the Imperialists:
200 Spanish Gendarmes: Generously, one unit of 7. Commanded by Colonna.
2000 Spanish arquebus: In four units of ten to twelve.
2000 Spanish pike: In one unit of 36 pike and 9 sword and buckler. I have put these under the command De Leyva.
1000 Spanish Genitors: In three units of 6.
8000 Landsknechts: two units of 72 pike. One column is commanded by Von Frundsberg.
Spanish artillery: an unknown number of guns represented by two batteries of 2 guns.
2000 Milanese foot: The vanguard of the 6000 Milanese Militia called to arms on the previous day. Four units of 10 – 12 crossbow.
400 Milanese Gendarmes: One unit of 7. Commanded by Sforza, the newly re-established Duke of Milan.

Sunday 26 April 2009

Harran 1104 Battle Report - Part 3 (the conclusion)

We left the action with the Saracens, having won the next initiative roll, about to play their 10 initiative pips:

The Saracens drew two melee cards in quick succession and had to resolve the ongoing melees. In the fight between Jekermish’s Seljuk horse archers and Baldwin’s foot sergeants the horsemen forced the infantry to give ground (the Franks were low on morale chips and were unable to risk spending them to prop up stubborn troops). The fight between Soqman’s unit of Ghulams and Bohemond’s Knights (neither body guard units) was an unequal affair in which the Knights were pushed back with loss then routed.

Jekermish (using march and manoeuvre cards) changed the direction of his attack to concentrate on destroying Joscelin’s command. But even though Joscelin was surrounded and outnumbered he was holding out quite well.

In the Franks responding initiative: A unit of Tancred’s knights charged a bunched mass of Turcomans who had got into the rear of Tancred and his bodyguard, and dispersed them (evaded off table). Meanwhile Bohemond, seeing that it was going to be up to Antiochenes to reverse what was looking like a dire situation advanced as best he could, throwing a unit of his foot sergeants at Soqman and his bodyguard; the sergeants advanced covered by their integral bowmen and, by chance, a shaft struck Soqman and felled him from his horse: Huzzah! In the following melee, however, the foot sergeants were thrown back onto Bohemond and his Knights.

The continuing melee between Baldwin’s sergeants and the Seljuk horse archers was slowly grinding its way to a conclusion. It was only by shear luck that they were managing to trade space without breaking. They fell back through one of Bohemond’s foot units and were temporarily relieved from the pressure. But the relief was short lived as the horse archers threw Bohemond’s sergeants back with loss and they found themselves in confrontation with their ‘old foe’ again.

Bohemond, himself, was faring better. His knights, now in the front rank of the melee with Soqman’s bodyguard, fell on them with such ferocity that they were routed from the field. Indeed, in this part of the field he and Tancred were now, with most of Soqmans cavalry scattered or routed (off table), feeling quite secure.
The next initiate rolls gave a swing of 2,3 and 6, and the Saracens took first bite each time. Most of the combat cards had passed so this was not a time of much action.

Baldwin’s foot sergeants gave way and were sent scuttling to the rear causing more disorder to their support.

On the other side of the field Jekermish’s cavalry came to grips with Joscelin’s Armenian guard, but low and behold, were shockingly pushed back (d10 Vs d4 and they rolled – 1 Vs 2). But his cavalry, supported by Turcomans, were faring much better with the bow; Joscelin’s infantry taking severe loss but just about holding on.

Turn 3.
The first initiative roll gave a swing of 6, and again the Saracen took first bite. The cards they turned were fatal – March, Missilery, Missilery, Melee, Manoeuvre and March - and at this stage of any game this combination is capable of swinging a battle; with the Saracens already on top, and as the cards gradually unfolded, any doubt in my mind over who the winner was going to be faded: This was game over.

First it was Joscelin who took the brunt. One by one his units fell (destroyed completely) to sustained missilery then he and his bodyguard were routed by Jekermish’s heavy cavalry who followed up in its wake. What remained of Joscelin's infantry, now severely weakened by archery, were set upon by Turcoman horse archers and utterly destroyed. The Antiochenes were now alone, and all of their units were suffering disorder, loss, or both. What was more, the Franks were out of morale chips and handing them over to the Saracens at an alarming rate.

The last two cards were used by Jekermish to wheel and advance in order to cut off any hope of the Antiochenes retreat; their fate was being sealed.

It, with things going badly, came as no great surprise, when two of the first four cards the Franks turned over were Army Morale (is this not always the way of luck) – and they failed both of them. The remnants of Baldwin’s command (a unit of Armenian archers) ran for the hills. Tancred was forced to withdraw twice and this forced one of his units of Knights to break on the first occasion and he and his bodyguard to leave the withdraw from the table on the second. Bohemond passed his first check but withdrew on the second causing much disorder throughout what remained of his army. He was in such dire straights that I decided, that the Franks should concede the battle – EVERY MAN FOR HIMSELF!!!

So ended my solo re-fight of The Battle of Harran 1104. Although the passage had been different the result was near to history. The Edessans had been slaughtered almost to a man, whilst Bohemond, Tancred and the Antiochenes, with a bit of luck and a kind flow of cards (due to them after the debacle of the last draws and with only one enemy march card still in play), would see most of them (the Knights at least) off table to safety.

In all, the game spanned two and a bit turns and perhaps two and a half hours of play. Not bad considering the game was solo and involved 31 units.

Tuesday 21 April 2009

Harran 1104 Battle Report - Part 2

This battle report describes the first eleven sequence cards of turn 2. The action took about 45 minutes to play.


It was the Franks who took the initiative first by bringing the Antiochenes into the fight. Seeing Baldwin in such dire trouble and in imminent danger of being killed or captured by the enemy, some of Bohemond's knights rode, like the 7th cavalry, to his rescue. They almost extricated him completely but, failing to rout the Ghulams facing him, they only managed to prevent the Ghulams from pursuing Baldwin to his sure demise. He rode to the rear, where miraculously he not only succeeded in rallying the small cluster of Knights around him (the unit had 0 Unit integrity), he also managed to rally his foot who had fallen into uncontrolled advance. It was his last act before falling to marauding Turcoman tribesmen.


Jekermish, who had held his cavalry back to await events now rode into the fray, thundering into the Flank of Baldwin's foot sergeants and positioning themselves to take on Joscelin at the same time. The foot sergeants, like Baldwin's Knights had done previously, held.

With support coming up from their rear, the Turcoman command facing Joscelin (rolling a triple move on the same 'March' card) changed position - from Joscelin's front to Joscelin's rear. They took a lot of casualties to archery as they did so, but Joscelin looked doomed, for once in that position they launched such a barrage into the rear of his Armenian guard that they almost ceased to exist. Joscelin had no option but to advance his battered cavalry through to the front of his infantry (a forced 'push back' advance) and to form his infantry into pitched defence (back to back) formation.

Whilst Bohemond sorted out his lines, it was now time for Tancred to go on a ride to clear some space to manoeuvre by scattering the Turcomans who, seemingly everywhere, were threatening to get behind the Antiochenes lines. This mad charge (a 30" triple move) succeeded but left him alone and exposed in the rear of the enemy.


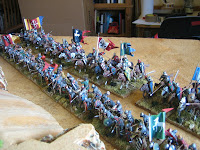
The photos above show the positions at the end of the session. The 11 points (per side) of initiative came out in dribs and drabs, in 1s 2s and 3s, with one 5 point initiative. The roll for the next initiative decided the end time of the session for me - both sides will get 10 initiative and the Saracen will chose to go first!

Sunday 19 April 2009

Harran 1104 Battle Report - Part 1

Being a solo game I intend to play it at my own pace - about an hour at a time. This way I will not rush for a result. Solo play requires a little more thinking time than multi-player games because wearing two hats 'fairly' is not easy, and one needs time to absorb what is going on.

Turn One
The Saracen pressed for getting a feigned flight very early on but were unable to get both forward Turcoman commands into contact with the Edessans at the same time (spliting the 'forward' Turcomans into two command groups made this almost impossible unless time was wasted in manoeuvring into the perfect position). The Turcomans on the left, after some desultory shooting by both sides, got into contact with Baldwin's command with two units, whilst the third hung off to the flank to await results; they managed to draw a feigned fight card almost immediately. One unit passed its uncontrolled advance test whilst the other failed; but this was enough, as when it ran after the fleeing Turcomans all the other units in Baldwin's command (who were within 4" of it) failed in response on the secondary check.

During the Frank's following initiative phase they drew two back to back 'March' cards. Baldwin's command rolled for two double moves and caused one of the fleeing Turcomans to descend into rout (it was contacted) whilst the Turcoman unit that had hung back on the flank, being the closest enemy unit, became the target of the rushing Armenians; the Armenians took significant casualties to archery as they came on; the Turcomans evading them with considerable ease. [Two double moves at 150% normal rate took most of the units clear over the river - the Knights under Baldwin advancing 52 inches in this time). The Antiochenes decided not to move on the first 'March' card, hoping that they might draw their ambush card and retrieve something from the situation, but when the second 'March' was drawn they felt obliged to advance normally and at least be in a position to stabilise a crumbling flank.
It was now the Saracens time to exploit the foolhardiness of Baldwins mistake. Baldwin and his Knights were subject to the massed archery of every unit that could shoot at them, then, after some deft manoeuvring (the cards were falling nicely into place for the Saracens), the unit of Soqman's Ghulams to the right of his bodyguard charged them in the flank. Baldwin's knights managed to hold, just [they took 3 unit integrity loss - only the presence of Baldwin held them together). During the remaining initiative Soqmans cavalry reformed and took up position to crush the rest of Baldwin's command.
At this point the turn, being about halfway through the sequence decks, ended on a tied initiative die roll and I decided to end my sessions play to think about what had taken place. The turn took about 30 minutes to play - not a bad amount of action considering the time taken walking from one side of the table to the other - Ager Sanguinis is game of swift movement. The approximate positions at the end of Turn 1 are detailed in the diagram below.

Friday 17 April 2009

Harran 1104 AD. A 'solo' scenario.

The Strategic Positions
In 1103, following the release, for ransom, of Bohemond of Antioch the northern Franks celebrated by launching two offensives. The first was against the region around Alleppo from which they extracted tribute to pay back loans made for Bohemond’s ransom. The second was against the Byzantines who were trying to reclaim the Cilician territories to the north west.

In the spring 1104 the northern Franks felt secure enough to turn against the Moslem states to the east. Their strategic goal was to take the mighty fortress of Harran. If this could be taken it would cut communications between the Moslems of Syria and the Moslems of Iraq and Persia. In March they began to raid Harran, and it became clear to the surrounding Moslem states that it was only a matter of time before the Franks besieged the place.
1103 had been a time of division for the Moslem world. The Seldjuk Sultan Barkiyarok and his brother Mohammed had been at war. Peace was made between them by the division of territory in January 1104; but it was an uneasy arrangement that suited no one. Following the death of Kerbogha of Mosul, Soqman the Ortoqid prince of Mardin had failed to gain the succession (he had backed the wrong horse in the civil war) and was at war with its newly appointed Seldjuk atabeg Jekermish.

Harran, independent of Mardin and Mosul, was in a state of turmoil following a successful uprising against its general, Qaraj, and the murder of his successor Mohammed of Isfahan by Jawali, a former page of Qaraj; with whom Mohammed had become unwisely intimate. Jawali’s succession was weak and he was incapable of governing and protecting Harran effectively. When Frankish raids against Harran’s fields and trade routes began in the spring of 1104 he was in no position to counter them. Seeing the threat, should Harran fall to the Franks, Soqman of Mardin and Jekermish of Mosul patched up their differences and launched a counter offensive against Edessa.

Hearing news that the Moslems were massing 70 miles from his capital, Baldwin of Edessa sent for help to his lieutenant Joscelin of Turbessel and Bohemond of Antioch. They would beat the Moslems to the punch by marching on Harran immediately. The armies concentrated before Harran, and had they stormed the place immediately it would have fallen easily. But the Franks wanted the place intact and they were quarrelling over whose flag would fly above its walls once it had been taken. Before the argument had been settled the combined armies of Soqman and Jekermish had swung south and were upon them; forcing the siege to be broken. The battle that followed would take place across the river Balikh (the exact location of the battle is unknown, but it is certain that it took place some distance from Harran itself).

The Battle
I should restate, here and now, that this is a solo scenario. If you want to use it as a multi player game, and you are not the umpire (and the game will need an umpire in this case), I suggest you stop reading now. What follows is a brief description of the battle as it occurred on 7th May 1104 AD.

The battlefield was split north to south by the river Balikh; which was fordable along its entire length. To the south west (the Frankish side of the river) was a large hill with gentle slopes. All of the surrounding ground was gently undulating scrubland strewn with bushes and stunted trees; this did not hamper movement, but goes someway to explaining why visibility was hindered.

The Frankish plan of battle was cunningly simple. The Edessans would hold the open ground in the centre / centre left and draw the Saracen into a close quarter fight. Once the Saracen was entangled, the Antiochenes would emerge, from their ambush position, over the brow of the hill (right flank) and crush the Saracens from flank and rear. The Moslem plan was somewhat similar. Firstly, Soqman’s Turcoman cavalry would engage with the enemy then feign flight back across the river. If the plan was successful the Franks would be drawn into pursuit and then crushed by fresh cavalry set in ambush on the Moslem side of the river.

As it was, the Saracen’s plan succeeded and the Frank’s plan failed. On seeing the Turcomans flee the Edessans thought the battle won and fell into pursuit, but once they had crossed the river thousands of fresh cavalry fell upon them from all sides and they were utterly destroyed and their leaders captured. Bohemond’s Antiochenes did not even enter the fight; having crested the brow of the hill, brushing away some light resistance as they did so, and seeing the slaughter of the Edessans in the plain below, Bohemond retreated with his force intact.

The Scenario
I have devised this scenario to be played with Ager Sanguinis rules, published in Miniature Wargames Jan 09 (issue 309) and associated army lists. Primarily it is devised to be played solo, and the scenario notes have been written with this as the prime objective. It will take little effort to convert it to a multi player game provided an umpire sets up the table and the players are only aware of their own ambushing troops (Jekermish and the Antiochenes) which will only be deployed when they move or are discovered.

The terrain and the forces should be deployed as per the deployment map. The forces of Jekermish and the Antiochenes (Bohemond and Tancred) are deemed to be ‘invisible’ to all other forces until they move, shoot, or are discovered. The Antiochenes will only be discovered if Soqman sends Turcomans to reconnoitre from the hill (see below). The troops from Mosul (Jekermish) will be discovered by the first Frankish unit to cross the river.
The scenario will run using the normal rules plus the special rules allowed under the ‘Special’ cards detailed below; when playing gambled ‘Tactical Advantage’ cards on a won lulls, remember that they can be used as a wild card including any of the ‘Special’ cards. Remember also that, the best way to get a good game when playing solo is to ruthlessly play for every advantage that the army in question can gain during its initiative phase. The Piquet mechanisms used in Ager Sanguinis are ideally suited to solo play in this fashion.
Edessa and Antioch
The combined strength of the two armies was put at 3,000 cavalry and 9,000 infantry, including many Armenian subjects from the Edessa region. By stripping every garrison of available men it represented almost the entire fighting strength of the northern Franks. For this battle, and using my own units, my figure ratio was roughly 1: 40 – 289 figures.

Army Die: D10; Morale chips: 23 + 1 ace; D10 sequence deck with the following additions:

Add ‘Special 1’ card to the army’s sequence deck: On the appearance of this card the Antiochenes, providing their position is not known to the enemy, can make a triple move as per ‘Move’ card counting it as ‘even’. For the remaining initiative pips in their phase, any enemy unit they contact may not evade, and, where required, any ‘Tactical Advantage’ cards can be used in place of a melee card for a single melee resolution. Its use represents a perfect ambush. Remove after use or the Antiochenes are discovered.

Add ‘Special 2’ card to the army’s sequence deck: On the appearance of this card, if the Edessans have moved uncontrollably across the river, Bohemond and Tancred must immediately test as though an Army Morale card test had been failed. This is the slim chance, that if the game is progressing historically, the Antiochenes will see discretion as the better part of valour and remove themselves from the field. The game is more balanced if they don’t, but it all adds to the tension of the solo player. Remove after use.

Eddessa
Baldwin (Motivation Die: D10): 1 small unit of Knights, 1 unit of Frankish sergeants, 1 unit of Armenian spearmen, 1 unit of Armenian bowmen.
Joscelin (Motivation Die: D10): 1 unit of ‘Armenian’ Knights, 1 unit of Frankish sergeants, 1 unit of Armenian spearmen, 1 unit of Armenian bowmen.

Antioch
Bohemond (Motivation Die: D12): 2 small units of Knights, 2 units of Frankish sergeants.
Tancred (Motivation Die: D12): 2 small units of Knights, 1 unit of Frankish sergeants.

Mardin and Mosul
The best guess at Saracen numbers is 10,000, all of which were cavalry. I have seen certain modern accounts that break down this figure to 7,000 from Mardin and 3,000 from Mosul, but I have chosen to go with Steven Runciman (A History of the Crusades 2. The Kingdom of Jerusalem) who states “Soqman with a considerable force of Turcoman light cavalry and Jekermish with a slightly smaller force composed of Seldjuk, Turks, Kurds and Arabs.” For this battle, and using my own units, my figure ratio is roughly 1: 40 – 228 figures.

Army Die: D12; Morale chips: 20 + 1 aces; D10 sequence deck with the following additions:

Add ‘Special 1’ card to the army’s sequence deck: On the appearance of this card, Soqman may, provided he is within 12” of a Turcoman tribal leader and he succeeds in beating a D8 roll with his motivation die (D10), may order any or all of that command group’s units to reconnoitre from the summit of the hill. On no other occasion, except perhaps that of pursuit, may any Saracen unit venture towards the summit of the hill – the Antiochenes position is OUT OF BOUNDS. This possible movement, in all likelihood by the two unit tribal command group deployed immediately to Soqman’s left, represents the light resistance met by Bohemond as his troops crested the hill.

Add 2 ‘Special 2’ cards to the army’s sequence deck: These are the feigned flight cards. On the appearance of this card, any Turcoman unit in contact with an enemy unit may challenge it into an uncontrolled advance by making a rout move away from it. The Saracen rolls his Army Die (D12) Vs the Frankish unit’s Defence Die. If the Saracen roll is higher the Frankish unit must advance uncontrollably, and any Frankish unit within 4” of it must also test (for the purpose of this rule Armenians are Franks).
Units in uncontrolled advance are vexed; they must move towards the nearest enemy on every move allowable on a ‘Move’ card, at 150% normal move rate; they may only be rallied by a leader not in uncontrolled advance; rallies count a down 2 modifier; they automatically rally from uncontrolled advance if they have a melee initiated against them.
Units in feigned flight count as routed, except that when rallying they do not count the down 2 routing modifier; any unit in feigned flight that is contacted by the enemy is properly routed.
Mardin
Soqman (Motivation Die: D10): 2 units of Ghulam cavalry.
3 Tribal leaders (Motivation Die: D10): 1 with two units and 2 with three units of Turcoman horse archers.

Mosul
Jekermish (Motivation Die: D10): 3 units of Seldjuk horse archers, 1 unit of Ghulam cavalry, 2 units of Arab / Kurdish heavy cavalry.