Monday 27 February 2017

Roll Call! - 15th Panzer Division late 41

When I decided to concentrate on a particular theatre and period for a WW2 collection I decided on Operation Crusader November - December 1941. I chose it because the forces are fairly well balanced, it's big enough and complex enough to provide the basis of scenarios of every type, and in changing down a scale (from my usual 28mm to 15mm) I would not need too much new terrain (desert).


Although I eventually intend to have enough war game pieces to represent all of the combatant formations (though not fielded altogether, you understand) I decided to start by buying enough stuff to field the British and the Germans. I used Battlefront's Flames of War range for almost everything. I put in one big order and bought everything at once, obtaining a 40% trader discount in the process (the photo opposite shows about 70% of it).

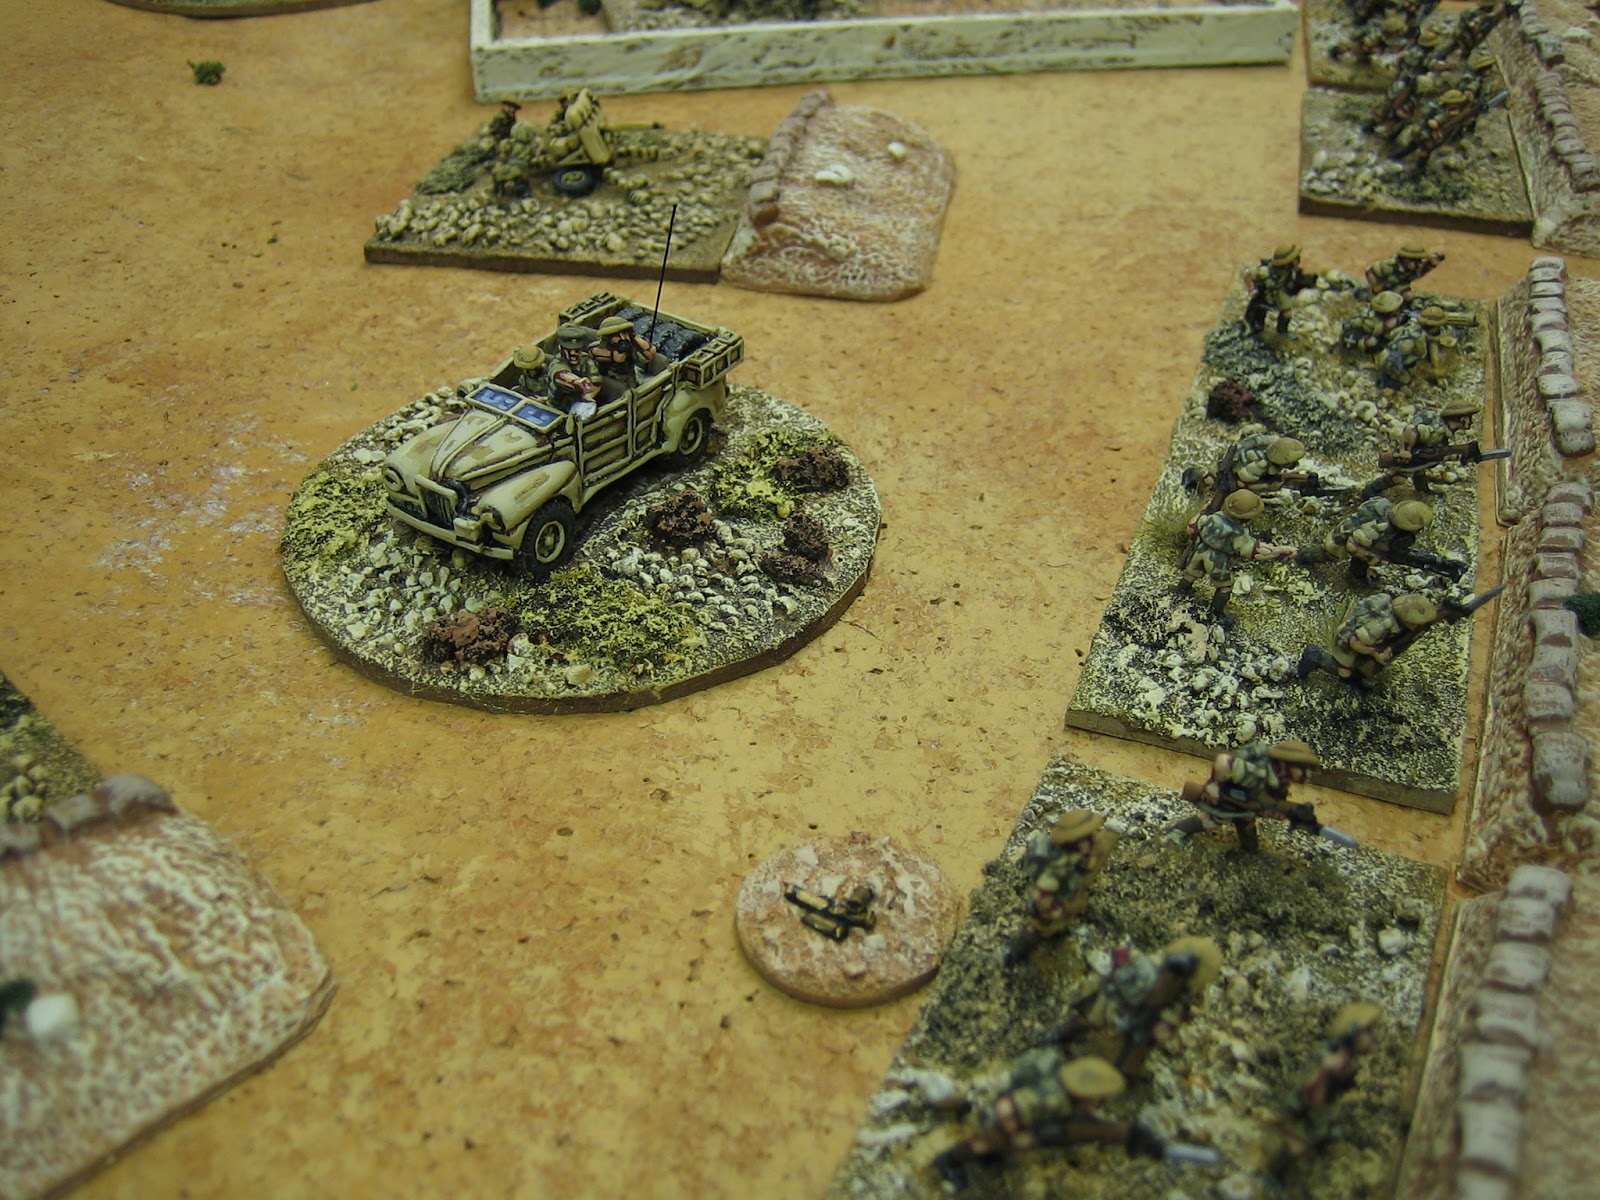
As I plan on fighting battles with 'brigade group' sized battle groups, I decided to use the OOB, in Frank Chadwick's excellent Benghazi Handicap. This book scales the forces at roughly 1:5 - or one stand to a platoon / troop. This scale allows quite big all arms actions to be carried out on a good sized table. 


Looking at the breakdown of Afrika Korps, the obvious formation to use as the base for all of the forces was 15th Panzer Division. This formation can be converted into the major elements of 21st Panzer, or Afrika Division ZBV, quite easily. I still have a few pieces, to convert 15th Panzer Division into Afrika Division ZBV, to do (namely 605th PzJager Btn and some Anti Aircraft pieces) but otherwise, this is (less some basing to finish) the German collection completed. I'll never be able to use all of it at the same time but, I will be able to use big chunks of it at the same time. 

8th Panzer Regiment. 

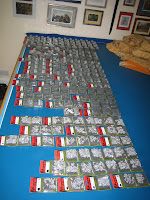
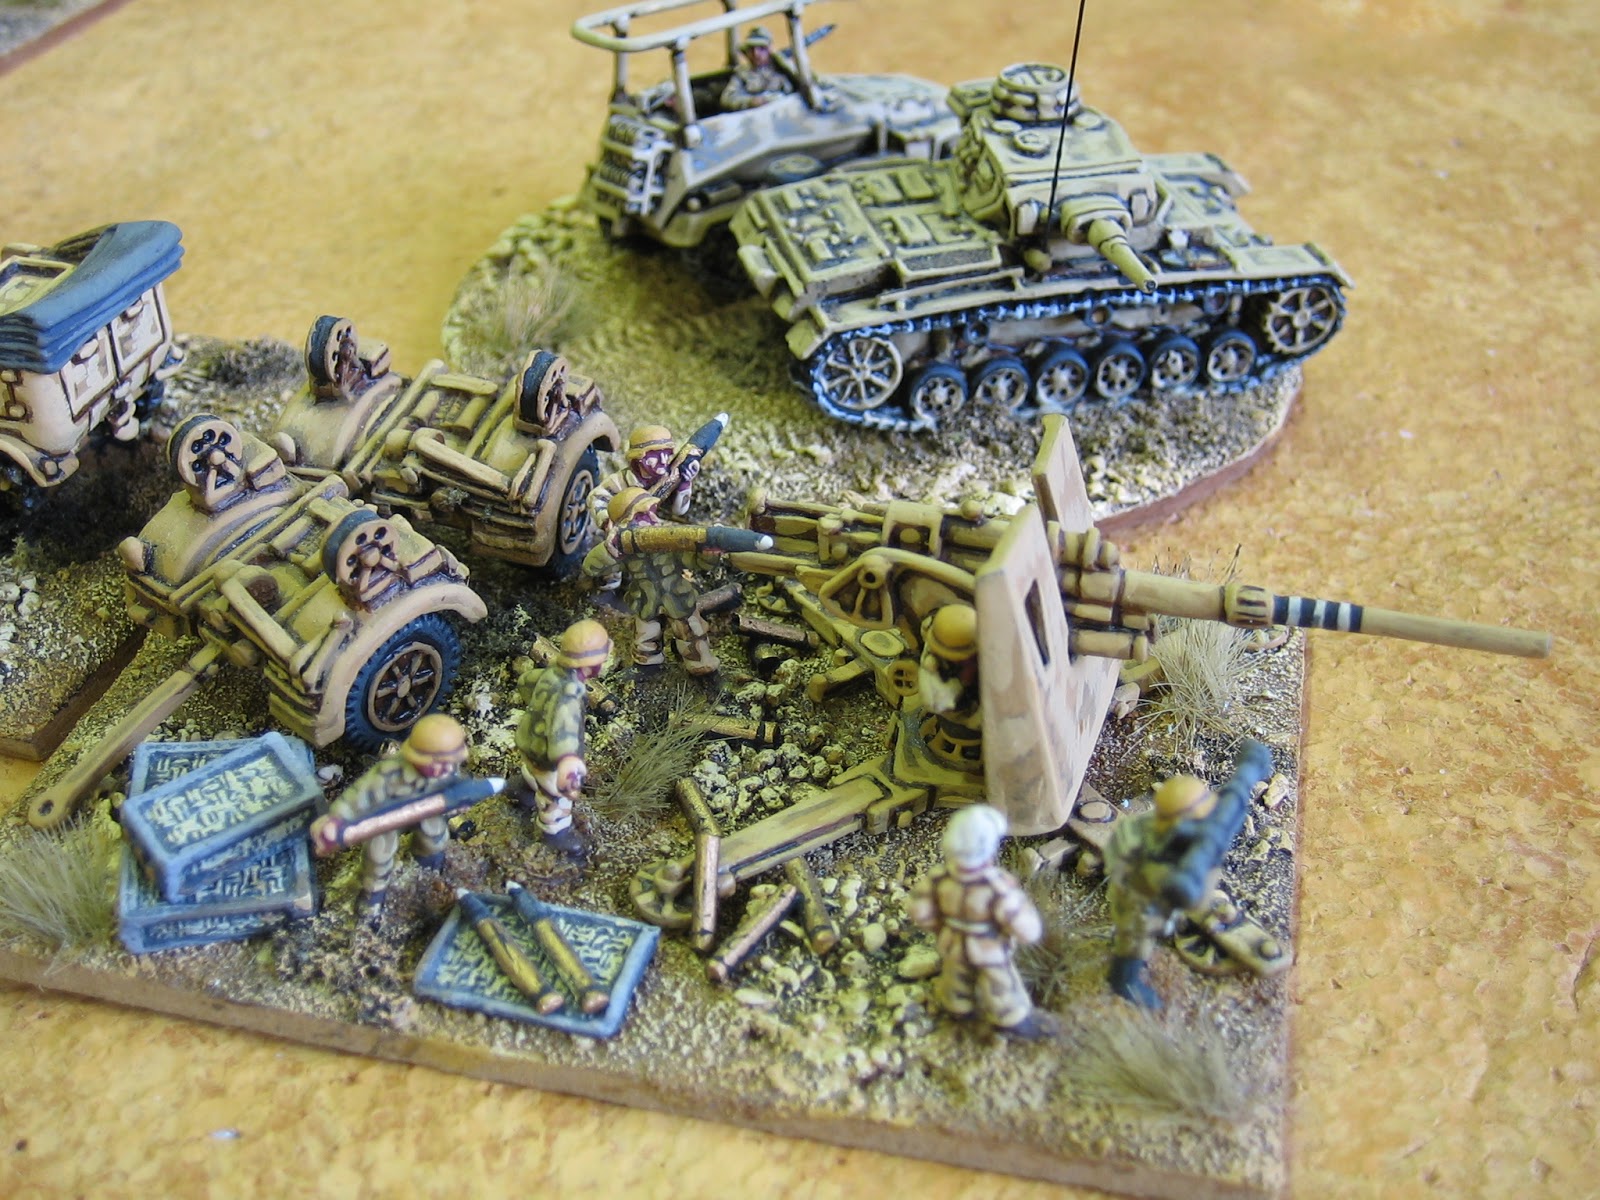
Two battalions of three companies (two light, one medium); two battalion command elements and a regimental command element (round bases); an attached Luftwaffe heavy AA battery (8.8cm).
33rd Reconnaissance Battalion.

A company of armoured cars; a motorcycle company (mounted / dismounted); a support company; a battalion command element.

Dedicated transport is pictured.
115th Rifle Regiment.

Regimental command element and regimental support elements (AT and infantry gun); 2 infantry battalions each of: 3 companies of infantry; a support company; a battalion command element.

Dedicated transport is pictured.
200th Infantry Regiment.

Regimental command element and SP infantry gun company.

15th Motorcycle Battalion: 3 infantry companies; a support company; battalion command element.

2nd Machine Gun Battalion: 3 MMG companies; a support company; battalion command element.

Dedicated transport is pictured.
 Artillery.

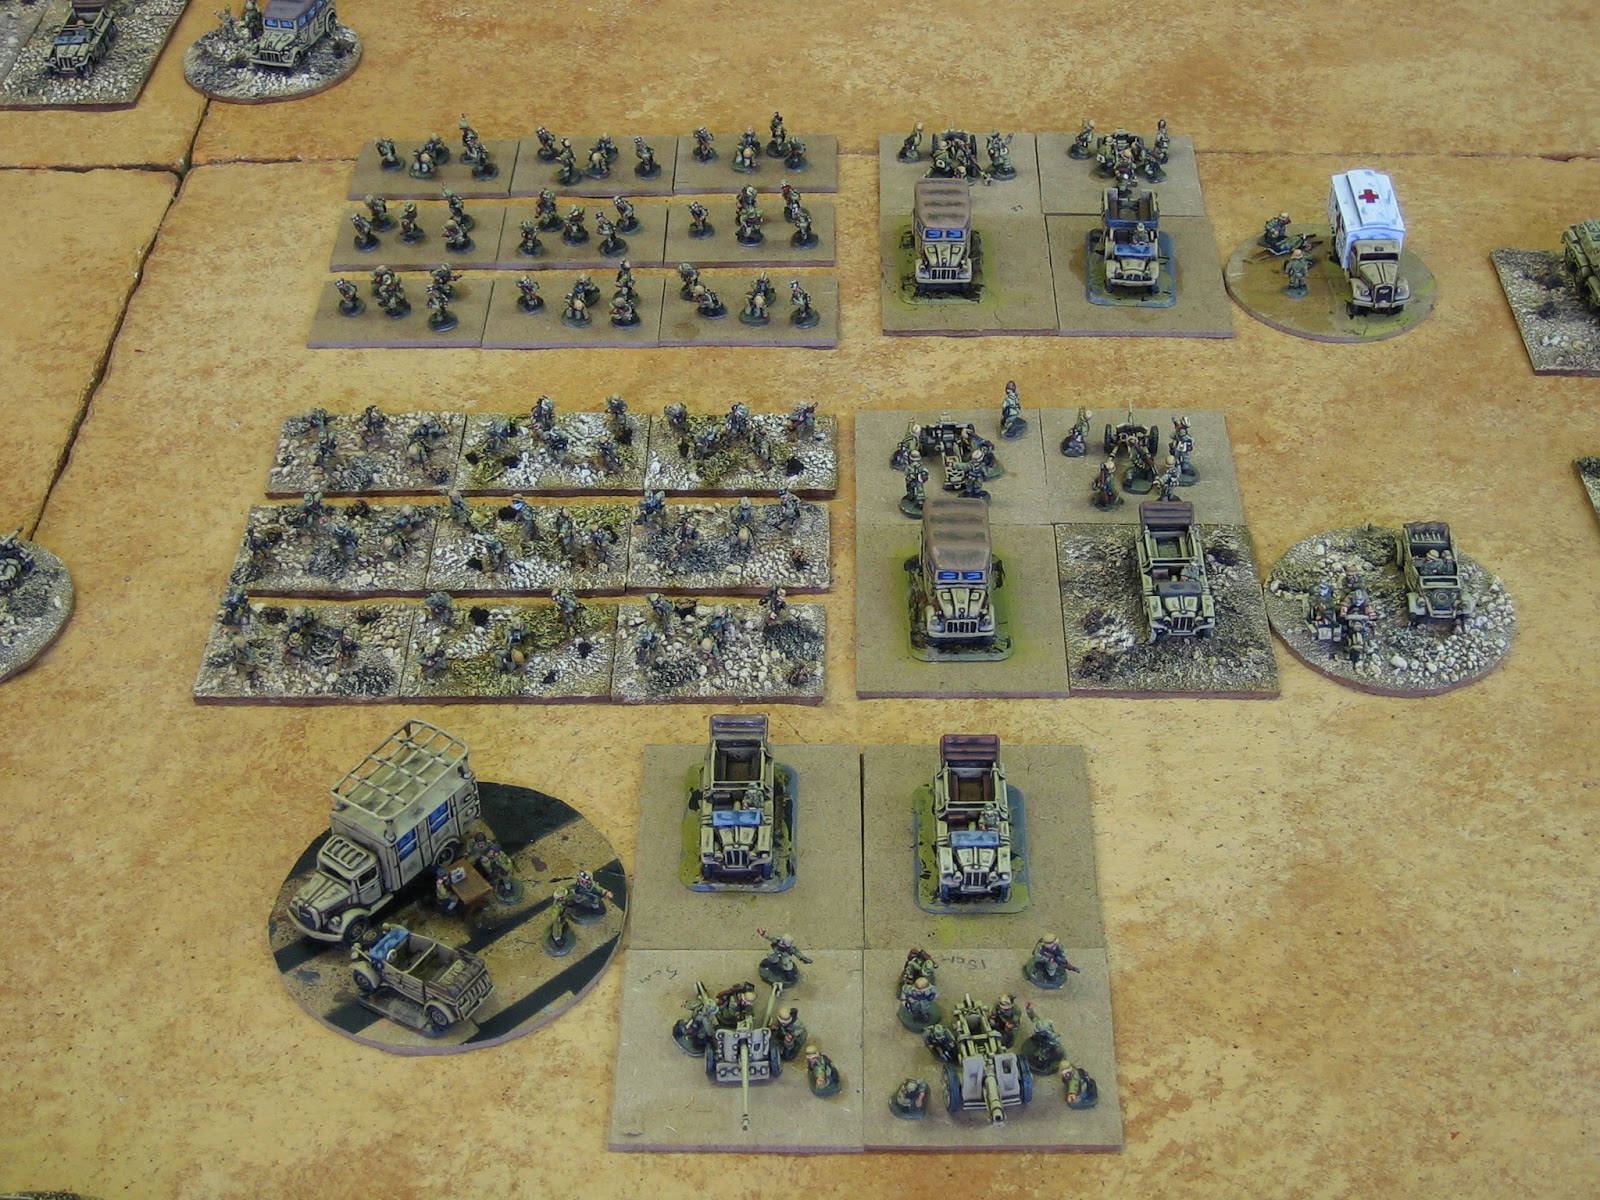
33rd Artillery Regiment: General Support battalion of 3 15cm howitzer batteries; 2 Direct Support battalions each of 3 10.5cm howitzer batteries; 3 forward artillery observer (FAO) elements.

33rd Artillery Battalion: 3 companies each of 2 3.7cm and 1 5cm AT gun.

Dedicated transport is pictured.

Note: There are no command elements as these guns were either generally attached to other formations or they can use their FAO element.

33rd Pioneer Battalion: 2 companies of infantry.

Dedicated transport is pictured.

Note: There is no command element as these companies were either generally attached to other formations. 

Non dedicated transport pieces: 24 Motor Transport stands.

My favourite AFV piece is the Sdkfz 121/122 self propelled 15cm infantry gun on Pz II chassis.

My favourite piece of artillery is the 8.8cm. I've liked the look of this powerful gun since childhood.
My favourite motor transport pieces are the motorcycle combinations - especially en masse. 
Each of my national forces will have an ambulance. To get them onto the table they will be used as command elements.
The most bizarre (pointless) piece is the enormous Sdkfz 9 tractor. It will be used as a transport piece just to get it on the table from time to time.

Speaking of 'pointless', I have omitted non-teeth arms from my order of battle. Not because I don't see why they were important but, rather because they have very little use on a wargame table.

Will I buy any more Germans? Yes, I still need two 2cm AA guns plus dedicated transport, half a dozen more Opel Blitz trucks and three SdKfz 7s for the 15cm hows. These were unavailable when I ordered all this stuff back in August 2010 - I'll get round to buying them eventually, probably with the Italian stuff I'll need.  

I'll be concentrating on the British next. Although I've made a very good start (50%?) on the British, I still have quite a lot of armour, infantry and artillery to paint. In fact, the stuff to paint for the British outweighs the Germans by a considerable amount. There are 25 tanks in the German force, there are over 100 in the British force - including Crusader I, A9, A10, A13, Honey, Matilda, Valentine and even some Vickers VI (for the infantry division's cavalry regiments).

Anyway, I hope you like the results of the very slow effort so far. For my part, I'm quite pleased with the way things have turned out and finishing a major part of any collection is always a spur to get the rest done. Thing is, this is my 'non-project' that I use as a change of menu when I get bored of painting 28mm; it may be some time before this particular cog turns again - especially as the next job is basing, uuuuurgh.

Friday 10 February 2017

Blitzkrieg Commander 2 - post battle thoughts


We've managed two games of Blitzkrieg Commander 2 over the last couple of weeks and I'm happy to report the Lads are up for a third next week. Considering the previous resistance to my Western Desert games (and I confess to being the major cause of this having bored them to death with the Sidi Rezegh game) I do believe the rules have been a major contributory factor - they had to throw me a bone at some point but, not three bones.

The first game was a much steeper learning curve than I had suspected it would be. The game got from A to B well enough but we (largely due to not playing games with a rigid turn structure that much) neglected to play some of the things allowed in the rules,  and played some things wrong. Having said that, you might think the game was a disaster but, it wasn't. It proved very entertaining. Many nuances in the rules were highlighted, even though most of the light was shone retrospectively.


The second game was much, much better. At heart, BC2 is a simple game and that is probably why the first game managed to keep going. The move sequence was understood and used much more effectively this time and the rule's basic simplicity allowed the essence of 'combined arms' to be realised and played without recourse to endless lists of stats and reference to the rule book. 

We played the second game to a satisfactory conclusion in the evenings play with victory going decisively to the Germans.


BC 2 is not the panacea for World War II gamers. It has its upsides and its downsides. I like it a lot and will be playing it for some time to come with the odd amendment here and there to suit my taste. 

BC 2 is aimed at Europe and Russia rather than the Western Desert and the basic terrain definitions don't really suit the desert theatre; desert terrain is less distinct (and a lot less 'vertical'  than you find in more temperate climbs) and has to be treated in a much more subtle way to get the best 'differences' out of it: However, terrain definition can be easily sorted out. 


One mistake I made in the first game was to count the British as being in trenches and gun pits and what I thought would be simple emplacements became the Tobruk defences! A quirk of the desert is the definition of 'dug-in' must change a little. You can't dig-in in much of the Libyan desert without recourse to pneumatic drilling. When troops were not in static positions for any length of time, they had to content themselves with very shallow 'scrapes' to the bed rock surrounded by piled rocks. Thus slit trenches became sangars. These are not as good as trenches and should probably only count as partial cover (and save on a 6?) and they should be visible at greater ranges because a substantial part of them is actually above ground level. Again, this is a simple thing to do in the rules, so no worries.

One rule that doesn't make much sense to me is only allowing the recce to communicate with the nearest friendly command unit? In the second game we changed it to nearest command unit, or FOA, or FAC and it seemed to work much better. 


Then we come to off table artillery. Off table artillery is one of my war game crosses and I fear I might carry it to my grave. I don't do artillery deviation by random direction dice and random distance off target dice. This is not how artillery worked. Requesting artillery I get; zone deviation off target is a load of 'Old School' war game's rubbish. Consequently I will disregard the rule as written in BC 2 and use the following rule instead (note, for my 15mm stuff, I've converted centimetres by adding 50% then converted into inches - e.g. 10cm = 15cm = 6". I'm not sure we ever measure anything very precisely in a game and inches lend themselves to friendly fudging better than centimetres IMHO, I'm not sure why):
  • The firing battery pin points the aiming point. The target rolls 2d6, the artillery rolls 1d6 per 18" distance between target and observer. If the artillery player rolls equal or lower he places the zone template with the aiming point anywhere within the zone. If the target rolls lower the target player places the zone with the aiming point anywhere within the zone. 
This means that the target point is ALWAYS in zone (unless there is a blunder on request). The only thing that needs to be decided is what else is. We played this in the second game and it worked well. It's not my own idea, the basic mechanism was pinched from a Piquet rule set.


At the weekend I met Leon Pendraken at the York show and we had a chat about BC 2. He told me that BC 3 is almost done. It's something we can all look forward to and I very much look forward to seeing it. BC is an excellent set of rules because it deals with the complexity of WW2 in very simple ways, making the game very enjoyable. If you haven't played Blitzkrieg Commander yet, give it a go.


Next week, we'll play again.

Thursday 9 February 2017

Generic pontoon wagon

At Derby last year I asked Martin over at War Bases if he would make a pontoon wagon to add to his excellent range of wagons and carts. I quickly got the impression that this request was just one more in a very long list of requests and I felt quite sorry for him.

Anyway, when I got home I decided to have a bash at building one of my own, or at least I would do the next time I saw War Bases at a show to purchase a wagon to base it on. I wanted something that I could use for lots of periods so I decided not to try and make a copy of any particular design. The best way to do this is to find a picture you like, store the image in your head, then leave a suitable gap before making a similar one of your own. I looked on Google for some inspiration and thought the ones with a trestle were probably the most 'pontoon wagon looking' of the various designs. That was in October 2016.

At Vapnartak York (first show of 2017 earlier this month), I visited the War Bases stand and bought a Peasant Cart 1 and a couple of cart horses. I said to Martin, at point of sale, with a wink "Pontoon Wagon": He gave me a quizzical look. The wagon was £3, the horses were £4 - cheap as chips. 

With a few bits and pieces from my bits box, I had everything I needed for a simple pontoon wagon.


Less some planked decking, which I omitted to add, I built the cart as standard. 

I put the planking to one side for use later. I did use the centre plank to add strength to the model and save the bother of cutting off the tabs; when the model is finished you will not be able to see this plank.
Next, using a couple of War Bases window frames that I had lying around (left over from a previous job), and some off cuts from the wagon sheet, I made a couple of trestles and glued them to the cart's front and rear cross pieces.
The unused planking for the wagon's deck, along with a few lengths of balsa wood sheet cut to a similar size. 

These represent the planks that would be used to construct the deck of a pontoon bridge. I have no idea about pontoon bridge construction - a plank is a plank as far as I'm concerned.
 glued the planks onto the deck of the wagon, making sure not to stack them too evenly. 

'Higgledy-piggledy' sometimes works best on small models; in reality the planks would be stacked much more neatly but doing that on a model this size might make them look like a solid block. 
The pontoon. I have no idea if it is the right size, but it looks about right.

This was a simple balsa wood construction. 

A few minor gaps on the underside (where the angled fronts joined the bottom of the pontoon) were filled with Milliput. Gaps in the interior of the boat, in the same place, were disguised with cross pieces; a few more 'crosspieces' and some uprights were added to disguise their true purpose and give some interior detail. 

Tip: Balsa wood is too soft to sand well. Always undercoat with a hard drying paint (enamel or household undercoat) before this is done.


The wagon, apart from some sanding of the shafts (where the horses go) to make them less square edged, is completed. 
The painted wagon. 

The planks are a lighter shade so that they contrast with the wagon. The higgledy-piggledy stacking can be clearly seen - I think it adds to the effect.
I painted the outside of the pontoon grey for no other reason than to provide a bit of contrast. I have not glued it on. 

I have made another five pontoons (still to paint) for my pontoon bridge project. I will buy another wagon to transport one of them - my pontoon train will be two wagons.


Another shot of the wagon, this time with the pontoon removed to show its interior detail. 

I like the War Bases horses too. Normally I would use Front Rank but these will do nicely. They are well proportioned and paint up well.

Job done. I hope this post proves useful.