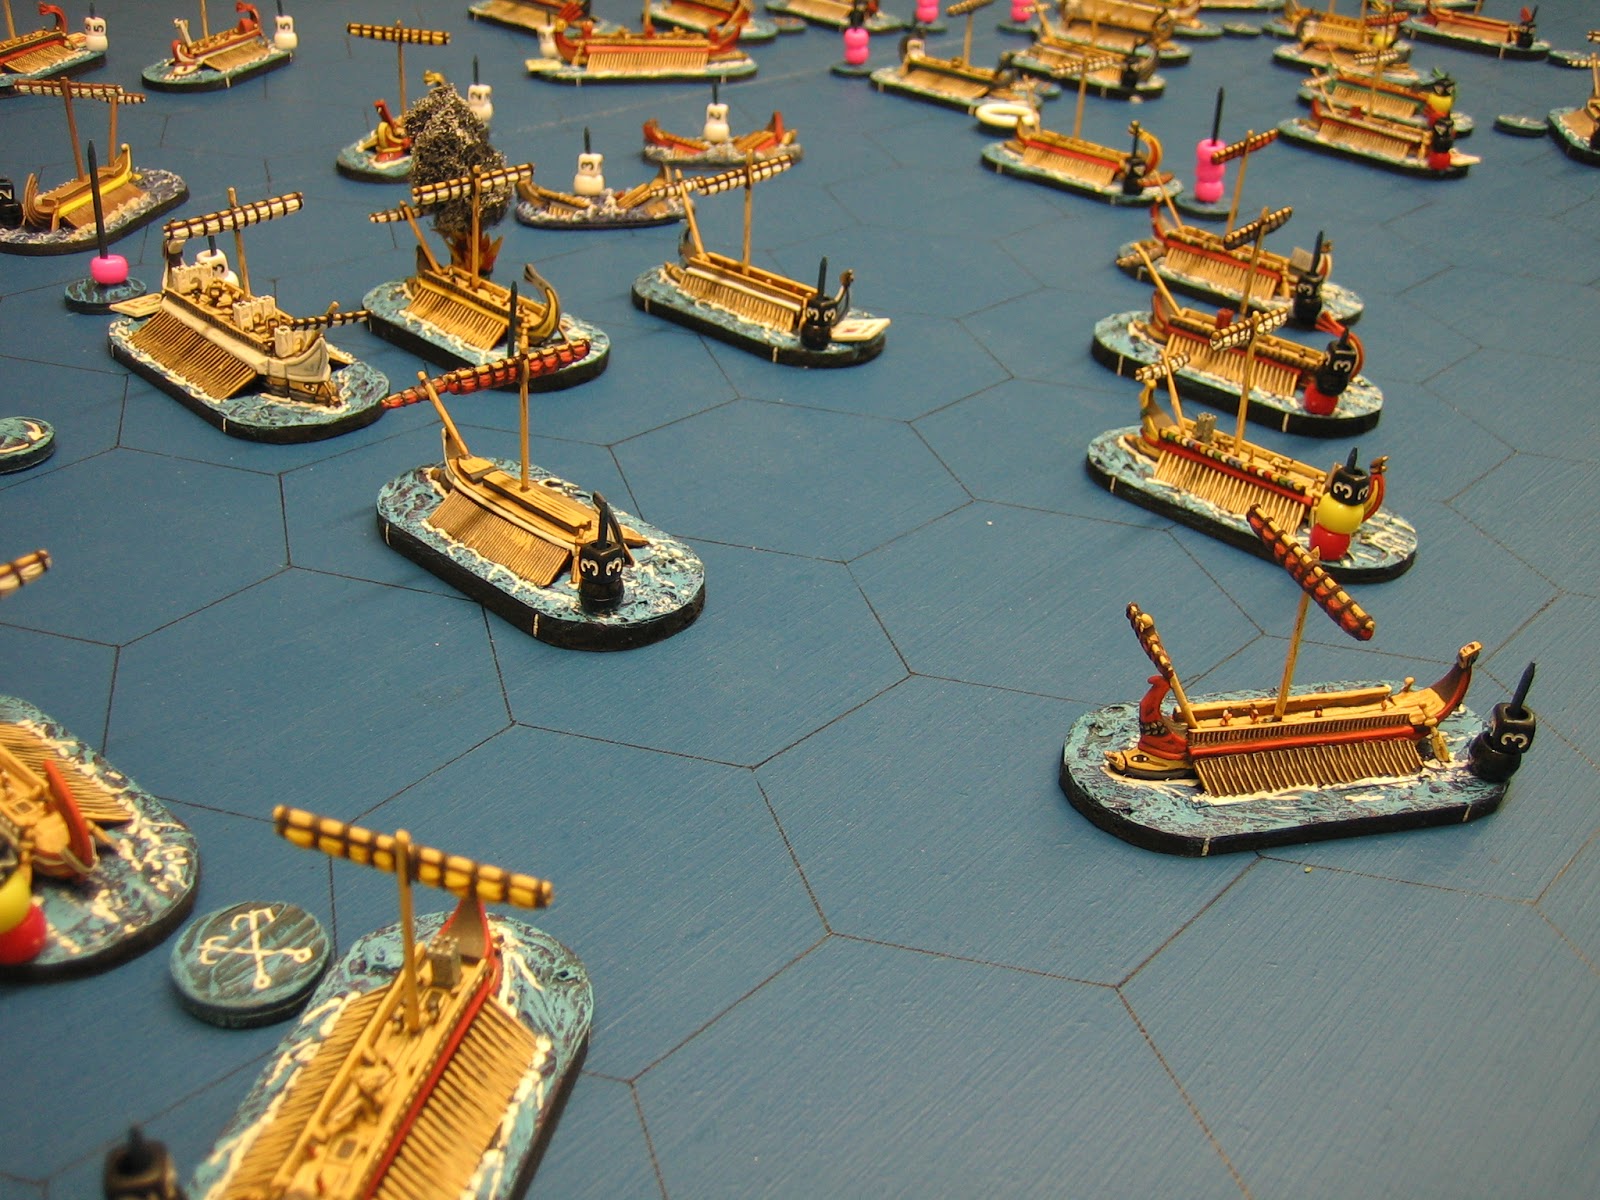
Showing posts with label Naval Wargames. Show all posts

Monday, 20 May 2024

The Haru-pa-kaut

From Wikipedia: Heru-pa-kaut – A mother goddess with a fish on her head.

When at Partizan yesterday, speaking to a few old friends (who I haven't seen for ages) about current projects, I mentioned the Heru-pa-kaut, the latest addition to my 'terrain pieces'. I thought I'd done a post about the Haru-pa-kaut but, looking back I find I haven't. What I did, for reasons I no longer remember, was to simply load up a bunch of photographs and add them to an old previously existing post - so it was probably missed by almost everyone.

Anyway, here she is: The Heru-Pa-Kaut, my first Nile paddle steamer for my adventures in Sudan.


This model basically follows a design I found on quindia studios blogspot. That model was made by extensively converting a plastic kit to make a model for 28mm gaming. When I first found this post my plan was to simply copy what he had done; then, I found out the model price; then, the Yorkshireman in me came out and I decided to go for something scratch built. The linked quindia studios post is definitely worth a visit - if only to show how much better some people are at modelling than I am - his model knocks the socks off mine. Thank you for your inspiring post, Quindia Studios.

Anyway, here is my version, made on the cheap. It's the first boat (outside the odd 1:600 galley) that I've ever made so everything was done on the fly and, outside of the basic design, it was very much an organic process from beginning to end and, until quite far in, I wasn't sure if it would come off.

What's the first thing I chose to make? The boiler. 

Why? Because, I figured, if I can make that I can probably make the rest. Turn around, touch the ground, spit....

The boiler is made from mounting card, thick paper, buttons and a couple of shields, more or less. The funnel is a plastic pen. The body of the boiler is thick paper shaped over internal mounting card ribs/fins. The ribs also serve to form the boilers legs/ and ends. Everything else is just applique work. Buttons were used because they are pre made perfect small discs, as are the shields. The riveted plates were a new discovery on my part: I cut pieces of thin card, placed them on a cork board and poked holes through the card with a thick pin - causing the card to burr on the reverse; then I put PVA glue into the holes to hold the burr in shape before gluing the plates onto the boiler, with burrs (rivets) outward. 

Next, of course was the wheel, shown next to the lower hull without it's sides.

Now, unfortunately I didn't take any photos of the wheel under construction (to be honest, I wasn't sure the first method would work and was concentrating so hard to make it work that it slipped my mind to). However, although a little time consuming, it proved to be a pretty straight forward way to do it. Here's how:

First, using a compass, I drew concentric circles on mounting card to form the hubs and rims for each side of the wheel. I needed four hubs and two rims. There are two hubs for each side of the paddle wheel, an inner and an outer, but only one rim for each. 

Whilst doing that, I did a copy of the hub and rim, as the wheel would look, on a separate piece of paper. This drawing of the wheel would be used as a bed on which the outer wheels could be constructed. I drew a line across the centre of this wheel then, using a compass, divided the wheel into sixteen equal segments - the spoke positions. Now, I did this without thinking because it's generally the method I use to equally divide up a circle but, looking at real paddle wheels, a lot seem to be twelve spoke so perhaps a protractor (and 30 degree segments) might be a better way. Anyway, I did what I did. Also, its on this piece of paper that you need to decide where the water line is and mark it on (you will use this to cut your rim and spokes at the water line), and draw an inner 'hole' on the hub around which your spokes will sit (the spokes cannot go to the very centre of the hub - because they have width, they won't fit).

After very carefully cutting out the mounting board hubs and rims with a very sharp 10A scalpel blade (I used a new blade for each rim), I took a hub and rim, laid them on the 'construction' sheet, which was pinned to a cork board, pinned them in place and cut the rim at the waterline. Then, I PVA glued the spokes into position using tweezers. Then I glued on the inner hub to secure the lot. When dry, I unpinned the now constructed side of the wheel and repeated the process for the other side of the wheel. 

After the wheel sides were done I glued the axle into place - this was made using a length of plastic pen. Now the exact width of the paddle wheel was known I cut out my mounting board paddles and glued them on. Afterwards, I was pleasantly surprised by the wheel's strength, and even more surprised at how good it looked - for a wheel made out of card, by me.

Two notes on the spokes: 
1. Spokes need to be accurately cut to length and need to be long enough to protrude beyond the rim to hold the paddles.
2. I made my spokes out of 'sealed' mounting card - sealing thin strips of card keeps them together and adds strength. To seal a strip of card I rub liberal amounts of PVA up and down it between my fingers. Then I hang the strip dry. The photographed strips are not spokes, these ones are thicker, wider planks that were used later, but the sealing process was the same.

Next up came the engine room (and cabin?). This was a simple mounting card construction with thin card applique: All self explanatory. 

The hull sides (thin card) have also been added to the MDF main deck. The main deck is propped up on supporting platforms of MDF and card (off-cuts) to give it 8mm of height above the waterline. This was the simplest way to get the main deck up to the right height.
Only the wheel arms and drive rods need to be explained. The wheel arms (held to the boat with blue tack at this point) are plastic tea spoon handles. The drive rods from the engine room are Warbases Napoleonic French limber poles (off cuts from another project - never throw stuff away!) 
Another shot of the boiler, now half painted, and the engine room. At this point everything is still separate parts -  nothing is glued in place, I'm still not sure where it all fits.
At this time I decide to do 'etched decking'. I was planning on doing applique planking but this felt an easier, quicker solution: This thing has been time consuming enough already. I also did the water work using thick (old) emulsion paint at this point.
Now I've built the wheel house (as per the engine room), added a rail to the upper deck and a low bulwark to the bow. Things are stuck in place and most of the painting has been done. 

The rail posts are steel tacks drilled and glued into the upper deck and the rail is sealed card. 

The water has been painted and I've added some sponge 'froth' at the paddle end. I used yacht varnish to 'gloss' the water - I hate the stuff because it takes ages to dry, and I mean days!

So the basic boat is done. She looks pretty good to me. 
Most of all, I like my paddle wheel - look how it churns that water. But, the Heru-pa-kaut doesn't have the Sudan look. For that she needs to be armoured.
You cant beat a bit of improvised barricade: Barrels and crates required. Barrels are Renedra plastics; crates and sacks are home grown. I've since added several more sacks because the barricades didn't look right, none of which are pictured I'm afraid.
And of coarse, improvised armour of stout planking and old boiler plates. The planks are sealed card strips - the card strips pictured above, if you remember. The boiler plates are cut up Perry plastic bases with some holes drilled through.
She has a flag, God bless her. The main pole is a tube and the flag is removeable so she can change sides. At some point I'll over paint the flag for better impact and do a Mahdist one at the same time.

I'll leave you with some shots of the almost finished boat. 

I say almost finished because, as I said, I added more sacks (I bought some new Milliput), added better (wire supported) smoke, and added her name plate. Her name plate is positioned above the windows of the engine room - so that the Thomas Cook tourists know they are getting on the right boat. 


Thursday, 20 July 2023

Little ships and Nimitz

EDIT

On Wednesday evening, as scheduled, Peter J. brought his WW2 ships along. I hadn't seen them before and I've got to say, for something that small, they looked good to me. They are 1:6000 vessels by Hallmark. Having been to the Magister Militum site today I found models of this Myoko class heavy cruiser were just £9.50 for a pack of four. 


Here are the two fleets that Peter brought along for the evening's game. Basically a mix of cruisers and destroyers: You can just about buy the lot for £40. A single unit of twelve 28mm cavalry from Front Rank cost more than that: 


Now, I've only ever played one game of WW2 naval before and that was years ago. It was a game put on by Brian Hicks (of Leeds Wargame club 'Hicks Centre' fame) using some of his shallow seas stuff. It was okay but, it was a bit complex and it certainly didn't enthuse me to go out and make WW2 naval a thing - on the contrary, in fact. 

In consequence, to be honest, I wasn't expecting much of the planned game. So it came as a nice surprise when the game proved to be both simple to pick up, exciting and fun: The rules used were Nimitz by Sam Mustafa.

We all decided to get stuck in from the start - which is usually the best way to pick up new rules (none of us had played, only Peter had read). Not knowing what ships could do what (beyond move rate and weapon range) there wasn't much tactical thought in evidence. Indeed, before move three was out pretty much everything had drawn up at close quarters and then all hell broke loose - this move to close range was lucky for the Americans because the Japanese would prove to be much better at long range than them.

This photo was taken at the same time as the other shot but, I thought I'd add a pencil to show the scale of these little beauties. The ship size means a big table isn't needed - I doubt we got out of a 5' x 3' all night. Shortly after this shot the formations dispersed a little, and the game got a little (being generous) more tactical. 

The rules were sorted within a couple of turns and the game ticked over very nicely. The firing mechanism was especially sweet because, unlike that other WW2 naval game I've played, it was very simple. Firing is split into three stages: Ships fire secondary armament (cruisers had some, the destroyers didn't), followed by all firing main armament, followed by torpedoes: Basically gunnery was half a dozen modifiers to give you a difficulty factor (0-5), cross referenced with tubes firing on a to hit table to find the number required to hit, then roll d6 - you hit, or you don't; if you hit roll D6 for damage cross referenced with gun penetration at close or long range, minus target armour for effect (tick off damage boxes); then roll a bonus 2D6 for a critical hit. Each fire takes literally seconds to resolve. The effects of damage were also very easy to follow; general movement rules were even simpler.

There is a bit of book keeping to be done on the individual ship roster / damage / gun factor sheet but, this was so easy it is hardly worth going into, except to say that, as with everything by Sam Mustafa, it's all incredibly clear once you've identified the symbols - he's a very 'visual' guy: Once identified and understood they do stick in the mind. 
The whole game, with virtually no looking at the rules, was carried out using this one sided QRS in about two hours. Pretty good for a first game with four players.

The game was a draw with both sides getting quite badly mauled. The Japanese cruisers were better off than the American ones at the end but were much worse off for destroyers.

Will I be going out to buy WW2 naval. Well no, but only because Peter has already done so. Otherwise, I'd be sorely tempted. 

Word to the wise about Sam Mustafa's rules: If you think you will get round to this as a period one day, and you like hard copy versions of rules, buy your copy of Nimitz now! They will sell out pretty quickly (they always do) and there never seems to be a re-print so second copies go for twice the price!

RECOMENDED!

We liked it so much we are playing it again next week.


Sunday, 8 July 2018

An unusual item FOR SALE.


The mould for an ancient transport / merchant ship.

THIS ITEM HAS BEEN SOLD
NO LONGER AVAILABLE

Over the years I have collected a few 1:600 Xyston galleys for playing ancient naval games. In fact, I've collected this lot. 


However, like a lot of gamers I baulk at spending money on the things that don't actually fight. In this case it was transport / merchant ships which, although very useful for scenarios, and essential for re-fighting some historical battles, are quite pricey at £7.00 each. But, you do need them eventually, and you can see mine in this shot (top right). 


Only two of my transports are Xyston models, which Dan F. of Wargames Illustrated gave to me (with a small fleet of painted triremes) for hosting an ancient naval photo shoot for the magazine. The rest are home made, like the one pictured above. 


I made a master and a mould some time ago, and then I cast ten hulls (three still to paint). I did a post on it at the time. (If you need a 'how to').

Having made the transports I need, I want to pass on the mould. It comes complete with the master, so there can be no doubt that this is a kosher model without copyright issues. It doesn't come with sails but anyone who collects Xyston ships will have an abundance of spare sails because you get two sets (furled and unfurled) with every model you buy.

So, how much do I want for this unusual item? 

I'm asking just £25 including postage (in U.K.).  Payment accepted by BACS or Pay Pal.

You can cast a dozen or so for yourself by melting down some scrap metal (or plumbers solder) then sell the mould on to someone else. It should prove to be a zero sum purchase in the long run.

If you are interested, email me at: olicanaps@gmail.com

Wednesday, 25 January 2017

Actium again - a slightly new set up, played solo, full report.

So, here we go again, this time with tweaked rules (see last post) and slightly different set up.

The new set up first. 


When playing the last scenario a couple of things became apparent fairly early on. Firstly, having the two lines of Octavian's galleys in separate commands threw up more command and control issues than were practical. Secondly, Antony's flagship was hard to position correctly using only three front line squadrons and the command structure was confused. 

Consequently, I have structured Octavian's fleet into three divisions each of two squadrons side by side; Agrippa is senior admiral, if he is killed Octavian will take over.  

I have reallocated the galleys in Antony's fleet to form five divisions with a total of six squadrons: The northerly division is larger than the other divisions (8 galleys not 5) split into two squadrons of four galleys, allowing Antony to take his rightful position in the line. Publicola now commands a squadron from the start, as does Acco (the transports); Antony is senior admiral, if he is killed Cleopatra will take over. 

If Antony and / or Cleopatra decide to run for it they may transfer command of their squadron, in whole or part, to the closest other squadron commander - this can be done, automatically, when required.

Because of various rule and QRS table changes, victory points required have been changed:

VICTORY CONDITIONS
  • If Antony's fleet has 75 VPs and double that of the enemy, he wins. 
  • If Octavian has 75 VPs and double that of the enemy, he wins. 
In addition to the usual VP awards:
  • If Antony and Cleopatra have escaped death or capture at the end of the battle they add 15 VP to their total (but if Octavian still has more VPs he still wins).
  • Whoever controls the treasure ship at the end of the battle adds 10 VPs.
I have, on reflection, chosen to make all of Octavian's galleys skilled.

I have marked all of Octavian's qinquiremes with a red bead, all have towers. 

I have doubled up on the 'black fleet ID' beads for easier recognition.
All of Antony's galleys remain as trained. I have doubled up on the 'white fleet ID' beads for easier recognition. All of Antony's quinquiremes are modelled carrying a corvus but this should be ignored, they all have towers.
Turn 1.

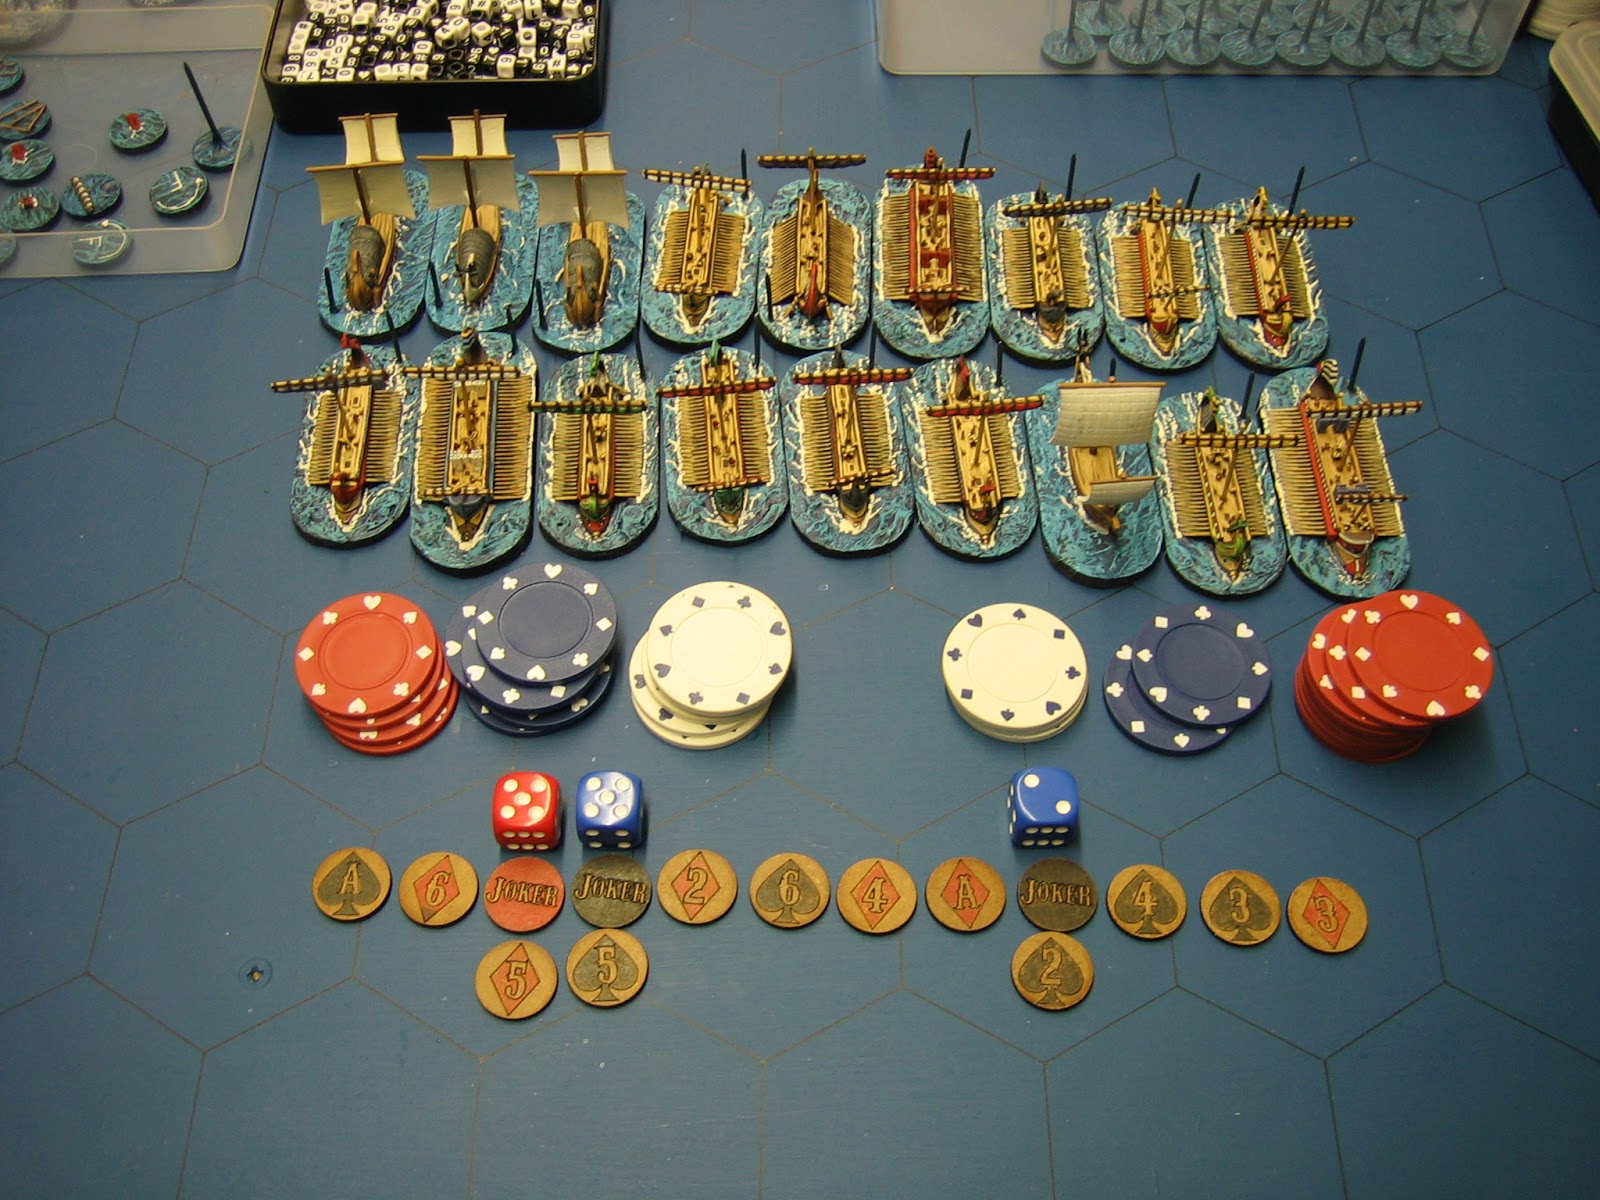
I described how we randomly activate the squadrons by drawing their squadron counter from a bag in a previous post. This photo and description of the activation sequence in turn 1 might explain things better. 

Each squadron activates as its counter is drawn blind from the bag. Diamonds are white, spades are black. 

Note: Antony gets one joker because he has 1 point of initiative. Agrippa gets 2 jokers because he has 2 points of initiative (he's a better admiral than Antony).

  • B6 (Octavian) is the first out of the bag so moves. 
  • It is followed by B4 (Aruntius) who moves..... 
  • The next counter out of the bag is B2 (Agrippa) but black decides to pass (counter B2 is put to one side)....
  • W4 (Publicola) is drawn, so moves next....
  • Next W3 is drawn, this is Antony's squadron and (being the senior admiral) he chooses to double activate with W2 - he rolls for success and succeeds, so both squadrons move as one squadron.... 
  • The next squadron drawn is B1 (Drasus)..... 
  • This is followed by a joker. The joker allows a chosen squadron (not previously activated this turn) to activate - Octavian chooses squadron B2 (Agrippa), which actually passed earlier in the turn.... 
  • A joker for Antony's fleet allows him to choose W5 (Cleopatra). 
  • Next W1 (Sosius) is activated....
  • A joker then allows B3 (Agricola).... 
  • Followed by B5 (Lurius).... 
  • Followed by finally by W6 (Acco). 
Note, this is not fake news, this is actually as it happened. I will report on turns pretty much as they happen, one by one, so that I can remember things. I'll also pass comment as I go on the rule changes, and rules in general.


After everything had moved this was the situation. 

After seeing proceedings in the previous battle, I decided that Antony's best chance was to attack Octavian's centre, so in turn one, Antony closed up and doubled up a little towards the centre. 

Playing solo you have to have a plan and for Antony this is basically it: His fleet will close on the centre in a tight mass to reduce manoeuvre in that area and get those boarding parties away in the pell mell that results.

Octavian's plan is pretty much the same as before. A periplus attack - an attack launched against the flanks of Antony's fleet - something a numerical superiority will usually allow.


Turn 2

This is how the activations proceeded in turn two, but I'll lead you through the significant events as they happened in some detail. The poker chips are VPs won during the turn, but we'll get to those in due time.

The squadrons activated as they were drawn and manoeuvred. Significantly, it W1 (Sosius) moving towards the centre, doubling his line, that allowed an opening to Lurius, whose counter (B5), was next out of the bag. 
By concentrating towards the centre, Sosius has exposed is flank. A quadrireme from Lurius' squadron (B5) rushes in, successfully raking (stripping oars from) a  quinquireme of Sosius' squadron (W1). The crew of the quadrireme are fatigued by their exertions.
This rake is followed by a ram - a near perfect ram - from a quinquireme and the happless vessel is now sunk. More than the flank of one vessel is exposed and a second (B5) quinquireme tries to ram one of Sosius' hepteres but without success - the ram is badly timed and the quinquireme is marked fatigued and at half speed for collision.

First blood to Octavian. 
Publicola (W4) is next to activate and a similar closing to the centre draws the attention of Drasus (B1) when his counter comes up. 

The results are not so encouraging here - the ram attempt fails with a collision and fatigue.

However, as can be seen, a periplus is definitely in progress.
Antony (W3) is next to activate and he is just close enough to trundle his galleys in. The results are good. One of Agicola's quadriremes comes under terrible missilery and suffers 2 depletions (to marines) and is set ablaze. 

What comes next is even worse. Agricola's flag ship is grappled, boarded and taken in short order. Agricola is put to the sword. Yellow beads indicate captured with prize crew; Antony adds another ship to his squadron by placing a W3 bead on it.
The last real action comes with a follow up advance by the galleys of Insteius' (W2) squadron. His big ships are not in reach of the enemy and hang back, but a quniquireme manages to grapple and board a quadrireme in Aruntius' (B4) squadron. The fighting is fierce, both sides take a depletion (pink beads) and the boarding attempt is repelled (white hoop on grapple marker - the hooks on the grapple marker indicate the direction of the last attack.

The position at the end of turn 2. The positions are already somewhat confused. This is typical of galley battles using individual ship models.

In the foreground you can see Octavian's squadron with clear sea before it, racing around the open flank. 

In the rear of Antony's fleet, Acco's transports make their clumsy way towards the south west. They are not completely useless, they are crammed with legionaries.


The northern sector in greater detail. The wind indicator has been placed to aid 'pictorial' navigation between this photo and the one below.

The open northern flank can be clearly seen. Drasus is already turning his galleys towards the centre to face Antony's fleet which, concentrating on Octavian's centre, is now several galleys deep in places.

Only one fire occurred in the turn but, as it is with sods law, it went out of control and it's master ordered "Abandon Ship" in the status resolution phase - all squadron beads have been removed.


This shot clearly shows Sosius trying to defend the flank of Antony's attack. He is outnumbered three to one. 

Antony's grand tactic looks like a real gamble. And I bet, the next turn is going to be very bloody.

At the end of turn 2 Antony has 10 VP to Octavian's 5 VP.


Turn 3. 

Sequence of activation. 

B1 was drawn early and passed until the last joker was drawn. Antony double activated W3 & W4.


Sosius (WI) actvated and cruised his ships into positions where they might board. Unbelievably he succeeded with all but one ship and that one managed to set ablaze Lirius' flagship with missilery.

This is the first time I've seen so many successful grapples - four in one  activation.
Two boarding actions succeeded. Two were repelled with loss to both sides.
Agricola's squadron (B3) was next to activate. His men, seeing his loss in the previous turn were out for vengeance. 

Two rams and two sinkings were quickly followed by the recapture of Agricola's flagship. 
Aruntius' squadron (B4) now maneouvred to pass through a channel that was open in the Antonian line. His shps becan to pass through, raking vessels to either side as they went.
Lurius (B5) maneouvres his squadron in an attempt to bottle up Sosius. 

A boarding attempt causes loss to both sides before being repelled.
Cleopatra (W5) turns her squadron to fend off the periplus from the north, doubling up to stop a possible deikplus.
Octavian (B6) continues his unopposed cruise around the southern flank of Antony's fleet.
Insteius (W2) slowly brings his squadrons powerful ships to bare with its missilery. Insteius is confounded, in some respects, by his own side's tactical plan. The lack of space is hampering him very much. 
Acco (W6) brings his transports a little nearer the action.
Antony (W3) again double activates: Publicola will move at the same time. 

Antony's galleys move in, grappling and boarding wherever they can, even attempting to ram at slow speed where possible. One of agrippa's ships is taken.
Publicola's (W4) ships are not in such a good position but they manage to take a quadrireme of Drasus' squadron. 

Agrippa (B2) now counter attacks. Agrppa's galleyy leads the fight back. Even though suffering depletions fom missilery his ship retakes a lost galley. Other ships of his squadron cripple the enemy with raking attacks. 

A cataphracted trireme bursts through the enemy line and, though it fails to rake Antony's flagship as it passes, it hits Cleopatra amidships - there are plenty of aphorisms I could throw in here but, I'll refrain - her heptereme is sunk (Top-mid picture, the green stern galley is the rammer, the upturned wreck is Cleopatra's vessel).

Finally, after passing early in the turn, Drasus (B1) is activated with blacks last joker. 

The attack is limited but successful. Several rakings cripple and disable some of Publicola's galleys and a vessel is recaptured - though being disabled (raked both sides) it will be of little use.

The situation at the end of turn 3.

As can be seen, several ships have taken 'marine depletions' due to missilery. Another ship has been lost to fire. Several sinking wrecks litter the battlefield.

Cleopatra, not wishing to go down, shifted her delightful hacienda to another ship.

VP for Octavian 26, for Antony 21.

The wind has picked up and will now provide benefit to ships under sail. To get this, Antony must roll less than the current turn number, in this case turn 3, on 1D6 - he rolled a 2. It is blowing, predictably, in a favourable direction (historically, it might be why he came out in the first place, he might have been expecting this as the 'normal' weather pattern).


Again two more situation shots of the combat area. 

The wind direction indicator in both this shot and the one below has been placed to aid 'pictorial' navigation.

I have the feeling that ships are going to change hands a lot in a game of War Galley, with sides fighting to and fro over a 'prize' in between. I like this - it has the sound of a land war fought at sea, with the prize being a kind of no man's land between.


There is plenty going on now. 

As for the rule changes: At this point, I feel quite happy with the missilery and there is certainly more to be said for ramming chances. I'm not sure if it's my dice rolling, or the fact I removed the -1 DRM for grappling a ship moving in the opposite direction, but there seem to be far more grappling and boarding action than in previous games. I doubt it has anything to do with Graham's (who played Antony in the last game) mind set - as far as I can see, getting to grips is in his nature.

One rule that doesn't seem quite right is the general 'raking' rule. The rules state that you can rake one ship then rake another. It is possible as far as I can see, under the rules, moving at maximum speed to rake four ships in succession, then ram a fifth at maximum speed at the end! I can't see how that would be possible because of the loss of momentum as the galley crashes through all of those oars, especially as one side of the raking galley can't be rowing at the time (if they were it would rake itself). There seems to be no rule governing speed reduction for raking, so I'm going to make one. If a galley successfully rakes, it can rake or ram one more target that turn but if it does it is marked with a half speed marker as per collision regardless of success. There was a moment in turn 3 above, where a ship raked three vessels, passed its fatigue check and went merrily on its way. I changed the result by re-rolling the dice until the results suited me - not good in a solo game - so immediate rule change required.


Turn 4.

The activation sequence. This turn proceeded in a very straight forward manner. Only the jokers disturbed the ordinary flow of the draw: These work extremely well and anyone choosing to go this alternate route for GMT War Galley squadron activation (fixed squadrons, random activation) should seriously think of including them as an alternative way of having an admiral's initiative bonus represented in the game - they work just dandy.


Agricola's squadron (B3) has no where to go because of the number of wrecks in front of him. He uses the lull in the fighting to regroup as best he can. 
Octavian's squadron (B6) rounds the southern flank of Antony's fleet in majestic style.

Looking north, confusion reigns. I can't emphasise enough, the importance of a grid in games like this. Without a grid, this is where galley games (with lots of galleys) become very difficult to umpire, with acceptable gaps for passage, etc., being very difficult to rule upon, seemingly everywhere, all of the time.
Sosius' squadron (W1) carries everything before it. It started the game with five galleys. It lost one sunk on turn two and it will lose another this turn but, after a spell of boarding everything in sight, including its prizes, it will be, at the end of the turn, seven strong.
Cleopatra's squadron (W5) begins to engage with unfortunate results for at least two enemy galleys, including the one that sank Cleopatra's flagship: Both taken by boarding.
Drasus' squadron (B1) is spread all over the place. Drasus himself has become isolated from much of his squadron which lies far to the north west of his present location in the rear of Antony's fleet. His squadron is suffering the consequences of loss of command and control (he is out of his 4 hex command radius, which cannot be traced through enemy galleys!). 
Acco's transports shepherd themselves south west.
 Antony's squadron (W3) activates as soon as the joker comes up. His ship retakes a lost prize whilst setting a liburnian of Agricola's squadron ablaze.

I do like my big white decares model (it's a converted heptereme, made longer, wider and taller with balsa wood inserts) - the white makes it look huge.
 Agrippa (B2) counters and retakes the prize. Agrippa's marines are severely depleted but that prize is now grappled by two ships of each side.

I'm not sure what to do about this situation in game terms. I think, in reality, that the prize would be reinforced rather than left with only a prize crew and taken again and again. I think I might allow the transfer of marines next turn; that will make it a big gamble and allow fighting to flow from ship to ship - like "Nelson's patent bridge for boarding first rates", I think that's the quote.
Aruntius' squadron (B4) finds a little sea room and uses it to good effect. He retakes a lost ship and sinks another. Everything becomes congested again.
Lurius squadron (B5) is now on the fringes of the action. He extricates his ships and tries to regroup.
Somewhere along the line I forgot to take a photo of Publicola's squadron (W4) activation. So we will skip to Insteius (W2). Insteius is barred from the enemy by the confused mass of ships ahead of him and steers the powerful ships he has south, hoping to find a gap there.


 The general position at the end of turn two.
To the north, the action is going one way then the other. There is very little sea room and the number of wrecks add to the chaos.

This shot clearly shows the flag ships of Antony and Agrippa, along with a supporting galley each, fighting over an Octavian quinquireme. At the moment it is in Agrippa's hands.
To the south, Antony's ships are finding it difficult to make progress due to the number of prizes and wrecks between them and what remains of the Octavian centre. 

Insteius' squadron, in the middle of the picture (big red flagship), can be clearly seen heading to the south to find some open sea. I have a funny feeling they will be steering towards Octavian's galleys sweeping around the rear. There's a fair bit of this battle left to fight.

At the end of the turn, Octavian has 35 VP, Antony has 47. 


Turn 5. The activation sequence. Notice how much the VPs will increase this turn. 
Drasus (B1) is the first to activate. His command is still all over the place. His attacks, such as there are, are all unsuccessful.
Agricola is separated from the enemy by a line of obsatcles - sunk ships and burning wrecks - so pulls back to reform.
Insteius's squadron (W2) is a mixture of big ships and crippled ships. The big ships turn towards Octavian's periplus. The others, where grappled, continue with their boarding attempts and take two prizes.

Things are turning for Antony, and I'm just beginning to see a chance for him to win.
Agrippa (B2) abandons his prize. His lack of marines makes this imperative.
Sure enough, Agrippa's other ships are taken in short order when Antony (W3) activates. Things are looking good for Antony's fleet.
Cleopatra's squadron (W5) starts to form up to allow the passage of her new flagship (the red model with corvus, entering bottom left). I've decided that Cleopatra and Antony will make a run for it but they will keep command of their squadrons for now. 
Aruntius (B4) begins to withdraw from the action against Sosius. A recatured prize (foreground) has to sail some distance from the rest of the squadron.
Acco's transports (W6) run the gauntlet. One of them is the treasure ship, but even I don't know which.
Sosius (W1) spends the turn regrouping his enlarged squadron.
Publicola (W4) attacks. He takes a liburnian and sets fire to a cataphracted trireme.
Lurius regroups the remains of his squadron (B5) in a good position to attack Sosius' squadron (W1).
Octavian's squadron (B6) attacks Acco's transports. He rams and sinks three of them. I diced to determine if the treasure was aboard - first one 1in 4 chance, second 1 in 3, third 50 / 50. Nope, the treasure is in the last one and that can't move because it is surrounded (and incidentally protected) by wrecks.
The situation at the end of turn 5.

At this point Octavian has 48 VPs (+13 this turn), Antony has 75 (+28 this turn). Antony has a real chance of winning. One good turn, if he and Cleopatra can get away, and he could just about do it.
The northern sector. Not much sea room.
The southern sector. Things are opening up.


Turn 6.

The activation sequence. Note how jokers are marked until the 'out of position' counters are drawn from the bag. This is a good aid memoir to ensure things don't move twice, especially if their is a mid turn break for dinner, etc.

 Drasus (B1) is desperately trying to get back to his squadron, but his captains have things in hand for the moment and a quinquireme of Publicloa's is sunk.
The treasure ship struggles to free itself from the wreckage that surrounds it. Acco fails to transfer from a sinking wreck.
Cleopatra's squadron (W5) moves in for the kill and virtually clears the north eastern sector of enemy ships. Cleopatra ships her flag yet again - she is almost sure to get away now.
Lurius (B5), have regrouped the little that remained of his squadron pounces onto the isolated galleys of Sosius' squadron (W1). They recapture a liburnian (represented by trimiolae for this game) and sink a heptereme.
Istensius (W2) turns south to face Octavian (B6), taking a quadrireme as they go. In the centre (not pictured) another galley is taken.
Most of Octavian's squadron is fatigued. It spend the turn regrouping.
Publicola (W4) takes revenge on Drasus' ships by taking the one that rammed earlier in the turn.
Sosius (W1) reorganises in the centre. Two liburnians are also taken after a brief struggle. Octavian's fleet is quickly running out of ships.
Aruntius (B4) continues to reorganise.
Agricola's squadron (B3) having reorganised, attacks with vigour. Two enemy vessels are sunk by ramming.
Antony's flagship (W3) makes a break for it/ Agrippa's flagship is set ablaze. Agrippa shifts his flag to his last remaining ship (a cataphracted trireme) that stands close by.
The situation at the end of turn 6.

Eighteen vessels have now been sunk. Including prizes, Antony's fleet (having started with 28 ships) is now 32 ships strong. Octavians fleet (having started with 45 ships) is 27 strong.

Antony has 103 VP; Octavian has 60 VP. Antony has a chance to win at the end of the next turn. Octavian will need to fight hard to prevent Antony winning. It might depend on the treasure ship.

The northern sector. North of the east west line defined by the wind indicator, Octavian can muster just four ships.
The southern sector. This, I feel is where the battle will be decided - a draw or Antonian victory.
Turn 7.

The activation sequence. 

Cleopatra's squadron (W5) activates first. Drasus' flagship is sunk. There is nothing to stop Cleopatra's escape now. 
Octavian's squadron (B6) is next to activate, it tries hard to reduce the VP deficit but to no avail.
Publicola's squadron (W4) captures the last galley in Drasus' squadron.
Agrippa (B2) tries to sink Antony's flagship but it is far to strongly built for anything other than a lucky hit to have an effect.
 Antony's squadron moves to shield Antony's flagship for any possible interference. 
Only one ship of Agricola's squadron (B3) can reach Antony's flagship. The attempt to ram it fails.
The treasure ship (W6) strikes a blow for the east. It captures it's assailant with it's hoard of legionaries.
Sosius' squadron (W1), by far the most successful in the battle, again wreaks havoc by sinking one ship and re-capturing a prize.
The remains of of Aruntius' squadron (B4) try to sink Sosius' flagship. They fail but manage to capture one of his quinquiremes. It is too little too late.
Insteius has the last move of the game, capturing a ship from Octavian's squadron. 

At this point Octavian's fleet draws a joker counter. Looking at the situation it is very apparent that he can do nothing more to salvage even a draw. Octavian concedes defeat.

The final VP count is:

Octavian: 60 VPAntony & Cleopatra: 123 VP plus 15 VP for both Antony and Cleopatra being safe, and 10 VP for control of the treasure ship - total 148 VP.

In conclusion, I'm happy with the amendments I've made to the rules. 


  • Missilery now has a effect, with the bigger vessels being able to 'clear the decks' of smaller ships in a couple of turns, which makes sense to me. Certainly ships lost to fire were certainly far fewer - four in total not four a turn! - whilst 'marine depletions' were still numbered in their tens, I estimate 30+ in the battle.
  • The ramming factors are now about right. Another play test will tell.  Most of the ships sunk in this battle were sunk by Octavian's fleet. In total, 20 out of the 73 vessels engaged were sunk. 
  • Any more than 20 ships were taken in boarding actions, with several ships changing hands two or three times. This was heartening in a battle between warring Romans. Changing the grappling rule slightly (the DRM for 'opposite directions' was changed to 'target moving at maximum') made a huge difference to the amount of successful grapples. As grappling is a pre-requisite for boarding, so this change has proved very successful, IMHO.
I now think the balance of action effects between boarding, ramming raking and missilery is now about right. Further play tests might make very slight tweaks but, I think the rules now give the kind game I was looking for. Are they historically accurate? Who knows? At the end of the day I was only looking for a good game.