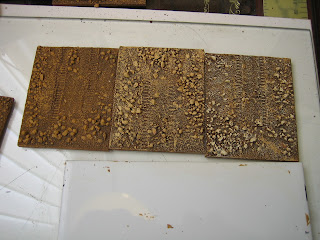
Thursday, 8 August 2013
The Battle of Sidi Rezegh (day 2) in full swing.
Here are some shots of the battle at the end of last night's play. I can't believe that the table, for Command Decision, is only 6 x 6; even on a 10 x 6 it looks quite crowded.
British and German armour engages west of the aerodrome. The Germans are tearing into the British tanks.
A regiment of A15 Crusaders from 22nd Armoured Brigade rushes through a gun line of 2pdr AT guns still on their portees.
5th Panzer Regiment, fans out across the desert, supported by an 88 which has quickly been brought into action. The regiment is advancing on a front of 1500m.
On the northern (left) flank of 5th Panzer Regiment, more close support artillery comes into the fray.
Around the aerodrome the British are forming a second defensive area - they have lost 'B' and the first German infantry are, in limited numbers, above the second escarpment.
British 25pdrs of 60th and 4th field regiments cluster around the aerodrome.
Below the second escarpment the Germans, of Group Knabe, are renewing their attack after initially being repulsed.
On point 'A' a company of 1st KRRC and command and control elements are the last defenders holding the escarpment.
The Germans move on 'B' (central) with close artillery support. It is the German artillery, including the 210cm Morser 18s firing from Belhamed, that have done the killing - the German infantry is advancing on empty positions.
Last night was one of the only times I have ever felt sorry for Peter. He only won 10% of the initiative, and Graham was winning it in big numbers including a runs of over 40 initiative points. Next week will see the conclusion because both sides are now quite low on morale chips. 'B' has fallen to the Germans. 'A' is destined to fall due to the artillery concentrations that are bound to fall on it. It will come down to who holds 'C'. My money, is on a hard fought draw.
Tuesday, 6 August 2013
Briefings for "Broken Spearhead"
The following briefings are for the previous post on my version the Command Decision scenario in Benghazi Handicap. It differs somewhat from the original. The primary source for the briefings was Sidi Rezeg Battles 1941 by Agar Hamilton and Turner.
BTW: This post is picture light, and in a horrible font, because yet again my cursor function is not working properly on this blog!
GERMAN BRIEFING FOR:
Major General von Ravenstein, officer commanding 21st Panzer Division, noon, 22nd November 1941
BTW: This post is picture light, and in a horrible font, because yet again my cursor function is not working properly on this blog!
GENERAL BRIEFING FOR BOTH PLAYERS
Yesterday saw the hardest fighting (of the British offensive to relieve Tobruk) so far. The fighting was chaotic as formations of both sides clashed to their front and rear. Between Tobruk and Gabr Saleh, British 70th Division was trying to batter its way out of Tobruk (objective Ed Duda) in the face of ‘Bologna’ and 90th Light, the latter also fighting off probing attacks by 7th Armoured Brigade and 7th Support Group to its rear from Sidi Rezegh. In their turn, 7th Armoured Brigade and Support Group were facing both ways in an attempt to fend off a concerted attack by 15th and 21st Panzer Divisions coming out of the desert from the east. The Panzer divisions were unable to concentrate fully because they were simultaneously holding off 4th and 22nd Armoured Brigades, which had chased them from Gabr Saleh.
At the end of the day there was no doubt that DAK had come out on top, especially in terms of material. However, the British had shown a good deal of tenacity and, despite very heavy losses, maintained the very important strategic position at Sidi Rezegh.
BRITISH BRIEFING FOR:
Brigadier Campbell (7th Support Group), officer commanding Sidi Rezegh, noon, 22nd November 1941
At Sidi Rezegh, plans for linking up with 70th Division at Ed Duda have been suspended until 22nd Armoured Brigade and 5th South African Brigade reinforce the position from the south. Support Group and 7th Armoured Brigade have spent the morning reorganizing and consolidating their position on the commanding ridge (second escarpment) overlooking Trig Capuzzo and around the aerodrome. Both 7th Armoured Brigade and Support Group are not in the best shape. Yesterday’s losses cannot be made good. Brigadier Davy (7th Armoured Brigade), has reported he has 28 runners, several of which have been hit more than once - he started the operation with 168 tanks – and morale has been adversely affected. It is a comforting thought that the Germans withdrew their armour, northward down the escarpment and out of the battle area, this morning. The arrival of 22nd Armoured Brigade is not expected for some time; 5th South African Brigade has been ordered to hold the third escarpment.
Major General Gott (7th Armoured Division) has personally given orders that Sidi Rezegh must be held at all cost. It will be the jump off point for units battering their way to relieve Tobruk. Following the arrival of the reinforcements a northward advance on Ed Duda can be resumed.
BRITISH GAME NOTES AND VICTORY CONDITIONS
4th Field Regiment RHA begins the game off table. One or both batteries can be ordered forward to the battle area at any time. Once ordered forward the guns cannot be stopped and cannot shoot whilst in transit. The batteries will be in transit for two Artillery Action cards. The guns will arrive (making a normal move) from the south, at the aerodrome, on the appearance of a third Artillery Action card.
22nd Armoured Brigade will arrive as reinforcements on the appearance of the Stratagem 1 card from the start of turn 4. Its regiments will arrive (making a normal move) on the card’s appearance, along the British base line east of the third escarpment. There must be a 12” gap between regiments. Note: This deployment is the real reason for the inclusion of the third escarpment in the battle area.
To achieve a decisive victory: Hold the majority of high ground at the second escarpment (including A and one B) and the aerodrome buildings at C.
To achieve a crushing victory: Providing that the above requirement is met, at least four companies (any strength) of tanks or infantry must cross the German base line west of point D – they move onto Ed Duda.
At the end of the day there was no doubt that DAK had come out on top. However, the British had shown a good deal of tenacity and, despite heavy losses, maintained the important position at Sidi Rezegh.
This morning, following receipt of orders from DAK, 15th and 21st Panzer Divisions moved north to take up defensive positions below the second escarpment. 21st Panzer Division was ordered to concentrate at Belhamed ridge and be ready to counter-attack the expected resumption of the British advance on Tobruk.
General Rommel, in person, has recently arrived at Division Headquarters. He has personally given you new orders. You must undertake a two pronged attack to secure the second escarpment. He has ordered Group Knabe to make a frontal attack from the north supported by the heavy artillery of Group Bőttcher (408th Heavy Artillery). Meanwhile, Group Stephan will take a circuitous route via the by-pass road and attack the aerodrome from the west.
GAME NOTES AND VICTORY CONDITIONS
Group Stephan will arrive as reinforcements on the appearance of the Stratagem 2 card from the start of turn 3. Its composite units will arrive (making a double move) on the card’s appearance, directly west [flank baseline] of the aerodrome, with at least one battalion of 5th Panzer Regiment leading.
To achieve a decisive victory: 21st Panzer Division must secure the majority of high ground at the second escarpment (including A and one B) and the aerodrome buildings at C.
To achieve a crushing victory: Providing that the above requirement is met, 21st Panzer Division must effectively eliminate all British armour.
Note: In time, the British are expected to continue their attacks toward Ed Duda. The baseline west of point D is the exit point for such attacks.
Saturday, 27 July 2013
Sidi Rezeg 1941 Scenario
Yesterday, I looked through Benghazi Handicap by Frank Chadwick. This is a Command Decision publication. I have used this well researched book as the basis for many of my army lists. It is absolutely stuffed with that sort of thing, including lots of invaluable stuff on the Italian forces which I have been unable to source, in English, from elsewhere. It does have a high cover price but I can't recommend it too highly. I now feel guilty for buying two copies when I saw it available for a tenth of its usual price on the web - the following day the company I bought them from adjusted the price by putting the decimal point in the right place!
Until yesterday I hadn't looked closely at the scenarios at the back of the book because I usually enjoy designing my own. But when I read the tenth one, entitled "Broken Spearhead - The Second Day at Sidi Rezegh" I suddenly realised that it was exactly what I was looking for for a combined deployment of 7th Armoured and 22nd Armoured brigades. Yes, I know, I said I couldn't field both together, but I was referring to the other scenario "Shiny Spearhead - The First Day at Sidi Rezegh". [grin]
I will use the map given in Benghazi Handicap (left) as the basis for my set up. It largely conforms to the more detailed map of the battle area in Sidi Rezeg Battles 1941 by Agar-Hamilton and Turner (below). This more detailed map clearly shows the strategic value of this strip of desert - it provides a way of getting a large force, travelling in formation, from the first escarpment to the summit of the third escarpment (it slopes upwards, west to east).
This (left) is my battlefield map. The escarpment is almost a copy of the one given in Benghazi Handicap, though mine is longer (bigger table - 10 x 6).
I have built the high ground into the line of the escarpment because it was described, when looking at it from the third escarpment, as forming the far side of a broad shallow valley. I have included the wadis running from the escarpment, which form the reentrants that will allow easy passage up it, but I have made them somewhat shorter above the second escarpment than they appear in the original scenario.
Although I have no idea where the escarpment's wadis would go, I have added a fictional wadi complex at the foot of the escarpment. This is an easy way to mark an east to west 'staggered' start line (roughly following the line of the escarpment at 800 - 1000m distance) for the Germans of Group Knabe to form up on.
I have removed almost all of the other high ground, especially that to the north of the escarpment - Belhamed is off table. Though geographically incorrect, I have introduced part of the third escarpment to give an indication that this piece of ground is a valley.
And here is how it all looks on my table.
ORDER OF BATTLE
I have largely, but not wholly, gone with Benghazi Handicap for the OOB. There are some differences in the force compositions to cater for my own tastes and my own choice of rules. As per usual, I have condensed them into organisational diagrams.
BRITISH DEPLOYMENT NOTES
60th Field Regiment RA: Must deploy within the red boxed area on the scenario map. One battery is dedicated to 1st Battalion, KRRC. One battery is a divisional asset.
7th Armoured Brigade Composite Regiment: must deploy within the red boxed area on the scenario map.
3rd (anti-tank) Regiment RHA: At least one anti-tank battery of 3rd RHA must set up within the red boxed area on the scenario map. Other batteries can deploy anywhere south of the second escarpment and north of the third escarpment.
1st Battalion King's Royal Rifle Corps, A Coy. 2nd Rifle Brigade (attached): Can deploy anywhere south of the second escarpment and north of the third escarpment.
4th Field Regt. RHA: Deployed nearby to the south, off table. One battery is dedicated to Composite Regiment, 7th Armoured Brigade. One battery is a brigade asset for 7th Armoured Brigade.
22nd Armoured Brigade: Deployed to the south, above the third escarpment, off table.
GERMAN DEPLOYMENT NOTES
Group Knabe: Must deploy within the blue boxed area on the deployment map. All lorried Panzergrenadier companies start dismounted. Any or all artillery can be deployed unlimbered.
2nd Battalion, 155th Artillery Regiment: Two batteries are deployed to the north, off table. One battery is dedicated to 2nd Battalion, 104th Schuetzen Regiment. One Battery is dedicated to 8th Machine Gun Battalion. One Battery is attached to Group Stephan. It can be dedicated to one of the Panzer battalions of 5th Panzer Regiment or held as a brigade asset for Group Stephan. It can be kept off table or can be used for direct support.
408th Heavy Artillery Battalion: Deployed to the north, at Belhamed, off table. The FOO for these guns can be deployed with Group Knabe or Group Stephan. (Note: Belhamed is 25m higher than the Trig Capuzzo). The guns are a corps asset.
Group Stephan: Deployed to the north, around Belhamed, off table.
For the time being, I will end this blog post here. I will add more scenario information, including two short player briefings and the victory conditions, after the two players have got the game under way - I don't want to give everything away to both player's at this point (Peter and Graham occasionally read this blog).
Until yesterday I hadn't looked closely at the scenarios at the back of the book because I usually enjoy designing my own. But when I read the tenth one, entitled "Broken Spearhead - The Second Day at Sidi Rezegh" I suddenly realised that it was exactly what I was looking for for a combined deployment of 7th Armoured and 22nd Armoured brigades. Yes, I know, I said I couldn't field both together, but I was referring to the other scenario "Shiny Spearhead - The First Day at Sidi Rezegh". [grin]
I will use the map given in Benghazi Handicap (left) as the basis for my set up. It largely conforms to the more detailed map of the battle area in Sidi Rezeg Battles 1941 by Agar-Hamilton and Turner (below). This more detailed map clearly shows the strategic value of this strip of desert - it provides a way of getting a large force, travelling in formation, from the first escarpment to the summit of the third escarpment (it slopes upwards, west to east).
This (left) is my battlefield map. The escarpment is almost a copy of the one given in Benghazi Handicap, though mine is longer (bigger table - 10 x 6).
I have built the high ground into the line of the escarpment because it was described, when looking at it from the third escarpment, as forming the far side of a broad shallow valley. I have included the wadis running from the escarpment, which form the reentrants that will allow easy passage up it, but I have made them somewhat shorter above the second escarpment than they appear in the original scenario.
Although I have no idea where the escarpment's wadis would go, I have added a fictional wadi complex at the foot of the escarpment. This is an easy way to mark an east to west 'staggered' start line (roughly following the line of the escarpment at 800 - 1000m distance) for the Germans of Group Knabe to form up on.
I have removed almost all of the other high ground, especially that to the north of the escarpment - Belhamed is off table. Though geographically incorrect, I have introduced part of the third escarpment to give an indication that this piece of ground is a valley.
And here is how it all looks on my table.
TERRAIN NOTES.
- Except at reentrants, the face of the escarpment is type IV terrain and requires a difficulty check to climb or descend. The reverse slopes are type I terrain. Reentrants are type III terrain. They can be traversed in column or depth formation. The track to the aerodrome is type I terrain and can be traversed in column without penalty. The escarpments are a superior position when firing to lower elevations.
- The high ground on the escarpment is the highest ground in the battle area and counts as a superior position to lower elevations. High ground counts as an escarpment for movement.
- All wadis are shallow and do not have steep banks. Wadis are type II terrain to all moving along them (in column only) or crossing them. Wadis provide type II cover or hull down to units in them unless the fire is enfilading or from a superior position.
- The rough ground at the foot of escarpments is type II terrain.
- The buildings at the aerodrome do not block LOS. They have a three stand capacity. They provide type III cover. The wire around the aerodrome has been flattened during the previous two days fighting - it merely defines the area of the landing zone in a 'scenic stylie'.
I have largely, but not wholly, gone with Benghazi Handicap for the OOB. There are some differences in the force compositions to cater for my own tastes and my own choice of rules. As per usual, I have condensed them into organisational diagrams.
7th Armoured Brigade Composite Regiment: must deploy within the red boxed area on the scenario map.
3rd (anti-tank) Regiment RHA: At least one anti-tank battery of 3rd RHA must set up within the red boxed area on the scenario map. Other batteries can deploy anywhere south of the second escarpment and north of the third escarpment.
1st Battalion King's Royal Rifle Corps, A Coy. 2nd Rifle Brigade (attached): Can deploy anywhere south of the second escarpment and north of the third escarpment.
4th Field Regt. RHA: Deployed nearby to the south, off table. One battery is dedicated to Composite Regiment, 7th Armoured Brigade. One battery is a brigade asset for 7th Armoured Brigade.
22nd Armoured Brigade: Deployed to the south, above the third escarpment, off table.
GERMAN DEPLOYMENT NOTES
Group Knabe: Must deploy within the blue boxed area on the deployment map. All lorried Panzergrenadier companies start dismounted. Any or all artillery can be deployed unlimbered.
2nd Battalion, 155th Artillery Regiment: Two batteries are deployed to the north, off table. One battery is dedicated to 2nd Battalion, 104th Schuetzen Regiment. One Battery is dedicated to 8th Machine Gun Battalion. One Battery is attached to Group Stephan. It can be dedicated to one of the Panzer battalions of 5th Panzer Regiment or held as a brigade asset for Group Stephan. It can be kept off table or can be used for direct support.
408th Heavy Artillery Battalion: Deployed to the north, at Belhamed, off table. The FOO for these guns can be deployed with Group Knabe or Group Stephan. (Note: Belhamed is 25m higher than the Trig Capuzzo). The guns are a corps asset.
Group Stephan: Deployed to the north, around Belhamed, off table.
For the time being, I will end this blog post here. I will add more scenario information, including two short player briefings and the victory conditions, after the two players have got the game under way - I don't want to give everything away to both player's at this point (Peter and Graham occasionally read this blog).
Saturday, 20 July 2013
New tanks, actually obsolete tanks
Wow, my cursor is back! Onwards and upwards.
This week, I've added a few bits and pieces to my Operation Crusader collection.
Here are the tanks I need to field 7th Armoured Brigade. With the addition of a regiment, plus a company, of Crusader tanks from 22nd Armoured Brigade (painted already), plus their command tanks, I can now field another armoured brigade group. I can't field them together. This is a pity, as 7th and 22nd did fight side by side, at reasonable strength, on the 21st of November 1941. A day later, 7th Armoured Brigade, following its clash with 15th and 21st Panzer Division had almost ceased to exist; certainly the A9s and A10s of 7th QO Hussars were no longer present - the Hussars were caught unsupported and were annihilated in a brief head on clash. It begs the question: How far should I go down the 'everything' line? I would need 13 more Crusaders to field both formations. Is it worth it?
7th Armoured Brigade was unusual in that it seemingly got all of the old obsolete cruiser tanks that were in theatre: Some A9s and A10s, and a whole regiment of A13s. The rest of the formation had Crusader tanks. This makes it more interesting than 22nd Armoured Brigade and 4th Armoured Brigade, which were solely equipped with brand new Crusaders and M3 Honeys respectively. 7th Armoured Brigade sums up everything that was bad about pre-war British tank design. As machines, these tanks were pants. It's a dream British wargames formation!
I've done them all of the tanks in a Caunter scheme. The A13s and A9s are blue / grey and green. The A10s are blue / grey and a dark winy colour (copied from an old Osprey print) which looks a little different. The red and white markings are 'Operation Crusader Stripes' which were plastered all over some tanks. All vehicles were supposed to sport them during the operation for easy recognition. You can see why the Germans liked them, and why the British crews hated them - "Herr Schmidt, we're over here!"
Lastly, I've done my German air superiority marker. A Fabbri die cast FW190. I like these models and they are reasonably priced, though they need repainting for the desert.
This week, I've added a few bits and pieces to my Operation Crusader collection.
Here are the tanks I need to field 7th Armoured Brigade. With the addition of a regiment, plus a company, of Crusader tanks from 22nd Armoured Brigade (painted already), plus their command tanks, I can now field another armoured brigade group. I can't field them together. This is a pity, as 7th and 22nd did fight side by side, at reasonable strength, on the 21st of November 1941. A day later, 7th Armoured Brigade, following its clash with 15th and 21st Panzer Division had almost ceased to exist; certainly the A9s and A10s of 7th QO Hussars were no longer present - the Hussars were caught unsupported and were annihilated in a brief head on clash. It begs the question: How far should I go down the 'everything' line? I would need 13 more Crusaders to field both formations. Is it worth it?
7th Armoured Brigade was unusual in that it seemingly got all of the old obsolete cruiser tanks that were in theatre: Some A9s and A10s, and a whole regiment of A13s. The rest of the formation had Crusader tanks. This makes it more interesting than 22nd Armoured Brigade and 4th Armoured Brigade, which were solely equipped with brand new Crusaders and M3 Honeys respectively. 7th Armoured Brigade sums up everything that was bad about pre-war British tank design. As machines, these tanks were pants. It's a dream British wargames formation!
I've done them all of the tanks in a Caunter scheme. The A13s and A9s are blue / grey and green. The A10s are blue / grey and a dark winy colour (copied from an old Osprey print) which looks a little different. The red and white markings are 'Operation Crusader Stripes' which were plastered all over some tanks. All vehicles were supposed to sport them during the operation for easy recognition. You can see why the Germans liked them, and why the British crews hated them - "Herr Schmidt, we're over here!"
Lastly, I've done my German air superiority marker. A Fabbri die cast FW190. I like these models and they are reasonably priced, though they need repainting for the desert.
Saturday, 13 July 2013
Some newly painted bits.
I've painted quite a few pieces for my WW2 collection recently, but as it is mostly more of the same, I thought I'd confine this post to dealing with some pieces that are a little different.
Firstly, some A9s for 7th Hussars with red and white Operation Crusader stripes. I have painted them with a Caunter Pattern - which, although accurate, never quite looks right for the desert. It is also a pain to do because Caunter is not a series of random shapes. It is a series of geometric shapes that, when viewed from directly above or from the side, all have straight lines. My only tip for doing Caunter is to do it with turrets off - that way you get the long horizontals along the top of the hull straight, then add the turret to get the verical surfaces right. Fortunately, I only have 44 more tanks to do and 31 of those are one colour Caunter (light blue / grey on the Honeys of 4th Armoured Brigade).
Then there are two newly painted British FOO stands. This bring my British FOO stand numbers up to three, so no more required. The carrier FOO is a Battlefront model - it is a tidy little piece with some character. The other is a Battlefront Bofors tractor with some new modeling to the back and a tower added. The tower is constructed out of wire 'spears' and thin card soaked in superglue. Possibly the hardest thing to get right was the figure seated on the top. This was my third attempt - he looked like a toddler throwing a paddy in a high chair on the first attempt. It is loosely based on a photograph in one of the Airfix books. Because it is a one off, it has a charm of its own.
Anyway, the cursor problem persists, and it is making this a chore, so that is where I will leave this post. Is anyone else having this problem?
Firstly, some A9s for 7th Hussars with red and white Operation Crusader stripes. I have painted them with a Caunter Pattern - which, although accurate, never quite looks right for the desert. It is also a pain to do because Caunter is not a series of random shapes. It is a series of geometric shapes that, when viewed from directly above or from the side, all have straight lines. My only tip for doing Caunter is to do it with turrets off - that way you get the long horizontals along the top of the hull straight, then add the turret to get the verical surfaces right. Fortunately, I only have 44 more tanks to do and 31 of those are one colour Caunter (light blue / grey on the Honeys of 4th Armoured Brigade).
Then there are two newly painted British FOO stands. This bring my British FOO stand numbers up to three, so no more required. The carrier FOO is a Battlefront model - it is a tidy little piece with some character. The other is a Battlefront Bofors tractor with some new modeling to the back and a tower added. The tower is constructed out of wire 'spears' and thin card soaked in superglue. Possibly the hardest thing to get right was the figure seated on the top. This was my third attempt - he looked like a toddler throwing a paddy in a high chair on the first attempt. It is loosely based on a photograph in one of the Airfix books. Because it is a one off, it has a charm of its own.
Anyway, the cursor problem persists, and it is making this a chore, so that is where I will leave this post. Is anyone else having this problem?
Thursday, 11 July 2013
The Three Kings - first night's play.
Here are a few shots of the positions achieved at the end of last night's play. So far there has been a clash between British armour and the Kradschutzen Btn around the King of Diamonds, an air raid, and several crashes of British artillery. The game is two full turns in. The British still have two units, and the Germans one unit, to arrive next turn. Battle is about to become general.
The Germans are entering on a narrow front of about 2.5km width which is, historically, about right. It looks as though they have chosen The King of Diamonds and The King of Clubs as their primary objectives. Currently, their only opposition is a single British tank regiment, which is slowly withdrawing in the face of superior numbers.
The British have entered on a wider front and are obviously going for The King of Hearts and The King of Clubs. Their right hook is miles from the action, but it is moving up quickly. The first shot, looking towards The King of Hearts shows an infantry battalion in a wadi backed by a regiment of 25pdr (one of which was taken out by Stuka). The second shot shows the British right hook, rounding the King of Hearts, moving towards the Germans advancing on The King of Clubs.
The above shots were taken today. The following shots were taken last night during play. The first shows the British moving up the wadi, deployed 25pdrs, and Crusader tanks moving on The King of Diamonds. The second shows Germans moving on The King of diamonds just prior to their Kradschutzen Btn. being caught out by the British armour shooting them up whilst 'bussed'. The last shot shows the air raid.
BTW. I'm currently having some difficulty with cursor control on this blog, so please excuse any spelling mistakes, the font, and so forth.
Wednesday, 10 July 2013
The Three Kings. A Western Desert cauldron scenario.
This scenario is a couldron scenario where formations from each side will sucked into the combat area over a several game turns. I will be using my variant of Piquet's Point of Attack rules to fight the battle so the forces will arrive over a three turn time span (in these rules, most troops can move three times a turn).
This picture shows the battlefield. Its dominant feature are three centrally placed hills - these are 'The Three Kings'. Each of the hills is given a code name - King of Diamonds, King of Clubs and King of Hearts. Each side must secretly choose two hills as its objectives. At the end of the game the side holding its two Kings achieves a victory. A side holding all three Kings achieves a total victory. The game will last for a maximum of 6 turns. The battlefield is also cluttered with rough ground, areas of rolling ground (where hull downs can be found), a mixture of the two, a couple of wadis, and a settlement (a Bir).
The British force comprises six on table battalion (regimental) groups each with additional assets. There are three armoured regiments, two infantry regiments, and a field artillery regiment. Off table, with an on table FOO, are three batteries of medium artillery, and access to aircraft (one air superiority and two ground attack), both held at corps level. The force also boasts one brigade level (armour), and one high level, command stand. The British may bring on two battalion groups on each of the first three turns of the game.
The German force comprises 4 on table battalion groups each with additional assets. There are two armoured battalions and two infantry battalions. Off table, with on table FOO, are 5 batteries of guns. Two are attached to the infantry and three are attached to the armour; all are brigade level assets. The Germans have access to two ground attack aircraft held at division level. The German may bring on one battalion group on turn 1, two on turn 2, and one on turn 3.
All arrivals will be pre-programmed by the players. The turn of arrival, and terrain tile of arrival, being determined by laying a plaing card under the command stand of the battalion group. The card is from a deck comprising diamond, clubs and hearts cards (denoting turn, in that order.) numbered A to 6 (denoting base line tile of entry, each player reading left to right). When a side turns an appropriate move card for the battalion group, on the right turn, it can make a full move onto the table.
For this battle I will be fielding almost everything I have painted so far. Next up, I'll be painting the tanks to make up 7th Armoured Brigade Group (3 x A9s, 3 x A10s, and 10 x A13s, to go with the Crusader tanks). After that, I'm thinking of painting up the last bits of 15th Panzer Division (115th Infantry Brigade, a battalion of 10.5cm guns, and an anti-tank company) so that one side is, to all intents and purposes, finished.
Friday, 5 July 2013
How I base 15mm for the Western Desert
| Newly based, 115th Kradschutzen Battalion swans out into the desert. |
Before I start, as with Eskimos and snow, there a lots of different types of desert, and mine is a specific patch of it.
I am concentrating my efforts on Operation Crusader (November - December 1941), which was mostly fought in Libya on the top of the escarpment that follows the coast to the north. Because of the season (there was torrential rain and sleet during the offencive), and because of the proximity to the coast and the rain showers that proximity brings, my bases are quite well foliated. Perhaps they are a little over foliated, it depends on what photographs you look at. Over foliated, or not, one thing that all first hand accounts attest to is the monotonous colour with subtle variation in texture, especially at certain times of the day. It is the variation in texture that I go for.
When basing tracked vehicles I add a further step. Immediately after the second sanding I add a sprinkle of fine sand.....
Then press the tracks of the vehicle into the surface of the base. Then shake off the excess fine sand.
then I dry brush it so that it blends in with the rest of the basing. Although not shown here, I sometimes add Woodland Scenics clumps - painted dark brown and drybrushed brown, or I add pale coloured static grass shop made 'tufts', or I just leave.
I think the bases have a subtle variation of texture and colour that makes them a little more interesting than the sanded bases you sometimes see.
Subscribe to:
Posts (Atom)