Monday, 4 November 2013

Charles Grant rides to the rescue yet again!

It is time to ring the changes and, with next year's demo games at the back of my mind, I have decided to do some Seven Years War gaming to inspire me to get more painting done. And I do need to get inspired because I have over 500 more SYW figures to paint by the end of next spring if the Zorndorf demo-game is to become a reality. In need of a quick scenario to get the juices going I turned to my book shelves and took out an old favourite.

This scenario is largely based on Reserve Demolition by Charles Grant in his book Scenarios for Wargames (published, WRG 1981). This is a book of 52 scenarios, one for every week of the year, covering all periods of historical war gaming and including tactical teasers for everything from basic attack defence set ups, through ambushes and coastal raiding, to games involving helicopters and trains. It is one of my all-time favourite war game books and definitely worth picking up if you don’t already have a copy – although many of the scenarios are oft run and commonplace wargames fare (in one guise or another), having them all in one place as an aide memoire is always comforting when you are stuck for a scenario to do. Reserve Demolition is scenario number 20; it features in Part 2 of his book dealing with river scenarios.

What follows here is my adaption of the scenario for a game, with a fictional Seven Years War backdrop, to be played using Classic Piquet rules. Because of the armies and the rules, changes have been made to the detail of the scenario, but the general underlying ‘plot’, terrain and overall force sizes are mostly unchanged. 

GENERAL OUTLINE

“A “reserve demolition” is the modern parlance for a bridge prepared for demolition but which must not be destroyed until the time is right.”

The year is 1759 and Frederick the Great has been rebuffed at Kunnersdorf. His army has ceased to exist as a fighting force capable of strategic action. Nothing but small forces now remain between the Russians and Berlin. Frederick has given orders that all bridges that might be used by the enemy are to be prepared for demolition. They are not to be blown without direct orders from the King as he might yet use them, if he is given time to concentrate a new army, for a counter-stroke.

GROUND


The object of the scenario is a single stone bridge that crosses a deep and swiftly flowing river.  At either end of the bridge three ‘town sections’ make up a small village. Due east of the village, commanding a crossroads, is a walled farm (single ‘town section’). North of the farm is an open wood (type II terrain), south of it a small gently sloping hill (type I terrain). To the south east a large, steeply sloping, flat topped hill dominates the whole area (slopes are type II terrain). All other terrain is ‘virtual’. In the photo above, the 'chain-line' marks the limit of Prussian deployment east of the river.

RUSSIAN FORCE


Forces: 
  • Commander in chief, four field officers. 
  • 2 units of elite grenadiers – Fire D12, Melee D8, Morale D8. 
  • 6 units of line infantry - Fire D10, Melee D8, Morale D6. 
  • 2 units of elite cuirassier – Fire D4, Melee D12, Morale D8. 
  • 1 unit of elite horse grenadiers – Fire D6, Melee D10, Morale D8. 
  • 1 unit of dragoons - Fire D6, Melee D8, Morale D6.
  • 2 units of hussars – Fire D8, Melee D6, Morale D6. 
  • 1 heavy artillery battery – Fire D10, Melee D4, Morale D6. 
  • 1 medium howitzer battery – Fire D8, Melee D4, Morale D6. 
  • Note: Officer Quality deduct - 2; Unit Quality - no change; Opportunity Chips - 3; Army Characterisation Deck cards (divisor 4) - 3; Sapper Task - D6.

Mission: 
Capture the bridge intact.

Briefing: 
You command an advance guard tasked with seizing a vital bridge over which the main army will cross to reach Berlin and end the war. You can advance on the bridge from any of three directions east of the river – using the east road, the north road, or the south road. You can divide your force into two columns, sending one by a circuitous route and approach from two directions, or keep your force concentrated and approach from just one.

In game terms: You must choose one or two roads on which to enter the battlefield. If you choose two you must choose the mix of each force and choose which will include the commander-in-chief before the battle begins. The force with the commander in chief will arrive as soon as the game starts with the first units being allowed to make an on table march of one move at full rate before the first throw for initiative. Units entering the table need not be in column of route but must start their move in contact with the road. The second force, if there is one, arrives immediately following the second appearance of the player’s Stratagem card, as per the main force (the delay is caused by the circuitous route the second column must take).

Intelligence suggests that the Prussians are preparing all of the bridges in the immediate area for demolition. For the operation to succeed speed is of the essence. Once on the bridge any demolition charges must be neutralised and a bridgehead on the western side of the river established.

In game terms: If the bridge has been prepared for demolition, and you have infantry on the bridge, you can clear the charges by making a successful check on your sapper task card. Because your infantry are not sappers they carry out this sapper task with a down 1 modifier. A bridgehead can be established by occupying the two buildings on the western side of the river, which incidentally also prevents the bridge being blown.

PRUSSIAN FORCE


Forces: 
  • Commander in chief, three field officers, one officer of engineers. 
  • 1 unit of elite grenadiers – Fire D12, Melee D8, Morale D8. 
  • 4 units of line infantry - Fire D10, Melee D8, Morale D6. 
  • 1 unit of sappers - Fire D10, Melee D8, Morale D6. 
  • 2 units of elite dragoons – Fire D4, Melee D12, Morale D8. 
  • 1 unit of hussars - fire D6, Melee D8, Morale D8.
  • 2 medium artillery batteries – Fire D8, Melee D4, Morale D6. 
  • Note: Officer Quality add 2; Unit Quality add 2; Opportunity Chips 4; Army Characterisation Deck cards (divisor 3) 3. Sapper Task D6.

Deployment: 
Sappers can be deployed at the bridge (they must be there to effect preparation but not material acquisition or destruction). One unit, or up to two artillery sections, can be deployed west of the river. All other units must deploy east of the river within the marked deployment area. Prussian forces deploy after the Russian player has organised his attack but before the Russian player deploys his first forces on table.

Mission: 
To hold the bridge, with minimal losses, until ordered to destroy it.

Briefing:  
You are responsible for holding and, ultimately, destroying the bridge if the orders arrive to do so. Unfortunately, although the enemy are within a day’s march of the bridge, the officer of engineers and his sappers have not received sufficient explosive and other equipment to blow it up – though the arrival of the powder train is imminent.  The officer of engineers has told you, in detail, what is required to blow the bridge.

In game terms: A series of sapper task checks (detailed below) must be made on the appearance of your Sapper Task card. One test is allowed each time the card appears. Failure at any stage will require the check to be retaken on the card’s next appearance until the check is successfully passed. The bridge is old and in a state of some disrepair so all sapper task checks will be made with an Up 2 modifier. 
  • First you must pass a sapper task check to acquire materials (the powder train), which will arrive by the northern road on the western side of the river (wagons count as medium artillery for movement). 
  • Second, and after the powder train has arrived at the village, you must pass a sapper task check to prepare the bridge for demolition. 
  • Third, you must pass a sapper task check to blow the bridge.
This morning you sent a dispatch rider to the King to inform him of the presence of the enemy and requesting further instructions. The rider returned with frustratingly awkward orders: The bridge must be held at all cost and is not to be blown without express orders to do so. You must maintain your force as intact as possible as the King will require it later.

In game terms: Under no circumstances must you let the bridge fall into the hands of the enemy. You can only destroy it if the King orders it directly – orders may arrive to blow the bridge on a successful check on the appearance of the player’s Stratagem card; the player will roll D4 vs D8 on first appearance, D6 vs D8 on the second, D8 on the third, and so on. Whilst fulfilling your orders concerning the bridge you must maintain at least forty percent of your force (14 stands). They must be west of the river if the bridge is blown.

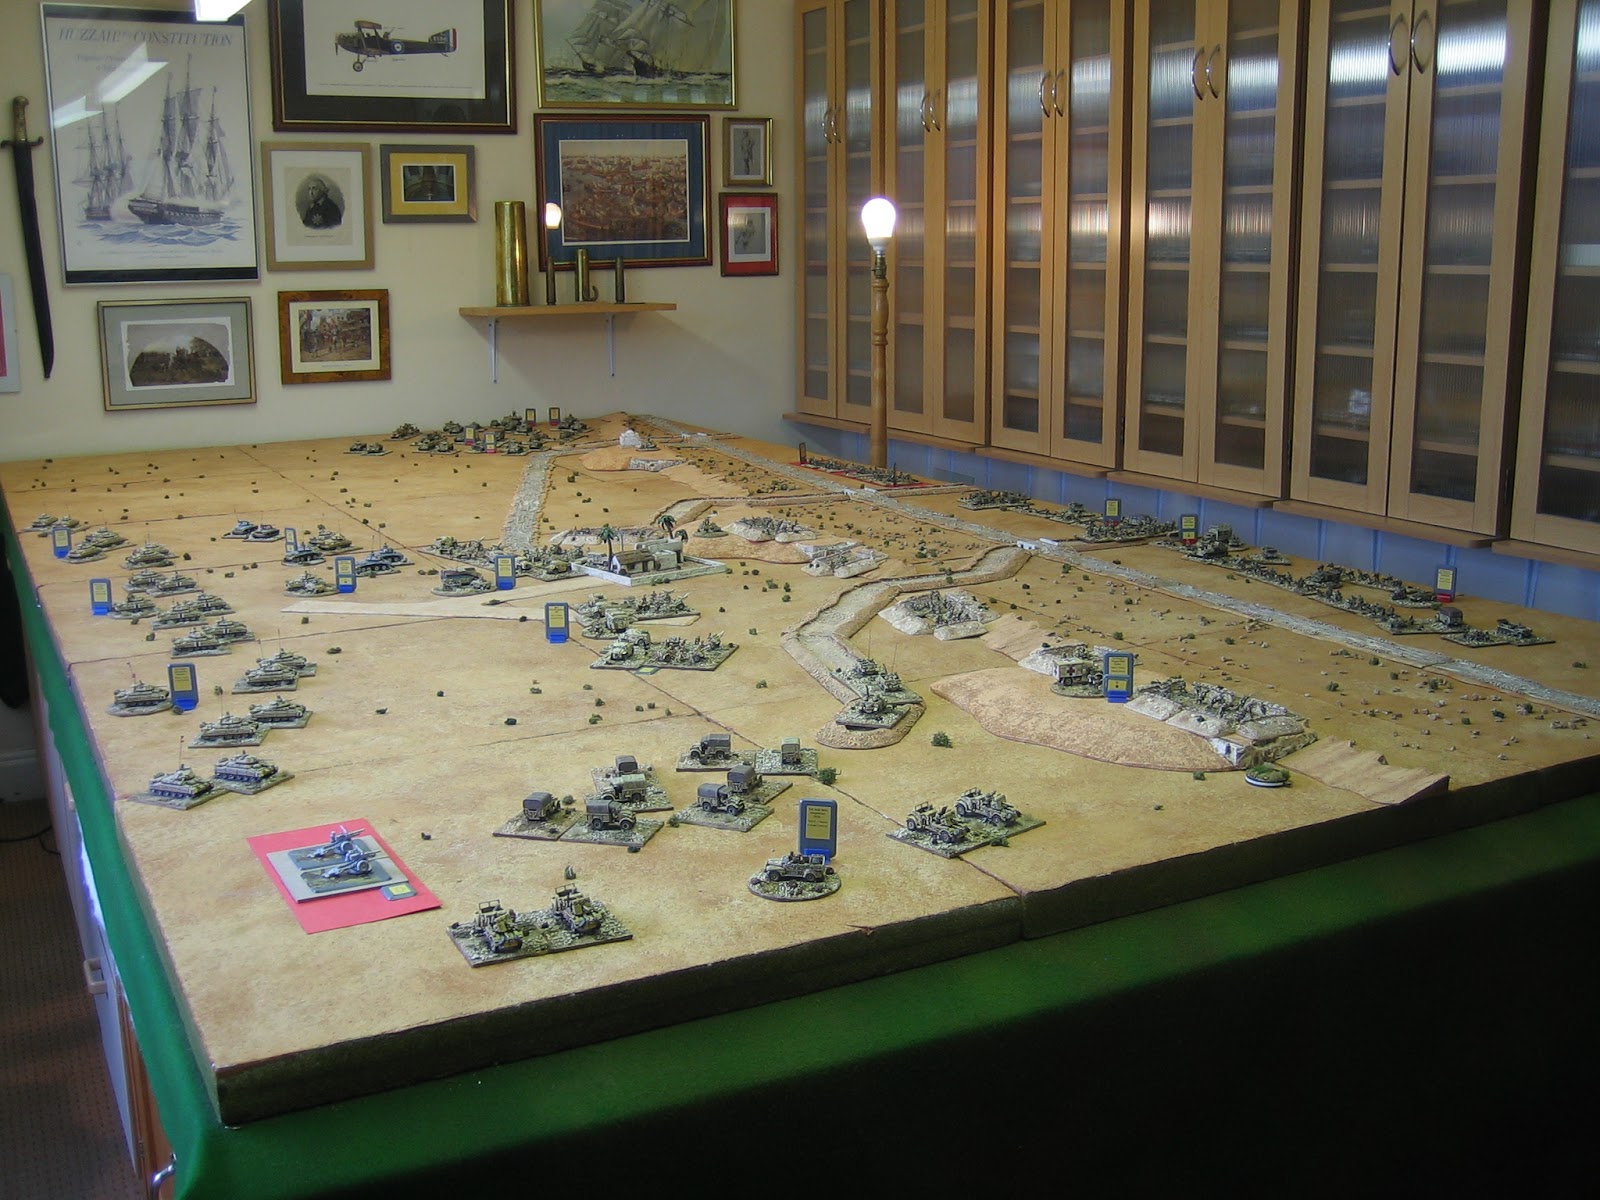
My next post will, with a bit of luck, be a battle report of this river action. Until then I'll leave you with the only worthwhile shot I took (before I smudged the lens) of the last game the Lads played: Sidi Rezegh 1941, at The Venue Formally Known As Saville's - our Fiasco 2013 demo game last month.


Thursday, 17 October 2013

Off table battery markers

Those who know me will tell you that I have an aversion to war gaming paperwork. Writing things up on a blog is one thing, having to look things up on a roster sheet during a game is quite another. It is why I make so many markers and counters. 

Recently my mind turned to off board artillery markers. Up until very recently I've been using 15mm stuff that has been placed, on- table, on pieces of red card to mark its off board status. It works well enough except for three things. Firstly, most heavy artillery is not available in 15mm (and why should it be as it will seldom, if ever, get used on-table). Secondly it has a large footprint and takes up too much room. Thirdly, even if it were available, it would take an excessive amount of time and money for its gaming value - cost benefit.


I was thinking of using pictures mounted on thickish card and so forth, then I suddenly remembered previous forays into WW2 in 10mm and 1:300 scale. A light went on.


Immediately thereafter ordered the guns I needed - some of which are pictured above alongside my 15mm stuff. Their range is not universal, but it has a good deal of the more common heavy stuff. It is also very cheap - £0.40 a gun and crew - and Andy Kirk is a pleasure to deal with.

I decided to paint and base them purely as markers - which took out lots of work - and I think they fit the bill perfectly. It will not be a new idea, but I think it is a good one and worth repeating. A very small corner of the field will be forever off-table.

Thursday, 3 October 2013

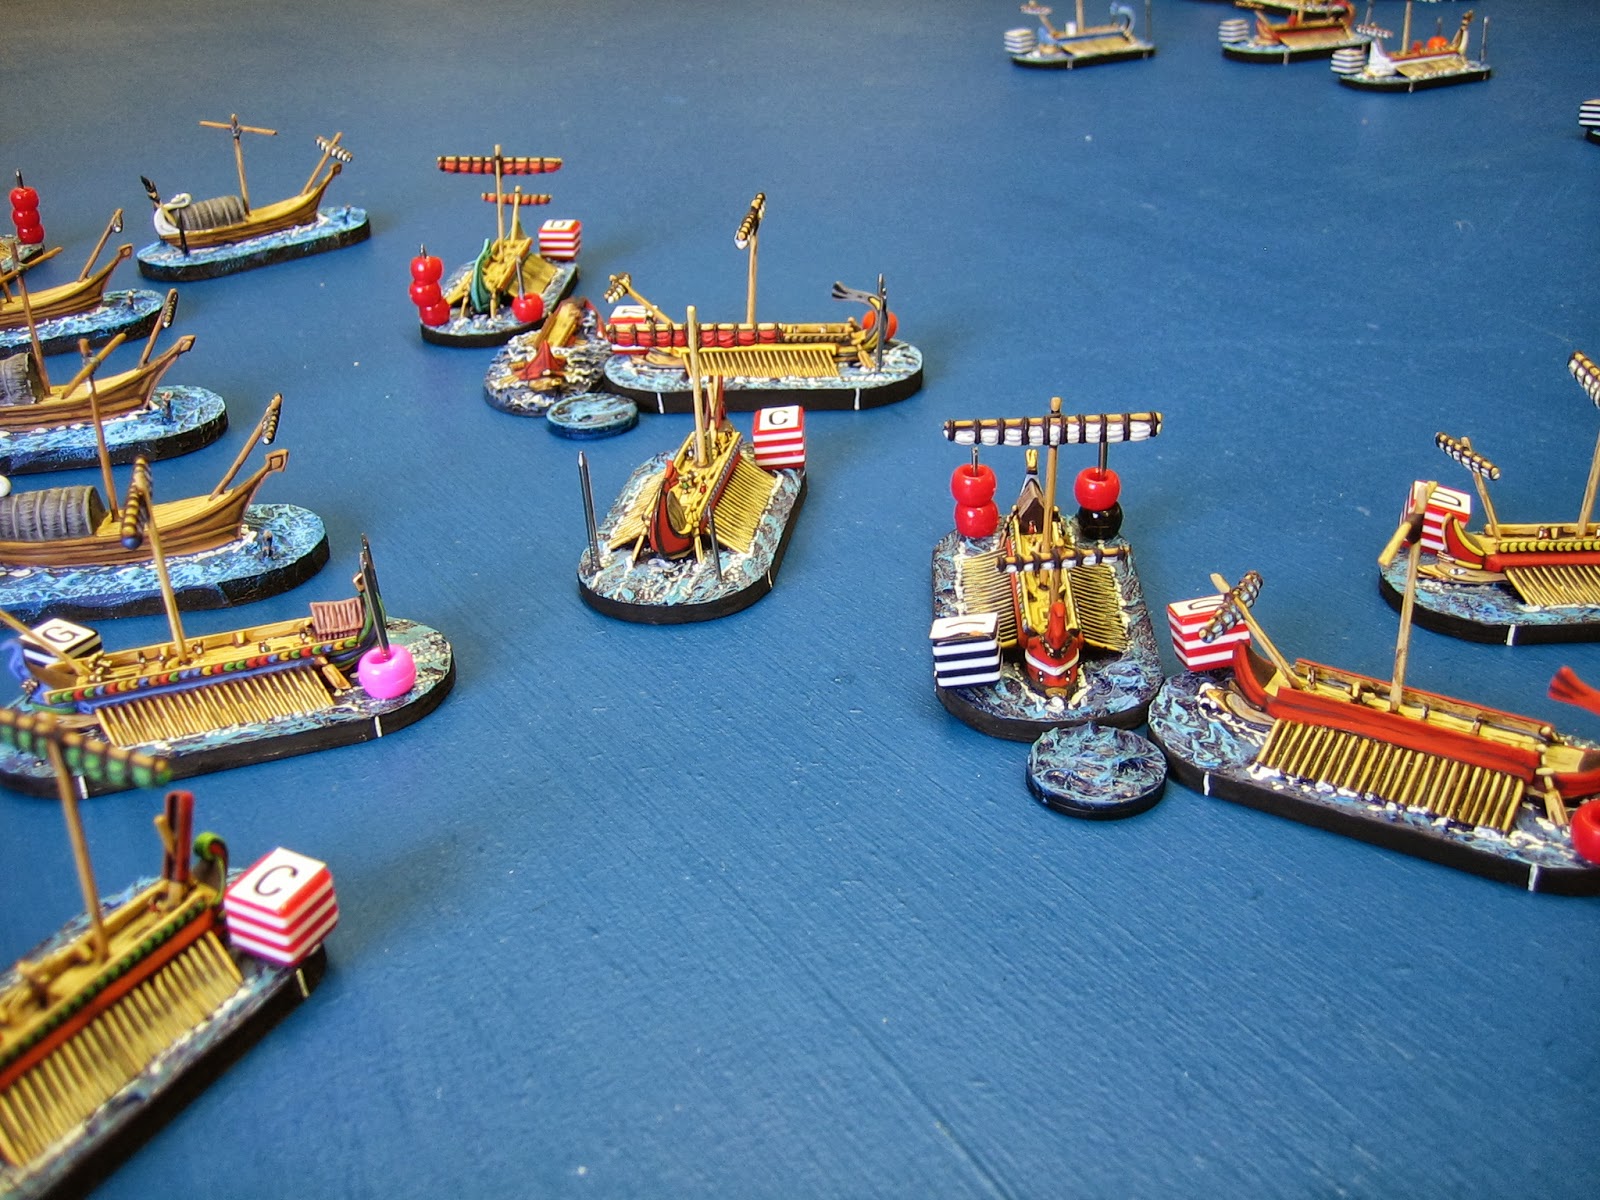
Battle Report: Ecnomus 256 BC

 The Roman consuls lead the first two squadrons against the Carthaginian centre.
They are drawn towards Hamilcar like moths to a flame, and the rear of their line is caught by the Carthaginian left wing squadron as it advances towards the Roman rear.
First blood to Carthage.
The Romans press onward regardless, whilst, in their rear transports are cut loose and the Romans try to form some kind of defence against the ships on the Carthaginian's wings which are closing quickly.
The consuls and Hamilcar' squadron clash for the first time. The Roman corvus proves its worth, as two Carthaginian fives fall almost without a struggle.
But the consul led squadrons are being doubly enveloped. It is now a race to see who can take advantage first.
The Gods favour Carthage - Ba'alocks!
Most devastatingly on the left. Here, on a single cruise card, a Carthaginian vessel shatters one consul's ship and, carrying its momentum through the wreckage, comes close to sinking the other.  
In the Roman rear the ships of the Carthaginian left get in amongst the Roman ships, raking them as they do so.
The action is now two distinct and separate battles. The Romans van is being crushed. In the rear they are fighting back. Hanno hangs off the Roman quarter ready to pounce.
Then a minor miracle, the Carthaginian ships of the left wing fail a squadron morale test (Fire, Flee, Flood card at half strength) - they flee.
Hanno's ships enter the fray with a successful rake on several ships of the 'triarii'.
The Roman van is now almost completely destroyed and Hamilcar is sending ships to support the attack on the Roman rear.
Having successfully raked the Roman ships of the 'triarii' Hanno's squadron deftly moves and turns his ships to face the Roman rear.
But the Carthaginians have used up most of their move cards and the Romans retaliate before they can fully press their advantage
Hanno is sunk! Hanno's squadron is at half strength. Oh Neptune, give them a Fire Flee Flood card - fat chance.
The Romans begin to reorganise their rear.
They advance towards Hamilcar and prepare for the final stand.
Hamilcar initiates the final act. The battle begins again in earnest.
The Romans are outfought, rammed......
......and sunk!

Carthage wins!

As with most Fleet of Battle games, this action was fast and furious. It was also subject to the best die rolls I think I've ever seen Peter make. He didn't ram and hole me as usual - possibly giving me time to make repairs on seamanship cards - he shattered my timbers at every turn. As my consuls took their final drink of Old Briny, I bet they gurgled "There is something wrong with our galleys today."

We will do this all again next week, partly because I don't have time to set much else up at the moment, partly because it is great fun.

Tuesday, 1 October 2013

Ecnomus 256 BC scenario


At the outset of the First Punic War the Romans had not been at home at sea and barely had a navy to speak of.  As the war progressed, the Romans realised that a victory on land would be insufficient to win the war. The Carthaginians could always counter land victories with actions by her superior navy. In a huge change in Roman strategy Rome began to build fleets of ships with which to challenge Punic naval supremacy. The First Punic War became a war at sea. Both Rome and Carthage threw huge resources into the construction and manning of war galleys. At first the Roman effort met with a series of disasters. But, as the war progressed, and the Romans learnt the art of naval warfare and innovated it with the invention of the corvus [literally ‘raven’ - a long boarding ramp, with large iron spike, or beak, at its free end, that was mounted forward and that could be dropped to bridge the gap between two ships], the two sides gradually achieved something like parity in battle. 
In 256 BC Rome decided to escalate the war. Rome built and manned a huge fleet of 330 warships, mainly fives, to transport an army to Africa. It would be an expedition to end the war. The mission was so important to Rome that both consuls for the year would lead it. This fleet moved down the Italian coast, across the Straits of Messana, past Syracuse and round the Cape Pachynus, to link up at Ecnomus with the veteran legions which had been successfully prosecuting the war in Sicily. 
The Roman plans were not made in secret. Realising that their home territory was vulnerable to the planned invasion, the Carthaginians amassed a fleet to oppose it before it reached their ill defended shores. The Carthaginian fleet, 350 ships under the command of Hamilcar, sailed to Lilybaeum and proceeded south east until it came to Heracleia Minoa. 
The scene was set for one of the most important clashes of the war. With one side determined to sail an army of invasion to Africa; with one side determined to stop it; with both fleet in close proximity; the battle was inevitable. 

Roman Fleet Notes 
The Romans, not knowing precisely how the Carthaginians would react, deployed their fleet in an unusual but compact body that was capable of sailing to Africa or fighting a major battle. The fleet was divided into four squadrons. 
The first two were led by the consuls, Marcus Atilius Regulus on the right and Lucius Manilius Vulso on the left. Each deployed in a single file echeloned back so that together their squadrons formed a wedge. The consuls, in sixes, commanded the lead ship in each squadron. 
  • Each: Squadron die D10. 
  • 1 Six (flagship). Boarding skill: Veteran. Other skill: Trained. 
  • 5 Heavy fives equipped with corvus. Boarding skill: Veteran. Other skill: Trained. 

Immediately behind these was the third and smallest squadron in the fleet. This squadron formed the base of the wedge. It was comprised of war galleys each towing a horse-transport that was incapable of moving under its own power. 
  • Squadron die D10. 
  • 4 Heavy fives. Boarding skill: Seasoned. Other skill: Trained. 
  • 4 Transports (fives without rowers and marines). Boarding skill: Abysmal. Other skill: Abysmal. Transports are incapable of movement under their own power and count as disabled if cast adrift. 

Behind these, in line abreast formation, was yet another squadron of galleys. Within the fleet this squadron was called the ‘triarii’ and formed the fleet's reserve. 
  • Squadron die D10. 
  • 6 Heavy fives equipped with corvus. Boarding skill: Veteran. Other skill: Trained. 


Carthaginian Fleet Notes 
The Carthaginian fleet comprised three squadrons of unequal size. Initially they had advanced in line abreast formation but once they saw the Roman formation they quickly made a kink in their line. 
In the centre, the bulk of the Carthaginian fleet was arrayed facing the Romans in line abreast with wide spaces between the vessels. This made, to Roman eyes, the centre of the line look weak. These ships were commanded by Hamilcar who took position in the middle of the line. 
  • Squadron die D10. 
  • 12 Light fives. Boarding skill: Seasoned. Other skill: Trained. 

On the right of the line the Carthainians placed the best and fastest galleys in the fleet. This compact squadron was commanded by Hanno. 
  • Squadron die D12. 
  • 6 Light fives. Boarding skill: Seasoned. Other skill: Seasoned. 

On the left, a quarter of the fleet was set at an angle to the coast: “…posted so as to form a left wing which pointed towards the shore, at an angle to the main body and extending beyond it.” 
  • Squadron die D10. 
  • 6 Light fives. Boarding skill: Seasoned. Other skill: Trained.


The Battle 
For a description of the battle I will quote the translation in Polybius, The Rise of the Roman Empire. Penguin Classics
“The action began when the Romans, seeing that the Carthaginian line was only thinly held because of its great length, launched an attack on the centre. The ships in this sector had orders to give ground immediately in the hope of breaking up the Roman formation, and so they retired at a brisk speed hotly pursued by the Romans. The result was that while the first and second Roman squadrons chased after the retreating enemy, the third and fourth became separated….
When the Carthaginians judged that they had lured the first and second squadrons far enough away from the rest, a signal was hoisted on Hamilcar’s flagship and the whole Carthaginian force swung round at once and engaged their pursuers. The battle that followed was fiercely fought. The Carthaginians’ superior speed allowed them to sail around the enemy’s flank as well as to approach easily of beat a rapid retreat. But for their part the Romans were equally confident of victory; as soon as the vessels came to close quarters the contest became one of sheer strength, since their ‘ravens’ [corvus] grappled every ship the moment it arrived within striking distance….
Meanwhile Hanno, in command of the right wing, which had kept its distance when the Romans first attacked the centre, sailed across the open sea, attacked the squadron of the triarii and caused them much distress. At the same time the Carthaginian left, which had been posted near the shore, abandoned their original formation, deployed into line with their bows facing the enemy, and attacked the Roman squadron which was towing the horse-transports, whereupon these ships cast off their tow ropes and engaged the enemy…..
The outcome of these engagements was much as might have been expected….
Those who had first joined battle were also the first to break off, for Hamilcar’s squadron was finally driven back and took flight…..
Regulus, when he saw the struggle in which the triarii and horse-transports were engaged, hurried to the rescue with all the ships of the second squadron that were still able to fight….
It was then the Carthaginian’s turn to find themselves hard-pressed. They were attacked both from the front and the rear and discovered to their surprise that they were being encircled by the relieving force, and so finally gave way and retired towards the open sea. Meanwhile Manilus, who was now on his way back to the battle, saw that the third Roman squadron had been hemmed in by the Carthaginians close to the shore. Both he and Regulus…….
made all speed to relieve the pressure on their comrades who were in great danger. They were surrounded as effectively as if they were besieged….. 
So the two consuls came up rapidly, surrounded the Carthaginians in their turn and captured fifty ships…. 
The general outcome of the battle was in favour of the Romans. Twenty-four of their ships were sunk, but more than thirty of the Carthaginians. Not a single Roman ship was captured with its crew, but sixty-four Carthaginian vessels suffered this fate.” 

Scenario Designer Notes: 
Both fleets were mainly fives but there must have been many smaller ships in any fleets of this size. Because there is no record of how many smaller ships, or their deployment, I have chosen to ignore this fact and except for the Roman flagships (Polybius specifically states they were sixes) all ships are fives. 
This was a battle between two fleets that carried more marines than was generally the case; the Roman fives were carrying an army; the Carthaginians had manned their ships with every available man. Consequently, I have partly rated the boarding skills of vessels for the relative numbers of marines. 
I have assumed that the fives of the towing squadron would have a normal complement of marines (they are classed as seasoned accordingly) and no corvus. The extra weight would be a significant factor in the performance of their towing duty. The horse transports themselves would be carrying just enough crew to maintain the ship for the voyage and have been significantly down-rated to ‘abysmal’ to reflect this. Towing and towed ships count as crippled. If cast adrift horse-transports are disabled. I have chosen to use merchant ships to represent the horse-transports so that they are easily identifiable. 
Polybius says that, even though the marines were fairly equal in numbers, the Carthaginian ships were faster. The simplest way to represent this is to class the Carthaginian ships, despite the high number of marines, as light fives. 
The manning of these fleets was a huge effort and it would undoubtedly lead to a diminished level of training in most ships – especially the rowers. Because of this most ships have had their ramming, raking and seamanship skill down-rated from ‘seasoned’ to ‘trained’. 
Hanno’s squadron has a D12 squadron die because Polybius picks out its ships as being somewhat superior to the rest of the fleet. All other squadrons have a D10 squadron die because they were unremarkable. 
The Carthaginian plan to lure the Romans into attacking the centre must be built into the scenario if the game is to have any resemblance to the battle. Three special events cards should be added to the Carthaginian deck. On the appearance of each, the Carthaginian ships in Hamilcar's squadron have the option to withdraw at full rate with their bows facing the enemy, and the Roman ships in the squadrons of both consuls must advance towards them at full rate, turning, if need be, towards the nearest ship in Hamilcar's squadron. If a special event card is not acted on the following special events cards are void. Special events cards are discarded after use. This information should be known to both sides – if the Roman player knows his ships will be drawn forward, regardless of his wishes, he might as well go with the flow and press his attack vigorously. 
We will use Fleet of Battle rules as published in Wargames Illustrated issue 278, December 2010.

Monday, 23 September 2013

Sidi Rezegh 1941 for Fiasco 2013


This scenario is for a battle based upon the events of 22nd November 1941 at Sidi Rezegh. The notes for this scenario were inspired by the scenario  "Broken Spearhead" in Benghazi Handicap by Frank Chadwick. They have been fleshed out with information from Sidi Rezeg Battles 1941 by Agar-Hamilton and Turner, and the members of various web forums. 

The game will be fought out at Fiasco later this year.


GENERAL BRIEFING FOR BOTH PLAYERS

Dawn has brought the fifth day of Operation Crusader: The major British offensive to relieve Tobruk and throw the Axis out of Cyrenaica. Yesterday saw the hardest and most chaotic fighting of the operation so far. Between Tobruk and Gabr Saleh, British and German formations became jumbled like the layers of a cake.

From west to east: British 70th Division was trying to sally out of Tobruk; 7th Armoured Brigade and Support Group, both of 7th Armoured Division, was trying to break through to them from Sidi Rezegh to link up with them at Ed Duda; sandwiched between these forces, and fighting both simultaneously,  were Italian ‘Bologna’ and German 90th Light; 7th Armoured Brigade and 7th Support Group were facing both ways in an attempt to fend off a concerted attack by 15th and 21st Panzer Divisions travelling west out of the desert from the direction of Gabr Saleh; 15th and 21st Panzer divisions were, in turn, being harassed from flank and rear by 22nd and 4th Armoured Brigades (7th Armoured Division) which were chasing them westward.  All were west of yet another battle, at the frontier, being fought by Axis forces defending the frontier and British XIII Corps.

The fighting was intense, especially around the aerodrome between the second and third escarpments at Sidi Rezegh. Here DAK had come out on top and the British, in terms of material, had taken a pasting. However, the British had shown a good deal of tenacity and had, despite heavy losses, maintained the very important strategic position at Sidi Rezegh.

Note: As can been seen from the map below, the position commonly referred to as Sidi Rezegh, between the second and third escarpment, is strategically vital to any operation in the Tobruk area (the Tobruk perimeter is approximately 3.5 miles north west of Ed Duda). Looking north from the third escarpment (at Point 178), it appears as a flat bottomed valley with ground that rises only slightly on the far side to the ridge of the second escarpment; it is ten miles long by four miles wide; it slopes imperceptibly down from east to west; it allows the passage of large armoured battle groups, moving in formation, to freely traverse from the top of the third to the bottom of the second escarpments. The area maked L.G. is the desert aerodrome.  


The Battle Area. From a map in Sidi Rezeg Battles 1941 by Agar-Hamilton and Turner.
The Wargame Battle Area. It represents the second escarpment from, roughly Abiar el Amar to Point 163. This war game table is 12' x 6' and ground scale is 1": 50m approx.

BRITISH BRIEFING FOR:
Brigadier Campbell (7th Support Group), officer commanding at Sidi Rezegh, 22nd November 1941.


Your Support Group and 7th Armoured Brigade have spent the morning reorganizing and consolidating their position at Sidi Rezegh. 1st Battalion, King’s Royal Rifle Corps (less one company) with a company of 2nd Battalion, The Rifle Brigade attached, have dug themselves in on a two mile long stretch of the second escarpment with commanding views over the Trig Capuzzo. The guns of Support Group, alongside 7th Armoured Brigade, have taken up positions, in a northward facing arc, around the aerodrome. To the south of the aerodrome 22nd Armoured Brigade stands ready to support you.

Both 7th Armoured Brigade and Support Group are not in the best of shape. Jerry has caused a good deal of damage and yesterday’s losses cannot be made good. Brigadier Davy’s tanks (7th Armoured Brigade) have faired the worse: This morning he has reported that he has 28 runners, all that remain out of the 168 tanks with which he started the operation five days ago, and several of these have been hit more than once during the previous fighting. 22nd Armoured Brigade has suffered too: It is at two thirds strength following its foolhardy action at Bir el gubi against the Italians on the 19th of November and running battles with Rommel’s panzers ever since. It is a comforting thought that the Germans withdrew their armour, northward, down the wadis of the second escarpment, out of the immediate battle area this morning.  Only shelling by German heavy artillery shooting from Belhamed is currently, and sporadically, disturbing the peace.

Plans for further advances to link up with 70th Division at Ed Duda have been suspended until the infantry of 5th South African Brigade reinforce your position from the south. Major General Gott (7th Armoured Division) has personally given you orders to hold the Sidi Rezegh area at all cost. It will be the jump off point for units battering their way to relieve Tobruk. Following the arrival of the reinforcements, a northward advance on Ed Duda can be resumed. God willing, Jerry will leave you alone long enough to get things organised.

BRITISH OOB, GAME NOTES & VICTORY CONDITIONS

All field artillery (25pdrs) units are veterans with elite morale status. The tanks of 22nd Armoured Brigade are green troops with high morale. The tanks of 7th Armoured Brigade are trained with high morale. All infantry are veterans with high morale. 

Note: The artillery present fought with a tenacity and discipline that was remarked upon by all . Consequently, I must give it elite morale status.
Note:The tanks of 22nd Armoured Brigade have been classed as green with high morale because of their enthusiastic, over confident ineptitude during the early phases of Operation Crusader. They were, to coin a phrase, fresh off the boat.

Brigadier Campbell is a heroic, average commander. All other commanders are average. 


The infantry of 1st Battalion King’s Royal Rifle Corps, less carrier platoons, start the battle in sangars. One battery of 3rd Royal Horse Artillery (2pdrs), may be attached to  1st Battalion, KRRC and be in sangars. FOOs can deploy anywhere above the second escarpment. All other troops must deploy in their designated deployment areas.


Batteries of 3rd Royal Horse Artillery (2pdrs) that are not attached to 1st Battalion, KRRC start the battle on their portees with guns facing east.


The guns (25pdrs) of 60th Field Regiment, RA are a brigade level asset. One battery of is prioritised to the battalion command stand of 1st Battalion, King’s Royal Rifle Corps. They start the battle deployed for action.

The guns (A and B Batteries, 25pdrs) of 4th Field Regiment, RHA are a brigade level asset. They start the battle deployed for action.

C Battery, 4th Field Regiment, RHA (25pdrs) is attached to 22nd Armoured Brigade. This battery was assigned to the brigade from the outset of Operation Crusader (it is a brigade asset). The battery is prioritised to Brigadier Scott-Cockburn. It can start the battle on table and limbered, or it can be kept as off table support deployed for action. 


22nd Armoured Brigade starts the game inactive; it cannot be moved; it cannot shoot; it cannot direct a barrage. This ruling represents the Brigade actually being somewhat south of its on table deployment area. 22nd Armoured Brigade is activated on any one of four events; activation represents the brigade's arrival in the battle area.
  1. The formation is activated on the appearance of a Desert Rats (Event) card.
  2. The formation is activated on the appearance of an Afrika Korps (Event) card.
  3. An enemy unit (other than aircraft) comes within 20”.
  4. The formation is fired upon by any ground troops.
VICTORY CONDITIONS
To achieve a decisive victory, at last light (end of turn 6) you must: 
  • Hold the two points of high ground currently held by 1st Battalion, KRRC. 
  • Hold the aerodrome buildings.
To achieve a crushing victory, at last light (end of turn 6), you must: 
  • Achieve the requirements of a decisive victory.
  • Get four companies (any strength) of tanks or infantry across the northern (German) base line west of the aerodrome track – they move onto Ed Duda. 
GERMAN BRIEFING FOR:
Major General von Ravenstein, officer commanding 21st Panzer Division, 22nd November 1941.

Yesterday was a successful day for 21st Panzer Division. At the end of the day there was no doubt that you had come out on top. However, the Tommies have shown a good deal of tenacity and, despite heavy losses, somehow maintain their position at Sidi Rezegh.

This morning, following receipt of orders from DAK, 15th and 21st Panzer Divisions moved north, down the wadis of the second escarpment, to take up defensive positions. 21st Panzer Division was ordered to concentrate at Belhamed and be ready to counter-attack any resumption of the British advance on Ed Duda from Sidi Rezegh. You have disposed your formation accordingly and it has refuelled and replenished without hindrance from an enemy who seem content to stick to their ridge.

Late this morning General Rommel arrived at Division Headquarters. He has personally given you new orders. You must advance and secure the second escarpment. This area is of vital importance to the enemy for their future operations to relieve Tobruk. He has ordered you to undertake a two pronged attack. Group Knabe will make a frontal attack from the north supported by the heavy artillery of Group BÅ‘ttcher (408th Heavy Artillery) on Belhamed. Meanwhile, Group Stephan will take a circuitous route via the by-pass road to Ed Duda then attack the aerodrome from the west. He assures you that the British at Sidi Rezegh are a beaten force with nothing more to offer than a stiff upper lip. One more sharp shock will send them scurrying for The Delta.

GERMAN OOB, GAME NOTES AND VICTORY CONDITIONS
All German troops are veterans with high morale.

Major General von Ravenstein, Lieutenant Colonel Stephan, and the commander of 2nd Battalion, 104th Schuetzen Regiment are a skilled commanders. All other commanders are average.


FOOs can deploy anywhere north of Trig Capuzzo or with Group Stephan.  All other troops must deploy in their designated deployment areas.


Two 10.5cm batteries of 2nd Battalion, 155th Artillery Regiment are a division level asset. They are prioritised to Lieutenant Colonel-Knabe. They are shooting from Belhamed; from an elevation 25m higher than the Trig Capuzzo but lower than the escarpment.

One 10.5cm battery of 2nd Battalion, 155th Artillery Regiment is attached to Group Stephan for direct fire support. It is a brigade asset prioritised to Lieutenant-Colonel Stephan.

The three batteries of 408th Heavy Artillery Battalion, Group Böetcher are Corps artillery prioritised to the general support of 21st Panzer Division. They are shooting from Belhamed; from an elevation 25m higher than the Trig Capuzzo but lower than the escarpment. 

Group Stephan starts the game inactive; it cannot be moved; it cannot shoot; it cannot direct a barrage. This ruling represents the Brigade actually being somewhat north and east of its on table deployment area. Group Stephan is activated on any one of four events; activation represents the groups's arrival in the battle area. 

  1. The formation is activated on the appearance of an Afrika Korps (Event) card.
  2. The formation is activated on the appearance of a Desert Rats (Event) card.
  3. An enemy unit (other than aircraft) comes within 20”.
  4. The formation is fired upon by any ground troops.
Optional: Two Panzer III companies (one in each battalion) can be three stands (vehicles) strong. For aesthetic purposes, the extra tanks should be represented by Panzer II tanks.

VICTORY CONDITIONS
To achieve a decisive victory, at last light (end of turn 6) you must: 
  • Secure the two points of high ground currently held by 1st Battalion, KRRC. 
  • Secure the aerodrome buildings.
To achieve a crushing victory, at last light (end of turn 6), you must: 
  • Achieve the requirements of a decisive victory.
  • Cause the destruction or retreat of all British armoured units.
TERRAIN NOTES

For movement the escarpment is type IV terrain. It provides a superior position when shooting to lower elevations. Reentrants (breaks in the escarpment) are treated as wadi (except if in column on the aerodrome track, which is type I terrain). Reentrants reach the height of the escarpment in line with the back edge of the representation of the ridge.

The high ground is treated as escarpment on its northern face and type I high ground elsewhere. It provides a superior position when shooting to lower elevations.

Wadis are type II terrain. They provide type II cover to infantry in depth, line or column formation if all stands are at least 50% in contact with the wadi bottom (a little common sense may be required here). They only provide type II cover to vehicles and guns traversing them in column.

Broken ground is type II terrain. It provides type II cover to infantry ending a move with a successful Other Difficulty check.

Aerodrome buildings provide type II cover; they do not block line of sight.

All other areas are type I terrain.

 Note: Infantry, as per usual, will treat all terrain as one type better for movement. 

Sunday, 22 September 2013

New markers for my WW2 desert games

Those who follow this blog will have noticed that we have been using plastic bases (for FoW) with home made sticky labels on them to indicate various things. Partly, this was because I couldn't think of enough different things to put on more scenic looking markers - the plastic markers would be a tidy stop gap until I could. I have been thinking about counters quite a lot recently, and I have come up with enough to get going.


I will, as usual, use small stones mounted on two pence pieces as casualty markers. These counters are very easy to make and do the job very well. At the moment I am using my less arid ones but in time I will make some new, less green ones. This photo shows a stone marker to indicate a 'compromised' stand. It also shows one of the old plastic markers.
Markers to show that a unit has fired are the most commonly used markers in our games. Consequently, they need to be kept simple enough to mass produce - I've made 32 so far and may need more. They take the form of shell craters mounted on two pence pieces. The crater is a thin layer (3mm) of Miliput with a hole pressed, and widened into it with the round ended handle of a big paint brush. The scoring on the crater sides was done with the side of a darning needle mounted into an Exacto handle. Sand and grit, glued with PVA, around the craters finished them off.

Markers to indicate suppressed units has been a little more difficult to come up with. Finally, I have settled on shell bursts.These were made on two pence piece bases. The bursts are made from nails of various lengths glued to the base with a glue gun. A glue gun is essential to make these simple and quite quick to make. After being made, the shell bursts were coated in PVA and dipped in a grit heavy sand mix. I made 16 in an hour and a half.

All counters were painted and dry brushed with household emulsion with a darker than usual base coat in the shell craters and on the 'sprouts' of the shell bursts.

Next up, I'm making up some 'used smoke rounds' markers. These are based on one pence pieces. They will be sand and gritted then have some cut up 28mm white metal spears sprinkled onto them - when painted a brass colour they will look like spent shell cases. I've used these on some of my artillery bases and they look very effective.

I am still to come up with markers for surrendered troops, and may need a marker for retreating (I plan on using two shell bursts until then). Current ideas are short lengths of barbed wire (for surrendered) and casualties (for retreating) units. Both must fit onto two pence pieces. If anyone has other ideas, please let me know, especially regarding markers for retreats - I hate painting figures that are just for markers.

Please, don't tell me that I am doing something illegal with my two pence pieces. I looked up the legislation some time ago, and I'm not. It is a myth that defacing the Queen's head on coins, or despoiling coins of the Realm is against the law. The law only concerns the 'breaking up' of coins. Providing that you don't cut, grind or drill into the coin it is pretty much OK to do what you want. If you want to dip the Queen in PVA and then sprinkle her with sand and grit, you can!