Friday, 29 April 2016

Seven Years War Austrians - finished!

At long last, I've managed to squeeze in some work on my own figures and get the last of my Seven Years War Austrian army finished. It has been a long time coming and I'm not only pleased but, frankly, relieved.

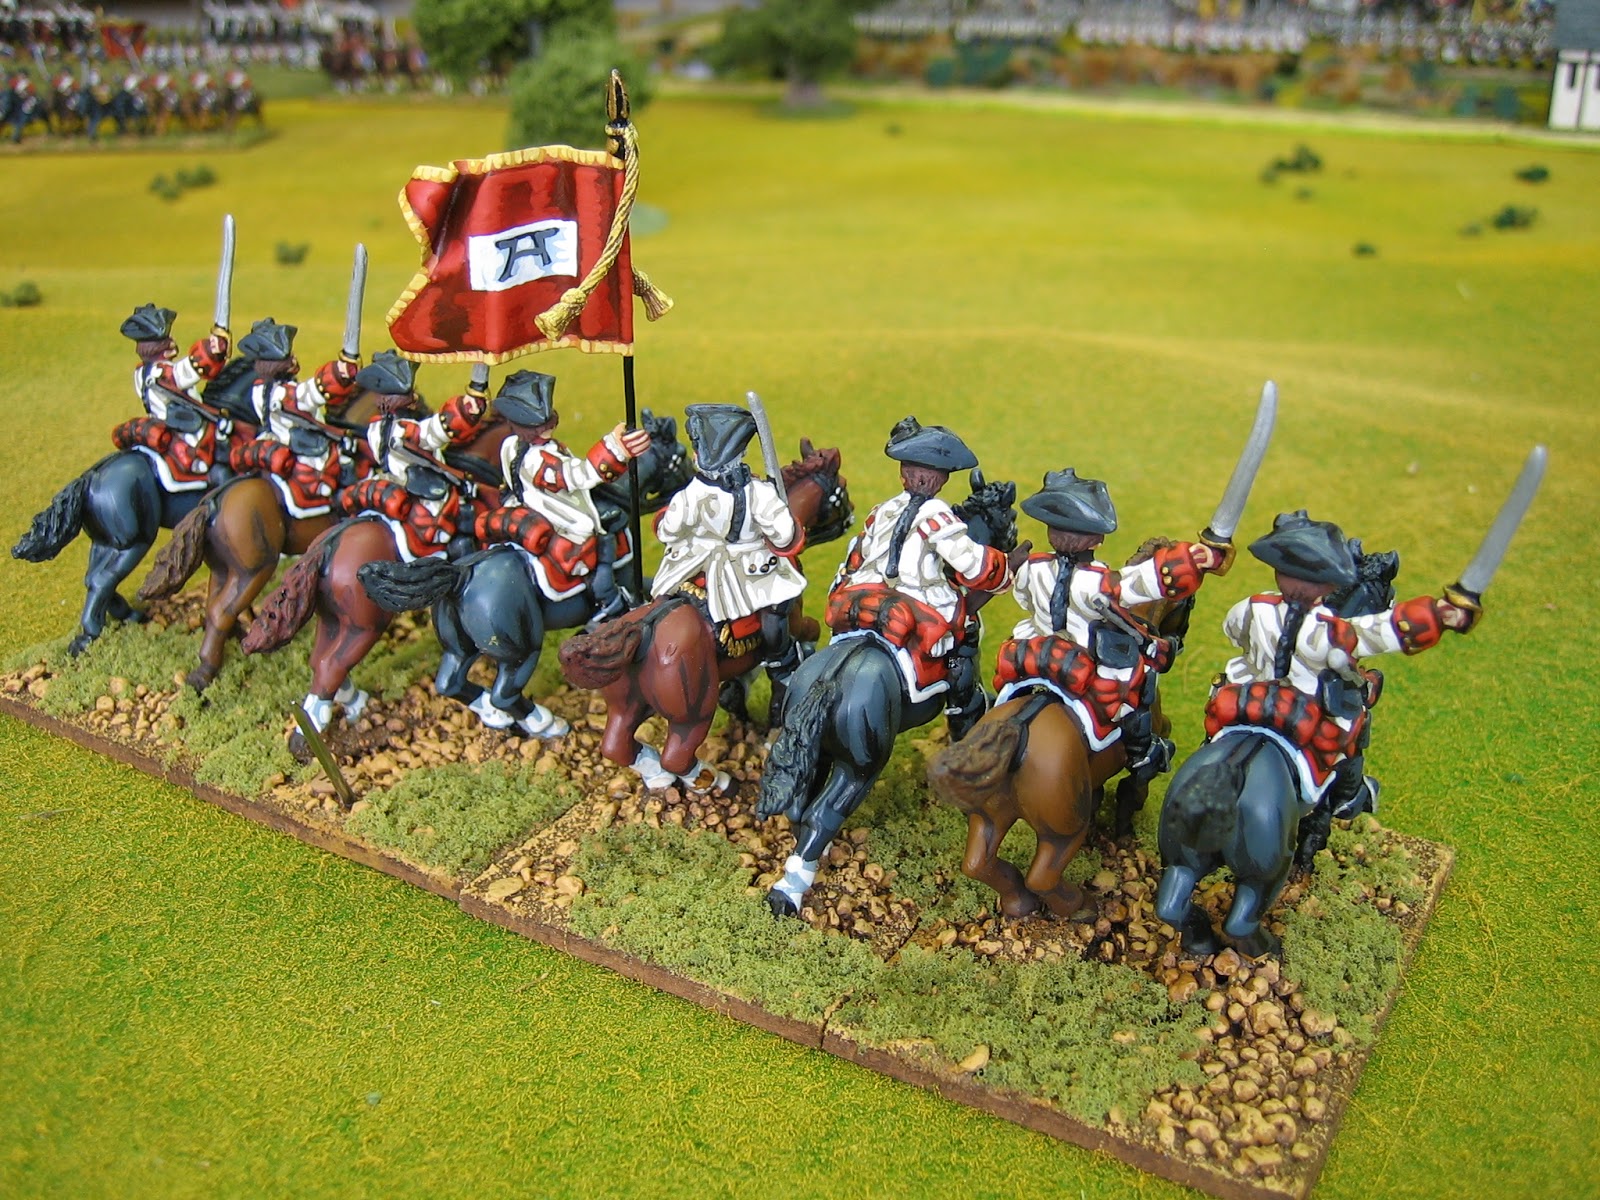
So, here are the latest additions: 3 units of cuirassiers, a unit of dragoons, a unit of horse grenadiers and three units of hussars. All are Front Rank figures. These units bring the Austrian cavalry count up to twenty units. 


This is DR 1 Erzherzog Joseph. I have painted it as its elite company of horse grenadiers. I have done this so that it can be used either as DR 1 or to represent a unit of combined elite companies from several regiments as the need arises.


This is DR iii Althann. This unit did not see that much war service and I chose it for other reasons. The first reason is aesthetic: it is the only regiment with a white coat and it has a nice easily recognisable flag. The second is that it has a very similar uniform to that of the cuirassiers, especially from the back, so if the need arises I can probably get away with designating it as a 'cuirassier stand in'. It's another multi-purpose unit.


 Three units of cuirassier. CR 8 Palffy, CR 12 Serbelloni and CR 25 Anhalt - Zerbst.

I did CR 8 Palffy, because it has a nice flag, an imperial eagle on one side and a simple to do crest, possibly representing a stag 'rampant' and a wheel.


HR 2 Kaiser. A rather nice, simple combination of colours. Front Rank hussars are ever so nice to paint. I suppose it is the lace that puts a lot of people off painting them but I think they are some of the prettiest troops on a SYW battlefield so well worth any extra effort.


HR 11 Nadasdy. I'm never sure about troops wearing green but these turned out rather well. The riderless horse is not a mistake on my part. I bought two 'unit packs' of twelve hussars each from Front Rank, each pack was delivered short of its standard bearer. I thought about giving Alec a ring (you always get great customer service from Alec and Elaine) but then thought that when they came I'd not only have to paint the figures but also two more flags, and unlike other cavalry in this range the hussar horses come with shabraques, making the horses ideal 'casualty' figures, so I demurred. The effect is, I think, rather pleasing.


Lastly, HR 32 Szechenyi. Another stunning combination of colours.

So that's it. Job done, the Austrians are finished. Next post, in a few hours time, will be an Austrian Army ROLL CALL!!

Saturday, 9 April 2016

Herr Schmied's house and smithy


A blacksmith's is another of those iconic war game buildings that I have somehow neglected until now. A smithy is easier to represent than most industrial buildings because it can be made with an open frontage to show the forge and an anvil. 


 Except for the inside of the smithy, this town section is a fairly basic construction. It is made in the same way as my other recently constructed buildings. The base and walls are MDF, the chimneys, brick work and timber framing and gate are balsa wood, the roofs are card. The windows and doors are by War Bases and the yard walls are railway accessories. 


Because this town section has two buildings it has two identifiable yards, one behind the house, the other in front of the smithy, each capable of holding a unit (four 45mm square bases) of troops but, because the overall base is only  8" x 9", it could easily be declared as a large one section piece.


Inside the smithy is the forge (with bellows), an anvil, a quenching barrel and a work bench. The forge has cat litter coals and a card cowl (out of shot but there). The anvil was made from a plastic matchstick from an old children's game set I ransacked years ago for tiddlywinks and other bits and pieces - I always knew those plastic match sticks would come in useful one day - mounted on a balsa wood block. 

So, now I have fourteen town sections for horse and musket battles set in northern Europe. Except for another church, I think I have enough for now. I certainly have enough for the Lobositz game at Derby later this year, which only needed nine.

Thursday, 7 April 2016

Lobositz - first fix for Derby.

This week I've spent a little time working out a possible set up for Lobositz 1756 for the Derby World Wargames show later this year. Whilst doing so I wondered if people would be surprised at how I actually go about this because my methodology is actually rather adhoc and unscientific.

No matter how hard I try I never seem to be able to effectively do a layout using pen and paper. Whenever I try to do it things never quite transpose to the table properly. I find it much easier to do a layout directly onto the table then, if necessary, draw it afterwards. 

Stage one is to choose a historically based deployment map and OOB, in this case I drew on the information from three sources (1) mixing and matching at my whim.  

Then I layed out the troops using paper templates held in position by a 'paper weight' stand of the appropriate troop type. This effectively gives a ground scale based on unit frontage.

After laying out the troops in their starting positions I lay the terrain around them. 

I've always found this way of doing things far better than doing it the other way around because terrain can be made to fit troop frontages but, being fixed by base sizes, troops can't always be made to fit the terrain: It's ground scale by war game unit frontage.

In this shot you can see I've used, thin chain to roughly mark some of the contours. I've laid out the other terrain in some detail so that I can be sure what I have and what I might need - for example, I'm going to need to make at least another eight feet of vines for the walled vineyards on the Lobosch.


Leaving the chain on the table for sizing purposes and removing everything else, I then see what I can do about the hills. The hills for Lobositz are quite large features and they required me to cut some new pieces. 

This requirement actually led me to discover that the pink insulation board I have is the same thickness as the blue - I've always believed it was thinner - result! 

The Homolka required a few new end pieces and some 'square' filler sections to make the hills bigger than those I usually use.


The Lobosch is a volcanic mound with a classic volcano cone. Fortunately this cone was not fought over and the action took place on its much less steep lower slopes.

I made the first two contours with pre-existing shapes and some new 'square' fillers. I've subsequently made two new sloped pieces that are not shown in this photo.

  1. One to  replace the front slope of the second contour squaring it to the table edge and giving it an extended straight front slope.
  2. A new piece to replace the back left section of the first contour, squaring it to the table edge.

I've used a piece of 2" thick board to do the lower slopes of the cone making the Lobosch 5" high at its highest point.
After the hills shapes were made I relaid the cloth over the top and set everything else out properly. 

I'm short just three units of cavalry (which I have unpainted in the lead pile) and possibly two Prussian howitzers (which I may, or may not, buy) to replace gun models. For the purposes of the photographs I've substituted other units.

I think it looks pretty good.


The Prussian army deployed on the Homolka. 

The windmill is Wchinitz.

A strange fact came to light as I laid out the troops. I have twenty four units of Prussian infantry but not one of them actually fought at Lobositz. I'm not sure how that could have happened.
Bevern's infantry facing Austrian Grenzers on the Lobosch. 

This shot shows the new shape of the Lobosch (under the front rank Grenzers). The second new hill piece merely tidies up the cloth at the table edge.

Massed Prussian cavalry and guns between the Lobosch and Homolka.
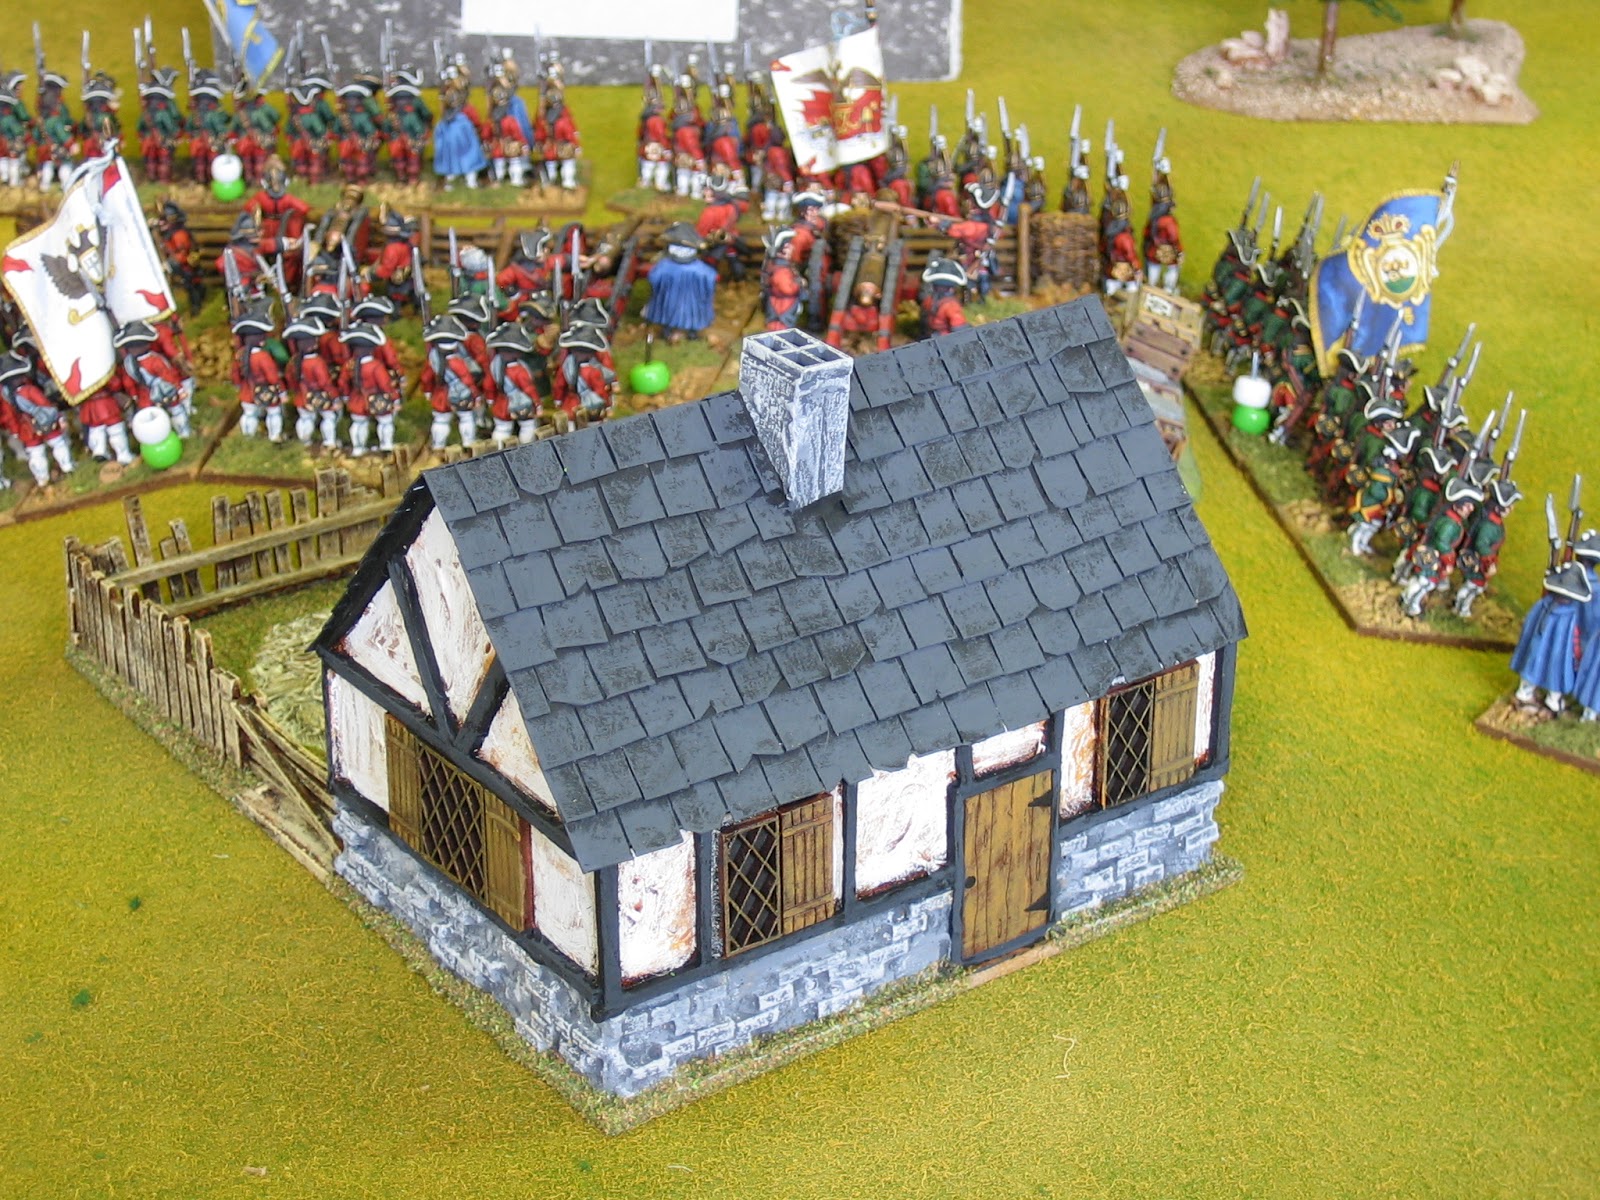
Lobositz, featuring a partly finished building. This is Herr Schmied's house and smithy. I'll post some pictures of this building when it's finished as it has some nice details that you can't see in this shot.

You can just see Austrian infantry passing out of the town in column of route towards the right flank to support the defence of the Lobosch and, just behind them, the dark bend of the Elbe.

Between Lobositz and the bulk of the Austrian army behind the Morellenbach stream is a sunken road. I'm currently making a new piece of terrain to represent this.
The bulk of the Austrian army deployed in Sullowitz and beyond the Morellenbach.

Having set it up, of course, means we might as well fight it. 

.....to be continued.

Notes:
(1) Deployment maps and OOBs were from Duffy's The Army of Frederick the Great, the official German High Command map from Kronoskaf Seven Years War Project, and Jeff Berry's excellent map on his Obscure Battles site.


Paltzig continued


This is a very short post is an AAR of the second night's play (fought on 30th March) of the Paltzig 1759 scenario. We left the action with the Prussians exceeding all expectations and pressing their attack on the southern flank of the Russian army but with the Russians still massively outnumbering the Prussians and forming a new line just south of Paltzig. The game was in the balance.


I have to report an unbelievable reversal of history. Peter (Prussian) just couldn't stop winning initiative and rolling high combat dice. The Russians couldn't manage a single noteworthy volley. 

The Prussians pressed home their attack with unerring precision from the start. It wasn't long before the Russian position began to collapse with their troops retreating to the rear areas in a constant stream. At the end of the battle the Prussians had somehow managed superior numbers, not just locally, but overall. 


The position at the end of the game. The Prussian line is intact and rolling the Russians up. 

At the end of the battle, the lost unit count said it all: Including four units of Cossacks (three of which were voluntarily withdrawn off table) the Russians lost twenty seven units, the Prussians had lost just three and most of their 'heroic' units were completely intact. 

Major morale failure was inevitable for the Russians and so we finished the game before working through to it - the Russians, who started with sixty four morale chips had none left and the Prussians, who started with just thirty six, still had sixteen.

If we replayed this game a hundred times I don't think the Prussians could do better. I still can't quite get over the enormity of the Prussian victory. Reversing history in such a lop sided battle is one thing, but to do it like this is simply astounding: A very, very memorable result! 

Wednesday, 30 March 2016

All Inn for Derby

This week I've added another new building to my generic 'horse and musket northern Europe' property portfolio. It was constructed and finished in a similar way to other buildings I've posted about this month (construction and finishing) so I will not repeat all that stuff here. The only thing I've done differently for this one is to roughly back paint the windows onto the walls, in three shades of blue, before I glued the window frames on.

As with all of my buildings, this one is under-scale. At a guess, size wise, for length and depth, I'd say it is closer to 20mm scale than 28mm. The trick, I think, when modelling under-scale buildings is to get the scale of the height right and to get the size of the doors and windows right - that way the building fools the eye when figures are placed next to it. As per usual these days, the doors, windows and shutters on this building are by War Bases.

Even under-scale the model is quite a large one; it is on a 270mm x 190mm base; it is about 150mm tall. The garden / yard has sufficient room for two units. 


So there it is:  The 'Two Roosters' coaching inn. I hope you like it.


Now I only need to make two simple two storey houses with yards. 

What for? 

For a Lobositz 1756 demonstration game at the Derby World's show later this year, of course. Perhaps I'll see you there.


Friday, 25 March 2016

Paltzig 1759 - The Player's Game

The last time I did an after action report on my Paltzig scenario was when I did it as a solo game. I played it solo because it looked like the scenario could well be a complete stinker: The Prussians, outnumbered 2:1, are attacking over bad ground. I was surprised at how well the Prussians did and, though they ultimately lost, I thought there were enough tense moments and tactical questions asked for the scenario to have some interest for Peter and Graham to have a bash. I reset the game and Peter and Graham came around on Wednesday and played the first three turns. I wasn't expecting what was about to happen so I didn't take any pictures during the evening's play.


This is actually a photograph of the solo game. In the game played on Wednesday the stream is closer to the Prussian edge and thr Russian line is positioned a little more forward.
Those who read the AAR of the solo game might have been surprised at just how well the Prussians did but, look at this. This is the position at the end of turn three. The Prussian reserves have arrived, the Russian reserves have arrived and everything is on the move. 

I can't remember the last time Peter [Prussian] rolled dice like he did on Wednesday; him getting dice and initiative at the same time is, frankly, unheard of; he's been up to something; I'm having an exorcism done next Tuesday.
This shot shows the overall positions at the end of turn three. Note the new depth of the Russian deployment zone - the front infantry line started directly behind the two Russian artillery redoubts. It has allowed the action of Manteuffel to take full advantage of his concentration of force against the southern flank of the Russian line - he is now, almost, behind the Russians!
Picture taken from Paltig looking south. Manteuffel's attack has crashed into the southern end of the Russian infantry line. The Russians have collapsed, the main battery on the southern hillock has been overrun and what is left of the line is being outflanked. Belatedly, the Russians are hastily forming a second line just south of Paltzig. 
In front of  Paltzig, Saltykov has ordered the Russian infantry of Villbois' command to advance towards the Eichemühlen-Fliess to engage Wobersnow more quickly.

This shot shows just how far back I pulled the 
Eichemühlen-Fliess back towards the Prussian base edged. This allowed the Russians to be deployed with more room behind them. 
 In the distance, Kanitz has arrived in support of Manteuffel's attack. Manteuffels infantry is still largely intact and attacking with elan. On the left, a Russian unit is being surrounded. In the foreground, a cheeky unit of Don Cossacks [Krasnochekov's command) is harassing them as they come forward. 


Krasnochekov's Hussars and Cossacks have voluntarily made an early advance up the valley. Schorlemer's cuirassier hastily advanced, licking their lips, to meet them.
A scenic windmill stands idly waiting for the corn to ripen. I took this shot purely for the sake of taking another picture of my newest building.
So, there you have it. What a turn up for the books. The Prussians are cracking on at an impressive rate of knots. They have lost a single unit of dragoons, blasted away by artillery on the southern hillock. The Russians have lost six units of infantry and two batteries of guns to the Prussian infantry under Manteuffel. However, the Prussians have been spending morale chips like water and are down to just 21. The Russians, on the other hand, had greatly more to begin with and still have 41 left. The Prussians could do with the Russians failing some Major Morale [now Vs 8] checks.

I'm looking forward to seeing how this one pans out. The Prussians might achieve an astounding reversal of history. We shall see...........

Wednesday, 23 March 2016

How I finished the buildings I made last week

Last week I knocked up a couple of cottages and a windmill and I posted a short article about their construction. 

I wasn't all that keen on finishing them quickly, as making buildings is always far more interesting and satisfying than painting them, but when I saw Charles G. on Saturday his first words were "James, nice windmill". Consequently, I felt almost obliged to finish it quickly. I took Monday as a day off (Sunday was a very long day) and did the prep work and some bulk colours; on Tuesday evening I painted the detail and finished them.

The brickwork was prepared with a coat of well diluted plaster filler and PVA mix. When this dries it gives a rough 'gritty' surface that looks 'stoney' when dry brushed. 

I've run out of black artist's acrylic (with which I would normally mix in white household emulsion to get grey), so I did the grey with a tin of satin grey enamel that I've had about the place for a few years (thanks, Mark S.). It was going onto a porous, rough surface so I knew it would dry matt. I then dry brushed it with two lighter shades (the satin grey with white matt enamel mixed in).


The woodwork was painted with artist's acrylics. - there is a base coat of mid brown on all of it with the darker wood getting a burnt umber (brown) artist's acrylic ink wash. 

It was then dry brushed with artist's acrylic lightened with household emulsion paint (I have jam jars with several shades of beige, left over from decorating, that I use). 

I decided to do the sails in a lighter shade of wood purely for the purpose of contrast. It is the same shade as the darker wood dry brushed with more emulsion paint mixed into the artist's acrylic. The detail on the sails was brought out with a few strokes of diluted brown ink.


I prepared the 'wattle and daub' walls (between the timber framing) by loosely applying Naples Yellow heavy body artist's acrylic paint. You can do the same job with a plaster mix but I find this much easier to apply and the acrylic gives a 'smoother' finish. 

When dry, I washed it with diluted brown artist's acrylic ink. Then it was dry brushed with two shades of household emulsion. 
After the daub had been painted the timber framing was painted with black matt enamel paint. This later got a highlight of dark grey. This highlight was applied carefully with a brush on the framing (because the daub had been done already).

The slate roofs are painted the same but, they are more casually dry brushed. 
As you can see, the yards / gardens have a rough appearance. This was achieved with a preparation of loosely applied heavy body artist's acrylic paint (it's the same as the daub), ink washed and dry brushed with beige acrylic and artist's emulsion. 
Finally, I used PVA glue to stick flock around the outside edge of the buildings. I also did the same thing around the interior edges of the yards / gardens. This last step is an important finishing touch.

So that is it, job done: Three new buildings for northern Europe added to the collection.

I hope this very brief description of how I did these buildings is of use to some of you. 

Making buildings, once a few basic materials and tools have been collected, is quite easy.