Introduction
Here are the scenario notes for the Ilkley Lads demonstration game at Fiasco, Royal Armouries, Leeds, 28th October 2018. We will not be giving away a hand out flyer as there is too much information to include. We will give out address slips for this blog instead - fill your boots.
As my previous post indicated, I have used various sources to develop this scenario, most of which are contradictory to some degree. Initially I went with Taylor's deployment but now I think this is fundamentally wrong. I've mostly followed Oman instead but, mostly I've still chosen to use Taylor's generous numbers. The background was taken from Mallet & Shaw's book because it is the easiest to understand (the style is 'modern'), and it had one or two other tit bits too. I always use Peter Sides' scenario booklet as a first look guide, because his numbers and deployment maps are laid out 'war game style'.
- Charles Oman - A History of the Art of War in the Sixteenth Century [ISBN 0-947898-69-7]
- Frederick Taylor - The Art of War in Italy 1494 - 1529 [ISBN 1-85818-002-3]
- Michael Mallet and Christine Shaw - The Italian Wars 1494 1559. [ISBN 978-0-582-057758-6]
- Peter Sides - Renaissance Battles 1494 - 1700 Volume 1. [Gosling Press]
- Other books, some I looked through for this scenario, in this linked list.
Images for the command labels were found on the net, some are guesswork.
We will use a revised version of Hell Broke Loose rules (by me), a set of rules based on Piquet by Bob Jones, and Piquet, Field of Battle by Brent Oman, to play this scenario.
The figure ratio used is 1:50-ish. I've counted 'lances' as two heavy cavalrymen each, they should be counted as the best part of three, but they would be hard to squeeze into the space available - assuming I had that amount of figures anyway, which I don't. To cut down the number of units the game will use (by about a quarter), to speed up play, I've increased the unit sizes, prescribed in Hell Broke Loose rules, by 50% - six stand units will represent four stand units, etc.
The Strategic Situation
 |
| Contemporary print of the Battle of Ravenna. The artist captures the brutal nature of the contest. |
As 1512 dawned, Louis of France must have looked at the future with some trepidation. France was beset on all sides by enemies. In 1511, The Holy League had been formed. This was an Alliance of Spain, Papal State, Venice and England. The stated aim of the League was the preservation of the Papacy, not specifically aimed against any power, but actually intent on restraining Louis' aggressive, and expansionist, foreign policy in Italy; the League even had its own army, largely Spanish in composition and led by Ferdinand's appointed commander, paid for by the Papal State and Venice.
In Lombardy, the Swiss were threatening to re-invade French held Milan. They had only just aborted a siege of it in December, with an army 10,000 strong, following a lack of support by the League's army. Venice was in the process of reorganising its army to reestablish control over its lost possessions in north east Italy. The Leagues army was cautiously awaiting these events, aiming to bring its weight to bear at the most advantageous moment. Meanwhile, Louis was also facing imminent invasion at home; Ferdinand and Henry had agreed to jointly invade Aquitaine. France's best ally, Maximilian, was prevaricating in his usual manner, demanding help for the Empire rather than providing it to imperilled France.
With so many threats, all imminent, Louis decided on a policy of preemptive strike. The only enemy army yet in the field was that of the League. He ordered his Italian army's field commander, his twenty two year old nephew Gaston de Foix (incidentally, also Ferdinand's brother-in-law), Duke of Nemours, to seek out and bring the League's army to battle and destroy it posthaste. This was easier said than done; the League's army was commanded by the very cautious Ramon de Cordona (some of his captains thought too cautious), Viceroy of the Kingdom of Naples, who was only too happy to avoid contact with the French, withdrawing before the French every time action looked likely. Short of supplies, Gaston de Foix decided to force the issue by laying siege to Ravenna. This city was too important to the League for its loss to be countenanced; Ramon de Cordona had to relieve it, or face being relieved himself. The die was cast.
On 10 April the League's army approached to within a mile of Ravenna and 'dug in', hoping that, with Foix running low on supplies, the French would withdraw. On 11 April, Easter Sunday, leaving a rearguard to watch the city's garrison, Foix marched out of his siege lines, over the Ronco, conveying his artillery using a specially constructed bridge, to confront the army of the Holy League. One of the bloodiest battles of the Italian Wars was about to take place.

The Battlefield
The battlefield is laid out on a 10' x 6' table.
- In the foreground the River Ronco flows between two man made embankments. The southern embankment carried the major roadway from Forli to Ravenna. From accounts, the Ronco was fordable everywhere but, for the purposes of this scenario, it is an impassable barrier at the northern end of the table. The southern embankment falls gently away to the lower lying ground and it is not an obstacle.
- There is an extensive area of boggy ground, occupying the south west end of the table. This is important because it formed the secure flank on which the southern end of the Spanish deployment area was anchored. It also allows safe haven for Ferrara's guns to enfilade the Holy League's position. Boggy ground is impassable to troops.
- There are two places of human habitation. The first is the mill at Molinaccio (referred to by Oman as "the mill called Molinaccio") which, by rights, should be somewhere off table, beyond the boggy ground, to the southwest of the battlefield; the second is the farm in the south east sector of the table. Both places are out of the way and should not interfere with the battle's progress. They were added to the layout to impress the fact that the fields surrounding the town of Ravenna (barely a mile away) were a 'living', well populated, agricultural environment. As a rule of thumb, as war game terrain features, they should, wherever possible, be ignored.
- The main feature of the Holy League's deployment area is the earthwork thrown up at the behest of Pedro Navarro (the famed military engineer) the day before the battle. I imagine it was similar to the one hastily thrown up at Cerignola nine years before; it was probably based on an existing ditch made wider and deeper, with the spoil thrown up into a low breastwork. In any event, for this scenario it counts as light rough (type II) terrain for all moving or fighting over it; it provides cover to the defender in melee; it provides heavy cover versus all missilery to troops directly behind it and is the range limit of incoming arquebus fire; it provides light cover to troops further back versus artillery and crossbows, which can 'arc' their fire over it; it provides a defending unit with 1 stubborn 'unit integrity' bonus (see Hell Broke Loose rules). For ease of play, contact occurs at, and all range measurements should be taken from, the leading edge of the earthwork.
- The rest of the battlefield is flat water meadows, clear of woodland, cut up by irrigation ditches and crisscrossed, here and there, by roads. The road running, north to south, down the table between the opposing armies is an important feature of this scenario (see scenario notes). The irrigation ditches, marked with 'foliage', are scenic and do not pose an impediment to movement.

The Holy League - OOB and Initial Deployment
The army has a D10 army die and sequence deck. From the Army characterisation deck, the army has the Like Hail reload card; a Stratagem card (see scenario notes); 28 morale chips.
The overall command of the army has fallen to Ramon de Cordona, Viceroy of Naples; generously given a D10 motivation die because of his high social rank.
The army is arrayed in six command groups: Two are infantry, four are cavalry commands.
From north to south...

Comprising two standard sized units of men-at-arms.
The 565 lances of the 'Battle', led by Marquis della Padula; D10 motivation die.
Comprising two standard sized units of men-at-arms.
(Note that numbers within these two commands have been evened out - it just worked well that way).

Comprising four standard sized colunela units; two medium guns; four war carts.
4,000 infantry of The Papal State, led by Ramassot; D8 motivation die.
Comprising one (counts as 6 stands in the rules) pike square; one standard sized unit of 'skirmish' arquebus.
(Note that most sources have the Italians at 2,000 strong. I have gone for the 4,000, claimed by only one source, in the interest of game balance).

Comprising one large sized unit of men-at-arms.
(Note that Taylor has the rearguard under Carvajal behind the 'Battle'. Given they sallied out of the south end of the position after being bombarded by Ferrara's guns I find this difficult to understand. Oman has him to the south of the position.)
1,500 light cavalry of the Holy League, led by Fernando d'Avalos, Marquis de Pescara; D12 motivation die.
Comprising one large sized unit of stradiots; one large sized unit of mounted arquebus.

The French - OOB and Initial Deployment
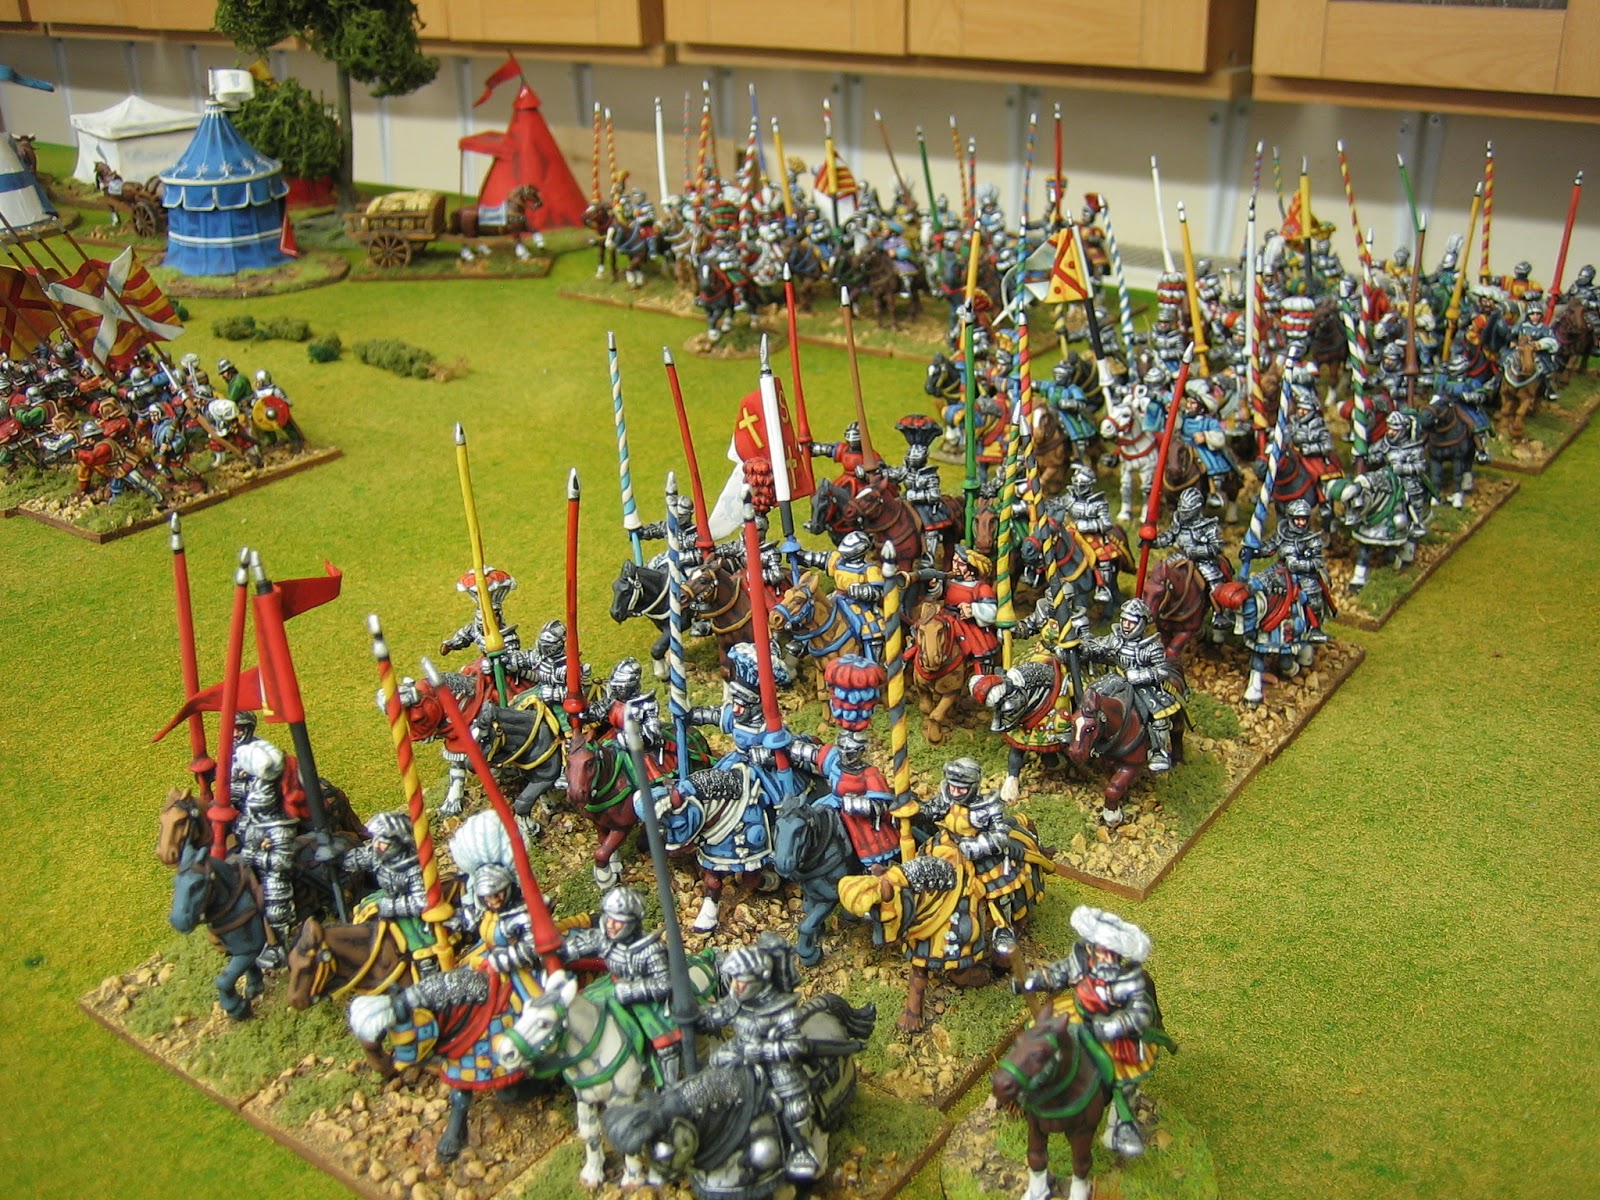
The French are army making the final adjustments to their battle array. The heavy cavalry of the 'Battle', under Odet de Foix, are about to take position at the ent of the infantry line; The Duke of Ferrara is moving his guns to the extreme end of the French line to better engage the enemy.
The army has a D10* army die and sequence deck. From the Army Characterisation deck the army has the Bounce Through artillery action card; the Ciao Bella command group wild card; a two use stratagem (see scenario notes); 34 morale chips.
The overall command of the army has fallen to Gaston de Foix, Duke of Nemours; D12 motivation die.
The army is arrayed in nine command groups: Four are infantry, four are cavalry and one is guns. One of these groups, the French 'Rearguard' cavalry under Yves D'Alegre, is off table (see scenario notes).
From north to south...

Comprising three standard sized units of Gendarmes.
4,500 Gascon crossbowmen, led by Soffrey Alleman, Seigneur de Molart; D10.
Comprising four standard sized units of 'skirmish' crossbows; 1 heavy gun; 2 medium guns.

Comprising three (count as 6 stand in the rules) pike squares; one standard sized unit of 'skirmish' arquebus.
(Note that most sources have the Landsknechts at 5,000 strong - 5,000, that's not enough!).
3,500 Picard pikemen, nominally led by Thomas Bohier, Seneschal of Normandie.
Comprising two (count as 4 stand in the rules) pike squares.
(Note that I have followed Oman for the position of the Picard pike but, I'm not sure this is right. They might be better placed alongside the Gascon crossbowmen, which they are said to have supported - perhaps on another day).

Comprising one (count as 6 stand in the rules) pike square; one standard sized unit of 'skirmish' arquebus.
780 lances of the 'Battle', led by Odet de Foix, Seigneur Lautrec; D12 motivation die.
Comprising two large units of Gendarmes.
(Note that I have deployed the cavalry of the 'Battle' making their way from behind the cavalry of the 'Van' to the southern end of the infantry line. Oman has them placed between the Picards and the Italians but fully admits this is guesswork by him - no one knows for sure where they were positioned. Historically, they engaged the Holy League's rearguard under Carvajal when it sallied out; I have put them where they can do so easily).

Comprising two standard sized units of Stradiots; 1 large sized unit of mounted crossbows.
The guns of Ferarra, nominally led by Alfonso d'Este, Duke of Ferrara; D12 motivation die.
Comprising 1 heavy gun; 1 medium gun.
(Note that, Taylor simply states that Ferrara brought his guns to the southern end of the line by road, by a circuitous route (the ground being too boggy to go 'cross-country'), independently of the main force, and did not arrive until shortly after the battle got underway. I'm very fond of this idea. I have him approaching a good, and safe, position from which he can bombard the cavalry at this end of the field - historically, something he did very successfully).
Off table: The 300 lances of the 'Rearguard', led by Yves D'Alegre.
Comprising one large sized unit of Gendarmes.
(Note that the 'Rearguard' may arrive during the battle subject to action being taken on the French Stratagem card - see scenario notes).
Scenario Notes and Special Rules

The French have two special rules in play and both are led by the appearance of their Stratagem card. The card can only be used for one purpose on each appearance. Both uses have a sound historical basis.
The first is 'Prolonged Bombardment'. On the card's FIRST appearance the player may declare that a prolonged bombardment will take place.
- If the French player chooses to undertake this stratagem the current turn ends and the bombardment deck comes into play (this comprises five very pretty playing cards, four jacks and one joker, which will be shuffled and placed face down prior to play).
- The cards are turned from the deck, one by one, and each card counts as an Artillery Action card for both armies.
- When the joker is turned, also counting as an Artillery Action card for both sides, the French player may use it to remove one medium gun from the battery at the northern end of the French line, then place it anywhere on the northern bank of the Ronco, and behind the enemy front line, from where it can enfilade the Holy League.
- When the last card has been played the bombardment ends and normal play resumes with a new turn.
(Note that the battle of Ravenna is famous for the longest and heaviest cannonade in history up to that point. Both sides suffered terrible losses during its two hour duration. It was also during the bombardment that the French chose to withdraw two guns and redirect them, with deadly effect, to a flanking position on the other side of the Ronco; if the bombardment isn't carried out the cannon cannot be moved - it was all part of the same plan).

The second special rule covers the arrival of d'Alegre. On the appearance of the Stratagem card the player may roll D8 Vs D8 to activate d'Alegre. If successfully activated, d'Alegre will arrive on the next March card. His move will start in contact with the French table edge and the Ravenna to Forli road.
(Historically, d'Alegre's arrival helped turn the cavalry battle between the French Van and the Spanish Van and Battle).

The infantry of the Holy League begin the battle lying prone, out of sight of the enemy. They were ordered to do so by Pedro Navarro. To indicate that the unit is prone, each unit begins the game marked with a (Broken Wheel) counter.
- The enemy modifies any fire to prone units Down 2.
- Prone units can stand to, facing in any direction, on the appearance of a Formation change card, or with their present facing if an enemy unit moves within 12" as a 'reaction move' (units stand but cannot shoot as part of the same reaction phase).
(Note that the decision to make the infantry lie down was a two edged sword. It preserved the infantry from the cannonade virtually unscathed. The cavalry, unable to lie down, felt the full force of the enemy artillery, causing them to charge out of their fortified camp rather than face certain slaughter).

The Holy League Stratagem card is not included in the player's sequence deck but held to one side, playable at any time: It is Hidden Ditch. At any time, the player may declare a stretch of the road running between the farm and the river embankment, up to 18" long, as a ditch that is difficult to cross .
- It cannot be put anywhere that any troops have already crossed in a previous move.
- It should be marked with two small trees, one at either end.
- The ditch will force troops to stop at contact, then move at half rate until it is fully cleared.
- It does not provide a terrain advantage or cover to defending troops.
(Note that the idea for this came from Oman's description of the battle. He says "Braving the fire which was poured upon them, they rolled up to the ditch, after passing a water cut (which was not part of the Spaniard's work) which was found to lie across their path." This indicates that the Landsknechts, at least, were held up by an unforeseen obstacle that was within arquebus range of the 'Spanish' works; the road makes a suitable, easily identifiable, location for such an obstacle to be placed).
Unit Specifications and Command Labels
Unit definitions for Ravenna 1512 using Hell Broke Loose.
FRENCH
|
||||
Troop type
|
Combat
dice
|
Defence
dice
|
Unit
Integrity
|
Notes
|
Elite Gendarmes [A]
(Two flags)
|
D12
|
D8
|
4 (1S*)
|
Swift (move on swift
cards);
Fierce (melee on even move
roll);
*Stubborn (8 stand units
have 1 stubborn UI, inc.).
|
Other Heavy cavalry [B]
|
D10
|
D8
|
4 (1S)
|
Swift (move on swift
cards);
Fierce (melee on even move
roll).
|
Stradiots [C]
|
D8
|
D8
|
3
|
Swift (move on Swift cards);
Grizzled (inc.).
|
Missile cavalry [C]
|
D8
|
D6
|
4
|
|
Picard pike [D]
|
D6
|
D6*
|
5
|
*Brittle (down 1 to DD die
Vs missile / command; -1 stubborn UI, inc.).
|
Gascon crossbows [D]
|
D6
|
D6*
|
3
|
*Brittle (down 1 to DD Vs
missilery / command);
Skirmish (may only be
‘formed infantry’ in a deep formation, or when defending a linear obstacle).
|
Landsknecht pike [B]
|
D10
|
D8
|
6 (3S)
|
Swift (move on Swift cards);
Stubborn (+1 Stubborn UI,
inc.).
|
Landsknecht shot [C]
|
D8
|
D8
|
3
|
Grizzled (inc.);
Skirmish (may only be
‘formed infantry’ in a deep formation, or when defending a linear obstacle).
|
Italian Pike [C]
|
D8
|
D6
|
6 (1S)
|
Brittle (-1 stubborn UI,
inc.).
|
Shot [C]
|
D8
|
D6
|
3
|
Skirmish (may only be
‘formed infantry’ in a deep formation, or when defending a linear obstacle).
|
Artillery [C]
|
D8
|
D6
|
2
|
Brittle (Down 1 for
command).
|
SPANISH
|
||||
Troop type
|
Combat
dice
|
Defence
dice
|
Unit
Integrity
|
Notes
|
Elite heavy cavalry [A]
(Spanish flags)
|
D12
|
D8
|
4
|
Swift (move on swift
cards);
Fierce (melee on even move
roll);
|
Other heavy cavalry [B]
|
D10
|
D8
|
4 (1S*)
|
Swift (move on swift
cards);
Fierce (melee on even move
roll);
*Stubborn (10 stand units
have 1 stubborn UI, inc.).
|
Genitors [C]
|
D8
|
D8
|
3
|
Swift (move on Swift cards); Grizzled (inc.).
|
Missile cavalry [C]
|
D8
|
D6
|
4
|
|
Spanish Colunela [B]
|
D10
|
D8
|
5 (1S)
|
Specialist (Up 1 to
missilery); Specialist (Up 1 to
melee Vs pike);
|
Italian Pike [C]
|
D8
|
D6
|
6 (1S)
|
Brittle (-1 stubborn UI,
inc.).
|
Shot [C]
|
D8
|
D6
|
3
|
Skirmish (may only be
‘formed infantry’ in a deep formation, or when defending a linear obstacle).
|
Artillery [C]
|
D8
|
D6
|
2
|
Brittle (Down 1 for
morale).
|
Light artillery (representing war carts) [C]
|
D8
|
D6
|
2
|
Organ guns (Down 1 CD for
fire, Down 1 for command).
|
Earthworks
|
Count as type ii terrain for all troops moving / fighting over; provide
cover to defender in melee; provide heavy cover to troops directly behind Vs
all fire and are the limit of incoming arquebus fire; provide light cover to
troops farther back vs artillery and crossbows; provide defender with 1
stubborn UI bonus.
|
|||
Fold over labels for commanders.