Monday, 29 March 2021

Huerta de Pablo - Battle Report, Turn 2


Yours Truly, caught by Alex, with measuring stick in hand, towards the end of turn 2.
Hit me with your rhythm stick. Hit me! Hit me! Das ist gut! C'est fantastique! Hit me! Hit me! Hit me!
All but two of the following shots was taken at the end of turn 2. This turn saw the continuing build up for the action with all but French 2nd Division making an appearance - and even 2nd Division is now active and about to enter via the NE road [point D].

I'll start with the initial deployment photo (turn 0) - so you don't get lost.

British 3rd Division makes its entry late in the turn. Its delayed entry isn't a bad thing as things are getting congested further up the SW road.
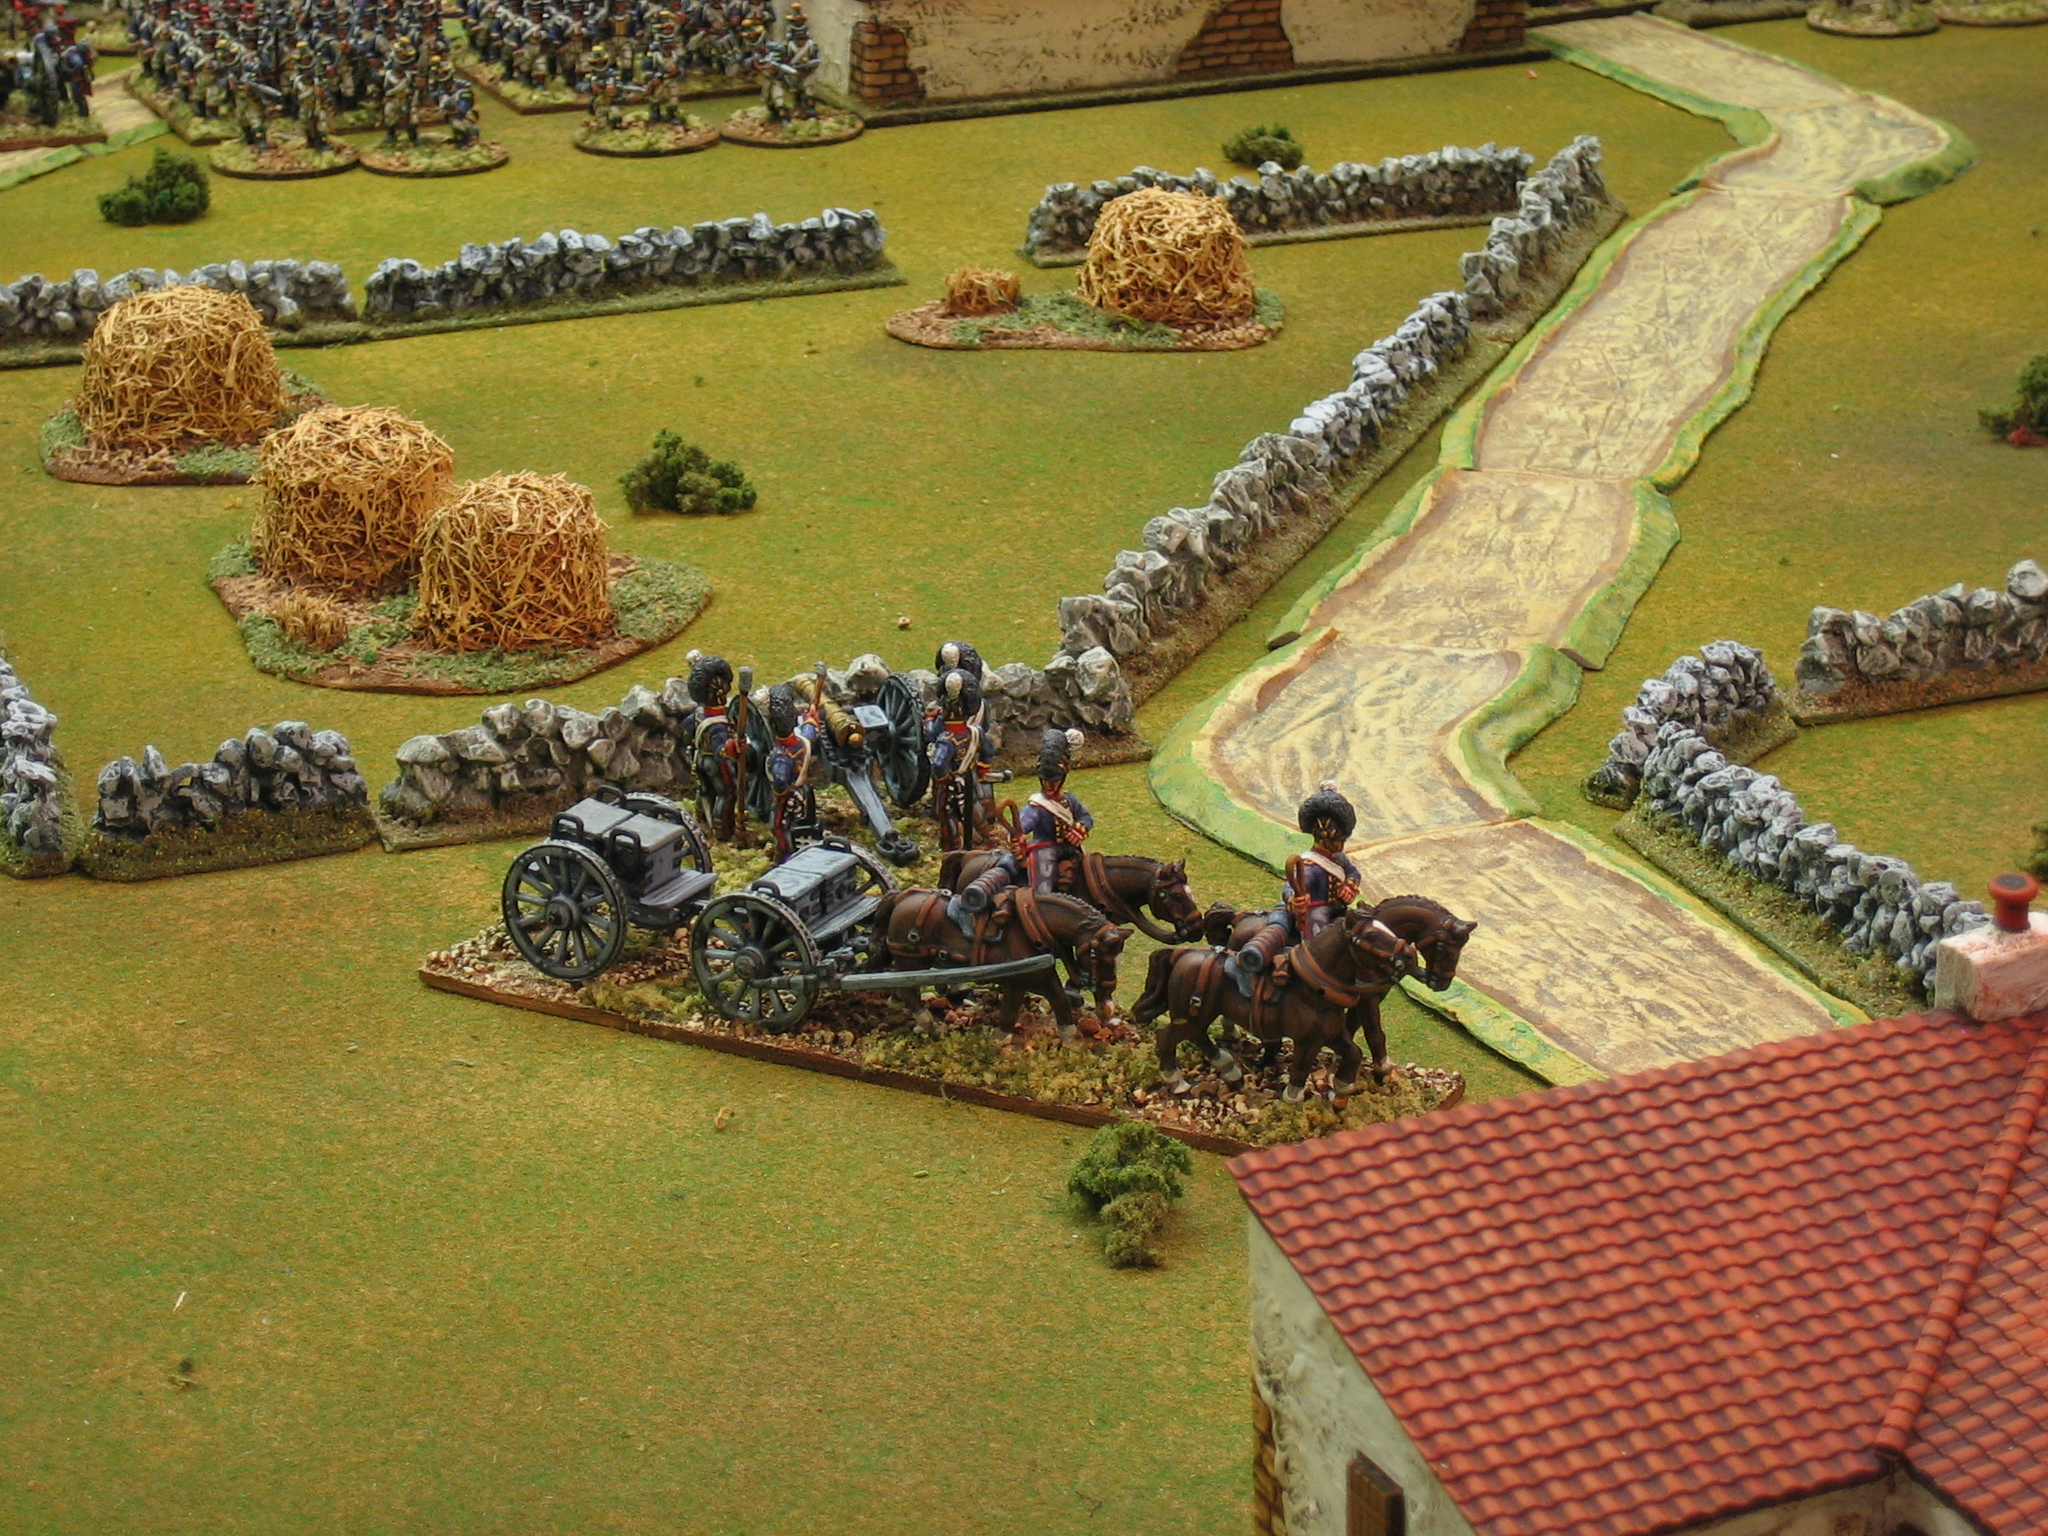
The Highlanders and Guards, with divisional artillery and cavalry support, approach San Pablo over Black Briar Stream. On the northern road, the French column of 4th Division is just visible.
At the northern outskirts of San Pablo, French 4th Division has made its entry via the northern road [E]. The fight for San Pablo may well come down to who can get a secure foothold first, and the French are leading with two battalions of veteran 4th Legere.

I think I've made a mistake with the French here. In retrospect, it might have been worth advancing the French cavalry (5th Division) to hold up the advance of the Highlanders and Guards. Only time will tell if holding them in reserve will prove a better option. The terrain is not cavalry country.
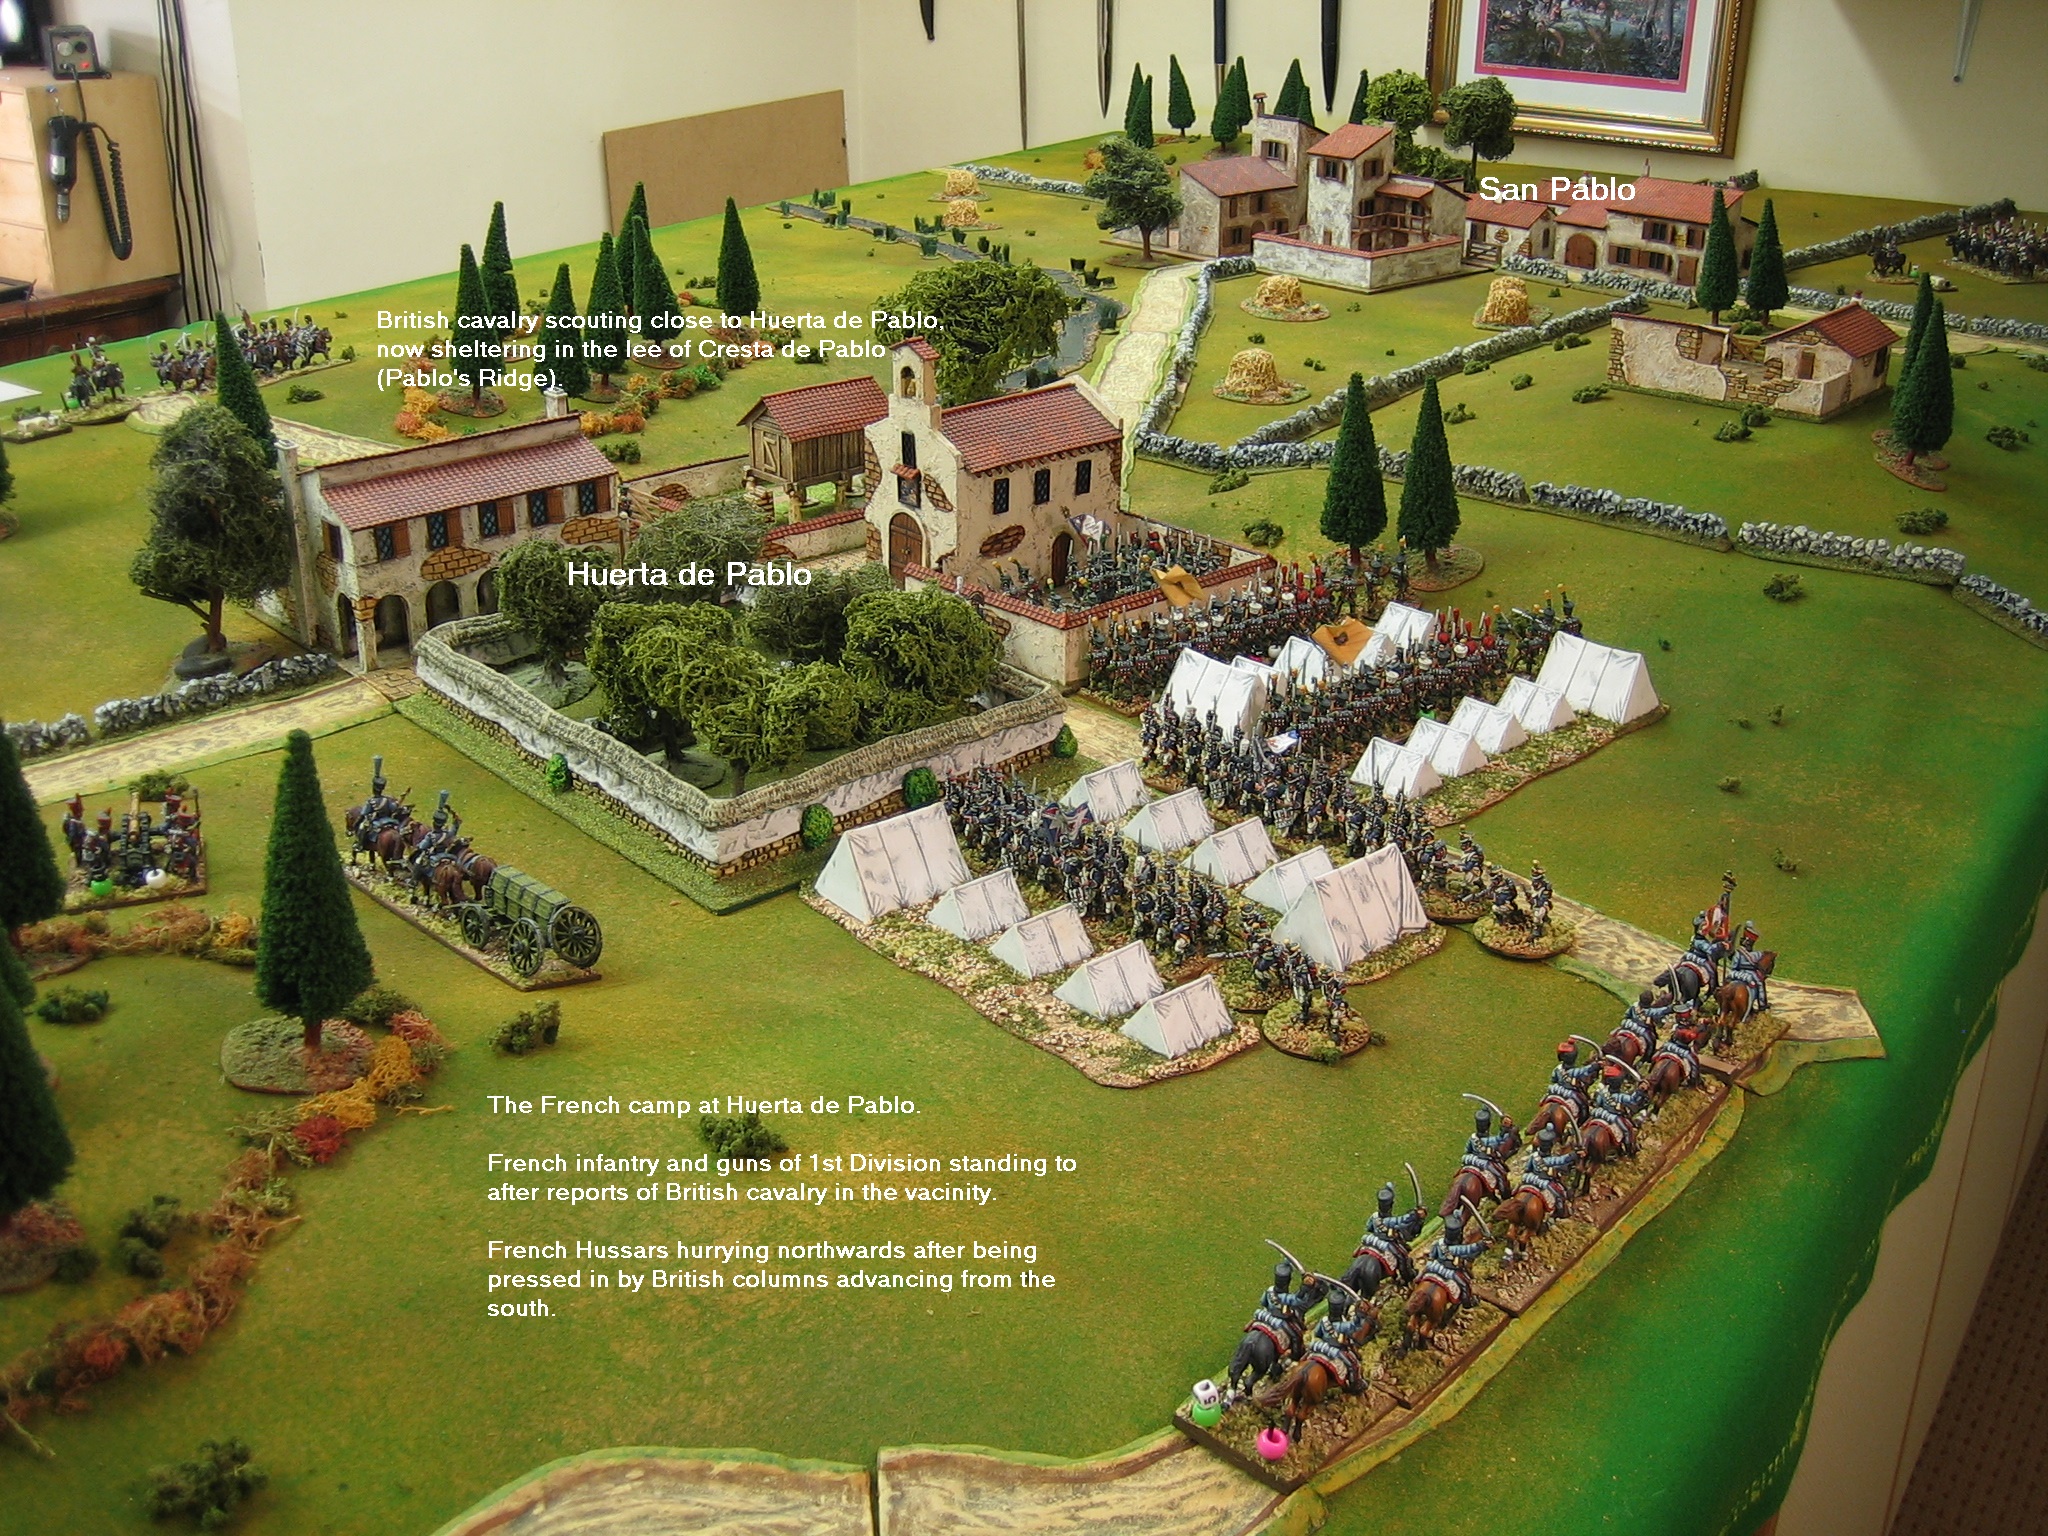
In the SE sector, British 2nd Division is now largely deployed and moving in to attack the southern outskirts of Huerta de Pablo. This might be a tough fight, two battalions of 4th Vistula are holding this sector of the town. 
The British have had much of the initiative in turn two. Before French 3rd Division can move to intervene, the British have attacked Huerta de Pablo from the highground (Cresta de Pablo) west of the town.

Consequently, they are beginning to deploy just short of the town, forming a line around High Farm Hill.
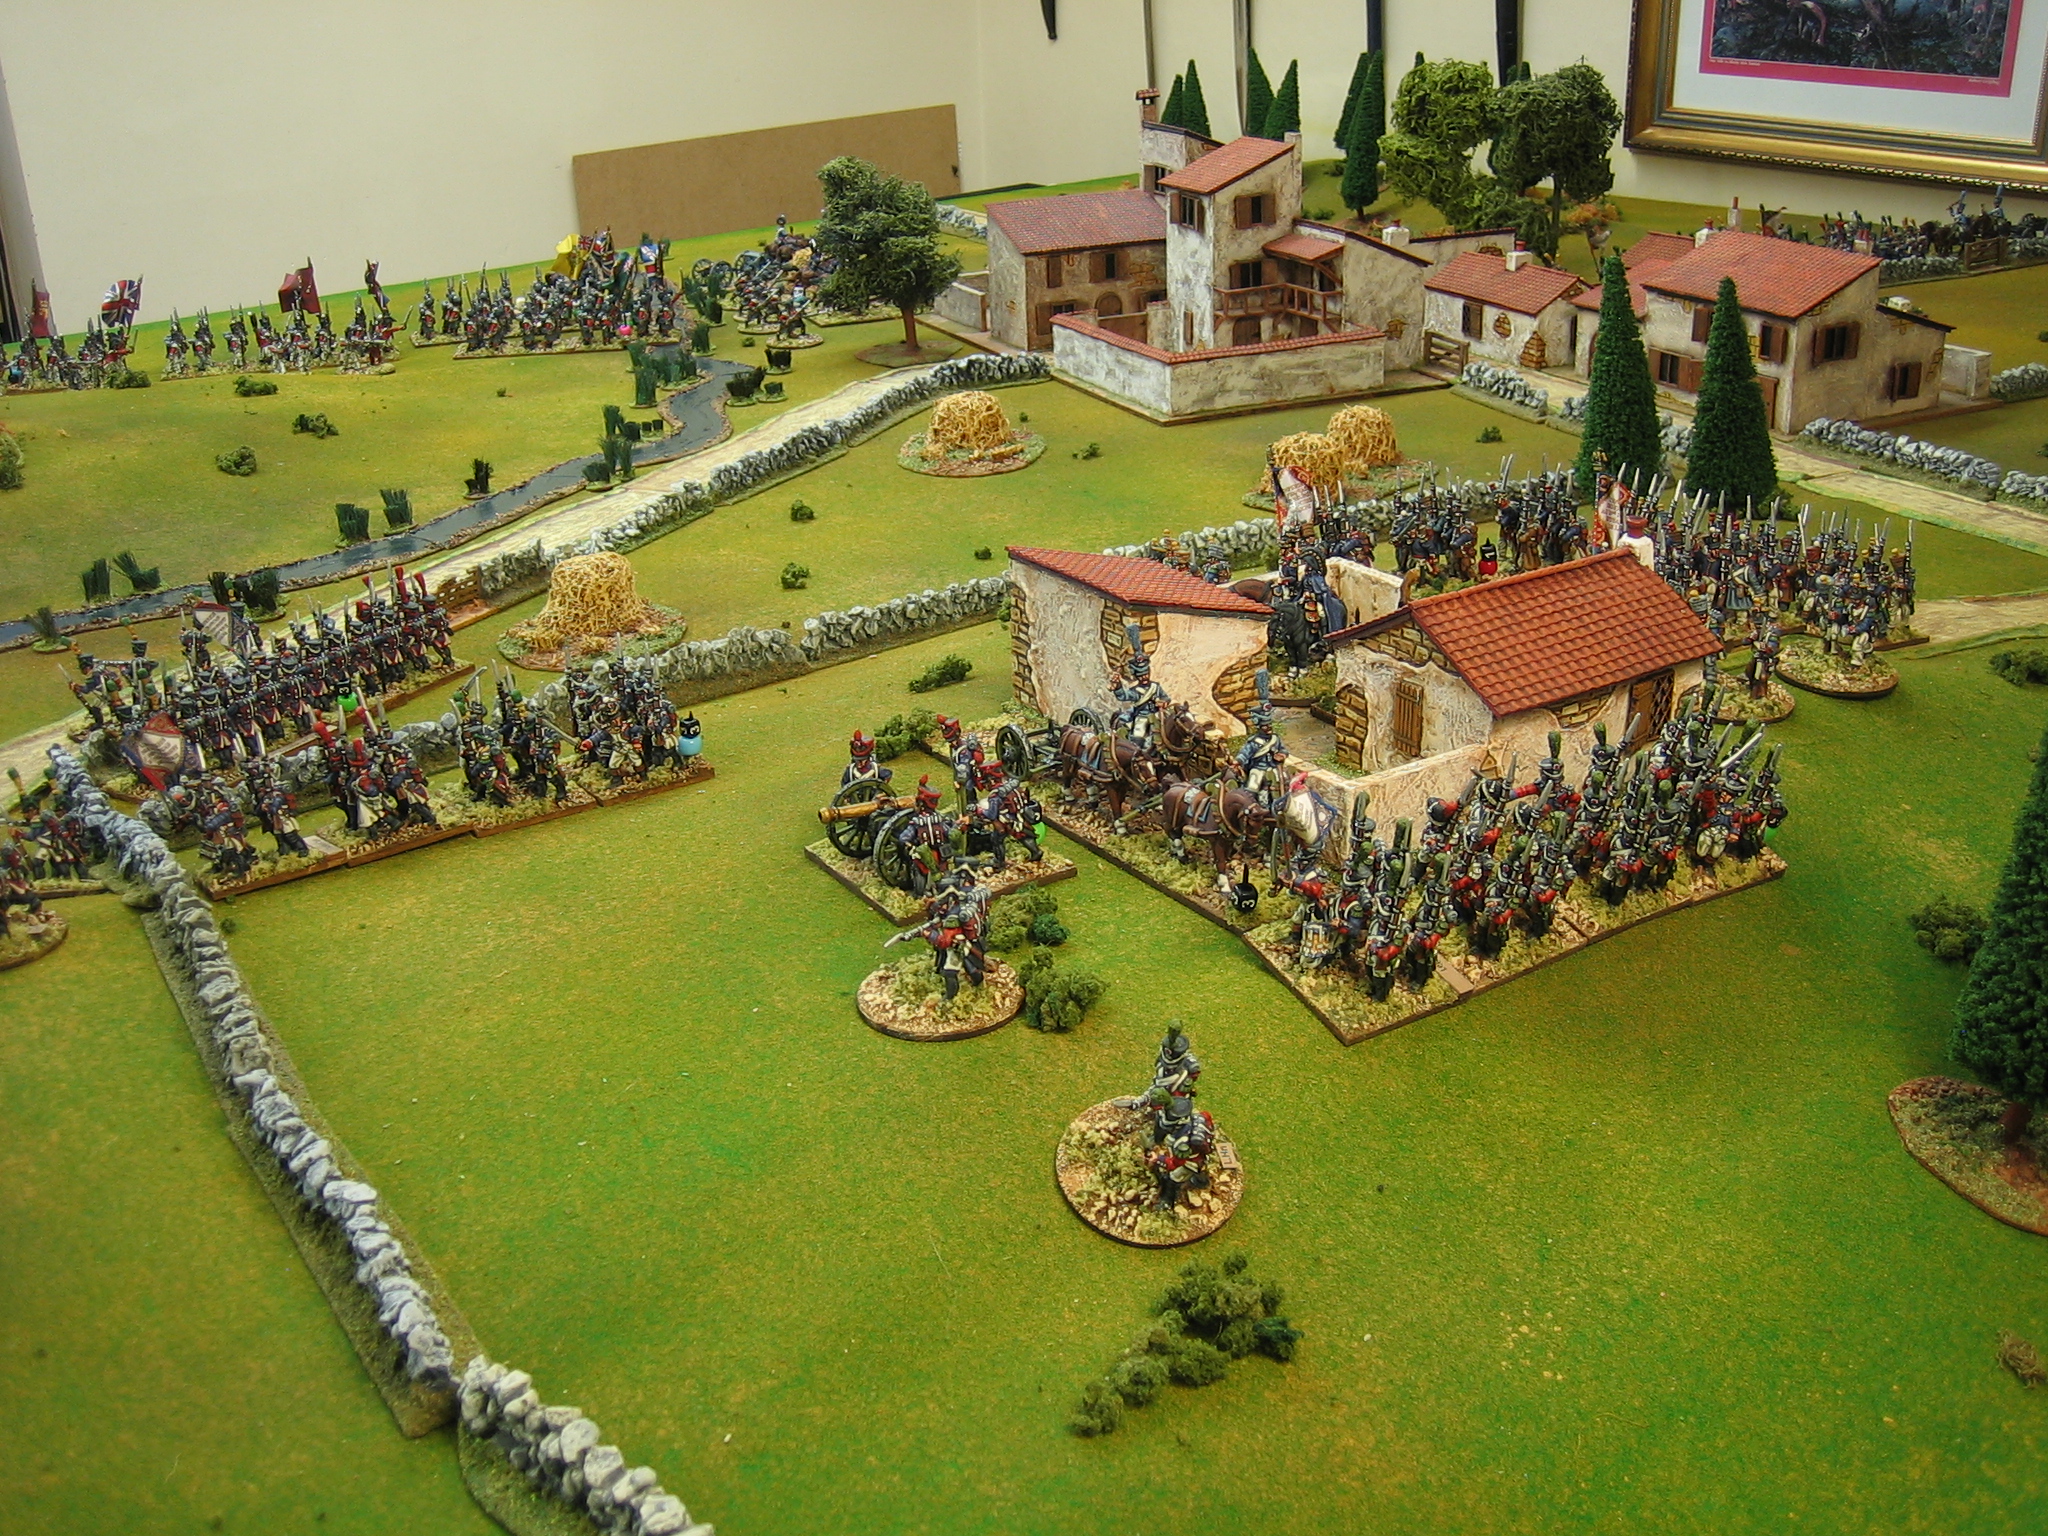
From Cresta de Pablo, the British (1st Division part) has swept down onto the western edge of Huerta de Pablo. Having got the better of the firefight, on the very last card in their deck - Melee Resolution - they charge home and fierce hand to hand fighting ensues in the houses and streets of the town.....
Neither side gets much advantage from the initial melee rolls (I roll until a conclusion is reached rather than have ongoing melee) but, after three rolls each, 71st Highland Light Infantry and 2nd Btn. KGL wrest the western side of the town from Legion du Midi (routed with very heavy loss) and Regt. Irlandais (falls back shaken with heavy casualties).

It was a tight fight, largely won by the British getting 22 initiative points to cycle through the last third of their deck, and being able to soften up the French defenders with several volleys of musketry to which the French could not equally respond. Drawing a melee card as their last card was simply icing on the cake - which they had, and ate.
It already feels as though the French in Huerta de Pablo are holding on by their fingernails. They are outnumbered 2:1. Can they hold on long enough for other French Divisions to get organised for a counter stoke: Will the French actually launch one even if they do? 

Part 3, coming soon....


Saturday, 27 March 2021

The Battle of Huerta de Pablo - Battle report, turn 1.

As I mentioned yesterday, I'm going to play this game over the next few days and do short reports as I go. I played for about half an hour last night, and about the same today. Turn one has been concluded and the build up for both sides seems to be taking shape nicely. All of the following shots, except the initial deployment shot (first pic), were taken at the end of the turn.


Episode 1: The Build Up

The British stormed the early part of the turn with a first initiative of 16 points. Before the French commander's girlfriend could say "Oh là là!", both 1st and 2nd divisions (8,000 & 5,000 men) were arriving in the vicinity of Huerta de Pablo, the 2nd on the south eastern road [C].
By the end of turn 1, both had begun to deploy, and the artillery of 2nd division was playing on 2nd Btn 4th Vistula who had deployed in front of the French camp.
Meanwhile, French 1st Division was using what time it had to deploy in readiness for the upcoming British assault. They occupied all of the 'building sections' of Pablo de Huerta (including the orchard, which I'm using as a two section town piece - after all, it's walls look pretty formidable).

I have to confess, at this point, that I didn't have a clue what to do with French 1st Hussars which were retreating ahead of the British advance by 2nd Division. Initially I thought to concentrate them with the rest of their division in the NE sector of the table and moved them through Huerta de Pablo to get the road bonus but, then I had second thoughts (gave them fresh orders) and, having passed through Huerta' I had them circuit back round to take position on the eastern flank of 1st Division. A long, circuitous about face: it all looked rather graceful.
French reinforcements also began to arrive via the NE road [D]. This was French 3rd Division (5000 men). They headed south to reinforce Huerta de Pablo, taking the direct route via High Farm Hill.
The only moment of high drama in the turn, came when 13th Light Dragoons tried to take out the French battery on Pine Hill. It had been trained on Cresta de Pablo and the 13th thought to take it in the flank. They came so close to doing so. In the nick of time it redeployed to engage the oncoming cavalry with a blast of cannister. In the morale challenge that followed the 13th were halted, shaken (that's the broken wheel marker - because their wheels just came off).

Note that I'm testing some new rules regarding what constitutes a charge. Nothing gets to go straight in, everything has to stop at 2" before it charges home on a melee resolution, or vs flank, shaken or artillery on a fresh move card. It's all working rather nicely. Also note that I'm not allowing shaken units to charge - which puts the 13th in a bit of a tight spot. It's all part of a broader attempt to get the line Vs column thing to work at it's best. 
And that was that. Turn one, done and dusted. 

As for the wider British plan, with a lot of troops coming up from the south, I've decided to send half of 1st Division (Highlanders, Guards and the divisional horse artillery) to seize San Pablo, or at least contest it. If the rest of the army can throw the French out of Huerta de Pablo quickly.... 

Also, I'm trying this new font - Spectral - tell me if you like it. 


Friday, 26 March 2021

The Battle of Huerta de Pablo (A solo scenario)

 I've set this solo game up to test out my classic Piquet style rules (though they get less 'classic' by the day) for largish Peninsular battles.


The Table-top:
Above, a picture of the table-top (12 x 6) and the initial disposition of troops. Unfortunately my camera doesn't pick up 'depth' as well as the naked eye, so I have roughly drawn some contour lines around the high ground so that it is much easier for you to see: The first contour is drawn around the base of the hill; the second contour shows the upper shape of the hill; hills are 2" high overall.

This battle is (fictionally) set in the hills at the western end of the Pyrenees Mountains. A few days ago I spent an hour driving 'virtually' around these 'hills' using google earth street view. It's somewhere I've never been and it wasn't what I expected, being a lot less rugged and far greener than I had imagined. Indeed, a lot of it reminded me very much of the Yorkshire Dales, or the central belt of Scotland. I can see it being a favoured local for my Peninsular scenarios.

Scenario:
The British are attacking the villages of Huerta de Pablo, currently occupied by French 1st Div. (6,000 strong), and San Pablo because of their command of several strategically vital road junctions. The attack has been planned in haste and the consequent confusion means that the British divisional columns, each advancing on a different road, will arrive somewhat piecemeal. The plan has been further frustrated by the British cavalry arriving too early and far too 'loudly', and patrolling French hussars which spotted the two British columns approaching from the south. Consequently, the French are already on the move to counter the British threat and French reinforcements are speeding their way to the battle area from the north and northeast. Indeed, the French cavalry of 5th Div. (1,500 strong overall, including hussars) has already arrived.

Unit Scale: 
Units each represent about a 1000 infantry or 500 cavalry. The standard command (battle group) is the division - typically, for infantry, 4000 - 8000 men.
  • The British army comprises 18,000 infantry, 1000 cavalry and three batteries of guns in four 'divisions'. It comprises some of the best troops in the Peninsular.
  • The French army comprises 21,000 infantry, 1,500 cavalry and four batteries of guns in five 'divisions'. It comprises a 'mixed bag' of troops ranging from veterans to newly raised conscripts with little battle experience.
Arrivals: 
The arrival of British 1st Division, 8000 strong and comprising Guards, Highlanders and KGL, is imminent - it is 'activated', just off table, and can begin to move on table as soon as a move card allows. It is in column on the western road (marked A). 

The two other, more typical, British divisions (each 5000 strong), and three French divisions (4000, 5000 and 6000 strong respectively) get the chance to arrive as follows: 
  • I have blind placed two playing cards (British), or three playing cards (French) at each appropriate entry point (marked B-E on the photo above). One card at each of the British entry points is a dud. At the French entry points, one has one dud and one has two duds. The other cards at each entry point relate to a particular division. 
  • Each side has two Stratagem cards in its sequence deck. When one is turned the side can turn one of the playing cards at one of its entry points. If the card is a dud, it indicates extra delay. If the card turned relates to a division, that division becomes active and may begin to march on table on the side's next move card. All arriving divisions are assumed to be marching in column along the road - as this is a solo game, I don't need to worry about the other side 'access point blocking'.
Victory conditions:
To win, the British must seize and hold Huerta San Pablo and San Pablo. To count as holding, no enemy can be present in any of the town sections. Holding one will be a draw.
I have to say, I'm actually rather pleased with the look of this terrain. It's even allowed me to get my pine trees and tents out, and that newly made granary looks quite good too. 

In fact, there are four newish buildings on the table - the granary in Huerta de Pablo, the L shaped single storey cottage in San Pablo (with the broken wall), a two one storey 'tithe cottage complex', barely visible, just behind that, and High Hill farm. I've been a little short of one storey rural buildings for the Peninsular but, I'm slowly putting that right.

Grandest of the new terrain additions is something I knocked up last year but never used. It's the walled orchard in Huerta San Pablo (2nd photo). This was made with Snap Dragon Studio wall sections (including a large T junction) that I've had kicking about in my bits box for over twenty years: I picked them up out of an 'odds and sods' box at a show but Snap Dragon went defunct before I could buy the corner pieces to make them into anything. On a whim, I decided to use them to make a high walled orchard, using Milliput to manufacture the corner pieces and fill some holes after using a hammer as a 'wall cutting' tool - considering I cut the walls to length with a hammer, not too shabby a job, I think. 

So that's it. Next up, when I have time to play and type, I'll start doing the battle report: This may come as a series rather than one extended post. This is because I find myself playing solo games in fits and starts - a hour here, an hour there - and this might be an easier way to report the goings on. 

Thursday, 18 March 2021

Do you remember these 18th Century limbers?

In the summer of 2019 I made up some limbers, using converted Gribeauval limbers by Warbases, for my SYW collection. I painted them natural wood: They didn't look right, so I didn't post anything. 

I decided to buy some more and paint them up in national colours - Prussian blue; Austrian ochre; Russian red. Then, once done, I posted about them in March 2020.

A picture from the March 2020 post.
Four for each nation, with interchangeable teams of horses.

In the interim, I had taken one of the converted limbers to Fiasco, to show Martin  at the Warbases stand. He was interested enough to take a couple of pics. I picked up some more Gribeauval limbers, plus some windows and doors from him, and that was that. 

Then, last year (mid-summer?), I received a packet from Warbases with this addition to the Warbases catalogue. 

Unfortunately, after it arrived, I put it away and promptly forgot where. I came across it yesterday and thought I'd better do this much belated post.

I'm not sure it appears in the WB catalogue, at least I can't find it. But, for those who might wish to skip the conversion stage, Martin does have the pattern for some simple 18C limbers. He's always very approachable, so drop him an email if you want some. I'm sure he'll come back with a reasonable price to cut them for you - he's already done the donkey work.

EDIT: Martin has been in touch to say that the "c.18th Limber", as pictured above, will be listed on the Warbases web site soon. They will be priced at £1.20 each.

Saturday, 13 March 2021

New building - Spanish Granary

Whilst googling for images of Spanish buildings I happened to type in 'barn'. Amongst the pictures was an image of an old Spanish granary. I googled Spanish granary, and found that this style of buildings was not a one off. There are several still in existence and, I presume, they were even more common in times gone by. Rodent proof storage facilities. What a find! 


These granaries come in several varieties. All seem to be built on stone stilts - though these might just be the 'surviving' examples of the basic design, perhaps others were built on wood stilts, though I suspect even these would have capstones between stilt and beam to prevent the entry of rodents (rodents can't hang upside down from stone). 

Some granaries are quite small (like this one) and some are much longer. Although some are square, most are long and thin. Some of the upper structures are stone built and some are made of wood. The larger stone built ones seem to be associated with churches - perhaps, they are Spanish tithe barns. Some are accessed by stone steps that don't quite join the building, others, especially the smaller ones, by ladder.

This model is made from a gabled MDF box clad in balsa wood planks. These were hand cut for thickness so that they look like 'hand sawn planks', with the edges lightly bashed in with the handle of a scalpel to make them look 'rustic'.

The main beams at the base are 4 mm plywood, for strength. The base and cap stones (all of the granaries seem to have flat capstones) are MDF, the ones at the base appliqued with Milliput for that rustic stone slab look.

The pillars are dowel (actually a wooden arrow from a child's bow and arrow set that I've had in my bits box for about six or seven years). I made it look like 'standing stone' pillars with a layer of Milliput - larger dowel could be cut down / shaved with a craft knife for the same effect. Some of the stone pillars I've seen were obviously shaped by a stone mason (some are tall pyramids) but I wanted a continuation of the ragged, rustic look.

The stone steps are 5 mm foam board, as are the enclosure walls. These were 'bricked and plastered' with thick emulsion paint; also used for the basic groundwork. The gate is made from ice lolly stick cut into planks (lollypop sticks are generally made from Baltic Birch; much less fragile than balsa wood - how do I know this crap?). 

Pantiles are Will's plastic sheets for HO railway buildings.

Top tip: Don't stick the walls on before the granary and groundwork (except flocking) are finished and painted. I actually had the forethought to do it this way and it made painting in between the stilts very easy. Before sticking on the surrounding wall I finished it's interior surfaces. The last thing I did was the flocking, which went all round the lower edge of the wall, tied everything together, and hid the join.

Mira Señor, Gabacho. Miles de ellos! Battle Report.

This battle report will be quite short. 

I played the game in fits and starts over a period of several days. It all went well and threw up a few surprises along the way. I was never quite sure how the game would turn out until mid way through turn four, when....

Turn one started well for the British. They turned their Brilliant Leader card quite early and won most of the initiative to boot. 

They had soon occupied Los Muerte....
...The Farm, and positioned a reserve line behind the northern end of Windmill Hill. This latter deployment would actually prove to be a mistake.

The French didn't get to move until the very end of their deck, turning their Brilliant Leader sixth card from last (26 card deck). Costly?
However, in turn two the initiative switched over to the French and soon Windmill Hill was under heavy attack. 

At first the British came out on top, routing two of the attacking French units, but then.....
....The French took the windmill. The Portuguese defenders were thrown out, they rallied, counter attacked, and re-took it.

This was the crucial part of the battlefield at this point and both sides concentrated their initiative spending here, the rest of the field going quiet. 
Finally, the Paris Municiple Guard secured the windmill. 

The cost had been heavy for both sides in both troops and divisional morale points. 

This was when I realised that the British had deployed their reserve badly - they should have deployed directly behind the Windmill - and they had the time to do it! The roughness of the terrain meant they were too far away to make an immediate counter attack. It would cost the British dear,
From the windmill the French began to roll up the British line of 5th division which was now out of divisional morale points.
Meanwhile, the French had advanced into the valley (The Gap) between the two steep rocky hills. 

However, British artillery and volley fire had depleted the French to such an extent that their threat was largely nullified.

Dethley-White's HA battery had done much to blunt the French attack. Fighting until his battery was silenced by counter battery fire, before being forced to withdraw by French columns. Dethley-White would be mentioned in dispatches.
On Muscle Hill, things had gone even worse for the French. The Scots and artillery had simple mown them down as they ascended the slopes. 

Turn four: The British were about to lose Los Muerte. The French were assaulting it from the north and west. The British infantry were surrounded. The French were bringing up artillery to blast their remnants out of the town. 

However, midway through turn four, time pressure was telling on the French: If they could get most of the initiative, they had a chance to pull off a victory. Night would fall at the end of turn six.

The British ordered their cavalry to attack the French infantry coming down the slopes of Windmill Hill. This was a desperate last throw of the dice for the British at the southern end of the line. This move actually looked quite promising. The French infantry were numerous but largely spent. Most of the 'prime' French units had been destroyed in the continuous French assaults to clear Windmill Hill and Los Muerte and 'morale points' were in very short supply: the three infantry divisions had only 7 between them, mostly with the raw troops of 2nd division.
Unfortunately, for the British, the French C-in-C had also changed his plan and ordered their cavalry forward. At this point the French had a tremendous run of initiative and, before the British cavalry could intervene the French cavalry was upon them. The British fought hard, holding their own, but it gave the French time to secure the town.

It was now turn five. One last push by the remaining French against the northern end of the British position might just succeed. It was still too close to call. 

Alas, the turn ended almost before it had begun. Duplicate initiative dominoes ending the turn abruptly. The French had run out of time. The British on Muscle hill were too strong to be dislodged by the French in its immediate vicinity. 

The French had given the British a very bloody nose. The British had lost Windmill Hill and could not launch a counter attack for fear of losing Muscle Hill too. But, the French, even with superior numbers had failed to totally dislodge the British from their position. I award a marginal victory to the British who have done enough to withdraw under cover of night to fight again.

EDIT: DAF has commented that it looks like a decisive French victory. In some ways it does but, having played both sides, it didn't feel like it. My reply to his comment is here. I hope it explains why I awarded a marginal victory to the British:

I know what you are saying Jim. The battle was 'won' by the French, and I'm sure the Marshal will say that in his report to Napoleon. However, because they outnumbered the British by such a margin, I set a very high bar for them to achieve a game victory. The result, you might say, was something like Dunkirk - it rather depends on how you look at it: Wellington will convey to Horse Guards a report expressing his satisfaction at bringing the army away to safety.

Playing both sides, it didn't feel like a French victory because they were so spent at the end that I was finding it hard to pick which units could lead the assault on Muscle Hill if time were available. Nearly all of their good troops, the few that were left, had taken a lot of 'hits' and were shadows of how they had started the battle, or they were at the far southern end of the field in Los Muerte and would take time to sort themselves out. Divisional morale points were also in short supply - a few reverses could see whole divisions withdrawing as they failed army level morale checks.

If time were available, I think the French could have won the battle with their abundant artillery, which now outnumbered the British artillery by seven to two - they could simply blast the British off their hill, but this would take time, perhaps two or three turns after reaching position (another turn or so?), time they didn't have.

Consequently, like Dunkirk, this was a British victory. It's just a pity they couldn't achieve the victory by actually winning!


Tuesday, 2 March 2021

Mira Señor, Gabacho. Miles de ellos!

Another 'simple scenario' solo game. I set this up for two reasons. The first was to continue my efforts to get my version of 'classic Piquet for large battles' to work for Napoleonic actions. The second was to get most of my French onto the table so that I could blood my new units. 

The scenario is basically a hold against superior numbers game - hence the post title which, I believe (google), translates as "Look Sir, Frogs, Thousands of 'em!". The raw numbers are 3:2 in infantry, 6:4 in cavalry, and 7:6 in guns.

To balance the numbers, I have given the British a very strong defensive position centred on two steep boulder strewn hills. I also allowed the British to dice again for any 'red bead' units they rolled up. I'll get onto what all the beads mean before the battle report proper so you can follow what's going on in the photographs more easily.

Because it is a solo game, to mix it up, I will stagger the time that each side can start moving: Neither side will be able to act on cards, other than those for firepower and melee, until it has turned a Brilliant Leader card - the British have two, the French have one - which counts only as 'Activation'. Will the British get into position before the French get their attacks underway, or will the French steal a march on them? Again, this in theory gives the British a slight edge but, this is Piquet, we will see.

To win, the British must hold for six turns. Obviously, if the  French turn their Brilliant Leader card late in turn one this might be reduced nearer to five turns. 

The Battlefield.
This photo is captioned with the names I'm going to use to navigate through the battle report. It shows almost of the set up except for the cavalry on the southern wings - which I couldn't get into shot.


This photo shows the French cavalry  of 6th division (1500 strong) on the southern flank with the infantry of 5th division (5000), to their left, about to make their way into the streets and buildings of Los Muerte. From here, 5th Division will seek to assault up the southern slopes of Windmill Hill. 

Because the British are badly outnumbered, I'm taking the decision to hold all of the French cavalry in reserve - to await events.

Just to the northwest of of Los Muerte stand the infantry of 4th division (7000) and 2nd divisions (4000), with 4th division, including two units of 'reserve grenadiers', leading. 

The artillery of both divisions (front right) is massed, on their right, to support the main attack on Windmill Hill. 

On a small knoll (centre left) the French C-in-C oversees the final preparations for the main assault.
Immediately to the north of 2nd and 4th divisions is another numerically strong division, the 1st (7000). This stands in reserve ready to support either the thrust on Windmill Hill or Muscle Hill. 

1st division will advance, but will not attack either hill immediately - they will by advance to a striking position in the valley and await further orders.

Behind them, are the Chasseurs of the Corps Cavalry under the direct control of the C-in-C.
Finally on the northern flank, facing Muscle hill are the infantry of 3rd division (5000) and the cavalry of 7th division (1000). The artillery of 3rd division is hidden from view - it is on the road (centre right) in front of the building.

3rd division will lead the assault on Muscle Hill in mixed order. The cavalry will act in support if required.

Holding the southern flank of the British line are the cavalry of 4th division (1500). Their orders are not to get into trouble.
In the foreground the Guards and KGL of 2nd division (4000) are marching quickly towards Los Muerte in order to secure the southern approaches to Windmill Hill.

Above them, on its summit, the infantry of 5th division (5000) stand ready to repel any assault up its treacherous slopes.
To the north, on Muscle Hill, the infantry of 1st division (4000), including two units of Highlanders, are set in depth to defend it in strength. Below them, a detachment of 4th division cavalry (500) lie in the dead ground ready to support their left flank.

On the road, heading south, are the infantry of 3rd division (5000). Their orders are to occupy the valley, using The Farm as a strongpoint, and forcefully prevent incursion by the French.
Lastly, in the valley between the hills, just west of The Farm, stands an independent HA battery under the command of Major Dethley-White. At present, living up to his name, his is the sole unit defending the valley.


So you might better understand the upcoming photographs, here is a list of the beads and markers you will see.

Each unit has two or three beads. On the left pin, there are two beads, one on top of the other. 

The top bead (in this game white for French, black for British) is easy enough, it's a number bead and notes the divisional command group. 

The coloured bead below is the basic quality bead. This affects the two main unit factors, combat and morale. All units start with the same factors, their base dice for combat is D8 and their base dice for morale is D6. The bead colour adjusts this. A red bead takes the dice values down a level (one dice smaller) to D6 and D4 respectively, a green bead applies no change, a blue bead takes the dice up one level to D10 and D8, and a purple bead takes the dice up two levels to D12 and D10. 

These dice are adjusted for tactical situation during the game in the usual kind of way - for cover, full strength, etc. - but the bead gives you base start point of the unit. As said, all units start at D8 for combat so the beads denote unit type (weight of cavalry, for example) and unit effectiveness (militia, or battle weary) combined.

Some units have a second coloured bead (on the right). This denotes 'Elite' status. There are three kinds of elite status. A white bead denotes guard status and takes the unit up a extra dice for morale, up a dice for melee, and allows it to use the Elite Firepower card. A pink bead denotes a 'fierce' unit and takes it unit up a dice for morale and for melee only. A yellow bead denotes elite light troops and takes a unit up a dice for morale and allows it to use both the Elite Firepower card and the Native Mobility card. Black beads denote the troops are steadfast and up a dice for morale only. In the picture above there are elite legere and fierce grenadiers. Note, dice in Piquet never go above D12; after that it's D12+1, etc. to a maximum roll score of 12. Dice never go below D4, you always have a chance.

Commanders have the same set up, but the dice only affects the command rating, based on a D8, of the division (which I take to be the aggregate of all the senior officers from colonel to division commander, rather than just the divisional commander himself). In the shot above, the command stand for 2nd division has a blue bead (D10, a well commanded division). At present, there are no second coloured beads for officers.

Next to the officer is a tray containing two D6: this is the morale point total for the division. This is an experiment I've already tried and liked (hence me bothering to make dice trays). The one above shows that of 2nd division, which rolled particularly well. The points were, for the true blood Piquers out there, worked out as follows. Divisions get 1 morale point per unit (banked), plus 1D6 per unit, plus 1 D6 per elite unit - the dice are rolled and the number of 5s and 6s are added to the morale point total, simple as that. When it reaches zero (spending them for being broken, shaken, eliminated, rallies and morale challenges) the division is subject to divisional morale checks on Major Morale cards.

I came up with the coloured bead thing after playing Commands and Colors for the first time. It's simply amazing how well the brain responds to colour coding. Honestly, the above might sound complicated, but after a turn or two, you simply don't forget - ever. Indeed, you should be careful how you colour code, because once done it's very hard to change it. What's more, everything is immediately visible, you don't forget unit type factors, and you don't get them wrong: roster sheets are a thing of the past here.

Lastly, there are in game markers. The pompom is a 'has fired marker'; the tuft means a unit is disordered; the broken wheel means the unit is shaken; stone markers (1 - 4 stones, here 2) are for marking unit integrity losses / casualties; the barrel is a general 'do not forget / where I'm up to / counting beans' marker (most often used to track what has used a card over two separate initiative phases).

So, that's part one. Everything is set for the off. Part 2, The Battle, coming soon.

Thursday, 11 February 2021

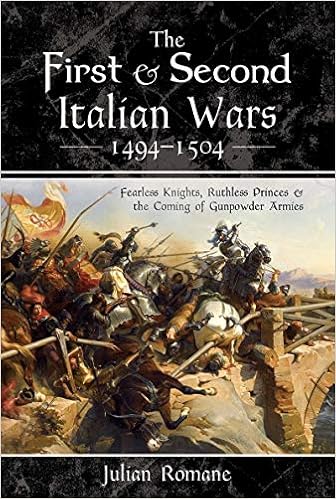
New Book: The First and Second Italian Wars by Julian Romane


I came across this book, published last year, whilst doing a general book search for my Christmas list. Being a fan of the early period, I took a punt and put it at the top of my list without reading a single review. I wasn't disappointed to have done so.

As well as covering the usual stuff, it has some nice chapters on the less well known stuff: such as Cesare Borgia's campaigns in the Romagna. Nothing amazingly new, nothing amazingly detailed, but nicely brought together. I also liked the extra bits such as the character studies of individuals, studies of geographic regions, and the use of poison.

I think it's a nice addition to the small pantheon of books on this much neglected period in military history. I'm guessing, like most books covering this subject, it probably had quite a small print run, so stocks will probably run out quickly, and it will probably double in price quickly in consequence. For less than £20 (in hardback) on Amazon, it's a steal. Get it! Get it quick!

Monday, 18 January 2021

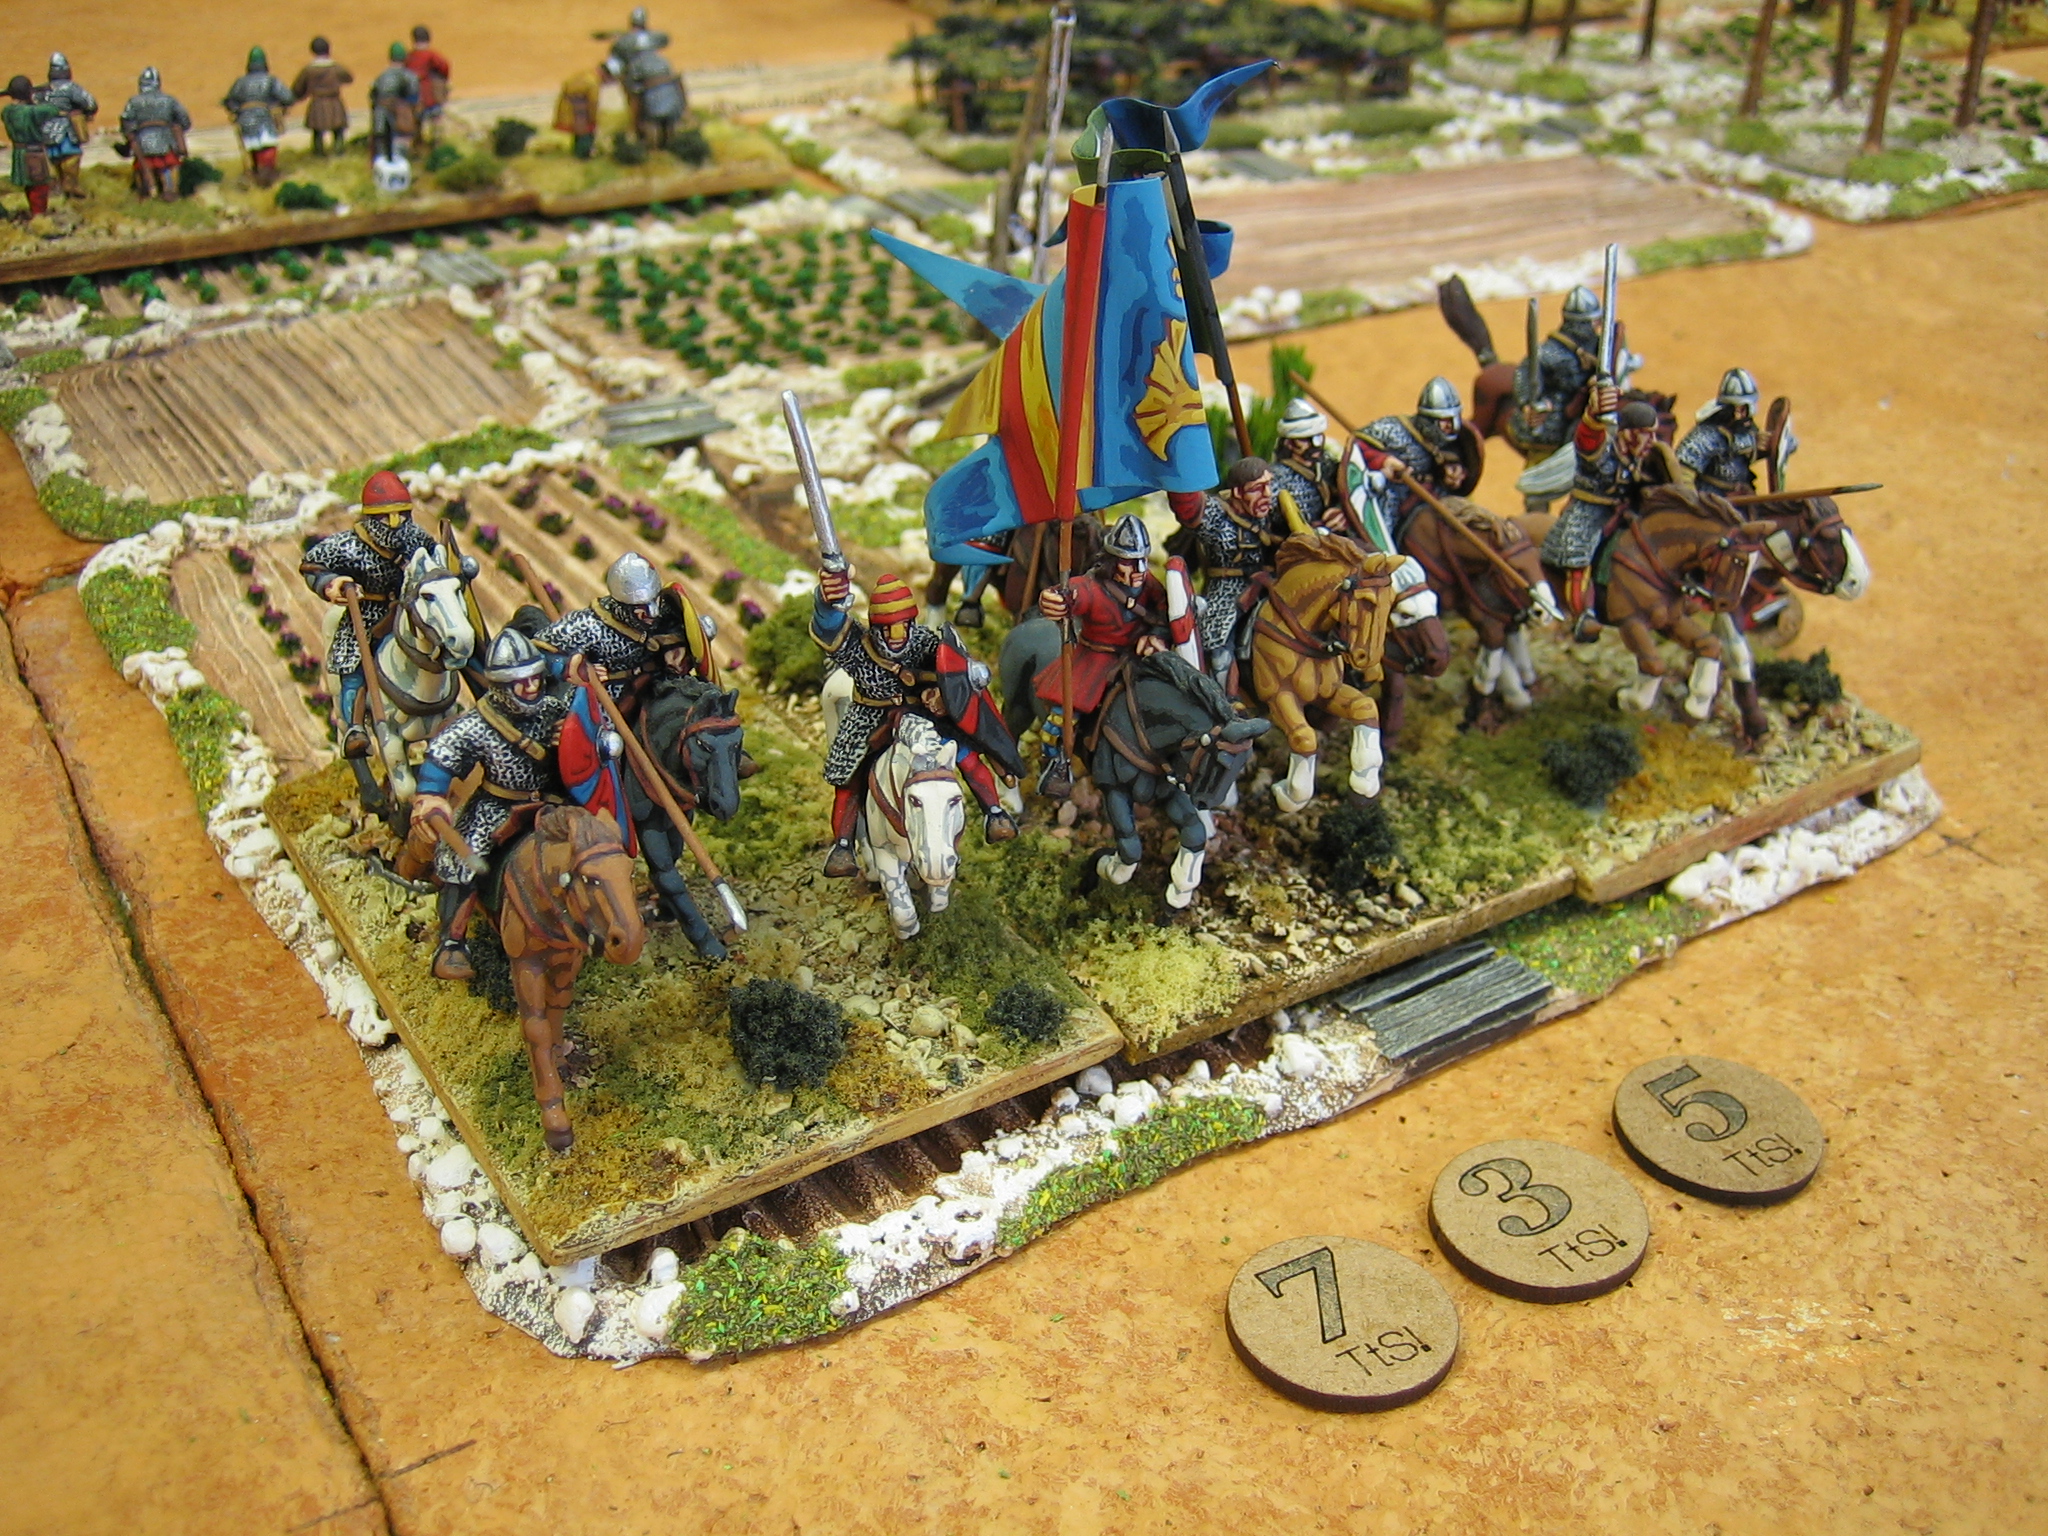
A Solo Meeting Engagement, Holy Land, 1105 AD.

The following battle is a fictional meeting engagement, played solo using To the Strongest rules (with house amendments). It has no 'background scenario notes'. Its purpose is to test my amendments, especially for game balance. Both sides have a roughly equal points value (180 points, or thereabouts).

I will describe the game turn by turn. I will illustrate each turn with at least one photograph, usually a close up of something that occurred in the turn, and an 'end of turn map' showing the game position. I will try to explain new formations and period specific rule amendments as they come up in the game (in blue).

One thing not noted below, are the Victory Point Medals (I use poker chips). The Franks have 16 (including three for their camp and three for the True Cross), and the Syrians have 15 (including three for their camp). I like the idea of camps in Crusades games: historically, camps feature prominently as the objective and / or prize of many battles.

The Set Up:

Terrain Definitions:

Cedar woods: Rough terrain for activations for all except light infantry. Rough terrain in melee, cover versus missilery. Block LOS.

Fields: Rough terrain for activations for all, except light infantry. No effect, regardless of depicted crops, on LOS or combat.

Escarpment: Rough terrain to all for activation. Troops deployed along top of the escarpment get a +1 save bonus versus charges coming up the scarp face (similar to defending a river bank). 

Buildings: The rules I will use for buildings differ greatly from the norm but, these a certainly not set in stone: 

  • Each buildings box has normal occupancy restrictions except that only one unit can be cavalry (infantry in the buildings, cavalry in the streets).
  • Units in a buildings box never present flank or rear, nor do they have a defined position (front or back) within it. 
  • When shooting from a buildings box, the shooting unit can choose which face it wishes to shoot from for the whole turn (it can be changed turn to turn); two units cannot shoot out of the same face of a building box in the same turn; only one shot per activation is allowed regardless of troop type. 
  • Where an activation is made to charge or shoot at a building box containing two units, the attacker chooses the target; in a melee the defender can choose with which unit he wishes to battle back, even if the target of the charge was destroyed (this is similar to the battling back allowed to Republican Romans, so it didn't seem too much of a rule stretch). 
  • A buildings box counts as rough terrain to all, in all circumstances; buildings block LOS. 

Partly, my reasons for these rules are practical. They work, especially for occupancy, with my model buildings.

Camps: Rough terrain to all for activation; cover versus missilery, no effect in melee; block LOS. Note that I don't quite get the amount of VPMs you should get for each camp box, I found the rules unclear (or I haven't found the right bit): but, as you lose three VP for each box lost, I settled on one added VP for each. I feel sure they will be targeted in the upcoming game.

Turn 1.
End of turn 1.

The Franks make a general advance. Nordwin's infantry occupy 'the farm' and its surrounding fields whilst his turcopoles and supporting knights move to counter any flanking move by the enemy Turcomans in front of them; Lazarus advances with Nordwin, slightly refused; Gungatin brings his Armenians up to the escarpment, throwing his archers, through the 'cedar wood', further out to the flank.

The Syrians begin a cautious envelopment on both wings with their Turcomans, whilst Prince Kalib throws his foot archers out to contest the advance of Nordwin's infantry through the fields and date palm groves about 'the farm'.

The Turcomans are in a new two unit formation: 'Whirling Mass'. I came up with this formation specifically for Turcoman nomads. 

Unusually, for middle eastern horse archers of the time, they didn't 'shower shoot' from a stationary position. Instead, Turcoman masses would advance in groups to shoot off a few arrows before retreating, constantly being replaced by other groups in the mass. This action almost certainly had a forwards and backwards motion, with a definite direction of attack (according to Nicolle). It allowed Turcomans to deliver a constant, heavy, withering barrage of arrows.

I represent this with two permanently converged units of Turcoman horse archers. My army list holds the key facets of the formation for TtS. It is points costed as two units of horse archers (10 points). The rules for whirling mass are as follows.

·         A whirling mass is a formation exclusively used by massed Turcoman horse archers. It represents groups of horse archers, within the mass, advancing to shoot before retiring, constantly replacing other groups within the formation ‘whirling’ in the same manner. It is represented on the table with two converged units, one unit placed directly behind the other: the stands of the second unit should be arranged with the centre stand facing forwards and the outside stands facing backwards.

·         A whirling mass has two hits; it is disordered after receiving the first, lost after receiving the second.

·         A whirling mass can shoot twice on the same activation unless it is disordered, in rough terrain, or it is partially out of ammunition (OOA) when it can shoot only once: partially OOA have one OOA marker, totally OOA have two. .

·         A whirling mass never presents a flank to shooters (because of its constant motion).

·         A whirling mass cannot share a box with any other troops and, due to its ever whirling nature, it cannot be interpenetrated.

·         A whirling mass is treated as light troops in all other respects (including the ability to move backwards after shooting).


Turn 2.
End of turn 2.
A unit of Turcopoles has been eliminated by Turcoman fire (Frank's unit 8, in grey).
The small white crosses (Syrian units 11 and 4) are 'out of ammo' markers.

Whilst the turcopoles shower their Turcoman adversaries with desultory volleys of arrows, the Franks advance through the fields an groves of date palms west of 'the farm'. On the left flank, the Armenian archers snipe from the woods and temporarily disorder a unit of Turcomans whirling around in front of them (it will rally in the Syrian turn).

All along the Syrian line, every bowmen looses arrows sending volley after volley of arrows into the serried ranks of heavily armoured Franks. The results are pitiful. Only one unit failed its save: a unit of turcopoles bit the dust under a hail of well directed (two hits on the first volley, one saved) Turcoman arrows. Two Syrian units received out of ammo markers *.

The photo shows the tall stack of 'to hit' chits drawn by Prince Kalib's command group, the smaller stack the number of saves that had to be made. The other chits were drawn for activations (and Kalib's command might have had more if I had remembered his signals group: more annon). It also shows a 'tuft' marker (behind the central unit of Syrian foot archers), which I'm using to mark units that have gone 'out of ammo'.

At this point I'll outline the changes I have made to the shooting rules. The basic mechanism is unchanged. All I have done is adjust the saves and ranges, changed the 'ammunition expenditure' rules to something simpler (if a little more abstract), and added a few troop types capable of firing twice on the same activation. I have made these changes purely in an attempt to tailor the rules for this specific period, where the technology of missilery was of great tactical importance. 

Note: The change to the ammunition rules were made because of the sheer numbers of units armed with missile weapons and consequent stacks of ammunition chits that would be required: basically, for aesthetic (and lazy) reasons.

Note: Crossbows are not the powerful weapons of later times, predating even a stirrup to aid loading, and have been downgraded accordingly. Although they were feared for their penetrative qualities at short range (and I did think about a -1 save for armoured targets), crossbows had a slow of rate of fire and I think one attribute cancels the other.

Note: Composite bows had a remarkably long range when shooting light hollow reed arrows, or darts with a majra or siper arrow guide, but suffered a from lack of accuracy and penetration when doing so. Regardless of its lack of effect, long range shooting was often employed against the (outranged) Franks so must be included in the rules.

Note: Simple slings (not staff slings) were not a military weapon in this period: they were largely restricted to 'pilgrim' and other civilian types, shooting stones rather than much heavier (and more lethal) lead shot.

The rules:
  • * Units of archers go out of ammunition if they draw an ace (1) chit to hit. Turcomans in whirling mass go partially out of ammo after drawing one ace chit, out of ammo on drawing two (because the formation comprises two converged units). Light infantry with javelin go out of ammunition if they draw a 1 - 5; other javelin armed units automatically go out of ammunition after activating to shoot. Note here, units armed with bow and javelin cannot shoot their javelin (javelins are their primary melee weapon and reflected in the unit's saving throw). Units can resupply themselves fully by activating to replenish and spending a replenishment (ammunition) chit.
  • The effective range of all bows and slings is two boxes, except that composite bows can shoot very light arrows and darts out to three boxes. Javelins, naptha pots, and improvised peasant weapons have a range of one box. Artillery has a maximum range of four boxes and a minimum range of two boxes.
  • Saving throws are unchanged for crossbows and composite bows at one or two box range. Saves against composite bows at three boxes range are made with a +2 modifier.
  • All saves against hits by simple bows and slings are made with a +1 modifier.
  • Saves against improvised peasant weapons are made with a +2 modifier.
  • All save against naptha pots (incendiary terror weapons) on 8+.
  • Artillery targets everything in a box, drawing a (to hit) chit for each target; all targets save on 7+.
  • Close order foot bowmen (such as Fatimid Sudanese), Turkish ghulams, mamluks and bow armed veteran askaris may fire twice on the same activation. Turcomans in whirling mass may also fire twice (see whirling mass above).
Turn 3.
End of turn 3: The Franks Press Home
Note that disordered units (Turcoman 4, Ahdath 8 and Armenian 16) are marked with grey numbers. Totally grey units are units destroyed this turn in the position in which they were destroyed.

Nordwin's men went forward, forcing the Syrian archer screen to evade. Nordwin lead the charge with his veteran ferocious* knights and, adding a hero to the equation, went through the Muttatawia (unit 9) like a hot knife through butter, then swept away the unlucky Syrian archers (unit 13) sheltering behind them (who failed to evade a second time) in their turn. To Nordwin's immediate left, his sergeants disordered a unit of Ahdath before the attack ran out of steam. However, whilst this attack went in, the other knights in his command also went forward and the turcopoles disordered the Turcomans facing them with a well timed volley.

According to plan, Lazarus and the Armenians maintained their refused positions to Nordwin's left. Lazarus' crossbowmen doing sterling service by routing the Syrian archers (unit 10) to their front.

* The mounted charge of western knights had a ferocious reputation. It was capable of smashing through far superior numbers of the enemy, be they infantry or cavalry. In the rules, veteran knights save on 5+, which makes them more durable than the best 'Saracen' cavalry which save on 6+, but doesn't quite reflect their devastating power in the charge. Consequently, I have added ferocious to the list of unit classes (army list cost, 2 points): Units charged by ferocious knights save at -1. Ferocious cannot be attributed to foot knights - these already have 2HCW (under the standard rules) which amount to the same thing.

Anything that makes the Franks, especially knights, so often outnumbered but victorious, more powerful but costly in points is probably a good thing - especially for balancing historical refights where the Franks are vastly outnumbered. It remains to be seen if this makes knights over powerful 'super troops' and if, in consequence, I decide not to make ferocious generally available as an army list option. At the end of the day, game balance is the most important thing. 

Turn three is not a great turn for the Syrians: their activations, even with the aid of the signals group *, being shortened by the draw of dreaded ace chits. Except for Sarrouff's Turcomans disordering a unit of Armenian foot (unit 16) on the escarpment, they only manage movement activations. However, these movements might prove to be tactically important ones. As well as Kalib managing to reposition his cavalry to repel Nordwin's attack, Ratfan begins his own counter attack with his veteran Ghulams and Kurds, possibly outflanking Nordwin and deflecting his focus of attack. We will see. 

* When reading about Saracen battle tactics, I was deeply impressed by their use of loud music or semaphore to transmit simple orders over battlefield distances. As the Franks get Holy Relics stands, I thought a balancing stand might be interesting and novel.

I had painted a group of musicians, including a camel mounted kettle drummer, and these were ideal to represent this aspect of their battlefield technology. 

Anyway the rule for this is pretty simple. A senior general, and only a senior general, can have an attached long range signals stand. He can use it to re-draw for a failed activation in any box, within three boxes range, that does not contain a general, once per turn. It cannot be used to replace an activation chit to get a lower one, only replace a failed activation chit. It cannot be used in a box containing a general because players shouldn't get two bites at the same cherry, and can be easily explained as troops in a general's box looking to that general for orders rather than signals from afar. 

In the army lists, I have given the piece a high cost of 7 points: I think the piece is a very powerful tool, to some extent making ordinary generals 'brilliant' and, in consequence, players should pay through gritted teeth for it (brilliant generals, such as Hannibal, cost an additional 4 points and are only allowed to specified armies).

I only allow them to Syrian states and Fatimids (Arabic rather than Turkish culture, though I'm not wholly sure the Seljuks wouldn't use similar technology).

BTW. The transmission of orders by flag (very simple semaphore) was carried out from a camel mounted platform - wouldn't that make an interesting gaming piece! 

Turn 4.
End of Turn 4: The Counter Attack
The Franks lose their first units of consequence (grey units 3,16), several units are disordered (grey numbers) and two units of lance armed cavalry lose their lance attack bonus (white cross, units S14, F2).
The photo opposite shows how the table actually looks at the end of turn four. 
 
Nordwin's men press home their attack still further. The sergeants to his immediate left rout the Ahdath they had disordered in the previous turn.  

Norwin urges his knights into the fresh cavalry now facing them: the Syrian cavalry are disordered but fight back bravely, disordering the knights. 

The knights to his right force the Turcomans back after a brief clash (the Turcomans failed to evade) but, the knights only manage to lose their lance bonus* and hero in the process (they hit twice, saved twice). 

The Armenians continue sniping from the woods to good effect, disordering a unit of Turcoman horse archers.

* Lance bonus to hit chits are not automatically lost after the first charge. Instead, they are lost if either to hit chit drawn is an ace. Lances can be replaced by activating to replenish. I do not differentiate between arrow ammunition and lance replenishment chits; a replenishment chit can be used for either purpose. 

Ratfan's Kurds now accomplish what they failed to do the previous turn. A unit of Kurdish cavalry (S16), orders reinforce by long range signals, charge into the flank of Nordwin's sergeants and scatter them to the four winds. Ratfan then leads his ghulams and Kurds in a charge against the Franks and Armenians on the escarpment. The fighting is fierce and three units (F11, F17, S15) are disordered, and Ratfans ghulams (S14) lose their lance bonus. 

The torment is still not over for the Franks. The unit of Armenian infantry, shieldwall not withstanding, fall beneath Turcoman arrows.

At this point the Franks have surrendered 5 VP, the Syrians 7VP.

Turn 5.
End of turn 5: Crisis.
[Edit: I have corrected an error in previous maps. The Frank's camp extends one box further to the right - it is three boxes wide].
Three more units have been destroyed, and both sides are running low on VP - the Franks have 6, the Syrians have only 4.
Ratfan's 'charge of opportunity' is shown with a red arrow.

Nordwin rallies his knights and charges again hoping to finish the battle quickly by breaking into the Syrian camp. He breaks the Syrian cavalry in the cedar wood, but he has redrawn an activation chit (a nine) to do it. Rather than risk everything by trying for the Syrian camp, the Franks must break off this attack to deal with minor crisis elsewhere. 

Fearing that the Kurds on their flank the sergeants withdraw into a defensive formation nearer the farm. Meanwhile the knights on the right, who have managed little so far, again come up short, forcing back the Turcomans but nothing more.

Lazarus, now is your time! A couple of good charges might do it. He draws a two, failing to extricate himself from the fields and palm groves, then draws an ace - Disaster!

Gungatin, now is your time! Gungatin's heavy cavalry career down the slopes of the escarpment and cash into the disordered Kurds at the foot of the slope. They are broken! He fails to rally his infantry. His archers fail to make an impact. All of his drawn chits are high. He tries to change his cavalry's eight to something lower - he draws a ten! The Franks finish their turn.

The Syrians now play cagey, to see what happens. Scarrouff rallies his disordered unit then fires on Gungatin's cavalry, disordering them. He moves his own unit forward then turns to bring more firepower to bare. His chits resemble those of his foe, all high. He fails to make any further impression.

Ratfan, charges up the slope into the disordered foot sergeants, they break. For once the chits are kind, he charged on the perfect score required, a 3. He is at the top of the escarpment looking at the undefended camp of the Franks. The Franks have 9 VP, the camp is worth 9 VP if he can take all three. The moves forwards (on a five, he could do it!), then sideseps into the camp (on a six, looking good), then the wheels come off. Poised on the brink of victory his turn is over.

Kalib, on the brink of defeat (4 VP left) now desperately seeks to defend his own camp. By hook and by crook he shifts several units into position and even manages to disorder the knights facing his Turcomans.

The Franks have 6 VP remaining, the Syrians still have 4 VP: This is going to be close. The Franks must decide either to defend their camp to buy time for a trial by combat they must surely win, or go for the kill, or a combination of both. For the Syrians, their best hope, I feel, is to survive the Frank's turn with Ratfan able to take the camp. The course is clear, the Franks priority must be to stop Ratfan.

Turn 6.
End of Turn 6: Victory!
There is no map because very little actually moved and victory was achieved by.......

Lazarus turns and races back towards the camp. His first activation chit is the worst possible - stick or twist. He decides to draw hoping for a nine to charge Ratfan cavorting amongst the tents. A three, followed by a redrawn five, and no banana. Now, it is all up to his father Nordwin.
Nordwin charges Kalib. The chip draw for the action is shown above. I actually kept track because of his initial draw of three tens. Top row is activation (the four was a replacement chit for the ten). The second row is to hit chits following a successful charge, the next row is the unbelievably great streak of saves, and the last row is the abysmal battle back chits to hit. after this, his other knights rallied, as did the Armenians, then failed to charge. The Franks ended their turn pretty much in the state they had  started it.
The Syrians didn't mess around. Ratfan moved through the camp with ease: 6 VP surrendered, game over. A Syrian victory grasped from the jaws of defeat. 

The camps worked well, giving a possible objective other than simple unit annihilation. The main lesson being to buy a camp guard. Just about anything would do, light infantry, Ahdath, or 'pilgrims': Any that would slow an attack on the camp long enough for help to arrive. In this game, following his unexpectedly easy victory over the sergeants on the escarpment, Ratfan saw his chance and took it.r for

The rule for ferocious knights wasn't overly tested in this game. However, it didn't seem to over egg the knight's pudding. A few more games required, I think.

I didn't get a chance to test the rules for buildings. My next scenario will be smaller, with unequal sides, and one side's camp will be in a town.

All in all, a good solo game. I hope you liked it too.