Friday, 18 August 2023

The Battle of Vich (part 1)

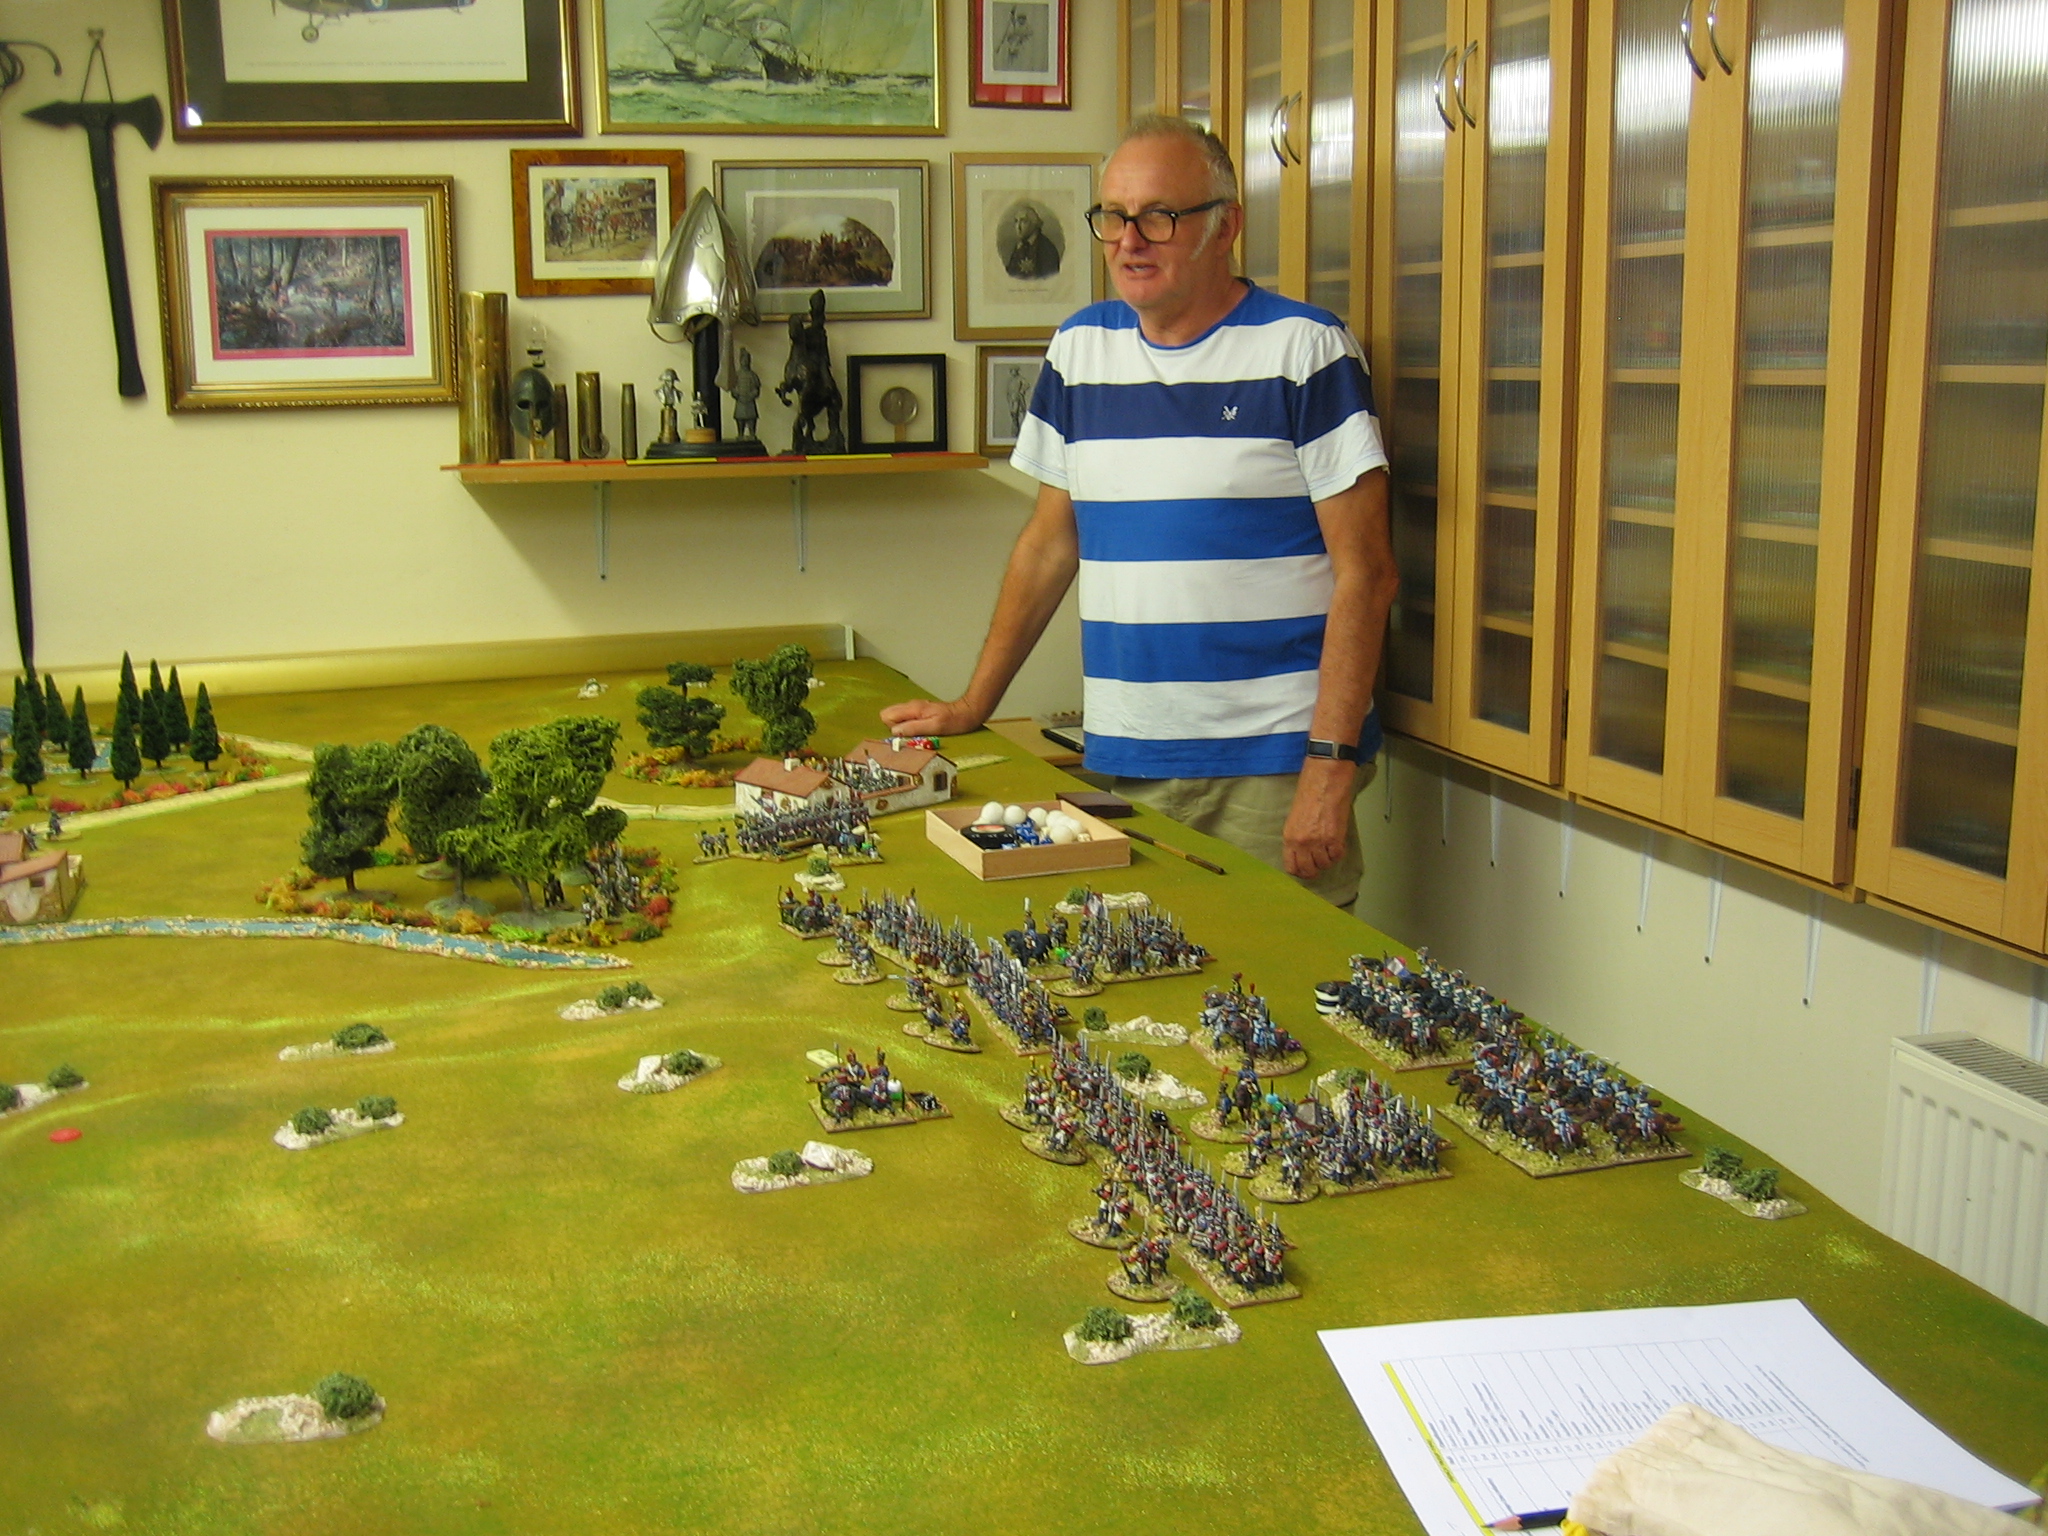
Campaign turn 4 (early cards): The French Army of Catalonia, under MacDonald (Mark, pictured below wearing something he tailored out of a deckchair) was marching south when it was confronted by Spanish 2nd Army under O'Donnell (Peter) after it crossed the mountainous (Pyrenees) frontier into Catalonia just south of Vich (modern Vic). The Spanish attacked.

Spain fielded 59 UI in five infantry divisions, plus 10 UI of cavalry and four batteries. 

France fielded 51 UI in four infantry divisions plus 7 UI of cavalry and three batteries. 

The French chose the side of table and deployed first. They deployed centrally on the reverse slopes of 'the mountain' to await the arrival of 4th Division which had become lost in the mountains whilst rushing to concentrate (delayed until 2nd appearance of the Stratagem card).

Peter (left), ably supported by Graham (the British player in the campaign), deployed second.
The Spanish deployed for a full frontal attack with a heavy cavalry presence on their right.  

The cavalry went right and the infantry came forward, skirting around the steeper sides (2nd contour) of 'the mountain' in front of them.
As the infantry went forward they were assailed by the accurate shooting of the French artillery to which the Spanish artillery, coming forward limbered, could not respond. Indeed, the incompetence of the Spanish commissariat would spell disaster - the guns came forward but their caissons were stacked up on the roads somewhere far to the rear (this is a fictional narrative: the Spanish failed to turn one of the two cards in their sequence deck which would allow guns to unlimber - the cards were always right at the bottom of the Spanish sequence deck and the French kept ending the turn before they could get to them). 

It was the Spanish cavalry that opened the attack. Advancing quickly, they were countered by the French cavalry. As the light cavalry clashed it was the French who initially had the better of it, throwing both units of Spanish light cavalry back in disorder (shaken); then they were caught reforming by the Spanish heavy cavalry and the French chasseurs went helter-skelter in rout; unfortunately, elated by their victory the Spanish heavies pursued. The discomfiture of the French cavalry was compounded by heavy musketry fire from the advancing Spanish infantry - the French cavalry were no longer a credible force and withdrew to the rear.

Meanwhile, artillery be damned, the Spanish infantry continued to come gallantly forward - surely the caissons would come up at some point.
Alas, they didn't and without effective artillery support their infantry, though fighting bravely and with some little success, were suffering much under the withering fire of the French.

In the centre, Spanish brigades were scuttling to the rear. (The same card that allows guns to unlimber also allows rallies - double whammy).
With no chance to rally, even the Spanish cavalry, which had shown signs of success earlier in the affair, and now outnumbering the French cavalry by 2:1 were also milling around without purpose in the rear. (Note: following pursuit cavalry are immediately reduced to 0 UI and need to rally UI back before they can do anything again - the unit doesn't physically go off in pursuit in my rules - instead, the unit is used to mark the rally point. The broken wheel markers denote 'shaken status' for having been pushed back in melee, or for being at 0 UI: Shaken units are penalised for everything and can't charge).

On their extreme left, the Spanish attack was looking promising. 

Hibernia (in the red coats ordered but possibly never delivered to Spain), supported by the Voluntarios de Asturias (Cazadores) to their right, have 1 Btn. 50th Ligne at a distinct disadvantage.
On the right, without artillery or cavalry support, things were looking uncertain. The French reserves had arrived and were quickly reinforcing the French defence - the cards of the French sequence deck were falling kindly.

I feel a French counter attack is imminent.

To be continued....


Friday, 11 August 2023

Campaign notes update: Army Lists

Just so you all know, I'm not making any early release of the MS Word files of the campaign rules, lists and other stuff before we've gone through the key features at least once but, following a comment to the previous post, plus a couple of emails I've received, I thought it might be useful to show you these.

So this is the army list for Suchet's Army of Aragon and will probably go a long way to explaining how armies are organised. 

The initial UI strength is noted in bold non-italic font; where there are UI slots available after that number, UI may be recruited above initial strength on the French Drafts campaign sequence card but only up to the maximum shown (division at full strength - no more government budget). 

There is a misprint (now edited): 5th Division's notes should read "This division cannot be reinforced by disbandments".

This is the quality roll sheet for the French. It also shows how cavalry and artillery randomly breaks down by type. Obviously, there will be a maximum number for each cavalry type (what I have on my shelves - E.g. 4 dragoons max.). If you are wondering about Polish Lancers, Ive attached them to a specific division: they appear as a note in the army list for Soult's 5th Division (Polish).

Anyway, for now, I hope that helps a little.


Thursday, 10 August 2023

Cuatro Cervezas, Por Favor!

Last night we got going with our four player Peninsular War Campaign. I gave you the heads up on this in a post on 16th July. You might want to read that again to recap on how it was set up. 

As it was, last night went surprisingly well: The rules, at least the ones used so far, actually worked.

So the campaign was set up with the main army pins in their jump off positions. This is not the campaign start position. Before turn one there was a set up turn. The end of turn card was removed from the campaign sequence deck (36 cards) so that each army would get two activations and each player would collect two campaign event cards. The only stipulation for play was that no one could initiate a battle or move into an enemy victory point area (marked with a small blue yellow or red pin). The set up turn was a good idea. Firstly, it allowed the players to decide how they wanted to try to get into position prior to kick off (rather than have me, as player and campaign master, deciding this for them); secondy, it gave everyone a run through of the cards in the campaign sequence deck and how the game would work (including the small amount of book keeping required); thirdly, it stopped a breakneck dash for battle before everyone was 'ready'.

After the set up turn was over this was the strategic position. 

At the start of the evening I had told the players that if required there could be a second set up turn if required. We took a vote, requiring a majority, for a second set up turn: It was rejected unanimously. The game was afoot!

Note that there will be movement impeding torrential rain in the region of Extemadura until it lifts (white pin with rain cloud): Extreme Wet campaign sequence card: Occurs on a roll of 5+; region is determined randomly on a D10. Clears on next appearance - then re-roll. Causes a -1 move dice modifier; rivers in Extremadura and downstream are in spate. There is also an Extreme Heat card - which has the same move modifier and does the opposite to rivers.


Now things took a bizarre twist. The only thing that happened in turn one was that Soult turned both his activation cards before the End of Turn card came up. The card deck was shuffled. First card out, End of Turn. Two end of turn cards back to back. The card deck was shuffled. First card out, End of Turn. This is from a 36 card deck! 

Now in some campaigns, with a calendar running, this might have made some eyes roll over but, in this campaign there simply isn't one. Campaign turns are simply that, and how long they are in 'campaign time' is elastic and will happily remain a mystery. When it comes to campaign time scale this has been my view for a long time because in so many wargame campaigns battles simply happen too frequently. With elastic time, where a turn can be a week or three months, you can brush this under the carpet and not give it a second thought; likewise, when three End of Turn cards pop up one after another you can say each turn was a week, or even a single day.

Turn four threw up two potential battles. I tried to force my way into Valencia by moving Suchet against Freire around Sarrion. The single road approach makes Sarrion a good place to defend, and Peter had chosen it well. Unfortunately, I couldn't bring him to battle (I failed to roll 4+). Damnably slippery, these Spaniards!

Then, from Manresa in Catalonia, O'Donnel successfully moved against MacDonald who had crossed the frontier to Vich in the set up turn. Both sides now rolled for concentration. The Spanish concentrated F2 (2 divisions) into Manresa for the attack. The French rolled to concentrate 4C (1 division) into Vich but rolled low. They will not be available in the upcoming battle until after the second appearance of their Stratagem card - and even then they will be in off table reserve. 

Next, we rolled up for table terrain. Now here, to save prep time, I cheated a bit. We are using the terrain maps from Sport of Kings and Bohemian Blitzkrieg published in the Age of Reason rule books. I chose four pages of table maps (17 table maps per page) for open terrain, three pages for mountain terrain and two pages for closed ('woody / farmland') terrain. This battle was in mountains so we rolled a D3 to decide which page of mountain maps to roll on. Then we rolled D20 to decided the actual table map. A result of 1-17 would correspond to the maps on the page by reading them off in order (note they are actually numbered 1-100 but we were ignoring this); a result of 18 - 20 would give the defending player the choice of table map from the randomly decided page. Mark rolled a 2, which corresponded with map 87. Note: The table for 87 is the two squares directly to either side of the number - each being 6' x 6'. 

After rolling for 'on the day' command quality (Peter rolled average for O'Donnel; Mark rolled skilled for MacDonald), the players rolled off adjusted D6s for table edge and who would deploy first. Mark won with a 3 Vs 2; neither side had doubled the other so Mark chose to defend the 96/98 edge and will deploy first.

Obviously, early 19th century military maps were not all that accurate when it came to the actual topography of the area concerned. They were a guide. At least that's my explanation.

Here are the hills as best as I could get using my insulation board hill sections.
With the cloth thrown over, it's not too shabby a representation of the map. 

The slopes on the hill sections have a gradient of around 1 in 3, which is pretty close to the natural 'drop' of the cloth over the shapes. So that the shapes can be easily picked up, I've gone round the contours with some flock (I'll pick this up with a mini-hoover after the battle is done for re-use later).
Then, on with the rest. The streams and bridges (there are no major rivers on the campaign map so none here), were put on first; followed by the roads; then the villages; then the woods. I might dress the steep rugged hills with some rocks and scrub later.

Note: Road networks are not as important in my rules as they are in Age of Reason so mine, whilst following the basics of the map, has been simplified.

Mark's three French divisions under MacDonald, less his cavalry division (two units of cavalry - type to be decided at random on fight night).
MacDonald's 'reserves' - 4th Division under the tardy Sebastiani. I fear Mark might need these earlier than due.
Peter's five divisions of Spanish under O'Donnell, less the cavalry division (three units of cavalry - type to be decided at random on fight night). 

Next Wednesday we will determine cavalry types, followed by divisional commander and troop quality (a single D6 roll per unit). Then the players can depoly (hopefully quickly) and the battle of Vich, the first battle of this campaign, can begin.

Ideally the battle will last one and a half sessions giving time to get the next campaign map move in at the end of it. Keep it "rollin'. rollin', rollin'", as they say.

After this battle, just about every rule will have been tested. We will have a chat and, if the players are reasonably happy that they are fit for purpose, I'll make them available on request.

Tuesday, 25 July 2023

Mid War Spanish Additions (cont. 17) - Sagunto Dragoons

This is the second to last cavalry unit for my Spanish (next and last, Coraceros). When it came to painting this unit I was really torn and I didn't go with what I wanted to do most: I went for what was probably more useful.

I wanted to do a heavy cavalry unit in blue coats (red facings) and bicornes and I have a flag for Del Rey but, that glorious unit is unrepresentative of the shambolic Spanish cavalry - if only they had not been so good. I also had a flag for the Sagunto Dragoons and that, strange as it seems, was the decider.

So here they are, the Sagunto Dragoons, or should that be the Dragones de Sagunto.

Figures by Front Rank and the flag is by Adolfo Ramos. Painting is by me, in Humbrol enamels. 
I think they look great in their resplendent, glowing, yellow coats with green lapels (and cuffs, under gloves).
Note the bugler. As with all Spanish dragoons in yellow coats, it's the yellow and  red (turnbacks) of the basic coat that get reversed - no green to be seen.

"No green to be seen" does that make me a wargame poet? Answers elsewhere, please.

I might do Del Rey as an addition at some point - a few additions are pencilled in for this army.

Next up: Regimiento Guadalajara. Not finished yet.


Sunday, 23 July 2023

Mid War Spanish Additions (cont. 16) - Voluntarios de Jaen 1811 & Voluntarios de Asturias 1811

I've added two units of infantry Cazadores to the army. These bring the compliment of light infantry to five units: Out of a total of twenty two units (when the last two are painted), including two Guerrilla bands, I think that should be more than enough. 

All figures are Front Rank. Flags are by Adolfo Ramos. Round bases are by Warbases, others are home cut from sheet MDF. All were painted a few weeks ago by yours truly using Humbrol enamels (mostly). Basing is a sand and grit mix; washed with diluted burnt umber ink, then dry brushed with two shades of beige household emulsion paint; the flock is Woodland Scenics coarse turf- a mix of 'yellow grass' and 'burnt grass'.

Voluntarios de Jaen 1811. Uniform details are from Osprey's Spanish Army of the Napoleonic Wars vol.3. There is no information on headgear. Given that the uniform is brown, I assume it was produced in Spain - so I've gone for round hats.

The number of skirmish stands is a visual game aid: They indicate the base skirmish factor. I nicked it from Lasalle by S. Mustafa. 


The brown and yellow coats look good as a combination and the white belts add nicely to the ensemble. The white gaiters are something I added on a whim. The Spanish wore gaiters in various colours (black, white, grey, light blue and dark blue). I couldn't find information on this unit's gaiter colour so I let rip - it's the men in top hats and spats.
Voluntarios de Asturias 1811. Again, uniform details from Osprey's Spanish Army of the Napoleonic Wars vol.3.... 
....and yet again, I don't have information on what headgear this unit wore. Given the recruitment area I can only guess that the uniform was produced in Britain: Probably a shako, then.
I decided on black accoutrements for this unit: Mostly because I probably haven't done enough of it in this colour.

Next up, another unit of Spanish dragoons (finished some time ago). That leaves just three units left to do. I can see the pub from 'ere! 

I've also finished the work on the campaign, the players seem up for it, so they might all see some action very soon.


Thursday, 20 July 2023

Little ships and Nimitz

EDIT

On Wednesday evening, as scheduled, Peter J. brought his WW2 ships along. I hadn't seen them before and I've got to say, for something that small, they looked good to me. They are 1:6000 vessels by Hallmark. Having been to the Magister Militum site today I found models of this Myoko class heavy cruiser were just £9.50 for a pack of four. 


Here are the two fleets that Peter brought along for the evening's game. Basically a mix of cruisers and destroyers: You can just about buy the lot for £40. A single unit of twelve 28mm cavalry from Front Rank cost more than that: 


Now, I've only ever played one game of WW2 naval before and that was years ago. It was a game put on by Brian Hicks (of Leeds Wargame club 'Hicks Centre' fame) using some of his shallow seas stuff. It was okay but, it was a bit complex and it certainly didn't enthuse me to go out and make WW2 naval a thing - on the contrary, in fact. 

In consequence, to be honest, I wasn't expecting much of the planned game. So it came as a nice surprise when the game proved to be both simple to pick up, exciting and fun: The rules used were Nimitz by Sam Mustafa.

We all decided to get stuck in from the start - which is usually the best way to pick up new rules (none of us had played, only Peter had read). Not knowing what ships could do what (beyond move rate and weapon range) there wasn't much tactical thought in evidence. Indeed, before move three was out pretty much everything had drawn up at close quarters and then all hell broke loose - this move to close range was lucky for the Americans because the Japanese would prove to be much better at long range than them.

This photo was taken at the same time as the other shot but, I thought I'd add a pencil to show the scale of these little beauties. The ship size means a big table isn't needed - I doubt we got out of a 5' x 3' all night. Shortly after this shot the formations dispersed a little, and the game got a little (being generous) more tactical. 

The rules were sorted within a couple of turns and the game ticked over very nicely. The firing mechanism was especially sweet because, unlike that other WW2 naval game I've played, it was very simple. Firing is split into three stages: Ships fire secondary armament (cruisers had some, the destroyers didn't), followed by all firing main armament, followed by torpedoes: Basically gunnery was half a dozen modifiers to give you a difficulty factor (0-5), cross referenced with tubes firing on a to hit table to find the number required to hit, then roll d6 - you hit, or you don't; if you hit roll D6 for damage cross referenced with gun penetration at close or long range, minus target armour for effect (tick off damage boxes); then roll a bonus 2D6 for a critical hit. Each fire takes literally seconds to resolve. The effects of damage were also very easy to follow; general movement rules were even simpler.

There is a bit of book keeping to be done on the individual ship roster / damage / gun factor sheet but, this was so easy it is hardly worth going into, except to say that, as with everything by Sam Mustafa, it's all incredibly clear once you've identified the symbols - he's a very 'visual' guy: Once identified and understood they do stick in the mind. 
The whole game, with virtually no looking at the rules, was carried out using this one sided QRS in about two hours. Pretty good for a first game with four players.

The game was a draw with both sides getting quite badly mauled. The Japanese cruisers were better off than the American ones at the end but were much worse off for destroyers.

Will I be going out to buy WW2 naval. Well no, but only because Peter has already done so. Otherwise, I'd be sorely tempted. 

Word to the wise about Sam Mustafa's rules: If you think you will get round to this as a period one day, and you like hard copy versions of rules, buy your copy of Nimitz now! They will sell out pretty quickly (they always do) and there never seems to be a re-print so second copies go for twice the price!

RECOMENDED!

We liked it so much we are playing it again next week.


Tuesday, 18 July 2023

Variety, they say, is the spice of life....

After a long break, gaming is now up and running again on an almost weekly basis. Unfortunately I haven't found time to blog about the games in any detail. Normally, I always take a photo of the set up for games but somehow I haven't even managed that for a few of them - for instance this week's game was an X Wing scenario featuring the asteroid base I made a couple of years ago (pictured opposite: Made out of a big sponge, half a polystyrene ball, Lego pieces and a couple of beads with Marmon Herrington turrets on top - panelling is thin card). This was a scenario test of the prequal to "A Tinder Moment" scenario called "Pod-Cast" where Tinder Caress kidnaps Moff Diver, escaping in the escape pod, under cover of a diversionary Rebel attack on an important Imperial spy base. Tinder will always escape in this scenario - it's just part of the back story. The game scenario is actually just a simple bombing mission versus a huge ship. The huge ship in this case is the spy base (which I counted as an immobile GR-75 mounting two Flechette Cannons) defended by a squadron of three Tie Defenders and a Tie Advanced. Attacking I got to use my two new (now old but never used) B/SF-17 Bombers plus two X Wing escorts. It's a pity I didn't take any pics because it actually looked pretty good - I'm always amazed at how good these games look: plenty of bang for buck, IMHO. As an obstacle, I classed the base as an asteroid rather than a ship (I had made the matching table template for that exact reason), with any damage for flying over it (rolling to hit dice as normal but allowing an action) being counted as coming from short range laser fire rather than an actual collision; classing it this way allows the Resistance Bombers to make proper bombing runs; the Imperials could fly over it without penalty as a defence advantage. Anyway, at some point I'll write this scenario up. I was the Imperial player and got whooped - mostly by doing my famous fly into small asteroids at every opportunity manoeuvres! It's a good job I don't drive.

We've also played a couple of Napoleonic games. This one was the first full on French versus Spanish encounter that we've played. I took three photos on the first evening's play, none on the second. It featured everything I have recently painted for the Spanish (except a couple of command stands).
The terrain was originally set up to do Bussaco but I decided I didn't have the time to research it properly, added a stream for difference, and played this fictional encounter on it instead. The French advanced on the wood sheltered convent, sweeping all before them.
The French swept up the long ridge, then over it, kicking Spanish arse all the way. There were lots of virgin Spanish infantry and cavalry units in action (17 of 21), and the Spanish did as most gamers might expect - I don't think I've ever played with that many new units in one army in a single battle before and I've definitely never seen that many new units break: Why do newly painted units always tend to do so badly? I was on the losing side of this game too!
We've also played a couple of To The Strongest battles set during the Early Crusader period. This one (pics of set up only) was interesting in that it featured an entirely mounted Saracen (Syrian / Turk) army. It was a point balanced game and I composed this army first (using every Saracen cavalryman possible to get a points total) before matching it with a more usual mixed force of Crusaders. It's actually less Saracen cavalry than it looks - there are only about 320 of them (Note to self: Need more horse archers). Of course, we used my purpose made (fit into grid) terrain pieces on my home made tea and coffee (plus a smidgen of burnt umber ink) stained canvas play mat: This has probably been one of my better money saving ideas - because it was simple and only took a few hours of work, if you don't count the three days of on-table (to keep it flat and uncreased) drying time - my house smelled like a coffee house for over a week.

It was an incredibly close game, nip and tuck all the way and very confused, especially on the wings. In the last turn of the evening, the last possible Saracen command to activate was a single unit of horse archers; it activated to shoot on an 8 (so it was probably the last activation of the Saracen turn), they hit on a 10 but went out of ammunition and having no ammunition chits left wouldn't shoot again in the game, the Crusaders failed to save their unit of armoured sergeants, in shieldwall, on a 5+ and lost their last two victory medals. The Saracens had won with just one victory medal left of their own! My unit of horse archers - heroes to a man - and a blessed VICTORY!!!

This week's game will be something completely different again. Peter is going to bring his ships (WW2) along for a naval game. Hopefully I'll remember to take a few photos this time!


Sunday, 16 July 2023

A Peninsular War Campaign

As I only have three Spanish units left in the lead pile (I've finished another three Spanish units since the last Napoleonic Project update, more on those later), it's probably time to get some proper use out of what is now, at well over 2,600 men, officially my largest collection. What better way than to launch into a wargame campaign. 

Over the last couple of months I've been slowly getting everything for a campaign together, and I'm almost ready to go. We are scheduled to play a naval game with Peter J.'s ships on Wednesday, then hopefully we can start the campaign the week after that. 

The players in this umpire-less campaign will be Peter J, Graham H, and Mark D and myself. There will be one Anglo-Portuguese, one Spanish and two French players. Peter J. wants to be Spanish, and that's fine by me. Mark and Graham can dice off for next choices and I will take what's left. 

The campaign will be fought over this point to point map. It was downloaded from here. At full size the map was too big for my map board - I printed the one pictured at 75%. I think these maps are quite brilliant for large area horse and musket campaigns in Europe and I'm very grateful to their cartographer for making them freely available on line.

I decided to start the campaign using armies from around mid 1811. Mostly, this was to give the Anglo-Portuguese player full control of Portugal - it wouldn't be much of a campaign if Wellington got pushed back into the sea on campaign turn 1. As a start date it also makes my Spanish army look about right. 

There is one massive fudge - much of the French Army of the North (about 70,000 men) is AWOL. However, this army was employed in trying to hold down the large swathes of Spanish territory under French occupation and took little part in offensive operations - what men were available for 'use in the field' are accounted for in the other armies starting line ups or as campaign card additions. The army's absence helps to even the campaign's odds, which numbers wise are already with the French. I feel that the inclusion of this army as 'a player army' would make it a French walkover unless some very complicated (and boring) rules for policing and garrisons were formulated. It is a leap for the imagination to make but, I simply can't think of ways to effectively keep the Army of the North occupied doing what it did historically - which in wargame terms is virtually nothing! - and make the campaign playable as an enjoyable reasonably balanced game. The two much smaller Spanish armies kicking about northern Spain (total about 25,000 men), which kept popping up to disturb the peace before disappearing into the hills, and which heroically kept the much larger French army dispersed, tied down in garrisons and fruitlessly 'chasing ghosts' about the place, are also AWOL - one lot cancelled the other, so to speak. 

To begin with, each army is represented by a single pin placed at its 'campaign jump off' point. The campaign will start with a set up turn. This set up turn will be used to sort out the actual dispositions of the forces before the campaign begins in earnest. This special turn will serve to give the players a run through of a full campaign turn (I will remove the End Turn card); the only caveats for how this special turn is played through is that no one will be allowed to initiate a battle or begin a siege - it is purely a game turn of manoeuvre and positioning.

Note all of the campaign counters (pins) that are stuck into the map board. There are pins for every division (the smallest individually tracked campaign force in the campaign), supply dumps, extreme weather, Guerrilla action and various other things that might feature due to campaign cards and events - I don't think I've forgotten anything.

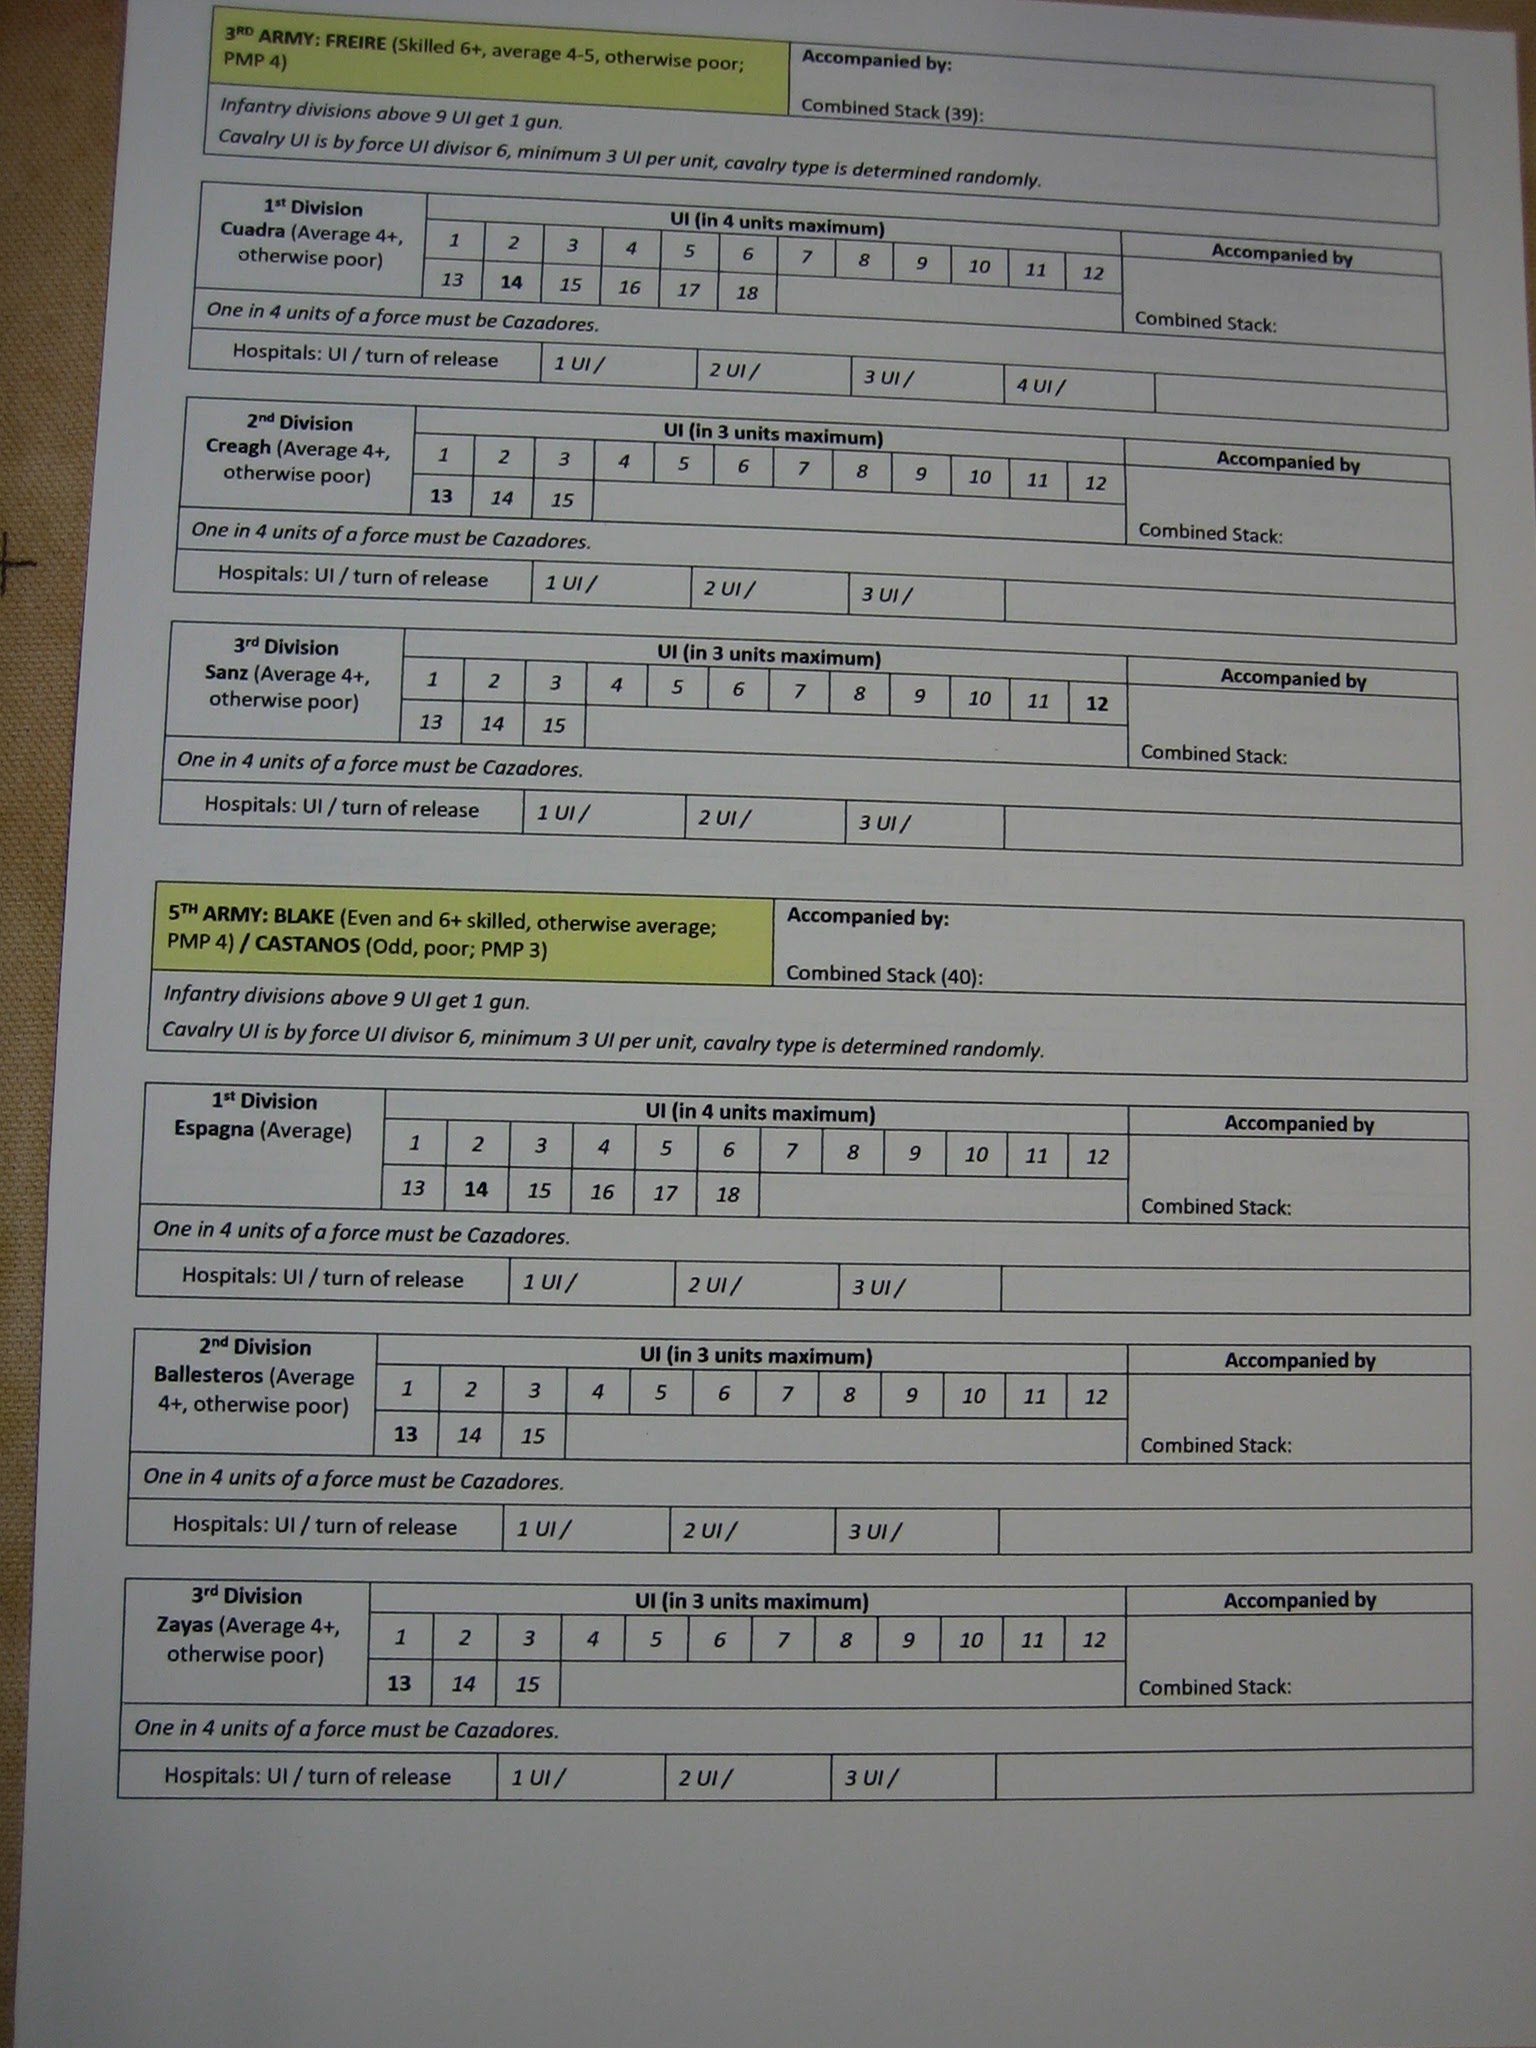
Here is a sample army roster sheet, in this case for two of the Spanish armies. These note any special divisional units and will be used to track army strength. They are loosely based on historical divisional composition for 1811.

If you look closely you can see starting strength - bold and non-italics number - of each infantry division: Tracking individual units is too much paperwork - I'm happy to simply track divisional strength in unit integrity points (UI) and let players organise their divisions into units when a battle occurs. 

I'm not going to track cavalry or artillery at all: Cavalry numbers are a product of infantry numbers, as is artillery. In this case, both Freire and Blake will get 1 UI of cavalry (random unit type) per 6 UI of infantry fielded, and each division will get a battery if it has 9 UI or more. 

One thing I have added to the campaign mix is 'hospitals': These are useful for dividing post battle infantry UI losses into two types - temporary and permanent.

One sheet not pictured is the random unit quality table for each troop type. Before battle, a dice will be rolled to determine the quality of each unit.

The game will be card driven. There is a campaign activation deck. This has two activation cards for each army (one for Joseph, alternately controlled by the French players), two 'draw campaign hand cards' for each player (see below) a reinforcement card for each 'nation', two extreme weather cards, a naval move card, and to sow the element of doubt into 'turn sequencing' an End Turn card. There are 36 cards in total.
Lastly, there is a campaign hand deck of 54 cards, most of which are too detailed to list. They will be picked up by players during campaign activations and can be used by the players at any time during the campaign to help them or their ally, or to hinder the enemy. Hopefully they will add governed campaign flavour and surprises - which is useful in an umpire-less campaign.

Lastly there are four or five pages of rules. I will not detail these until after they have been play tested a bit but, they cover movement, stacking limits, supply & attrition, initiating battle, force concentration from adjacent areas prior to battle, post battle casualty and movement, sieges and the like. I've tried to keep everything pretty simple because past experience has taught me that's usually best.

Once the campaign is properly underway, and any glaring rule errors and omissions have been sorted, I'll make everything available on request.


Wednesday, 31 May 2023

Mid War Spanish Additions (cont. 15) - Garrochistas and more commanders

First up, a few posts ago, I mentioned that I had two more command stands left in the lead pile but, looking into my bits and pieces box, I found two more figures that I could convert to make a third. 

I'm now down to a lead pile of just six Spanish units.

Command stand #6.

You have seen the bugler (he's the Russian figure with an added big feather plume) before. This is a changed / revamped cavalry command stand: I took the officer off and replaced him with this converted officer in a cuirass to make it even more flamboyant. The officer I removed found his way onto a new stand below.

Both of these figures are in made up uniforms - which would be nothing special in a Spanish army of which Surtees commented "It was really absurd and ludicrous to see the strange figures they generally made themselves. In one regiment alone you might observe more different uniforms than both we and the French have in all our armies....all the [styles and] colours of the rainbow.....in the uniforms of one regiment's officers; and every one of them appeared to vie with the other who could make the greatest harlequin of himself...."

The newly converted figure was a French general of cuirassier in a helmet and distinctive laced, square tailed coat. I swapped his head (with a spare British officer's in bicorn), added a large Milliput neckerchief (the neck was a bit of a mess because of the cuirass's ruff), then reshaped the coat tails and added more traditional turnbacks to using Milliput.

Command stand #7
Command stand #8.

Note that the uniform of the ADC is not made up; it follows a portrait by Denis Deighton. Officially the uniform should have been blue faced red with a plume-less bicorn: it goes to show that Surtees wasn't wrong in his opinion.

Command stand #9.

The officer on the left is the second converted figure mentioned at the start of this post. He was a Nassau officer. His new head is that of a decapitated (Renegade Miniatures) Roman with a large (Front Rank) bicorn. I also added some lapels to make him look more like an ADC and a big moustache to make him look more Spanish, using Milliput.

A unit of Garrochistas. These are Spanish cowboys and their 'lance', when not skewering Frenchmen, is for prodding bulls into obedience.

I'm not sure if these figures aren't more early than mid war but, they are very evocative of Spain: They can be used as Guerrillas or light cavalry stand ins.
I tried to make the most of the variation in the multi-coloured striped blankets but I kept the rest of the pallet fairly simple to speed up the painting process.

The majority wear green jackets (the most common colour, apparently) with a few blue and brown ones; trousers are tan (majority), grey or dark brown. 

Most Garrochistas seem to have favoured red head scarves (hair in a black hairnet beneath) and red sashes. 

I did all their hats and gaiters the same colour to speed things up a bit.

At some point, I might change the colour of some hats. I'm not sure what other colours would be appropriate - Zorro black perhaps?

All figures are by Front Rank.

All were painted by yours truly using enamels.

Next up, a Spanish Vs French battle and not a Brit in sight! I got there, in the end....