Apparently, a brief description of how the sections were painted was not sufficient so to save further queries here, with my narrower 100 mm wide river sections, is a blow by blow.
These sections were constructed in exactly the same way as described in Part 1 so, lets not dwell on construction.

I'm not sure this is necessary but I do it anyway. The colour is probably unimportant.

This is probably a good idea as it saves the next colours, the ones you want, from soaking into unprimed wood and card.
The first proper colour I painted on was the dark brown shade on the banks. I used Dulux Golden Bark 1.
Being the first colour you can be a bit messy with this one.


These two sections show three applications of paint. The first shows the base colour (Dulux Royal Regatta 1, Indian Ivy 1 and Night Jewels 1 mixed 1:1:1) followed by a highlight of the same mix with Dulux Azure Fusion 2 (1:1) in a rough dry brush.
The second section shows an extra highlight of neat Dulux Azure Fusion 2 for more depth of colour.
Note that this dry brushing was applied with an old, rather splayed 1" brush where the bristles had 'splayed' gaps between them.
Note that the dry brush follows the direction of 'river flow'; dry brushing in any other direction never looks right.
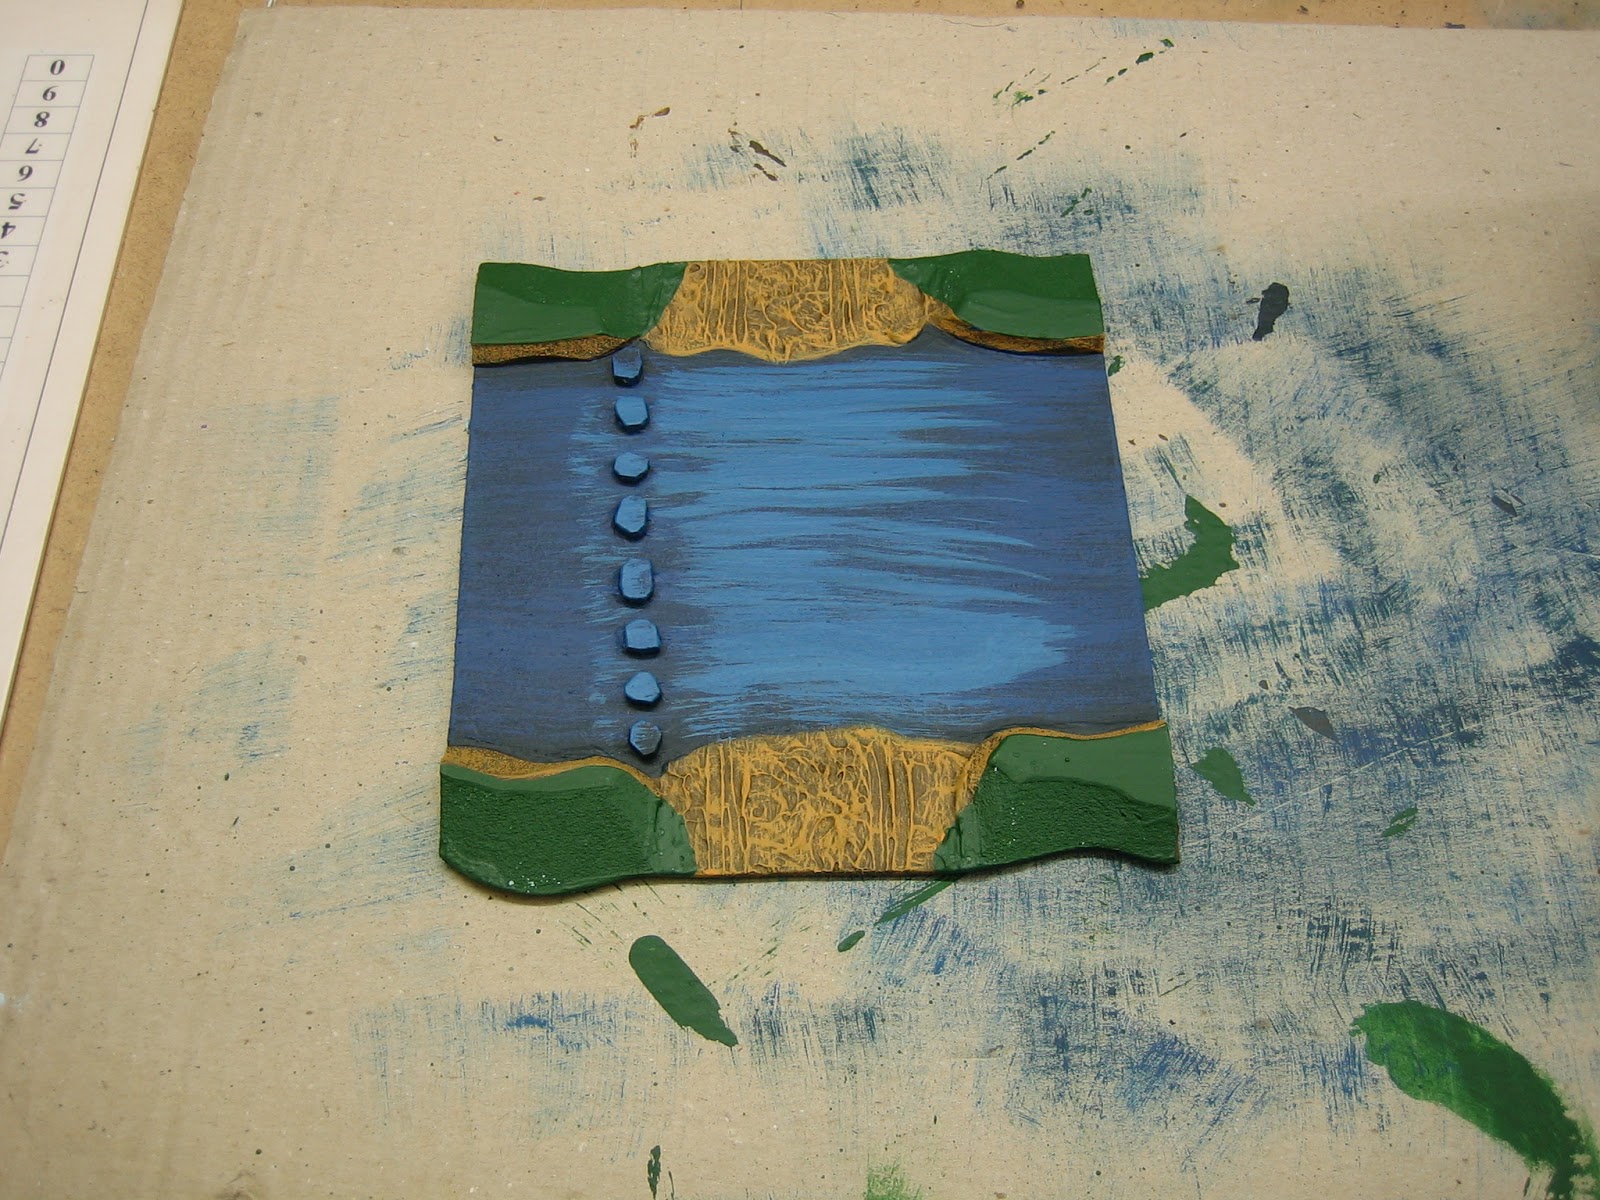
To delineate the shallower water of the ford I used a mix of Dulux Azure Fusion 2 and white emulsion. Again I did this with a lateral, with the flow, brush stroke and kept the pattern 'jagged'

When completely dry I added a coat of Yacht varnish mixed with a couple of thimbles full of wood stain (two teaspoons to half a cup of varnish -ish). This darkened the tones and softened everything nicely.
I left this to dry overnight.

Obviously everyone's choice of flock will be different. My table is quite bright so I chose this light mottled green mix. It's Javis flock: Light Meadow Green and Spring Mix at 1:1.
Note: Good quality household brushes are well worth the money for this kind of job. This one, by Harris I think, has man-made fibre bristles; I've been using it for years and it has unbelievably, and totally retained its shape.

I'll leave them here for three or four days. They are already pretty warp-less and flat but, once completely dry, they should be completely flat.
Here there are:
12 x 12" sections
7 x 6" sections
1 x 6" ford section
3 x 4" sections
4 x 3" section
7 x 22.5 degree turns (should have been 8 but I bodged one).
3 x 30 degree turns
4 x 45 degree turns
4 x 15 degree turns
2 x 180 mm to 100 mm forks
1 x 180 mm to 100 mm T junction
1 x 100 mm to 100 mm T junction
2 x 100 mm to 50 mm T junction
That's about 25'.

Here, two new sections have an old section between them. Not a bad join, IMHO.

The two forks, going from a 180 mm wide section into two 100 mm wide sections, were made so I can do 'river island' games so often seen in scenario books. I decided to do them 180 mm - 100 mm wide so that I didn't need to make another six feet of 100 mm wide sections just for this purpose - you have to stop somewhere. Plus, for most river islands it seems wide rivers running into two narrower ones is the natural run of things (?).
The other junctions are for tributaries and will be added to the two 180 mm wide rivers with 50 mm wide T junctions I made last time. I'm not sure how often these will ever get used but if they are needed I will have them.


As with the other sections, there is nothing too clever here; everything has been kept very simple and tidy. The stones are 2.5 mm thick balsa wood sheet cut into irregular shaped blocks.
The road has been textured using heavy body artist's acrylic paint from a tube (Emerald green, I had lying around, in this case) then painted with the same emulsion as the earth banks. I can't recommend artist's acrylic paint enough for texturing things: It sticks like the proverbial; you can apply it with a brush that doesn't 'bung' up like brushes do with plaster; it never flakes off; it is easy to work and over paint.
Next up I will have to make three fixed bridges and a further section with pontoon ramps. They will all be 6" wide, adding another 2' to the total. I may well do a post on this - Part 3 - what do you think?
8 comments:
Great & big job ! Brao !
Where do you buy the light mottled green mix ? Or is it home made ?
In this case culd you tell your secret ? :-)
Looks great, James. Thanks for the how-to!
It's not a secret, it's Javis flock. 1 bag of Light Meadow Green to 1 bag of Spring Mix. I decided to restock my flock for this job and bought two bags of each. I've made almost 50 feet of river with 30mm deep banks to either side. At a rough guess, I have about 40% of it left. As I still have 20 feet of narrow river to make I'd say I judged that about right.
Note I've edited this reply into the post.
Some of the nicest river sections I've seen anywhere. Looks like you have enough for some of those more complex Charles Grant river (through and around a small town) scenarios.
Best Regards,
Stokes
Thanks James for informations !
:-)
Always nice to see how others do their terrain and usefully reminds me to 1finish off the ones I've done and2do some more!
Best Iain
Very nicely done. A prime example of good prior planning.
Tony.
If you want "ripples" cheaply and easily, I've described what I used on my blog if it helps:
http://gnwgaming.blogspot.co.uk/2018/04/workbench-making-river.html
Post a Comment