If you have been following my desert terrain posts of late, you will know that I stained a large canvas play mat (cut down to 14' 4" x 6' 6" approx) and kept the off cuts for one reason or another. You will also know that because the cloth shrank by 16" in length that I don't have quite as much stained off cut as I would like.
However, although I have now completely run out of stained canvas, I have managed to do my hill tiles for To the Strongest games. For those unfamiliar with To the Strongest, it is a game played out on a grid and consequently, for two reasons, I decided to go for stylised terrain based on the size and shape of the grid squares.
The first reason for my choice of hill shape was to achieve a certain sartorial elegance. The game is based on a square grid so why not embrace it.
The second reason, and the reason my hills are so square, is down to cost. Originally I had planned to do my hills in a similar fashion but with less regularity of shape and I had planned on buying new foam insulation board to do it. However, a box of twelve one inch thick tiles two foot square is nearly £80.00 including delivery, VAT, etc.
As I only actually needed three or four tiles this was too much, especially as I already had sufficient 'spacer sections' in my collection of under cloth hills tiles for 'green terrain' from which to make my desert hills. These sections are unpainted square edged lengths (to increase the width / length of hills) and could be easily converted into painted sections for going on top of the table for TtS desert games, whilst still maintaining their usefulness as spacers when going under a green cloth where their true identity cannot be seen. A simple case of double bubble. A side benefit of double bubble hill sections is of course storage space requirements - hills being one of those terrain features that require quite a lot of storage space.

Having decided on a basic design and working out that I had cloth for 21 squares worth of sections, I made a simple plan of what to make. I drew out the sections I would cut and shape on a piece of paper, and changed my plan after a little thought to add two one square spacers.
Previous games had shown that two square hills were the most useful, so I planned for three. One square hills are very much stand alone pieces so I settled on three; this might prove one too many and I did consider just doing two and adding another one square spacer. I also decided to do two right angle corner section to allow for up to two right angled hills, or a horse shoe shape, or an S shape hill to be made.
On the plan, you will note the green squiggles, this was simply to check, by matching one join with another, how many tiles might be left at the end - it proved to be a maximum of one. Red ticks were done as sections were made, just to keep track.
With more cloth, I would have made four or five more hill sections, mostly open ended spacers, perhaps including a two square long open ended section, and another right angle.
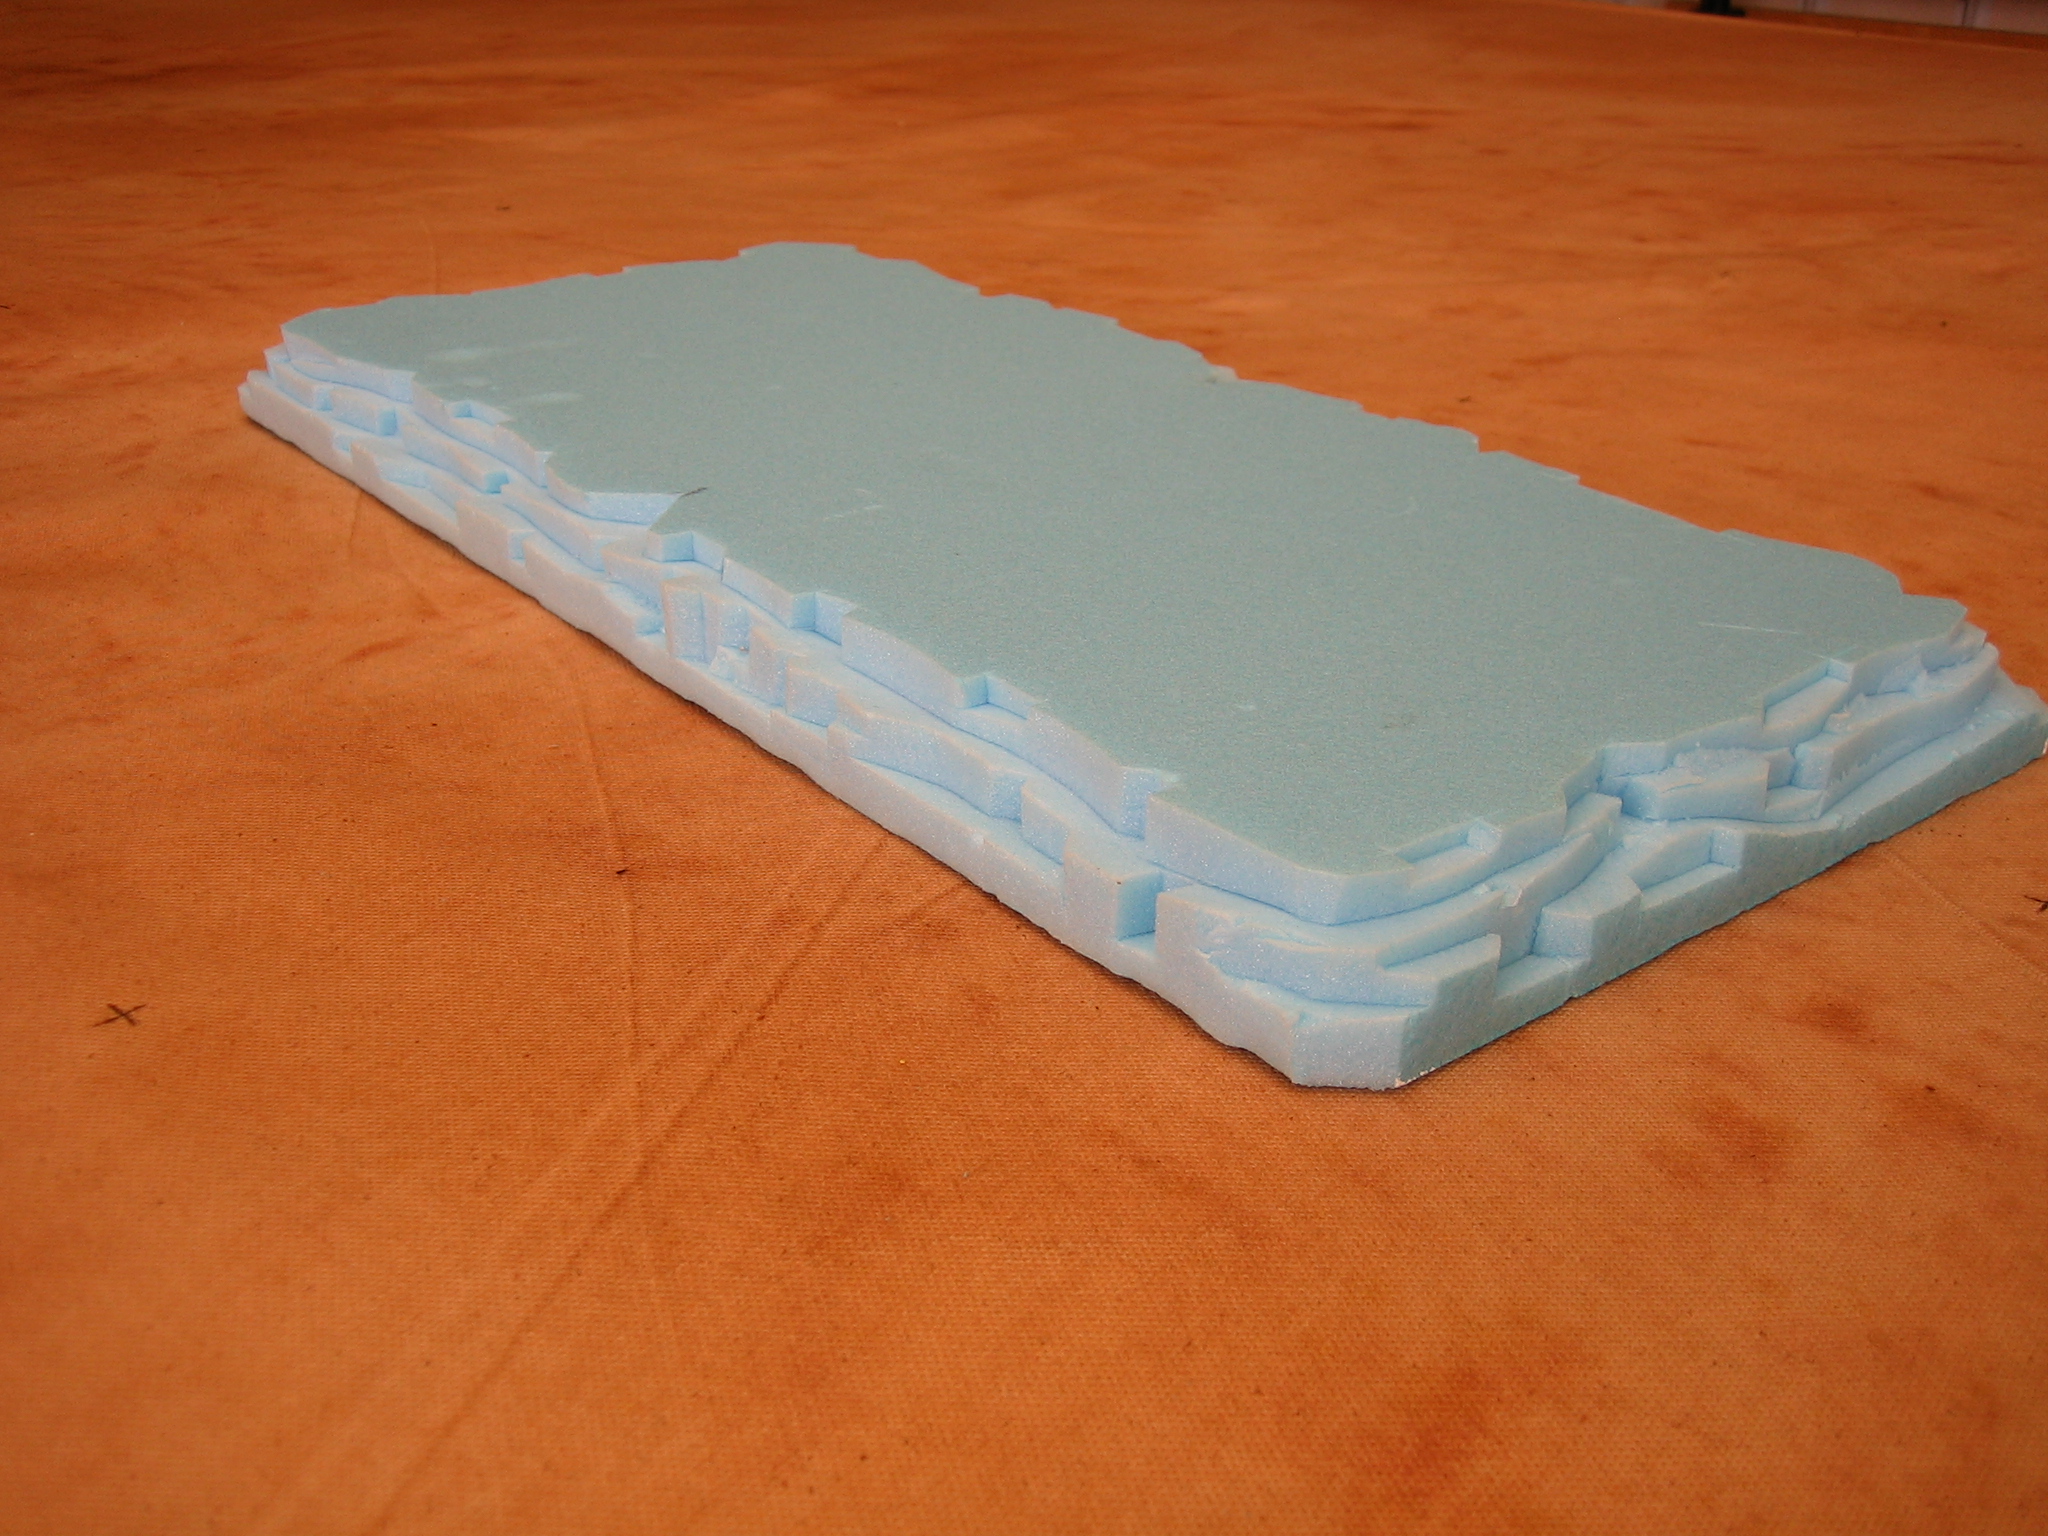
The first thing to do was cut my hill sections so that they had a slope on one side whilst being able to be flipped over to become spacer tiles.
I decided a simple step pattern was the best solution to this. This would, I hoped, give the impression of stylised cliff faces.
This was achieved by first cutting horizontally into the side of the hill to give the horizontal steps, then doing the vertical cuts to give the shape of the hill in that plane.
I worked top to bottom, doing the first horizontal cut followed by vertical cuts, before moving down to the next horizontal cut. It's worth noting that where the first horizontal cut was quite high, it allowed an intermediate horizonalt cut to be made at certain points to increase the number of 'strata'.
Tools used were a Stanley knife for the horizontal and a scalpel for the vertical cuts. Blades were always new and replaced at regular intervals. In the whole process (start of project to finish) I used 4 Stanley blades and seven scalpel blades - most can be reused in the future where a less sharp blade is required to do a job.
The edges were now sealed with thin filler mix. Creamy texture with a 1:1 PVA water solution. This is important. Thick filler is much easier to apply onto a coated surface.
Whilst drying, weight was applied, using a couple of glass shelves, to stop the chance of the tiles warping.
Filler was a cheap brand (2Kg for £4) and cheap PVA which I mostly buy to do sand and grit basing: It's quite runny.
Then the thicker filler is applied to rough up the surface. I used a hog hair brush to get the effect. Again filler is mixed with a 1:1 PVA water solution. This is important as it will stop the filler chipping when in use - it's all glued together.
Warping hasn't ever proved much of an issue with this technique but, until the filler was dry I wasn't taking any chances. The tiles were stacked on a level surface under two glass shelves and weights (a few books).
When the plaster was dry I painted the 'rock faces'. I did this as a two part operation. Firstly I did the bottom of the cliff going under half an inch onto the base to seal everything, placing the hill upside down to dry. Then I did the top half (as pictured) doing the same.
At this point, you don't need to worry about warping.
I used Dulux Wholemeal Honey #1 for this: Code 90YR 19/487
When dry I ink washed the surface with Daler Rowney Burnt Umber acrylic ink diluted 1:4 with water.
First drybrush. Done using a big (size 8) flat hog hair brush.
I used Dulux Wholemeal Honey #2 for this: Code 90YR 34/468
Followed by a second and third highlight using a Magnolia, first mixed with WH2 for the second highlight, then applied neat.
Next the top surface was applied. This would be canvas offcuts stained when the cloth was done. A thin coat of PVA was applied to the top surface of the tile and also to the leading edges of the fabric.
The latter was done to seal the fabric to make the edge easier to cut later, and also because otherwise the fabric would soak up all of the glue applied to the tile and reduce the glue's sticking potential.
Note the 6B pencil used to stencil trace the hill edge to help direct where to add glue to the fabric. You don't get to use a 6B pencil very much but I'm glad I had one kicking about for this job.
Up until this point everything was straight forward and quick. Now the hassle began. I had to cut off the excess canvas from around the edge of the hill. For this I used a scalpel.
This was also where my knowledge of the finished result was lacking. It was a harder job than I had imagined, mostly trying to hold the hill in a position where I could see what I was doing - something I found best achieved by holding the hill edge on between my knees - and the cut wasn't as neat as I was hoping.
Also, because the stain hadn't evenly penetrated the cloth, the fabric had a distinct pale edge.
Consequently, I decided to stylise the hill.
First I sealed the top edge of the canvas by painting a quarter inch line of PVA around the cliff edge to stop leaching before adding a dark edge with ink (diluted 1:1). This new clean edge line hides a multitude of sins, and possibly because the ink was used elsewhere in both processing the cliff faces and the cloth, it somehow blends in with the whole effect.
One possible combination of 21 squares of hill sections.
And slightly less hills in a game set up.
Please ignore the tall 'stalks' in the woods. They are commercially available plastic palm trees currently being made up and finished off with various painting techniques to make them look a little less like plastic (hopefully).


3 comments:
Those hills look superb
Very effective James and they blend in nicely:)
Visit for Tiles
Post a Comment