I'll be using the scenario described earlier this month, using The Ilkley Lads' amended Piquet rules for fighting large 18th century battles. Being a solo game I can play it, at my own speed, whilst taking notes and photos as I go along. Note that the initiative will be decided by drawing two dominoes (one for each side) for each 'initiative phase'. I'll explain the system later but, suffice to say that unless one side draws double blank, each side gets some initiative on each draw.
Where necessary I will give unit designation by the actual (what the unit was painted as) wargame unit present. PCR2 is Prussian Cuirassier Regiment number 2; ADR28 is Austrian Dragoon Regiment number 28; PIR3 is Prussian Infantry Regiment number 3; etc.
I will detail the refight in a series of short posts. O.K. luvvies: Camera, action!
Turn 1.
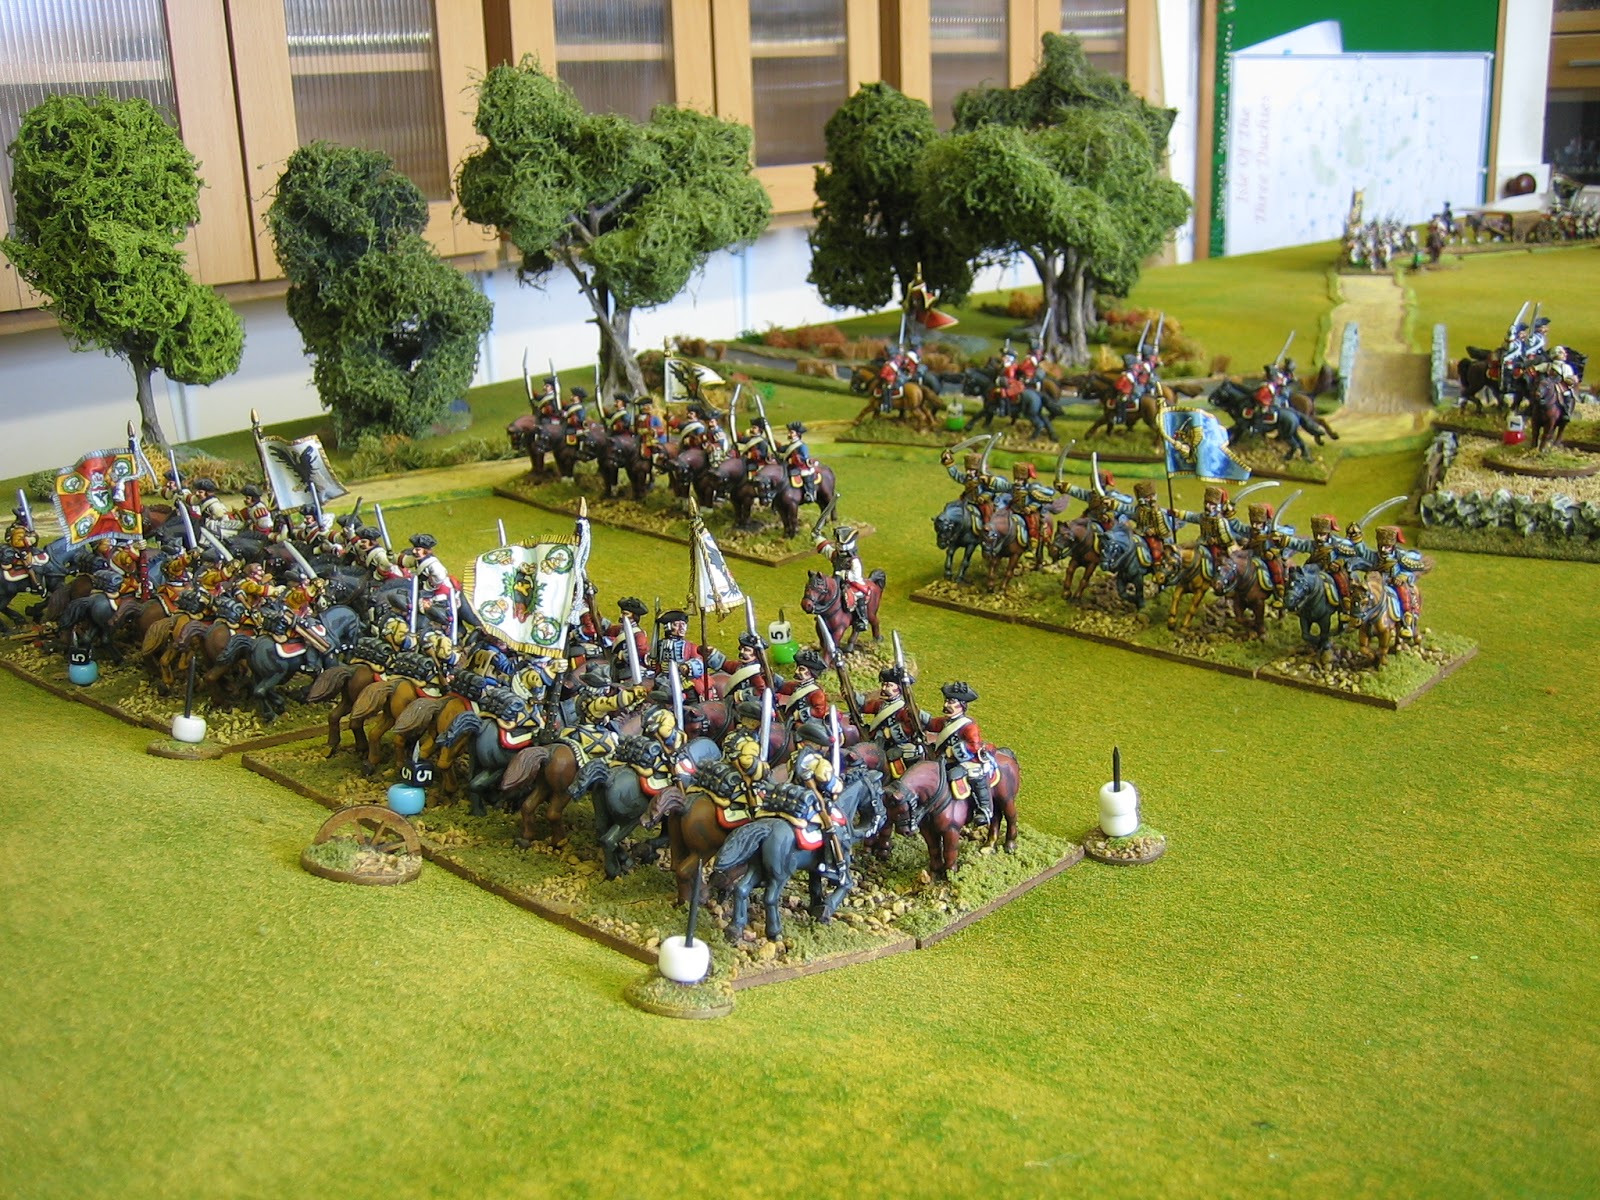
Initiative P9 / A5: Holsteins lead cavalry regiments thunder down the hill and immediately melee (the sequence cards flowing nicely) the Austrian vanguard cavalry. The melee is inconclusive - PCR2 narrowly gets the edge on ACR2 whilst PCR8 narrowly loses against ADR28 - and the losers are shaken without loss. On the right Zeuner begins to bring his infantry forward .
The photo shows the positions after the melee has been resolved. The Prussian cavalry have used a 'blown' marker (white bead) for charging. The wheel denotes PCR8 being shaken. In the background the Austrian cavalry of the second line can be seen moving to form a third line.
The cavalry melee continues in the Austrian phase. This time the Austrians suffer heavily in the ongoing fight. Both ACR14 and ADR28 are routed with three unit integrity (UI) loss. PCR8 does not pursue and rallies back. PCR2 is forced to pursue but it's path being blocked by the Austrian second line can't go forward so it 'mills about'.

The Prussians withdraw PCR8 behind their infantry line whilst the cavalry under Krokow advances to cover the left flank of the infantry line.
Note ADR28 routing towards the guns - soon they will leave the table without a chance of being rallied.

The Prussians open fire with their artillery on the grenadiers of the reserve to little effect (1 UI loss).

The routing Austrian cavalry has now begun to exit the field at Pantern.


The picture shows the dominoes and the initiative clock. The clock is used to count down initiative as it is spent. The picture also shows the sequence deck (it's the Austrian one). Turning a card costs an initiative point and each action carried out generally costs an initiative point. The last card the Austrians turned (in the last initiative) was Infantry Move in the Open, any infantry commands that have not acted on the card may do so in the next initiative phase providing initiative points are available.

The Austrians reserve ascends the slope with ineffective artillery support, whilst the columns move up. Latterly the lead elements of the columns manage to deploy.
The next domino draw is double 3 double 1. One thing I forgot to mention. If double double dominoes are drawn at the same time, the turn immediately ends and the sequence card decks are shuffled ready for the next turn.
Pictures showing the field at the end of turn 1
 |
| The grenadiers of the Austrian reserve are assaulting up the hill. Visible in the foreround, ACR14 is about to leave the table in rout. |
 |
| Austrian infantry of the first line is formin up in and to the north of Pantern. On the far side of the field the situation following the cavalry engagement can be clearly seen. Note that wagos represent limbered artillery (I don't have limbers yet). |
 |
| The columns of the first and second lines are coming up into position ready to assault the Prussian position. There is sure to be a bottleneck, and the Austrians will be forced to attack in waves. |
4 comments:
This is the best way to view a battle report. Well done!
Lovely setup. Your pictures are superb.
Oh, a fine battle with strict rules. i never could imagine that a solo-player game could be so exciting! It seems the Austrians have endless reserves bringing to the front - the large column in the village was impressive. I am curious on the step 2..
Peter
An interesting twist on the domino initiative/impetus idea!
Post a Comment